"Earth grow topsoil" is not a brand name or a single product you order online. It is the process of building or rebuilding that top 5 to 10 inches of your growing bed, the layer with enough organic matter, microbial life, and loose structure to actually support healthy roots.
Earth Grow Top Soil: Practical Steps to Build Better Soil

Marcus Holloway
3 Apr 2026
When home growers search for this, they are usually asking one of two questions: how do I fix soil that has stopped working, or how do I create rich, productive growing medium from mediocre dirt? Both answers come down to the same fundamentals: organic matter, biology, and structure. This guide walks you through exactly how to diagnose what is wrong and fix it, with quantities and timelines you can start using today.
What topsoil actually is (and what "earth grow" means in practice)
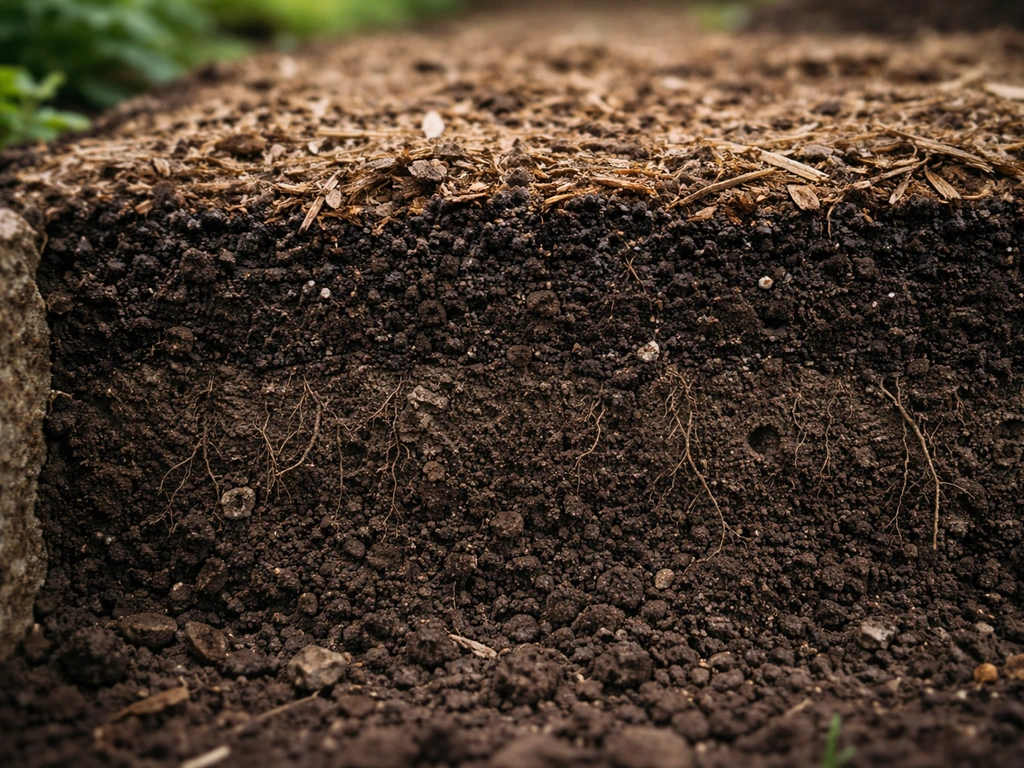
Topsoil, in the scientific sense, is the A horizon: the uppermost mineral layer of soil, typically running about 5 to 10 inches deep. It is distinguished from deeper layers by higher organic matter content, active microbial life, and defined structure. In teaching materials it is often described as being "mostly made up of humus," meaning decayed organic matter broken down by organisms over time. That biological richness is what makes it productive. Without it, you just have dirt.
In gardening retail, "topsoil" gets used loosely. You will see bagged products at hardware stores marketed as lawn repair or fill material, and brands like Earthgro sell both mulch and topsoil-labeled bags for general use. That bagged product may or may not resemble real A horizon soil. It is often a blend of mineral soil, peat, and fillers with minimal biology. If you are wondering whether you can use regular dirt to grow plants, the short answer is: sometimes, but not optimally, because unimproved dirt almost always lacks enough organic matter and biology.
"Earth grow topsoil" in the context most home growers mean it is the practice of building that productive layer yourself, by layering in organic amendments, encouraging microbial activity, and protecting soil structure over time. It is not about buying a bag; it is about creating and maintaining a living, productive root zone. There is also a specific branded product some growers reference, and if you want a closer look at that, Grow Max topsoil is covered separately. But the principles below apply regardless of which product or approach you start with.
Diagnose what is actually wrong with your soil first
Before you dump amendments on a bed, figure out why it is underperforming. Most troubled soils fall into one or more of these categories: compaction, low organic matter, poor drainage, pH imbalance, high salinity, or a dead microbial community. Each one needs a different fix, and applying the wrong one wastes time and money.
Compaction
Compacted soil has a platy or massive structure with no clear crumb or granular texture. Roots in compacted beds come out flattened, stunted, or sharply deflected around a dense layer. Bulk density increases, which restricts both root penetration and water movement. The practical field test: push a wire flag or pencil into moist soil to 6 inches. If you hit serious resistance in the top 4 inches, you have compaction. You can also do a simple single-ring infiltration test: fill a cylinder pressed into the soil with 1 inch of water and time how long it takes to drain. Healthy topsoil drains that inch in under 15 minutes; anything over 30 to 45 minutes suggests a structural problem.
Low organic matter and dead biology
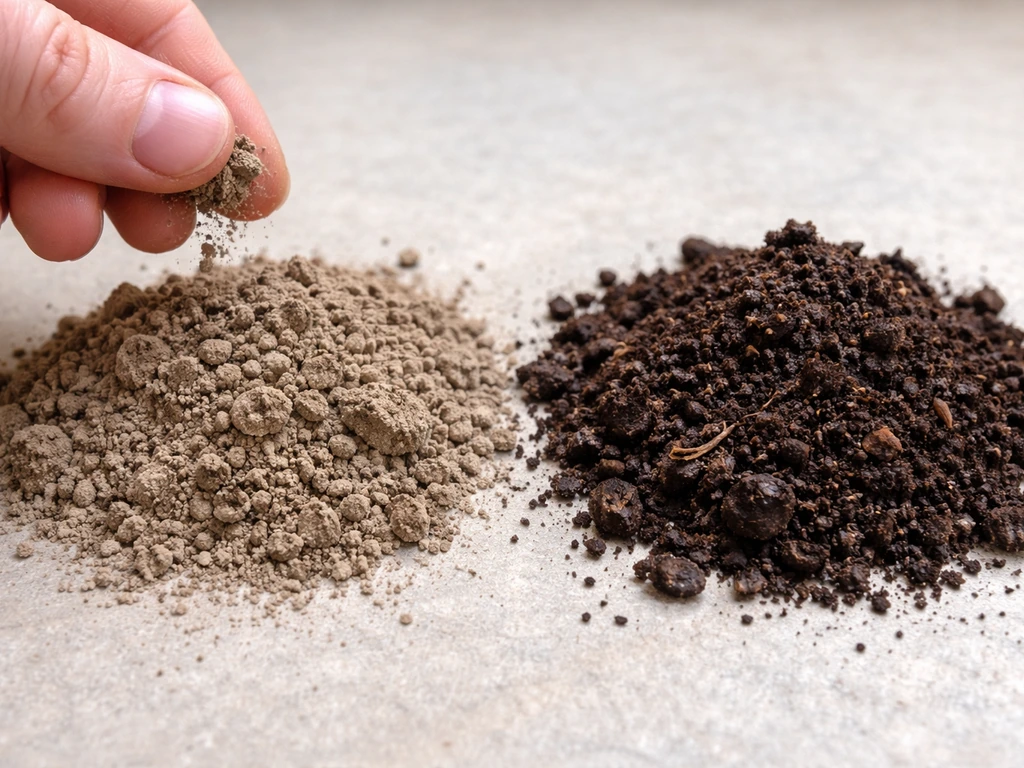
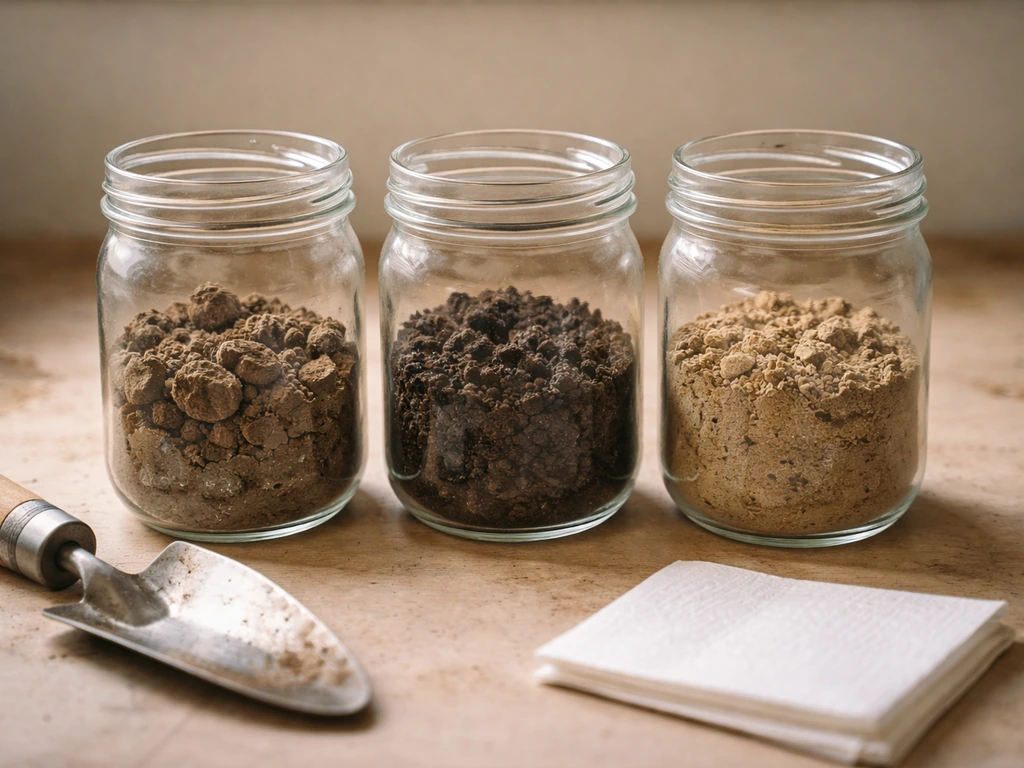
Grab a handful of your soil. Good topsoil is dark, has a rich earthy smell (that smell is actually microbial activity), and crumbles rather than powdering or clumping into a hard ball when dry. Pale, sandy, or gray-brown soil with no smell and no visible earthworms is low in organic matter. Soil with low microbial respiration essentially stops cycling nutrients, so even if you feed it, plants cannot use what is there. This is the biological indicator side of soil health.
pH and EC problems
Soil health is three-dimensional: physical, chemical, and biological. pH and electrical conductivity (EC) sit in the chemical dimension and affect everything else. Nutrient availability is near its optimum between pH 6. 0 and 7.
0 for most vegetables and crops. Outside that window, even well-fertilized soil will show deficiency symptoms because nutrients are chemically locked. EC, which measures dissolved salt concentration, tells you whether there is too little fertility (too low) or whether salt buildup is actively killing microbial life (too high). Michigan State University Extension’s soil-test interpretation guide provides EC interpretation ranges, including how EC units relate to soluble salt interpretations [EC, which measures dissolved salt concentration](https://www.
canr. msu. edu/foodsystems/uploads/files/soiltestinterpretation. pdf).
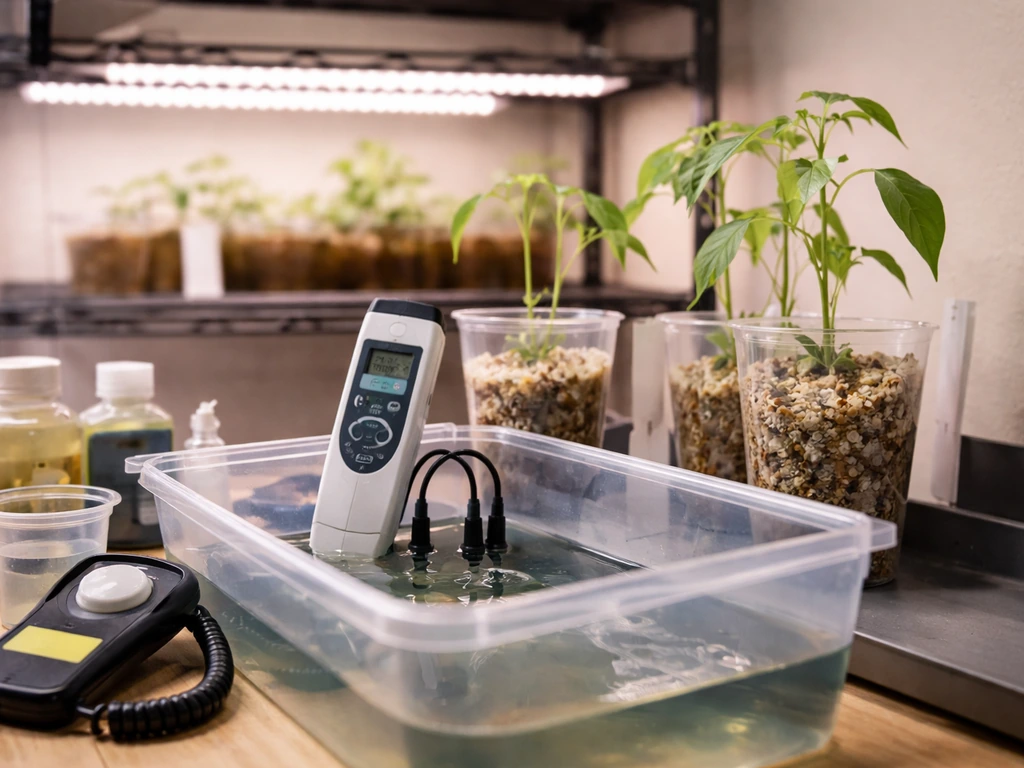
High salinity can reduce microbial biomass and disrupt nitrogen and phosphorus cycling even when you are adding organic inputs. A basic soil test from your county extension office or a $20 digital meter covers both. Test before you amend.
Erosion and surface loss
If you have outdoor beds on a slope or in a high-rainfall area and your topsoil layer seems to be getting thinner each year, erosion is removing the organic-rich surface layer faster than you can build it. Bare soil after harvest is especially vulnerable. You will know this is the problem if you see rilling (small water channels) after rain, or if the bed surface is visibly lighter in color after storms.
How to build topsoil fast: compost, organic matter, and structure
Building topsoil is really a two-track process: adding organic matter to feed biology, and creating the physical structure that lets roots, water, and air move freely. You need both. Organic matter without structure compacts over time. Good structure without organic matter will not hold nutrients or support life.
How much compost to add and when
For an established vegetable bed that needs annual maintenance, the practical standard is a 1-inch layer of compost worked into the top 4 to 6 inches, once per year. For a 100 square foot bed, that translates to roughly 8 cubic feet of compost. For sandy soil that drains too fast, go heavier: up to a 2-inch layer is reasonable. For clay that compacts easily, a 1-inch layer incorporated more shallowly helps without sealing the surface. If you are starting from genuinely degraded or compacted soil, NRCS urban soil health guidance supports going up to a 2- to 4-inch compost application (or up to about 25% by volume) in the first season to kick-start biological recovery.
Compost quality matters as much as quantity. Use mature, stable compost with a low respiration rate, meaning it has finished its active decomposition phase. Fresh or "hot" compost still breaking down can temporarily tie up nitrogen, and contaminated compost (from municipal sources with herbicide-treated grass clippings) can carry residual herbicides that stunt plant growth. When in doubt, source from a known supplier or hot-compost your own pile to at least 131 to 160°F for several days to kill weed seeds and pathogens.
Structure: aeration, layering, and avoiding over-tilling
Tilling seems like the obvious way to mix in amendments, but aggressive rotary tilling destroys the fungal networks and aggregate structure that take months to build. For amendment incorporation, a broadfork or hand fork is enough to open the soil to 8 to 10 inches without fully inverting it. Spread compost on the surface, fork it in with gentle vertical penetration, and let biology do the rest. If you are dealing with a severe compaction layer, a one-time deep fork to break the pan is justified, but do it when soil is moist, not wet or bone dry.
Feeding for living soil: nutrients, microbes, and pH/EC
A living soil does not need heavy synthetic fertilizer inputs if the biology is working. The microbial community converts organic matter into plant-available nutrients continuously. Your job is to feed the biology, keep pH in range, and avoid salt buildup that shuts the system down.
For pH correction: if your test comes back below 6. 0, add agricultural lime at 5 to 10 lbs per 100 square feet for a moderate correction, and retest in 6 to 8 weeks. For lime recommendations, Iowa State Extension expresses the rate as pounds of pure calcium carbonate per 1,000 square feet to raise soil pH toward targets such as 6. 5 or 6.
9 (typically over the top 6 inches) Iowa State Extension provides lime recommendations expressed as pounds of pure calcium carbonate per 1,000 square feet.
If you are above 7. 5, sulfur at 1 to 2 lbs per 100 square feet is the standard fix, but it works slowly, so plan several months ahead. Keep in mind that compost additions themselves slowly buffer pH toward a slightly acidic to neutral range over time, which is part of why regular compost use improves overall soil health.
For biological support, avoid applying high-nitrogen synthetic fertilizers directly to a soil you are trying to build biologically. They can suppress mycorrhizal fungi and reduce earthworm populations over time. Instead, use worm castings (a thin 0.25-inch topdress works well), fish meal, or kelp for a slow-release biological input. If you have used synthetic inputs heavily for years, a single application of a microbial inoculant (mycorrhizae/bacteria blend) worked in with your compost can help restart the community, though inoculants only hold long-term if the soil environment supports them.
EC is your safety gauge. For outdoor vegetable beds, a target EC of 1.5 to 3.0 mS/cm covers most crops. If it creeps above 4.0, you are accumulating salts, likely from over-fertilizing or irrigation with high-mineral water. Leach the bed with a thorough, deep watering and cut fertilizer inputs. This same concept scales directly into container growing, which is worth understanding alongside the broader question of where soil grows best in different setups.
Adding and mixing soil the right way: mulch, aeration, and layering
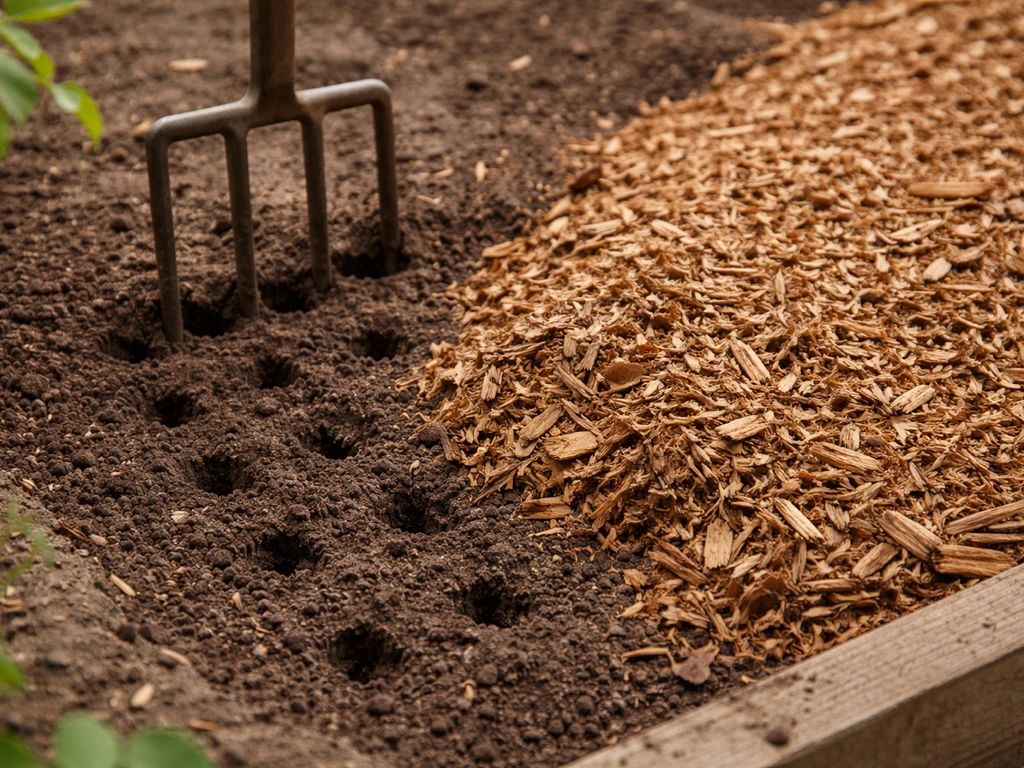
Mulch is the topsoil-builder's best friend when used correctly, but there are some hard limits. Organic mulch (wood chips, straw, shredded leaves) applied at 2 to 3 inches over the surface does three things: it keeps moisture in, it moderates soil temperature, and it slowly feeds surface-dwelling microbes and worms as it breaks down. Rutgers Extension puts the upper safe limit at 3 inches total depth, including any prior-year mulch that has not fully decomposed.
More than that and you start blocking gas exchange and creating anaerobic pockets. Fine-textured mulch (like shredded bark or fine compost used as topdress) should go on thinner, around 1 to 1. 5 inches, to avoid matting. If you want to understand what specific mulch products like Earthgro offer and how they compare, Earth Grow mulch is broken down in detail elsewhere on this site.
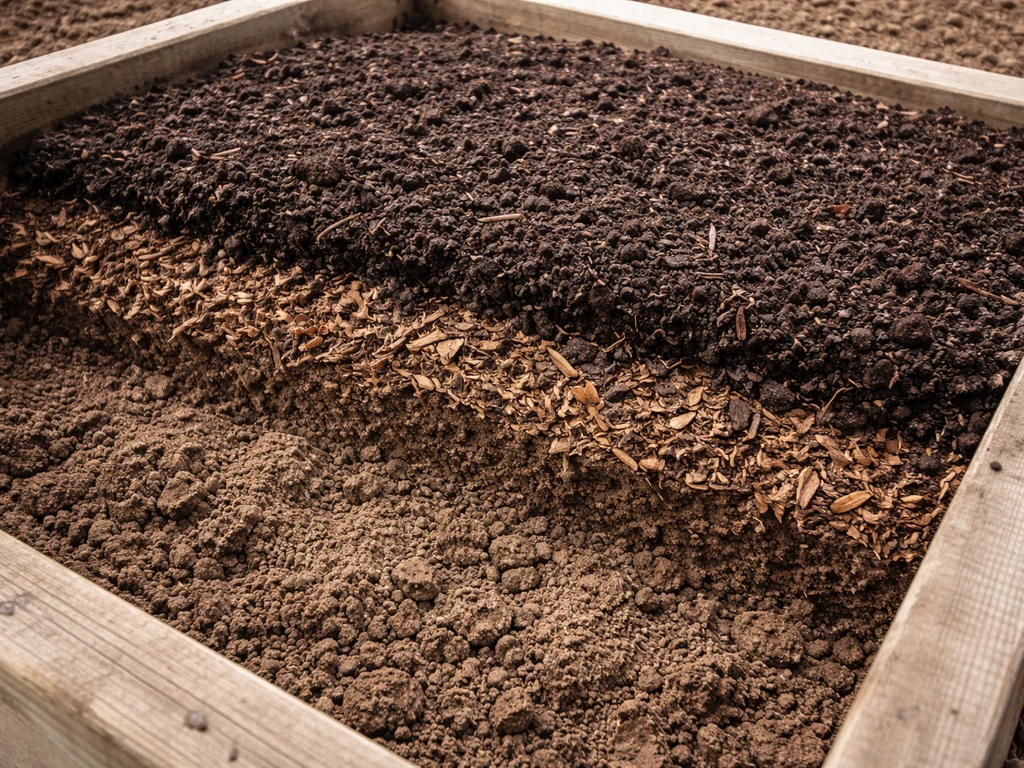
Layering is more effective than deep mixing for most home garden scenarios. The "lasagna" approach, alternating carbon-rich material (dried leaves, straw, cardboard) with nitrogen-rich material (grass clippings, compost, kitchen scraps), creates a layered organic stack that breaks down from the bottom up over 3 to 6 months. Start with cardboard directly on soil to suppress weeds and encourage worms to come up from below, then alternate brown and green layers up to 12 inches. Water it well and let it sit. By the next growing season you will have a loose, biologically active layer ready to plant into.
If you are adding soil rather than building it from scratch, the critical step is integration. New topsoil or amended media dropped on top of compacted ground without any connection to the soil below creates a distinct interface layer that disrupts root penetration and water movement. Always loosen the existing layer 3 to 4 inches down before adding new material, so the two zones blend at the interface.
Plant-based ways to grow and protect your topsoil
Plants build topsoil passively through root exudates, root turnover, and above-ground biomass. This is not a slow strategy; it is a parallel strategy that complements everything you do with amendments.
Cover crops are the most powerful tool here. After harvest, instead of leaving beds bare, seed a cover crop immediately. Winter rye and hairy vetch together make an excellent combination: rye adds carbon-rich root mass and prevents erosion, while vetch fixes nitrogen biologically. Crimson clover works similarly in milder climates. In spring, terminate them by cutting at the surface or rolling, then wait 2 to 3 weeks before planting into the decomposing residue. The root channels left behind become aeration pathways and the above-ground biomass becomes surface organic matter. Even a single off-season cover crop cycle measurably improves aggregate stability.
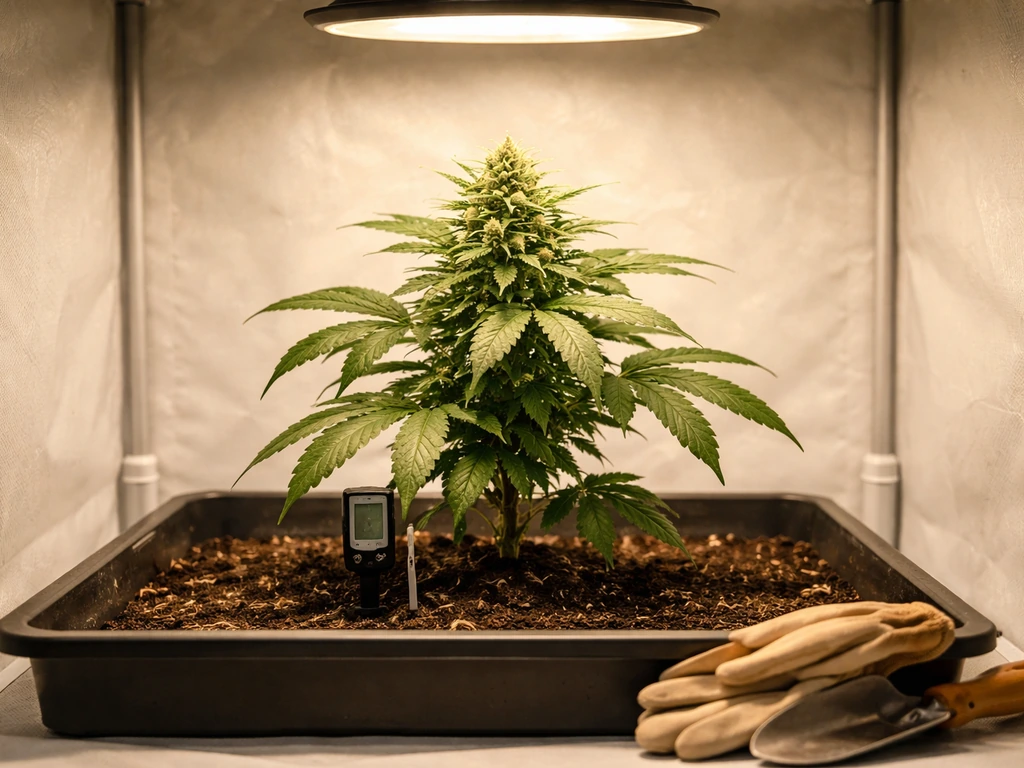
Minimal disturbance is the principle that connects all of this. Every time you till, you expose organic matter to oxidation and disrupt fungal networks. Roots do the most important aggregation work, binding soil particles into the crumb structure that defines good topsoil. Perennial plants or permanent paths that keep some roots in the soil year-round accelerate this process. Where you do need to disturb, use tools that lift rather than invert: broadforks, garden forks, or collinear hoes that work the top 2 to 3 inches.
Soil vs. containers vs. hydroponics: where these steps apply
Not every approach above translates directly to every growing setup. Here is how the framework maps across methods:
| Approach | In-ground beds | Container growing | Hydroponics |
|---|---|---|---|
| Compost additions | 1–2 inches per season, incorporate shallowly | Refresh 20–30% of mix per cycle, avoid over-compacting pot | Not applicable (no soil medium) |
| pH management | Target 6.0–7.0, amend with lime or sulfur | Monitor each watering, use pH-buffered coco or peat blend | Target 5.5–6.2 depending on system |
| EC monitoring | Test 2–3x per season, flush if above 4.0 mS/cm | Monitor runoff EC after each feed, flush at 10–20% runoff | Daily or continuous monitoring essential |
| Mulching | 2–3 inch organic mulch layer, maximum 3 inches total | Not used, top-dress with perlite to reduce evaporation | Not applicable |
| Cover crops | Plant immediately after harvest | Not applicable | Not applicable |
| Aeration | Broadfork or fork once or twice per season | Add 20–30% perlite or pumice to mix before potting | Air stones and oxygenation handle this |
| Microbial support | Worm castings, compost teas, minimize synthetics | Use beneficial microbe inoculants with each fresh mix | Sterile systems are intentional; some growers use AACT carefully |
If you are running containers, the concepts of soil health still apply but the timeline is compressed and reset with each grow. Good container soil starts with the right mix from the beginning. If you have ever asked yourself whether you can grow plants in eco earth, that curiosity about alternative media is part of this same question: what medium actually supports root development and biology in a confined space?
For hydroponic growers, the topsoil-building steps simply do not apply in the traditional sense, but the chemical indicators, pH and EC, become even more critical because there is no soil buffer. If you are deciding between approaches, the side-by-side breakdown in this hydro vs. soil grow comparison lays out the real trade-offs clearly. And if you have ever wondered about truly unconventional growing substrates, the answer to whether you can grow plants in Orbeez is a useful illustration of just how specific medium requirements actually are.
Common mistakes, realistic timelines, and how to troubleshoot
Mistakes that stall progress
- Adding compost on top of severely compacted soil without breaking the compaction first. The organic matter sits above the problem and never integrates.
- Using immature or "hot" compost. It ties up nitrogen as it continues decomposing and can burn roots directly.
- Over-tilling. Deep rotary tilling destroys fungal networks and aggregate structure faster than biology can rebuild them.
- Ignoring pH before adding amendments. If pH is off, compost and fertilizer both underperform.
- Applying too much synthetic fertilizer to a soil you are trying to build biologically. It suppresses mycorrhizae and shifts the community toward bacteria-dominated cycling, which is less stable.
- Expecting bagged topsoil to solve a structural problem. Dumping bagged product on compacted ground creates an interface layer that blocks root development.
- Mulching too deep. More than 3 total inches of mulch restricts gas exchange and can create anaerobic conditions at the soil surface.
Realistic timelines
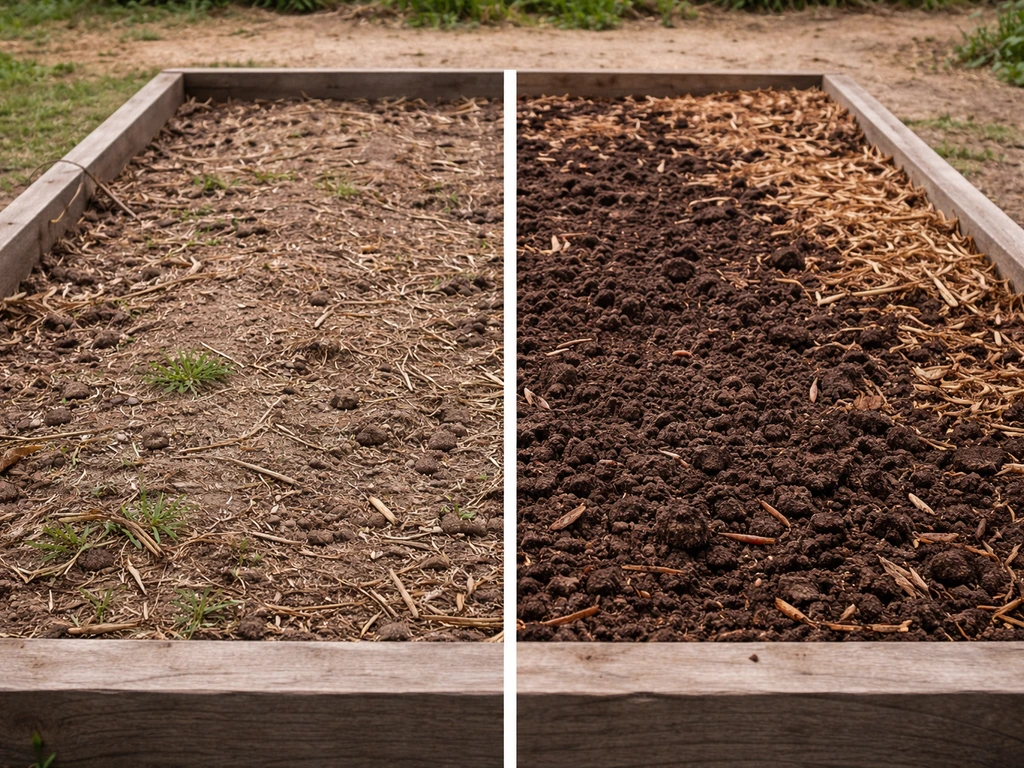
You will not build genuine topsoil in a weekend, but you can see measurable improvement within one growing season with consistent inputs. Here is what to expect:
- Weeks 1–2: Amend with compost, correct pH, apply mulch. Soil structure begins to loosen at the surface. Worm activity may increase visibly within 2 to 3 weeks if conditions are right.
- Weeks 3–6: Root zone improves in amended areas. Drainage and air exchange improve. If you planted a cover crop, you will see establishment and early root development.
- Month 2–3: Biology becomes more active. Compost layers begin integrating. Soil smell improves. EC and pH stabilize if you managed them from the start.
- Season end (3–5 months): A measurably darker, looser, crumbly soil layer should be visible in the top 3 to 5 inches. Organic matter content has increased. Second-season compost addition will compound the gains.
- Year 2 onward: With annual compost, cover cropping, and minimal disturbance, the A horizon deepens steadily. Expect 1 to 2 additional inches of productive topsoil per year under consistent management.
Troubleshooting quick reference
| Symptom | Likely cause | Fix |
|---|---|---|
| Plants yellow despite adding compost | pH out of range locking out nutrients | Test pH, correct to 6.0–7.0 before next amendment |
| Soil still compacted after amendments | Compaction layer not broken before adding compost | Broadfork to 10 inches, then re-apply compost |
| Water pools on surface after rain | Low infiltration from surface sealing or compaction | Incorporate compost, add perlite or coarse sand, consider cover crop |
| Amendments not breaking down after 2 months | Soil too dry, too wet, or biology suppressed by high EC | Check moisture (aim for 40–60% field capacity), flush if EC is high |
| Nutrient burn symptoms after compost application | Immature compost or over-application of nitrogen inputs | Flush bed, reduce amendment rate, use only fully mature compost |
| No improvement in container mix after one cycle | Mix has compacted from repeated watering, pH drifted | Replace 25–30% of mix, re-check pH and EC of runoff |
The fastest path forward is to test first, then amend. A $15 soil test tells you whether you are dealing with a pH problem, a compaction problem, or a biology problem, and each one has a different first step. Skipping the diagnosis and just adding bags of product is how growers spend money without seeing results. Get the data, then get to work. The soil will respond.
FAQ
My soil is dark but plants still struggle, could it be a biology problem? What should I check first?
Use the simplest indicator first, soil texture and drainage. If the bed drains extremely slowly, has a musty smell, and you see puddling, you likely have structure or compaction plus poor oxygen. In that case, add compost and improve structure gradually, but prioritize drainage fixes like loosening only when soil is moist and using cover crops or mulch to protect the surface. If water still stands after a day, consider checking for a perched water table or installing a drainage solution rather than relying on amendments alone.
Can I use fresh compost to build topsoil right before planting?
Yes, but timing matters. If you apply fresh or “hot” compost near planting, some batches can temporarily tie up nitrogen and stress seedlings. A practical rule is to use stable, finished compost for direct seeding or transplanting, and if you only have hotter compost, apply earlier (at least several weeks before planting) and keep the incorporation shallow with watering to speed stabilization.
What should I do first if my soil test shows both pH issues and nutrient problems?
A pH test and EC test are the quickest decision aids. If pH is below 6.0, lime is usually the correct first move, and adding compost alone may take longer than you want. If pH is already in range, go back to structure and biology, compaction and drainage are often the real bottlenecks. Also watch for salt buildup, if EC is high, do not add more amendments or fertilizer until you leach and correct the salt issue.
Do I have to till to blend amendments into the full 6 to 10 inches?
Not as a one-size-fits-all rule. If you are building topsoil, the goal is to preserve aggregates and fungal networks, so “mixing” should be gentle. For most beds, fork-in compost with vertical penetration, avoid full inversion, and use minimum disturbance moving forward. Deep mixing is mainly for one-time severe pan breaking, then switch to layering and cover crops so structure rebuilds.
How do I know if my mulch layer is too thick or causing anaerobic conditions?
It depends on the type and consistency of the mulch. Thick mulch over fine-textured materials can mat and reduce gas exchange, especially in wet weather. Stick to 2 to 3 inches total depth for typical organic mulches, and only go toward the upper end if it does not become a dense mat. For shredded or very fine mulch, use thinner layers and reapply more often rather than one heavy application.
What does leaching mean in practice, and when should I re-test EC?
“Leaching” means watering through the profile enough to move salts below the root zone, not just a light sprinkle. For most outdoor beds, perform a deep watering cycle, then wait and re-check EC after a short period. If you are irrigating frequently with high-mineral water, the real fix is changing irrigation source or controlling fertilizer input so salts do not keep accumulating.
I added new topsoil on top of compacted ground, why are roots failing to cross the layer?
If you see a hard interface at the boundary between old compacted soil and new media, you will often get “roots circling” or stopping at the layer. Fix it by loosening the existing soil 3 to 4 inches where the new material will land, then spread and fork the new amendments so they blend at the interface. For raised beds, you can also reduce the interface problem by ensuring new material is consistent in texture and not dumped in a single unmixed cap.
Can I use cover crops in climates where fall planting windows are short?
Yes, especially in warm-season beds where you want soil covered between harvests. However, the key is choosing timing that matches your climate. Winter rye and hairy vetch work well for many regions, but if you cannot get a fall planting established, use a faster cover crop like certain clovers or other quick greens and accept a shorter biomass window. Also plan termination 2 to 3 weeks before planting so residue is decomposing when roots start growing.
Should I just add more fertilizer when my soil looks brown and plants look weak?
Not necessarily, and it is a common mistake. Most healthy soils are not “unbalanced” because they lack fertilizer, they are underperforming because structure, pH, salinity, or biology are off. If your EC is already within the target range and your compost is stable, heavy nitrogen feeding can suppress beneficial fungi and reduce earthworms over time. Instead, focus on stable compost, worm castings topdressing, and cover crops, then adjust only if pH or EC indicates a real chemical constraint.
How long does it really take for earth grow topsoil to work if the soil has been neglected for years?
You can speed recovery, but not instantly. Visible improvements usually show up within a growing season, for example better drainage, fewer stress symptoms, and improved plant vigor. Full maturation, especially of biological structure and stable aggregate formation, often takes multiple seasons, particularly if the soil was compacted for years or repeatedly tilled.
How do these topsoil-building steps change for containers?
Yes, but you must treat container soil building as a refresh cycle, not a permanent fix. Since containers reset with each grow, “lasagna” layering can be less effective unless you keep adding compost and topdressing. A practical approach is to start with a high-quality base mix, then topdress with compost or worm castings between cycles, and avoid over-salting by monitoring EC if you fertilize heavily.
How can I tell if a bag labeled “topsoil” is actually good for earth grow topsoil?
If you are using bagged “topsoil,” you need to verify it is closer to mineral topsoil plus stable organic matter, not just a fill blend. Check for consistency, smell, and texture, a good mix should crumble and contain stable organic material rather than lots of inert filler. When uncertain, treat bagged topsoil as a base and integrate with compost and gentle incorporation, then improve over time with cover crops and mulch.