The best grow soil for cannabis is a well-aerated, slightly acidic potting mix with good drainage, a neutral-to-rich organic matter base, and a root-zone pH held between 6.0 and 6.8. That single sentence covers 90% of what matters. The rest is about matching that foundation to your specific setup: indoor or outdoor, container or in-ground, first-time grow or dialed-in living soil run. This guide walks through all of it, from choosing the right soil type to mixing your own amendments, setting up containers, feeding strategically, and troubleshooting problems before they cost you a harvest.
Best Grow Soil for Weed: Choose Mix, Amend, and Avoid Burn

Marcus Holloway
24 Mar 2026
What 'Best Grow Soil for Weed' Actually Means for Your Setup
There is no single universally best soil. A good rule of thumb is to aim for a potting mix that offers reliable drainage, steady moisture, and a slightly acidic root-zone pH There is no single universally best soil.. What works best depends on three things: your grow environment (indoor tent vs. outdoor raised bed vs. in-ground), how involved you want to be with feeding (hands-on synthetic nutrients vs. set-it-and-forget organic), and how much experience you have managing pH and deficiencies. A beginner growing indoors in a 5-gallon pot needs a different soil strategy than an outdoor grower running 25-gallon fabric pots with a no-till living soil approach.
Cannabis roots need four things from soil: oxygen (drainage and aeration), moisture retention (but not waterlogging), a stable slightly acidic pH (around 6.0 to 6.8 for most soil grows), and access to macro and micronutrients in the right ratios at the right growth stage. Any soil choice that reliably delivers those four things is a good soil for weed. The tradeoffs between options come down to cost, control, and how much work you want to do each week.
One important disambiguation upfront: if you are researching hydroponic or coco coir grows, this guide is not your primary resource. Hydroponic and soilless setups use a different pH target (closer to 5.5 to 6.2), a completely different feeding approach, and no soil at all. We cover when to consider those methods near the end of this article, but the core focus here is soil-based growing.
Potting Mix vs. Living Soil vs. Super-Soil vs. Buffered Blends
These four categories cover most of what you will find in grow shops and online, and they are not interchangeable. Here is how each one actually works and who it is best for.
Quality Potting Mix (the beginner default)
A good-quality cannabis-appropriate potting mix, like Fox Farm Ocean Forest, Roots Organics, or a well-reviewed store brand, is the right starting point for most first-time growers. These mixes already include aged compost, perlite for drainage, peat or coco for moisture retention, and some pre-loaded nutrients. Ocean Forest, for example, comes with enough fertility to carry seedlings for two to three weeks without any added feed. The downside is that the nutrients run out relatively quickly (around weeks 3 to 4 of veg), after which you need to supplement. pH buffering is decent but not perfect, so you still need to monitor runoff pH.
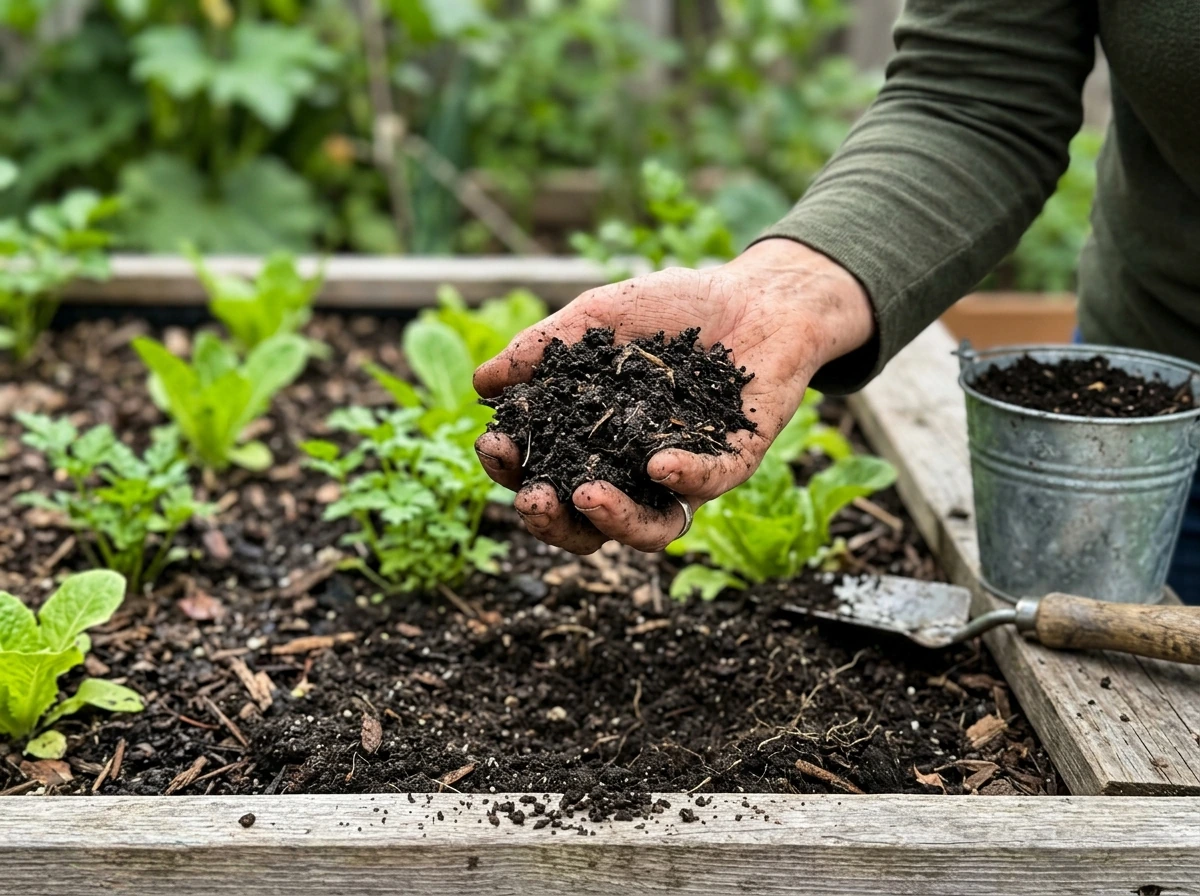
Living Soil (organic no-till approach)
Living soil is built around a thriving microbial ecosystem: bacteria, fungi (especially mycorrhizae), nematodes, protozoa, and other organisms that break down organic matter and make nutrients bioavailable to roots. In a true living soil grow, you feed the soil (with compost teas, top-dressing with worm castings, or mulch) and let the biology feed the plant. This approach produces some of the best-tasting, most complex end results, but it requires patience and a learning curve. It is also more forgiving of overwatering in the long run because the soil structure stays open. Living soil is a great fit for outdoor grows and experienced indoor growers who want a low-feed-input approach.
Super-Soil (cook your own buffered blend)
Super-soil is a heavily amended base mix that is 'cooked' (composted) for four to eight weeks before use, allowing amendments to break down and become stable. A typical recipe starts with a quality base like Roots Organics or coco-heavy mix, then adds blood meal, bone meal, kelp meal, worm castings, bat guano, greensand, and mycorrhizal inoculant, all in measured ratios. The goal is a soil so nutrient-rich and well-balanced that you only need to water with pH-adjusted water (around 6.2 to 6.5) for most of the grow. Super-soil is excellent for intermediate to advanced growers who want organic results without constant feeding, but getting the recipe wrong leads to nutrient burn or deficiencies that are harder to correct mid-grow.
Buffered Blends (pre-amended commercial mixes)
These are commercial soils pre-loaded with slow-release amendments, perlite, and pH buffering agents. Products like Craft Blend by Roots Organics or Biobizz All-Mix fall into this category. They sit between a basic potting mix and a full super-soil: more nutrients than a starter mix, more stable than DIY, but not as fully loaded as cooked super-soil. They are the sweet spot for intermediate growers who want to reduce feeding complexity without going full no-till. Most buffered blends carry plants through four to six weeks before supplemental feeding is needed.
| Soil Type | Best For | Feeding Required | pH Stability | Cost |
|---|---|---|---|---|
| Quality Potting Mix | Beginners, first grows | From week 3-4 onward | Moderate | Low to moderate |
| Living Soil | Experienced growers, outdoor, no-till | Minimal (top-dress only) | High (biology buffers) | Moderate to high setup |
| Super-Soil | Intermediate to advanced, indoor/outdoor | Water-only most of grow | High if cooked correctly | Moderate (DIY recipe) |
| Buffered Commercial Blend | Intermediate growers, indoor containers | From week 4-6 onward | Good | Moderate |
Recommendation: If this is your first or second grow, start with a quality potting mix like Fox Farm Ocean Forest and add 20 to 30% perlite by volume. That gives you a proven, well-draining base with enough built-in nutrition to get through early veg. Once you have a few grows under your belt and understand how your plants respond to feeding and pH shifts, move toward a buffered blend or start experimenting with a living soil build.
How to Mix or Buy the Right Soil: Amendments That Actually Matter
Whether you are buying a pre-made mix or building your own, you are trying to hit the same targets: good drainage, adequate aeration, slow-release organic nutrition, and a stable slightly acidic pH. Here is what to prioritize and what to skip.
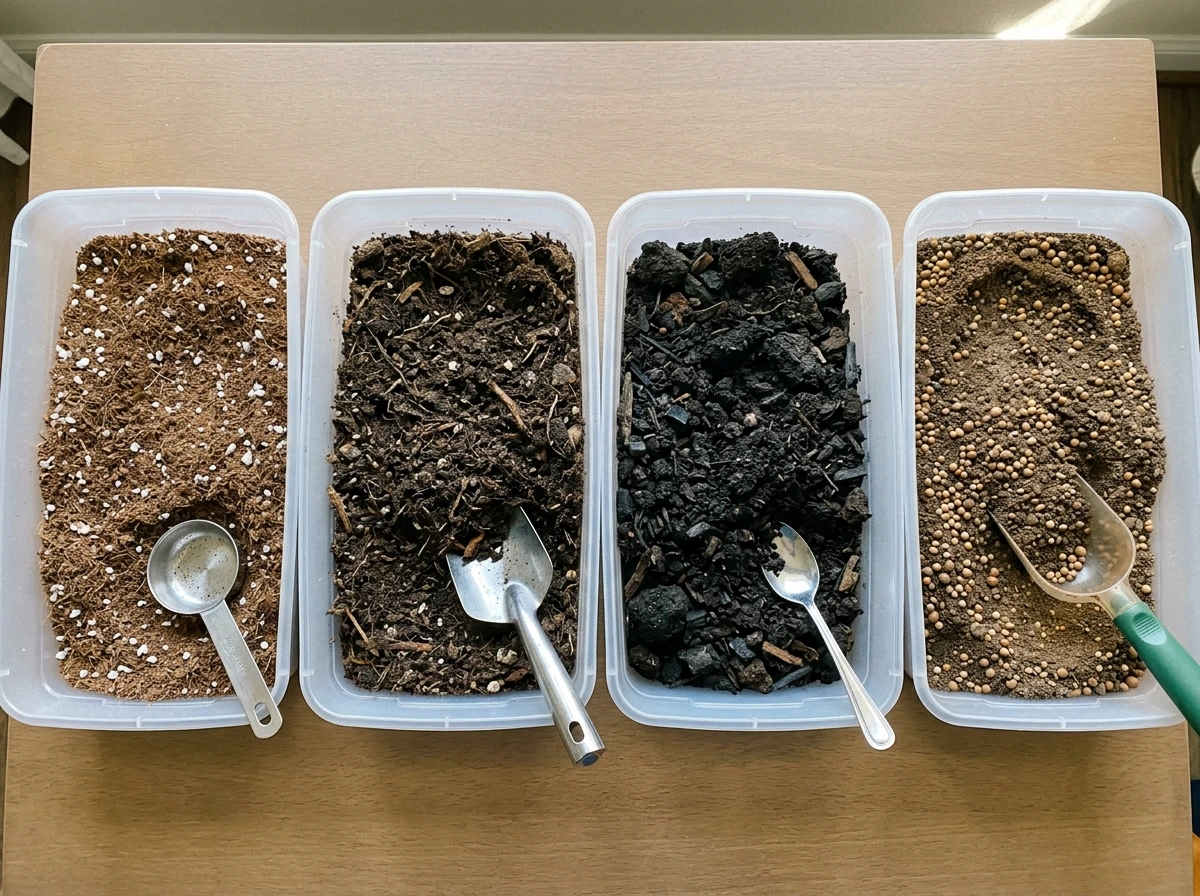
Essential amendments and what they do
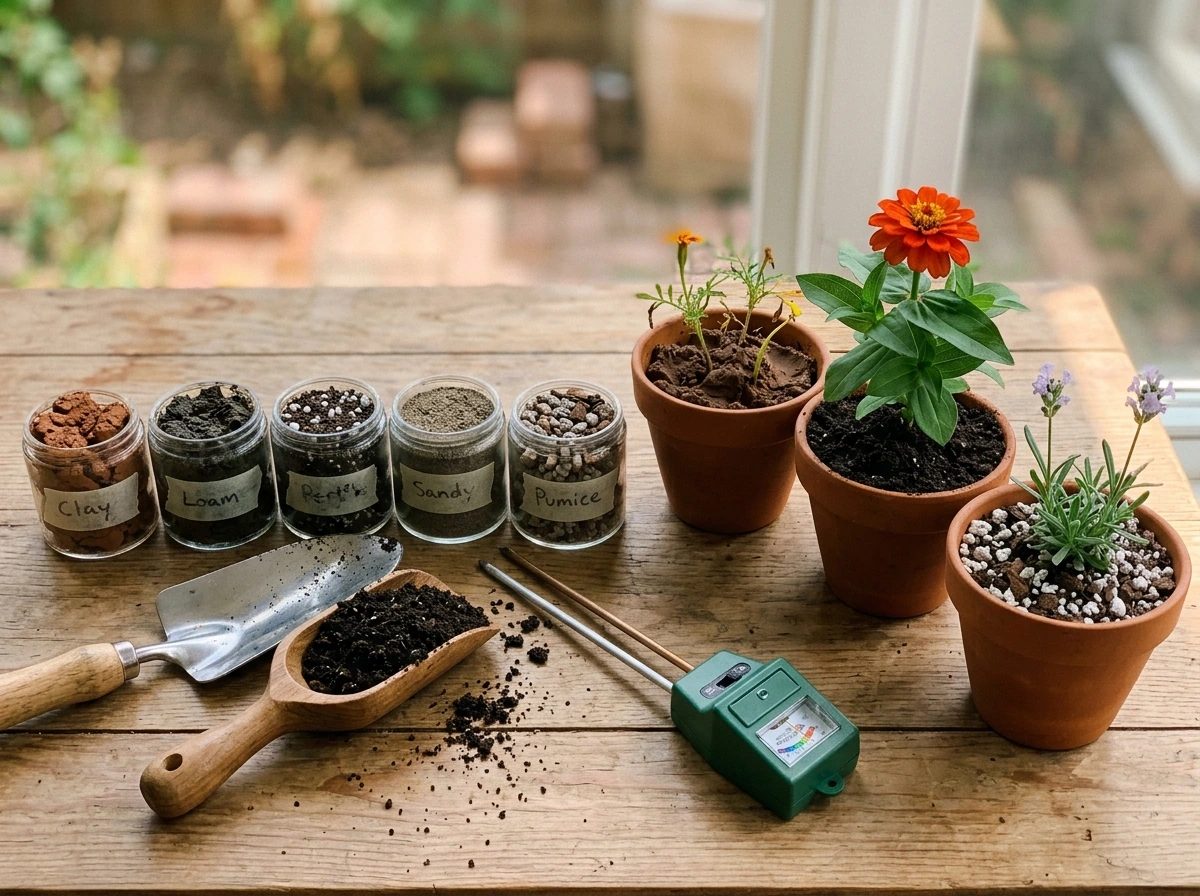
- Perlite (15-30% of mix): volcanic glass that keeps soil loose and oxygenated. The single most important drainage amendment. Without it, most potting mixes stay too wet between waterings.
- Worm castings (10-20% of mix): gentle, slow-release fertility that rarely causes burn. Also adds beneficial microbiology. One of the safest ways to add nutrition to any soil.
- Compost (10-20% of mix): aged compost improves water retention, microbial diversity, and slow-release nutrient availability. Avoid fresh, hot compost.
- Coco coir (10-15% optional): adds structure and moisture retention without going anaerobic. Works well in dry climates or under high-heat grow lights.
- Rice hulls (alternative to perlite): renewable, pH-neutral aeration. Breaks down slowly over a season. Good for outdoor and living soil builds.
- Kelp meal (for DIY blends): natural source of trace minerals and growth hormones. Add at 0.5-1% of total mix volume.
- Mycorrhizal inoculant: encourages symbiotic root fungi that expand the effective root zone and improve nutrient uptake. Add at transplant, directly on roots.
What to avoid
- Seed-starting mixes or germination trays as your main grow medium: too low in nutrients and often too fine in texture for established plants.
- Garden topsoil or bagged 'topsoil' from hardware stores: too dense, often contaminated, compacts in containers, and pH is unpredictable.
- Time-release synthetic fertilizer mixes like Miracle-Gro potting soil: the slow-release pellets are designed for light-feeding ornamentals and routinely cause nitrogen toxicity in cannabis, especially in flower.
- Heavy clay-based mixes: they stay wet, restrict oxygen to roots, and compact over time in pots.
- Overly high nitrogen amendments in late veg or flower: blood meal and high-N guanos push vegetative growth and delay or reduce bud development.
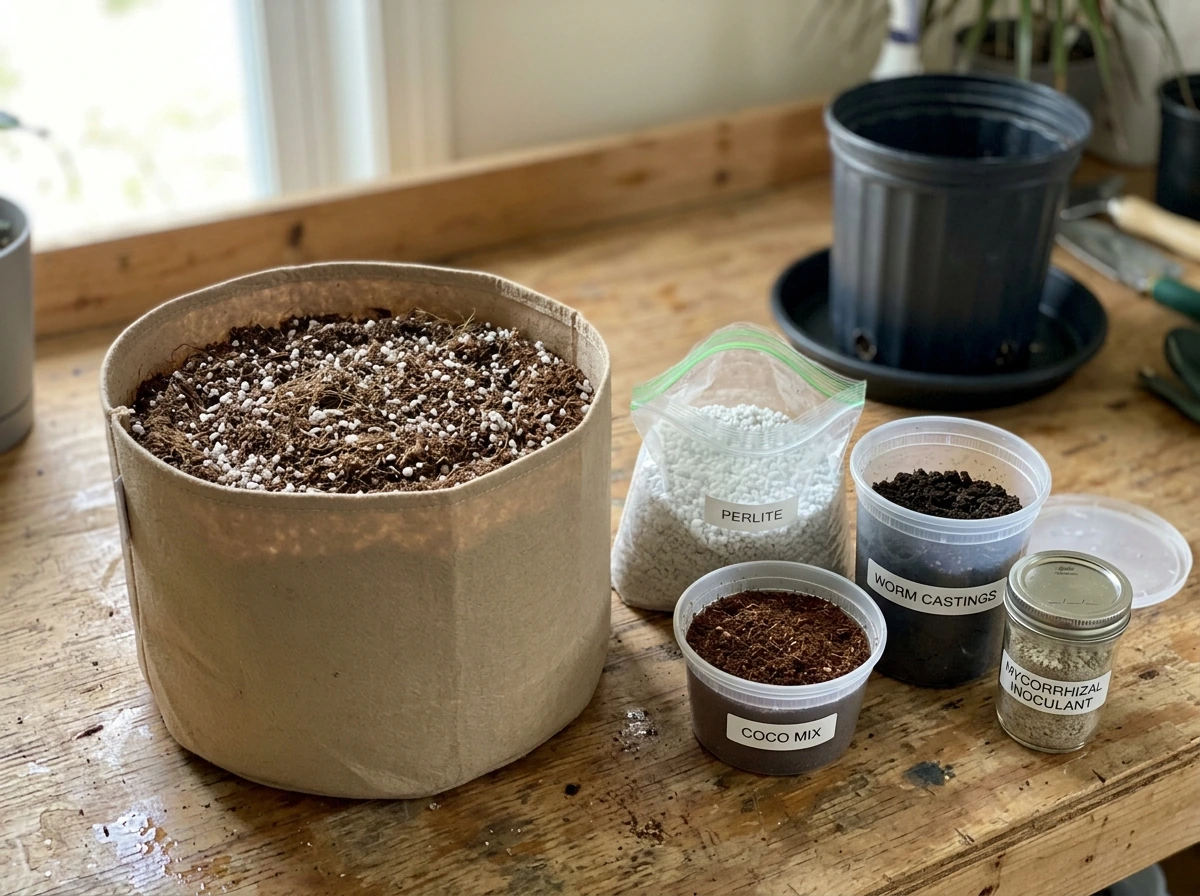
A simple beginner mix recipe
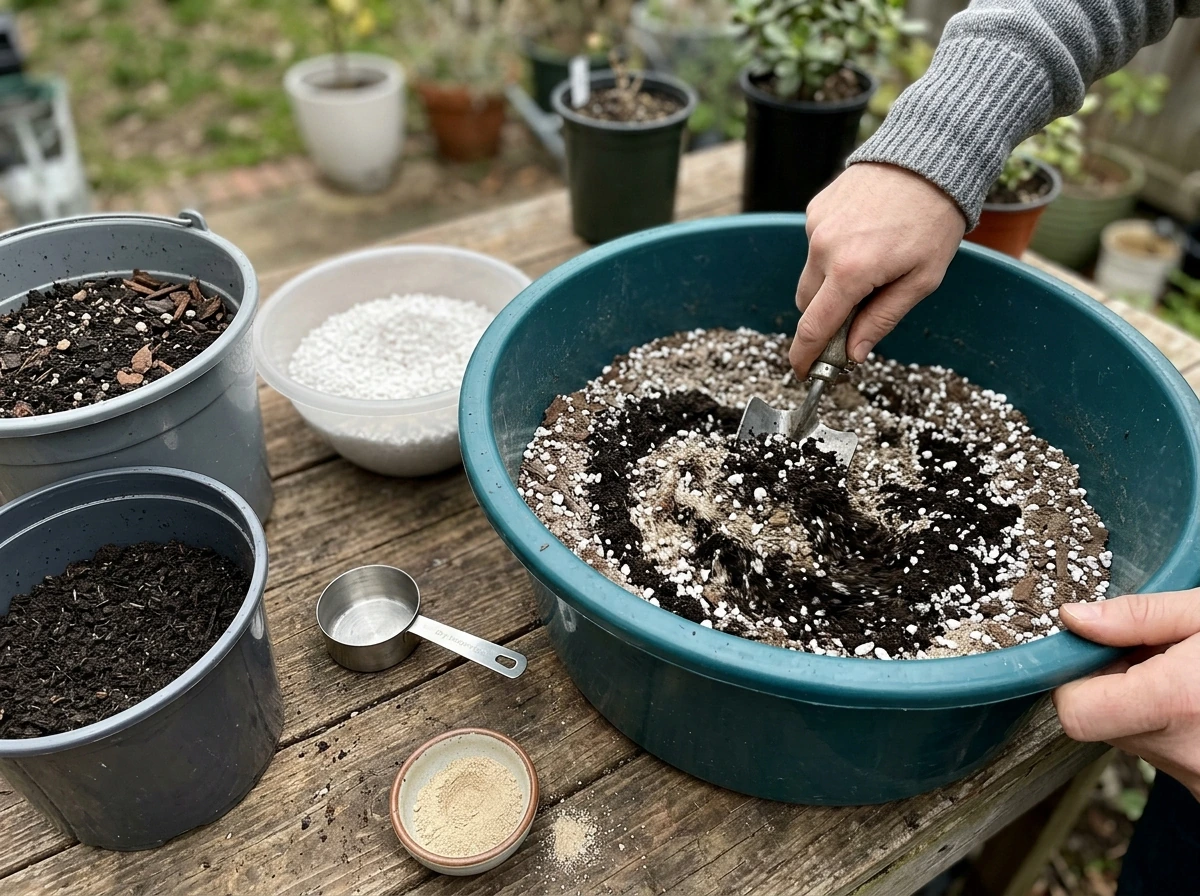
- 3 parts quality potting mix (Ocean Forest or equivalent)
- 1 part perlite
- 1 part worm castings
- Optional: small handful of mycorrhizal inoculant worked into the transplant hole
This blend is forgiving, well-draining, and has enough fertility to get most plants through the first three to four weeks without additional feeding. It costs very little to adjust on subsequent runs based on what you observe.
Soil Setup Essentials: Pots, Drainage, and Keeping Things Clean
Container choice and size
For indoor growing, fabric pots are the best choice for soil grows. They air-prune roots, preventing root-bound conditions, and dramatically reduce overwatering risk because excess moisture evaporates through the fabric walls. A 3-gallon fabric pot is fine for an auto-flowering strain in a short veg cycle. A 5-gallon is the standard for photoperiod plants in a typical 60-day veg. If you are running a longer veg or a large outdoor plant, go to 7 or 10 gallons. Bigger pots mean more soil buffer, but they also take longer to dry out between waterings, which matters for your watering schedule.
Drainage and runoff
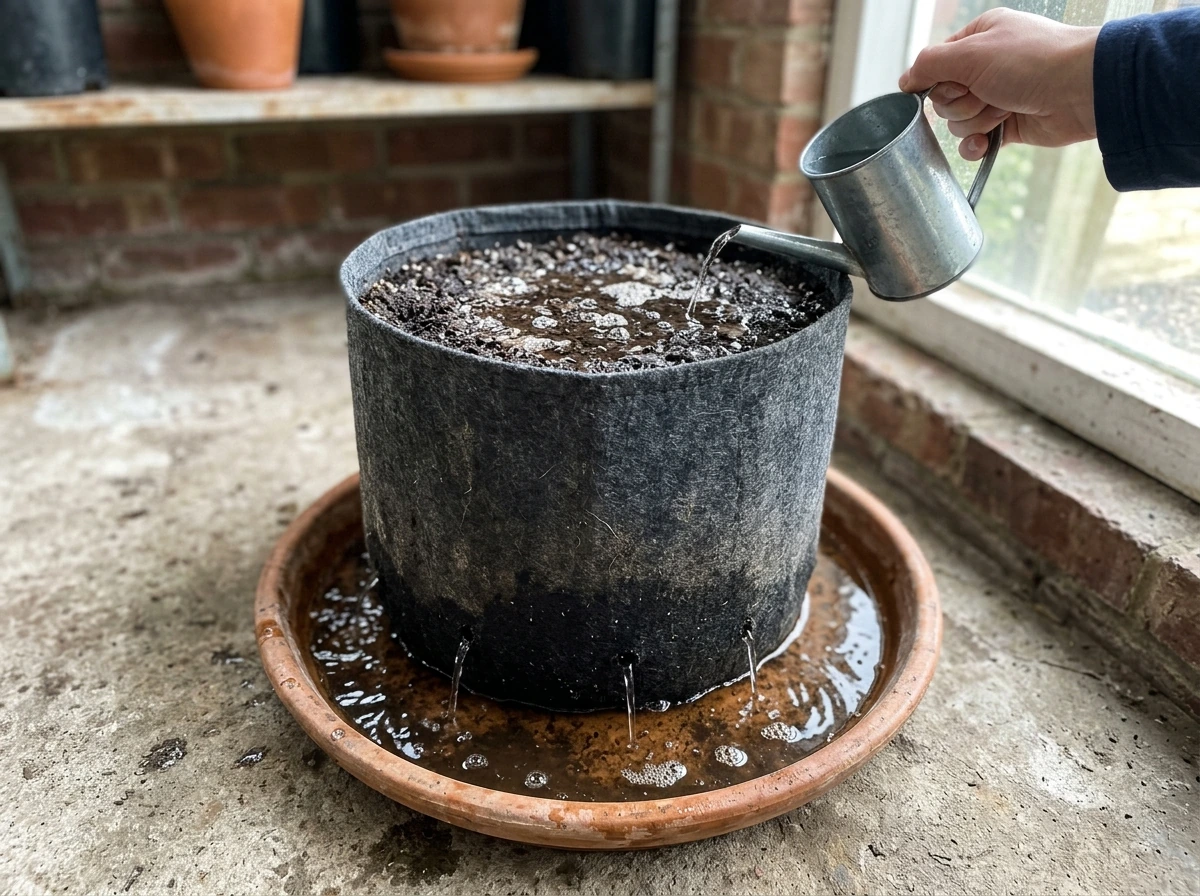
Every container needs drainage holes at the bottom. Never let plants sit in standing water in saucers for more than 30 minutes after watering. Prolonged standing water promotes root rot and anaerobic conditions. When you water, aim to get about 10 to 20% runoff from the bottom of the pot. This flushes salt buildup and lets you test the runoff pH, which tells you what is actually happening at the root zone.
Sterilization and contamination prevention
If you are reusing pots, clean them with a 3% hydrogen peroxide solution or a diluted bleach rinse (1 part bleach to 9 parts water) before the next run, then rinse thoroughly with plain water. Contaminated soil and unwashed pots are the most common vectors for fungus gnats, root rot pathogens like Pythium, and powdery mildew. New soil from sealed bags is generally clean, but any bag that has been open for more than a week and exposed to moisture can harbor fungus gnat eggs. If you store soil, keep it sealed and off the floor.
Watering basics
The most consistent mistake beginners make in soil grows is overwatering. Cannabis roots need cycles of wet and dry to uptake oxygen and develop properly. A simple test: lift the pot before and after watering to feel the weight difference. Water again only when the pot feels light and the top inch of soil is dry. In a fabric pot with good perlite content, this usually works out to watering every two to three days in veg and slightly more frequently in flower when transpiration is high. Always use pH-adjusted water (see the next section on pH) and avoid ice-cold water straight from the tap.
Feeding Plan Based on Your Soil Type
The biggest feeding mistakes in soil grows come from either starting too early (when the soil already has enough built-in nutrition) or from applying a hydroponic-style nutrient schedule to an organically rich soil. Here is how to match your feeding approach to your soil.
Pre-loaded or buffered mix (potting mix or commercial buffered blend)
With Ocean Forest or a similar pre-amended mix, hold off on any added nutrition for the first two to three weeks after transplanting a seedling. The soil has enough to sustain early growth. Start watching for the first signs of pale lower leaves or slow growth around week 3 to 4 of veg. At that point, introduce a balanced vegetative nutrient at half the recommended dose and work up only if the plant shows it needs more. Never start at full dose in a pre-amended soil.
Super-soil or heavily cooked mix
Water only with pH-adjusted water (6.2 to 6.5) through most of veg and early flower. The amendments in a properly cooked super-soil release nutrients slowly and microbes make them bioavailable as the plant needs them. Top-dress with a small amount of worm castings at the transition to flower if you want a gentle nitrogen boost before the plant stacks buds. Avoid liquid nutrient feeds unless you see clear deficiency signs, because adding salts to an organic system disrupts the microbiology.
Living soil / no-till
Feed the soil, not the plant. Every two to four weeks, top-dress with 1 to 2 cm of worm castings or a layer of finished compost. You can also brew and apply actively aerated compost tea (AACT) every week or two to reinoculate the biology, especially after any soil disturbance. Avoid synthetic pH down or up products, as they can disrupt the microbial balance. If pH adjustment is needed, use citric acid (diluted) for lowering or a small amount of dolomite lime worked into a top-dress for raising.
Transitioning to flower regardless of soil type
When you flip to 12/12 or when an auto starts showing pistils, reduce nitrogen inputs and shift toward phosphorus and potassium-dominant feeds or amendments. Excess nitrogen in flower causes leafy, airy buds and delayed maturation. In the last two weeks before harvest, most growers either flush with plain pH-adjusted water (for synthetic nutrient grows) or simply water with plain water (for organic grows) to clear any residual salts and let the plant use up stored nutrients for a cleaner finish.
pH, Nutrient Lockout, and Fixing Common Soil Problems
pH is the single most misunderstood variable in soil growing, and getting it wrong is the root cause of the majority of apparent nutrient problems that beginner growers experience. If your leaves are showing yellowing, spots, or discoloration and you have been feeding consistently, check pH before adding more nutrients.
Target pH for soil grows
For most soil-based cannabis grows, the root-zone pH sweet spot sits between 6.0 and 6.8, with 6.2 to 6.5 being the most commonly recommended target range for balanced nutrient availability. Some research points to a slightly tighter optimal window of around 6.2 to 6.7 for larger soil volumes with high cation exchange capacity, while a slightly lower range of 5.8 to 6.2 may be cited for soilless or peat-heavy substrates. The practical takeaway: aim for 6.2 to 6.5 as your target for water going in, and watch runoff pH to see where your root zone actually sits. If runoff drifts below 5.8 or above 7.0, you have a problem that needs correction.
What nutrient lockout looks like and why it happens
Nutrient lockout happens when pH is outside the range where specific nutrients are soluble and available to roots. Even if you are feeding correctly, the plant cannot absorb what it needs when pH is off. Iron and manganese become unavailable when pH climbs above 7.0, showing up as yellowing between leaf veins on new growth (interveinal chlorosis). Calcium and magnesium can lock out when pH is too low. Phosphorus locks out on both ends of the range, showing up as purpling leaves or stunted root development. The fix is almost always to flush with a large volume of pH-correct water and then resume feeding at the correct pH.
Troubleshooting the most common soil grow problems
| Symptom | Most Likely Cause | Fix |
|---|---|---|
| Yellowing lower/older leaves | Nitrogen deficiency or pH drift below 6.0 | Check and correct pH, then add diluted N feed |
| Yellowing new growth (interveinal) | Iron/manganese lockout (pH too high) | Lower water pH to 6.0-6.3, flush with correct pH water |
| Dark green, clawing leaves | Nitrogen toxicity (overfeeding or Miracle-Gro soil) | Stop feeding, flush with plain pH water, wait |
| Drooping, heavy leaves | Overwatering | Let soil dry fully before next water, improve drainage |
| Brown leaf tips/edges | Nutrient burn or salt buildup | Flush and reduce feed concentration by 25-50% |
| Spots with yellow halos | Calcium or magnesium deficiency | Add cal-mag supplement at correct pH, check runoff |
| Soil smells sour or rotten | Anaerobic conditions from overwatering | Improve drainage, reduce watering frequency, check roots |
Testing pH the right way
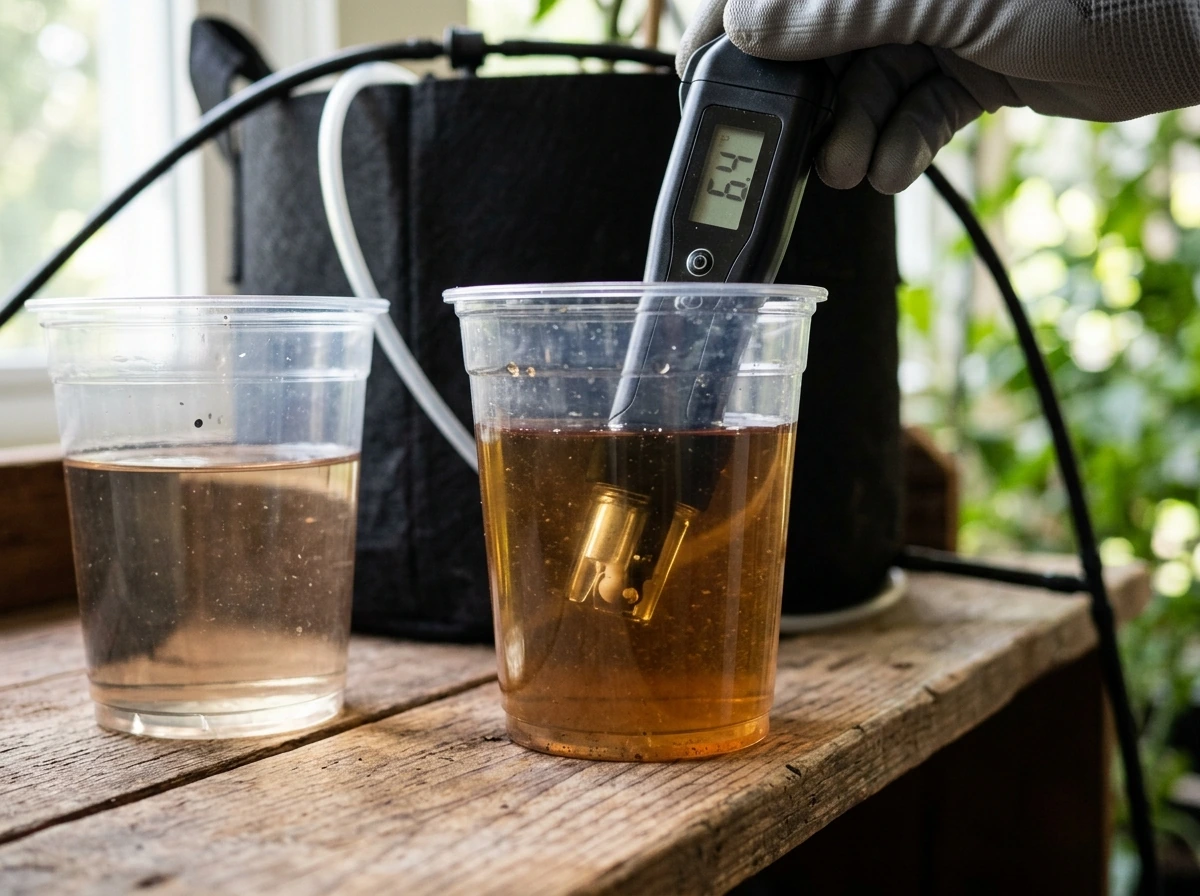
A digital pH pen is a worthwhile investment for any soil grower. Test your water or nutrient solution before it goes in, and collect a small sample of runoff from the bottom of your pot to test what is coming out of the root zone. A difference of more than 0.5 pH units between input and runoff tells you the soil chemistry is drifting and needs attention. Calibrate your pH pen monthly using calibration solution; an uncalibrated pen is worse than no pen because it gives false confidence.
Indoor vs. Outdoor Soil Grows (and When Hydro Makes More Sense)
Indoor soil grows
Indoor growing gives you full control over environment but limits your soil volume (container size) and means you are entirely responsible for fertility. The best soil for indoor grow is a high-quality buffered potting mix with added perlite in fabric pots, combined with a well-timed feed program that ramps up in mid-veg and transitions to bloom nutrients at the flip.
The best approach indoors is a high-quality buffered potting mix with added perlite in fabric pots, combined with a well-timed feed program that ramps up in mid-veg and transitions to bloom nutrients at the flip. Indoor growers benefit most from keeping soil mixes on the lighter side (less pre-loaded fertility) because it gives them more control over nutrient timing. Pre-amended or super-soil approaches work indoors too, but require more experience to avoid overfeeding in the confined root space.
Outdoor and in-ground soil grows
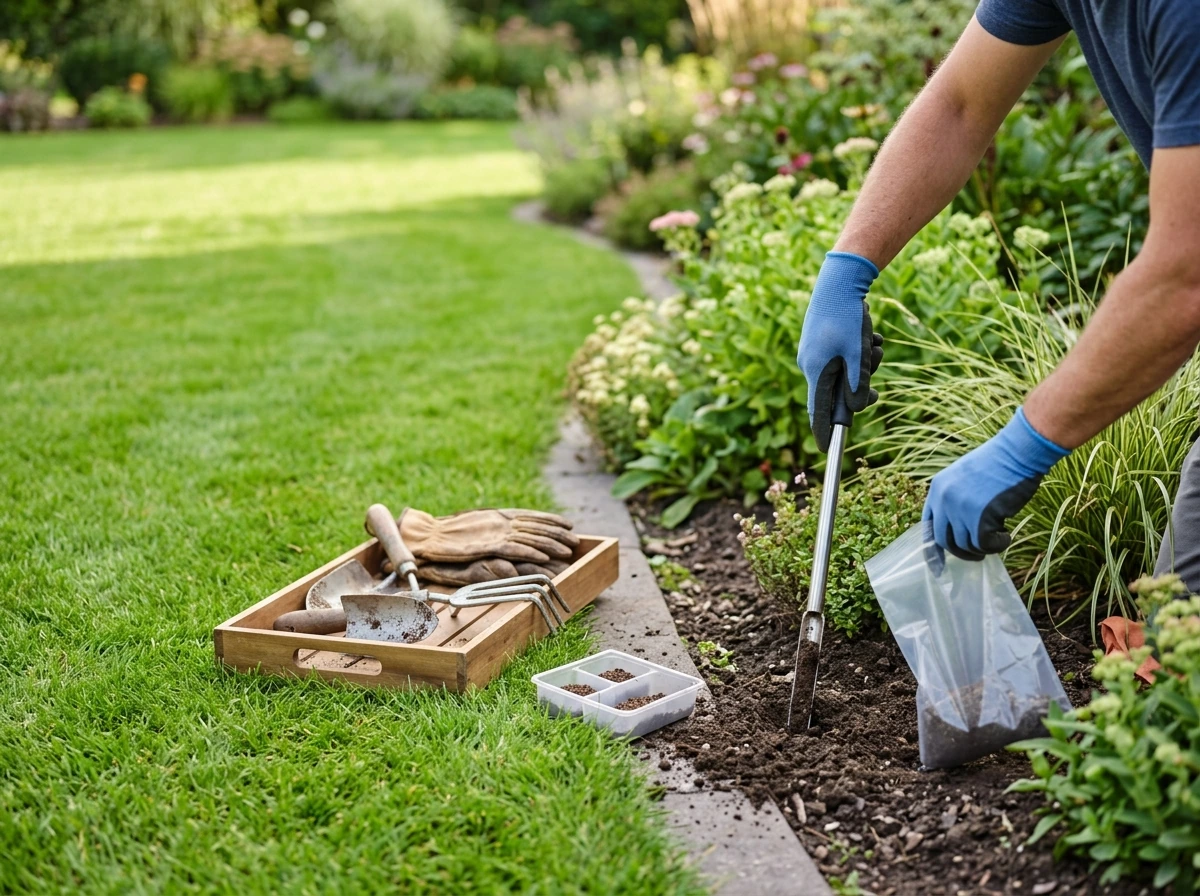
Outdoors, you have the advantage of volume: larger containers (25 to 100 gallons) or in-ground planting means a much larger biological buffering capacity. Living soil and no-till approaches shine outdoors because the ecosystem has room to develop. In-ground growing means less watering intervention but requires more attention to native soil quality: you may need to amend heavy clay soils with compost and perlite or sand to improve drainage, or add nutrients to sandy soils that drain too fast.
A soil test kit (looking at nutrient levels and pH in your native soil) is worth doing before planting in-ground. For details on selecting soil specifically for outdoor grows or indoor environments, those topics are covered in more depth in our companion guides on best soil for outdoor grow and best soil for indoor grows.
When to consider hydroponics instead of soil
If your main goals are maximum growth speed, precise nutrient control, and you are comfortable with the learning curve of managing EC (electrical conductivity) and a tighter pH range (5. 5 to 6. 2 for most hydro and coco setups), then a hydroponic or coco coir system may outperform soil for your situation. Hydro grows can cut veg time by 20 to 30% and produce very high yields in experienced hands.
But the margin for error is much smaller: pH swings, pump failures, or reservoir contamination can damage plants in hours, not days. If you are new to growing, start with soil. The slower pace gives you more time to observe, learn, and correct course. Once you understand how your plants respond to nutrients and environment, transitioning to hydro or coco is much less risky.
Reusing soil vs. starting fresh
After a harvest, most potting mixes are depleted of fertility but still structurally sound. You can revitalize used soil by mixing in fresh compost, worm castings, and a small amount of kelp and bone meal, then letting it sit for two to four weeks before reuse. This is essentially building a simple super-soil on the fly. Alternatively, if you had root rot, severe pest pressure, or disease in the previous run, replace the soil entirely rather than risk carryover contamination. No-till living soil builds are designed to be continuously amended and reused across multiple runs, with only periodic top-dressing and biology replenishment rather than full replacement.
Your Next Steps After Choosing a Soil
Pick one soil type that matches your experience level and setup, then commit to it for a full run before changing variables. If you are a beginner, that means: buy a quality potting mix, cut it with 20 to 30% perlite, fill fabric pots, water with pH-adjusted water in the 6.2 to 6.5 range, and do not feed for the first three weeks. Get a basic pH pen, test your water, and check your runoff every other watering. Watch your plants closely in weeks 3 and 4 for the first signs that they are asking for more nutrition. Start feeds at half dose and work up from there.
If you are an intermediate grower ready to step up, start a living soil build or cook a super-soil batch now so it is ready for your next run in four to six weeks. The investment in understanding your soil pays off in healthier plants, better yields, and fewer mid-grow crises. Most problems that show up on leaves in weeks 5 through 8 trace back to decisions made when you filled your pots. Get the foundation right, and the rest of the grow becomes a lot more straightforward.
FAQ
Can I use compost tea or worm castings with a pre-made “buffered” potting mix?
Yes, but don’t treat it like a hydro product. If you want to add compost teas, worm castings, or kelp, do it after the soil has had time to settle and only in small amounts (top-dress lightly rather than soaking the pot). Also, avoid “tea” brewed with unknown ingredients, because inconsistent microbes and salts can worsen pH drift.
What if my seedlings look like the soil is too strong, even though I’m not feeding yet?
In soil grows, “too hot” often means the pre-load is supplying more nutrients than the seedling can use, which can show up as slow growth, tip burn, or dark, clawing leaves. The practical fix is to start with plain potting mix for seeds, or transplant into Ocean Forest-style mixes only after a couple weeks, and hold off on added nutrients for the first 2 to 3 weeks.
How do I interpret runoff pH, and when should I test it?
For fabric pots, runoff pH is the most useful check, but timing matters. Take runoff samples mid-watering cycle, not immediately after the pot has barely absorbed water, and compare input pH to runoff pH consistently. If runoff is off by more than about 0.5 pH, adjust your water chemistry and reassess your mix (and you may need to re-check your pen calibration).
Is adding more perlite always better for the best grow soil for weed?
You can, but it is often a tradeoff. A high-perlite mix drains fast and can starve plants between waterings if you go too high, while a low-perlite mix can stay wet too long and trigger oxygen stress. Start where the article suggests (about 20 to 30% perlite by volume), then adjust gradually based on how long the pot takes to dry in your room.
My plant looks “deficient,” how do I know if it is pH, nutrient, or something else?
Calcium and magnesium issues can look similar to pH problems, but the decision aid is: check pH first, then look at pattern and timing. If yellowing is between veins on newer leaves and runoff pH is high, it points to iron or manganese availability. If issues appear after you’ve added amendments or adjusted water salts, consider whether your water source has changed, not just the soil.
Should I add more nutrients when leaves yellow, or is there a safer first step?
Don’t rely on visual symptoms alone. Before adding any product, do a quick rule-out: verify water pH, confirm you are watering only when the pot is truly light/dry at the top inch, and check runoff. If the runoff pH is drifting, fixing pH usually helps more than adding fertilizer.
Can I reuse soil after root rot or heavy pest pressure?
Pre-made super-sols and living soils can be reused, but only if you had no serious disease and the soil wasn’t saturated for long periods. If you had root rot, persistent fungus gnats, or powdery mildew outbreaks, replace rather than “revive,” because pathogens and pests can survive in the medium even after amendments.
What should I do if my soil is hydrophobic and won’t absorb water?
Re-wetting dry, hydrophobic soil is possible, but it is easy to overcorrect. The safest approach is to water slowly and evenly, sometimes in two passes, until the pot regains uniform moisture. If water keeps beading on the surface or runs straight through, you likely need structural refresh (more perlite and compost) rather than just more frequent watering.
Will the “best grow soil” guidance change if I change my pot size or move indoors to outdoors?
Yes, but you need container matching. Indoor pots dry differently than outdoors, and larger volumes keep pH and moisture more stable. If you move from a 3 to 5 gallon setup, expect slower dry-down and adjust watering frequency, and consider that the same soil mix may require a different feed schedule because nutrient depletion is slower in bigger root zones.
What is the smartest way to troubleshoot a soil grow that keeps having the same problem mid-flower?
For persistent issues, vary only one factor per attempt. The most common recovery path is: correct water pH, stop overwatering, and use a light top-dress of worm castings or compost only if the soil is truly established. If symptoms worsen after amendments, pause further inputs for a full cycle and retest runoff pH rather than continuing to add nutrients.