The best soil for an indoor grow is a well-aerated, lightly pre-amended mix that drains fast, holds just enough moisture, and sits at a pH between 6.0 and 6.5 for most plants (or 5.8 to 6.3 if you're growing cannabis under LED). That one sentence covers the core of it. Everything else in this guide is about understanding why those numbers matter, how to build or buy the right mix for your specific setup, and what to do when things go sideways. best soil for outdoor grow. best soil to grow flowers
Best Soil for Indoor Grow: Mixes, Amendments, and Tips

Marcus Holloway
24 Mar 2026

How to Choose the Right Indoor Growing Soil for Your Plant Type and Goals
Indoor growing changes the rules compared to outdoor. You control everything, which is an advantage, but it also means the soil has to do more work on its own. There's no rain to flush salts, no earthworms cycling nutrients through the bed, and no natural temperature swings to regulate microbial activity. The mix you choose has to compensate for all of that inside a container.
The first question to ask is what you're growing and how aggressively it feeds. Herbs, leafy greens, and flowering houseplants are relatively forgiving. Cannabis under an LED setup is not. It's a heavy feeder with specific pH requirements, a sensitive root zone, and a two-stage growth cycle (veg and flower) that demands different nutrient profiles at different times. If you're growing weed indoors, you need a soil built for that, not just a bag of all-purpose potting mix from the hardware store.
Second question: are you running an LED grow? LED lighting changes the game in ways that affect soil choice. Modern full-spectrum LEDs run cooler than HPS or CMH lights, which means the growing environment retains more moisture. A mix that works fine under a hot HPS canopy can stay wet too long under LED, increasing the risk of root rot. LED grows typically need a mix that leans a little drier and airier than what you'd use under traditional lighting.
Third: are you growing in soil purely for simplicity, or do you want to dial in yields? If you're a beginner who wants healthy plants without a lot of fuss, a quality pre-made mix with added perlite gets you 90% of the way there. If you're chasing maximum yields and have some experience under your belt, a custom amended mix or a living soil approach will outperform anything in a bag. This guide covers both paths.
Matching Your Mix to Your Plant
| Plant Type | Ideal pH Range | Key Mix Traits | Feeding Approach |
|---|---|---|---|
| Cannabis (veg) | 6.0–6.5 | Airy, fast-draining, moderate nutrients | Light feeding, mostly nitrogen-forward |
| Cannabis (flower) | 6.0–6.3 | Same base, boosted P and K | Heavier feeding weeks 3–6, taper off at flush |
| Herbs and leafy greens | 6.0–6.8 | Moisture-retentive, rich organic matter | Minimal supplemental feeding if mix is pre-amended |
| Flowering houseplants | 5.8–6.5 | Balanced drainage and retention | Light balanced fertilizer every 2–4 weeks |
| Tropical foliage plants | 6.0–6.5 | Well-draining, chunky texture | Low-nitrogen, slow-release amendments |
| Tomatoes and peppers (indoor) | 6.0–6.8 | Deep containers, rich base, good drainage | Regular liquid feeding from week 3 onward |
Best Soil Recipes for Indoor LED Grows and General Indoor Plants
There are two routes here: buy a pre-made mix and upgrade it, or build your own from components. Pre-made mixes save time and are perfectly valid, especially for beginners. The problem is that most commercial potting soils are too dense and too moisture-retentive straight out of the bag. They're formulated for outdoor containers or casual houseplant use, not a sealed indoor grow tent where airflow at the root zone matters a lot.
Pre-Made Mixes Worth Using (and How to Improve Them)
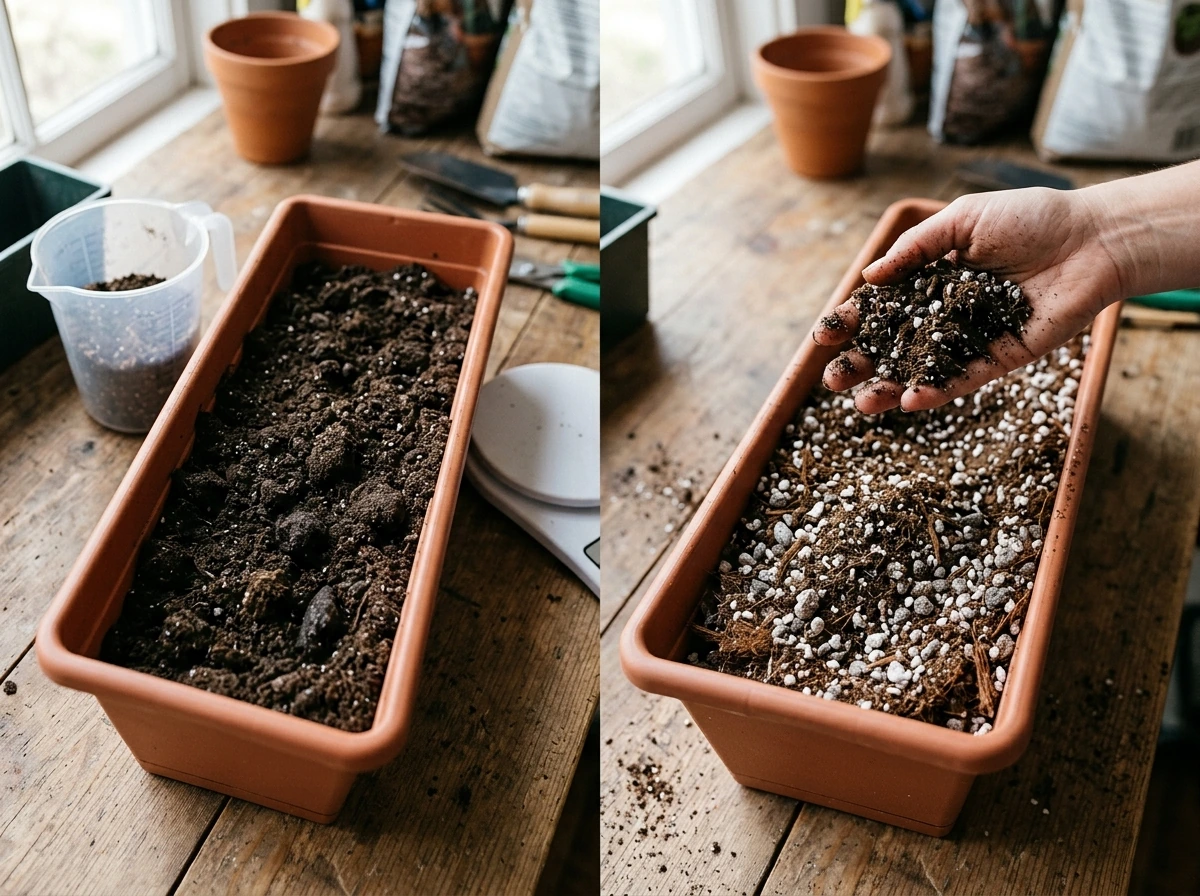
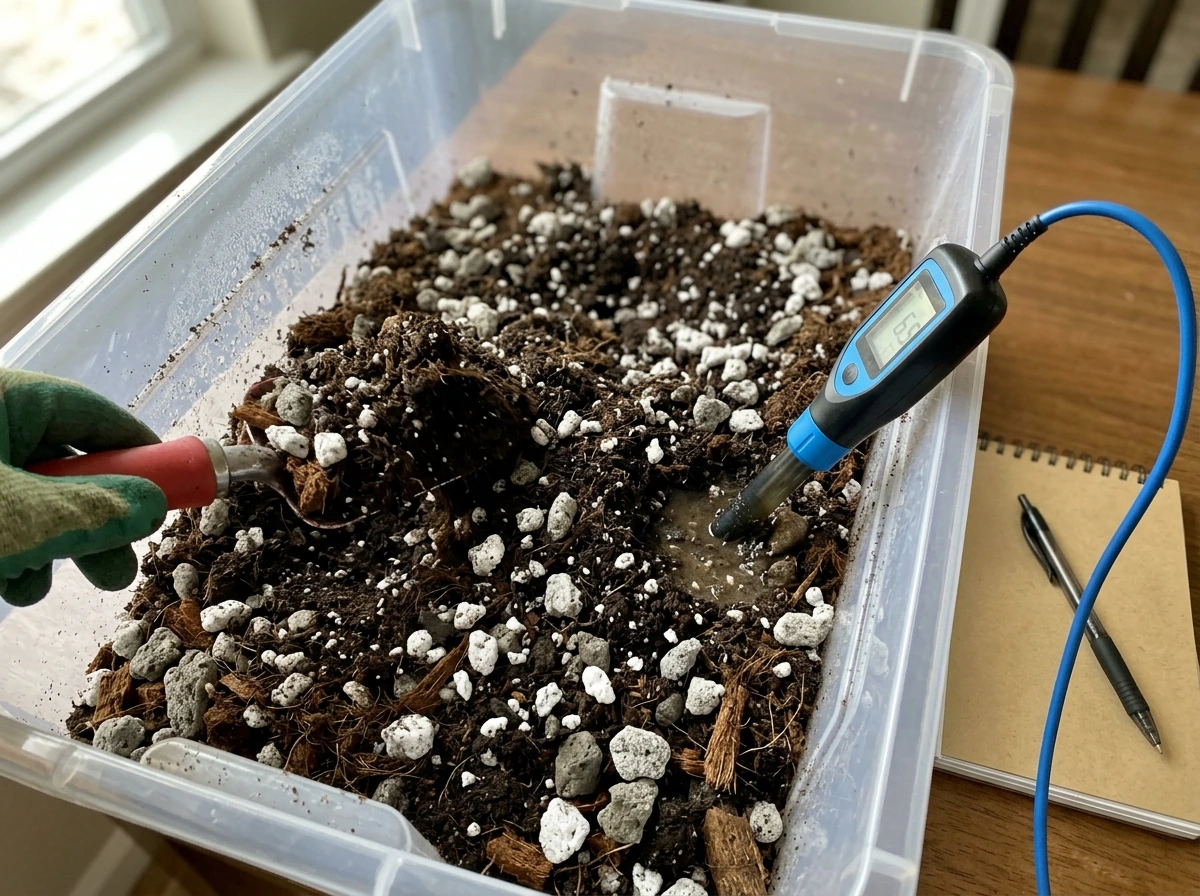
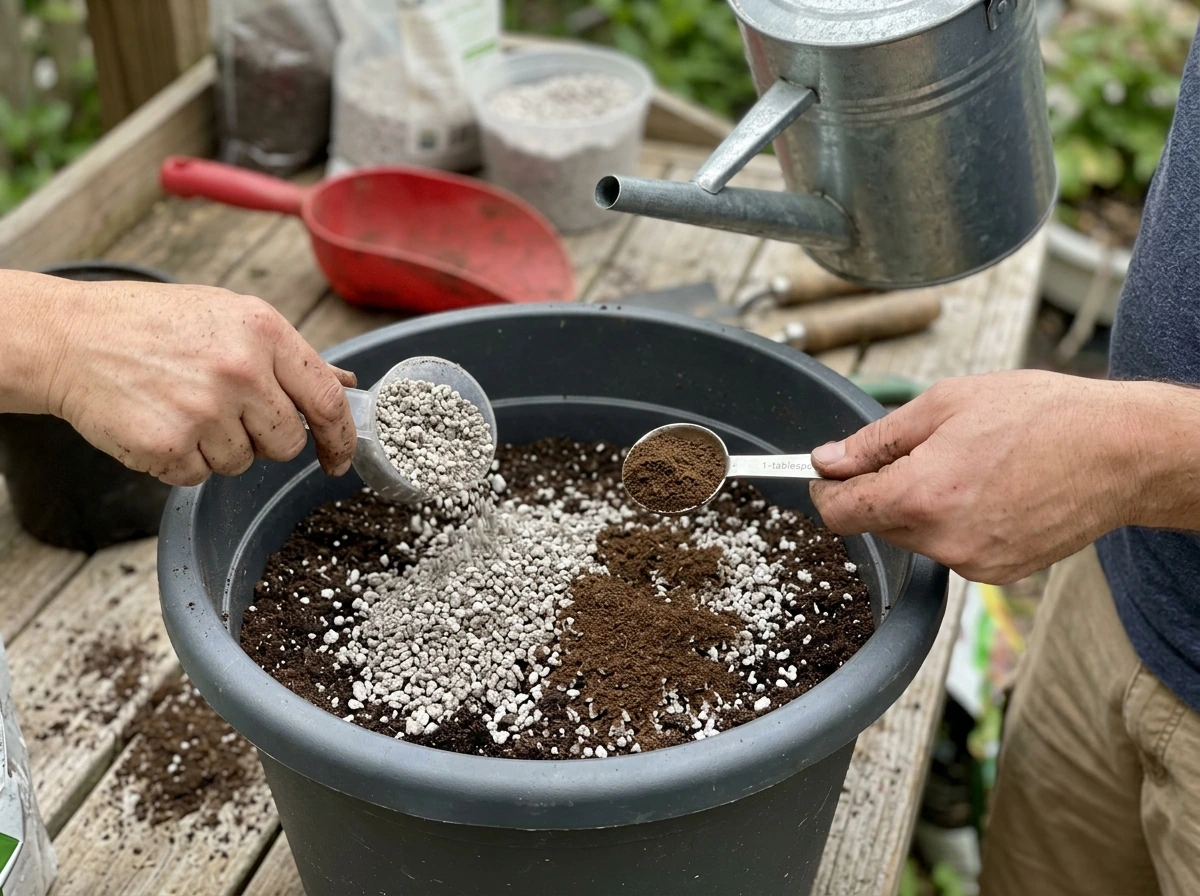
If you're buying a pre-made mix, look for ones already blended with perlite, pumice, or coco fiber. Brands popular with indoor cannabis growers (like Fox Farm Ocean Forest, Roots Organics, or similar quality craft blends) typically start close to the right texture. Even so, I always add extra perlite at a ratio of about 20 to 30 percent by volume. If the bag reads '15% perlite already added,' open it up and add more. For an LED tent, aim for a final mix that's roughly 30% aeration materials (perlite, pumice, or lava rock) by volume. That extra airspace is what prevents the soggy-root problem that kills so many indoor grows.
DIY Base Mix for Cannabis Under LED
This recipe works for cannabis in veg and flower, and it translates well to tomatoes, peppers, and most other heavy-feeding indoor crops.
- 40% high-quality compost or worm castings-based potting mix (the organic base)
- 30% perlite (medium to coarse grade, not fine dust)
- 15% coco coir (buffered, rinsed) for moisture retention without compaction
- 10% pumice or lava rock (adds long-term aeration that won't break down)
- 5% compost or worm castings (if your base mix is light on organics)
This gives you a fast-draining, airy mix with enough organic matter to hold moisture between waterings without becoming waterlogged. It's forgiving for beginners and responsive enough for experienced growers who want to dial in feeding schedules.
DIY Mix for Herbs, Greens, and General Houseplants
- 50% quality potting mix or peat-based compost
- 25% perlite
- 15% coco coir
- 10% worm castings
This is a more moisture-retentive blend suited to plants that don't need as much airspace at the roots. Herbs like basil, mint, and cilantro will do well in this. For tropicals or succulents, swap the coco coir for more pumice and drop the castings to 5%.
Living Soil: The Advanced Option
Living soil is a no-till approach where you build a rich, biology-heavy mix and let the microbial ecosystem feed your plants. You water with plain water (or compost teas) and the bacteria, fungi, and microorganisms do the nutrient cycling. It produces exceptional quality in cannabis and is popular with craft growers. The tradeoff is setup time, cost, and a learning curve. If you're interested, it fits naturally into the same framework as the DIY mix above, with heavier amendment loading upfront. That's a separate deep dive on its own, but worth knowing this option exists if you outgrow basic soil feeding.
Soil Amendments and Nutrients: What to Add, When, and How Much
Amendments fall into three categories: aeration, organic matter and water retention, and nutrients. Most growers focus on nutrients and ignore the first two, which is backwards. Get the structure right first, then worry about feeding.
Structural Amendments (Add at Mix Time)
| Amendment | Purpose | Typical Rate |
|---|---|---|
| Perlite (medium grade) | Drainage and air pockets | 20–30% of total mix volume |
| Pumice | Long-term aeration, won't compress | 10–15% of total mix volume |
| Coco coir (buffered) | Water retention without compaction | 10–20% of total mix volume |
| Lava rock (small grade) | Drainage, root-zone airflow | 5–10% of total mix volume |
| Worm castings | Organic matter, microbial life, mild nutrients | 5–10% of total mix volume |
Nutrient Amendments and Feeding Timing
A quality pre-amended mix or a well-built DIY mix will feed your plants for roughly the first 3 to 4 weeks without supplemental fertilizer. During this window, especially in early veg, hold off on liquid feeding unless you see clear deficiency signs. Over-feeding seedlings and young plants in a pre-amended mix is one of the most common mistakes in indoor growing.
After week 3 or 4, plants start drawing down the nutrients in the mix and you'll need to supplement. The general approach for cannabis under LED looks like this:
- Weeks 1–3 (early veg): No supplemental feeding if using a pre-amended mix. Water to runoff at a 6.0–6.5 pH.
- Weeks 4–8 (active veg): Begin liquid feeding at half-strength. Nitrogen-forward formula. Feed every other watering, not every session.
- Weeks 1–3 of flower: Transition to a bloom formula. Increase phosphorus and potassium, reduce nitrogen. Full-strength feeding.
- Weeks 4–6 of flower: Peak feeding period. Maximum P and K. Monitor runoff pH and EC (electrical conductivity) to avoid salt buildup.
- Weeks 7–8 of flower (pre-harvest): Taper feeding. Many growers flush with plain pH-corrected water for the final 1–2 weeks to clear residual salts.
For herbs, greens, and houseplants, it's much simpler. A balanced liquid fertilizer (something like a 5-5-5 or 10-10-10 NPK) applied at half the label rate every 2 to 3 weeks during the active growing season is sufficient. Less is more. Burned tips on leaves are almost always a sign of over-fertilizing, not under.
Organic vs. Synthetic Nutrients in Soil
Organic nutrients (fish emulsion, kelp, bone meal, blood meal) feed the soil biology, which then feeds the plant. They're slower-acting, harder to over-apply, and build the microbial health of your mix over time. Synthetic nutrients (liquid mineral fertilizers) feed the plant directly and give you precise control over NPK ratios. For beginners, organics are more forgiving. For yield-focused LED growers who want fast response and exact dialing, synthetics give you more control. Many experienced growers use both: an organic base mix with targeted synthetic top-dressing or liquid feeding when specific deficiencies appear.
Drainage, Aeration, and Container Setup

The container you choose is just as important as the mix inside it. Good soil in a bad container underperforms. Bad drainage traps moisture, suffocates roots, and creates the conditions for fungus gnats, pythium (root rot), and a cascade of nutrient lockout problems.
Container Types and What They Do for Your Roots
| Container Type | Drainage | Aeration | Best For | Trade-offs |
|---|---|---|---|---|
| Standard plastic pot with drainage holes | Good if mix is correct | Low to moderate | Beginners, budget setups | Can stay wet longer, no air-pruning |
| Fabric pots (grow bags) | Excellent | Excellent (air-pruning sides) | Cannabis, tomatoes, heavy feeders | Dry out faster, need more frequent watering |
| Smart pots (felt-style fabric) | Excellent | High | LED grows, plants needing dry cycles | Same as fabric pots |
| Air pots (molded plastic with holes) | Very good | Very high | Advanced growers, large plants | More expensive, harder to move |
| Terra cotta pots | Good | Moderate (breathable walls) | Houseplants, tropicals, herbs | Heavy, can dry unevenly |
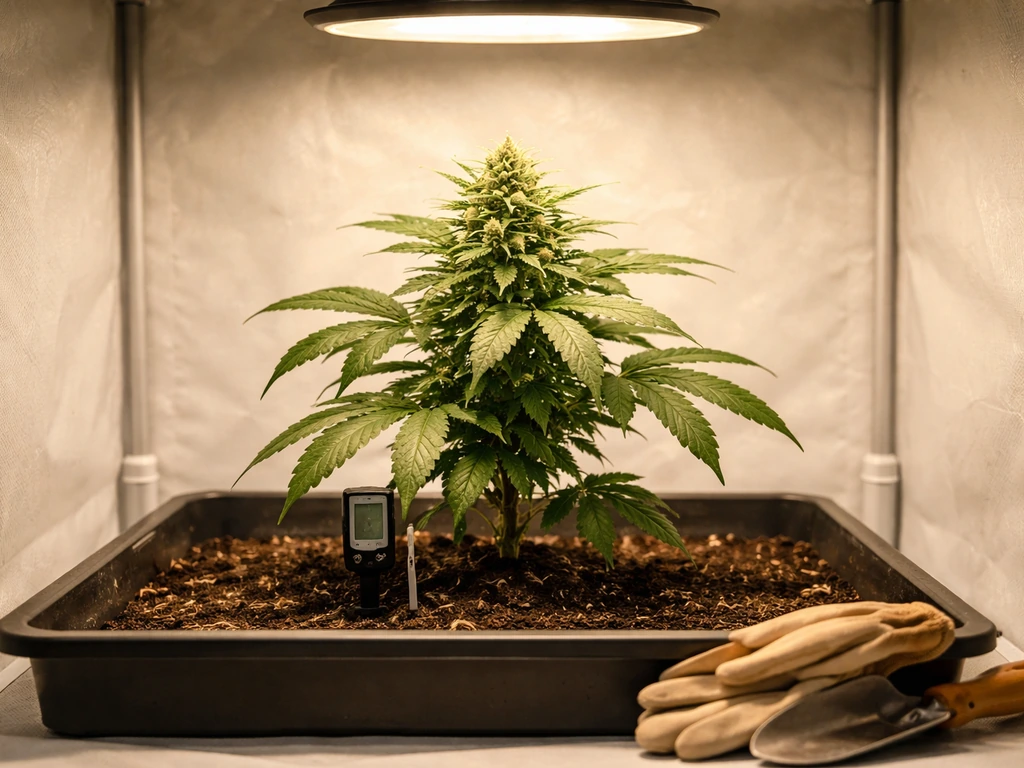
For cannabis under LED specifically, fabric pots are a strong first choice. The air-pruning effect stops roots from circling the container wall and encourages a dense, fibrous root zone. Combined with a well-aerated mix, they produce noticeably better plant health than standard plastic pots in the same conditions.
Container Size and Drainage Mechanics
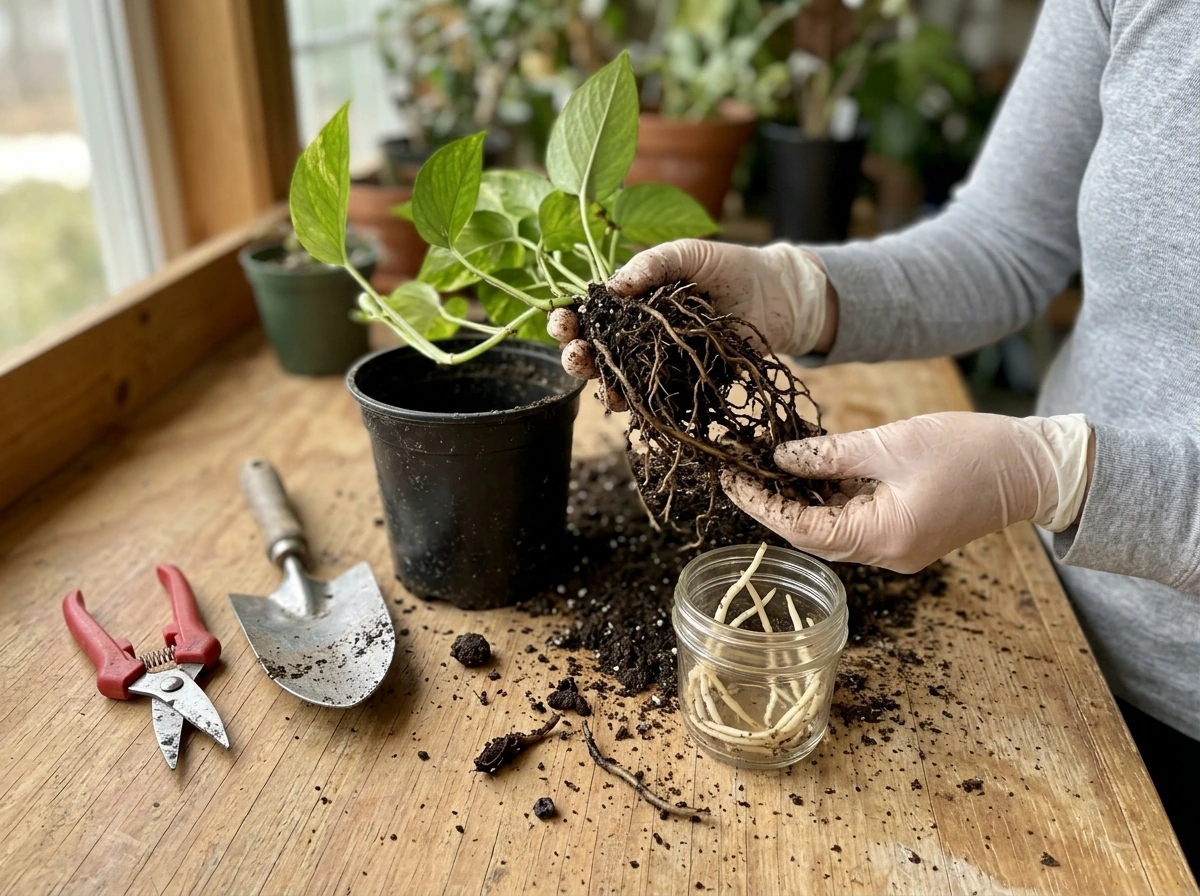
As a general rule: seedlings and clones start in small containers (solo cups or 1-gallon pots) and get transplanted as roots develop. Moving to a container that's too large too quickly is a common error. In an oversized container, the soil holds way more water than the young plant can use, staying wet for days and inviting root disease. For cannabis, a typical progression is solo cup to 1 gallon to 3 gallon to 5 gallon for a full-cycle indoor grow.
Every container needs adequate drainage holes at the bottom, and you should always water to runoff. Watering until you see 10 to 20% runoff from the bottom serves two purposes: it saturates the entire root zone, and it flushes accumulated salts that would otherwise concentrate in the soil and lock out nutrients. Collect the runoff in a tray and empty it within a few hours. Letting plants sit in runoff water reintroduces those flushed salts and promotes root disease.
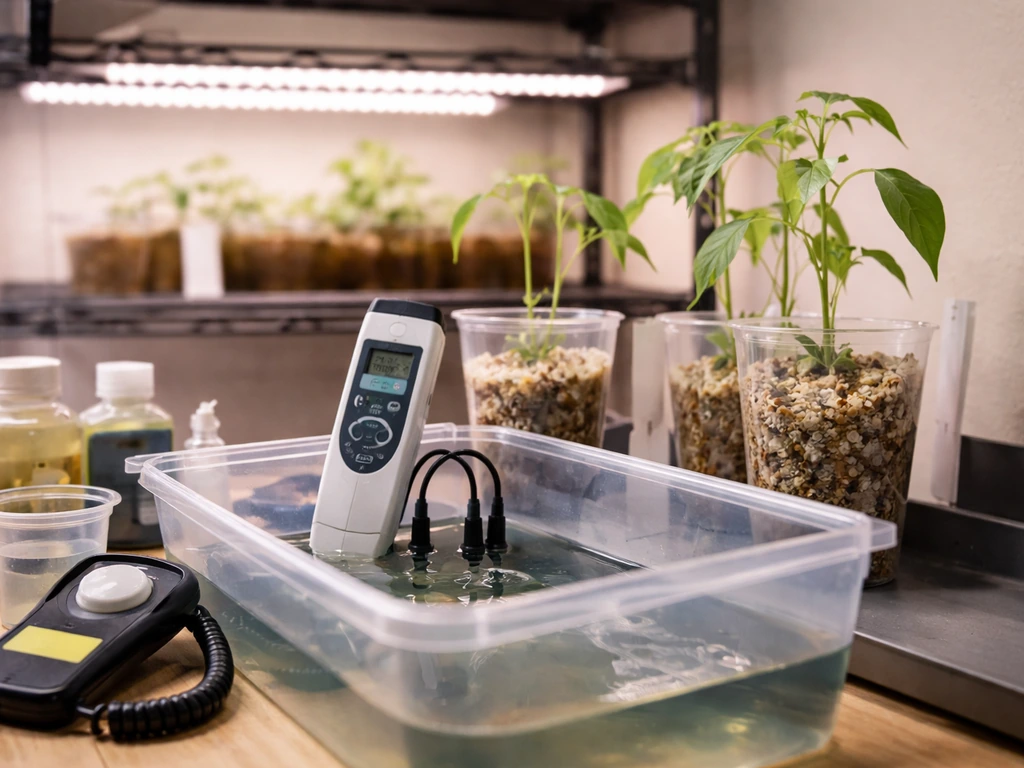
pH Buffering and Why It Matters More Indoors
Research from Purdue Extension confirms what experienced growers know from practice: substrate pH around 5.4 to 6.6 is where most nutrients remain available, with the sweet spot for most crops sitting closer to 5. Purdue Extension substrate-pH guidance describes an effective target range around 5.4 to 6.2 and notes that optimal pH varies by plant substrate pH around 5.4 to 6.2. 8 to 6.5. For cannabis, I target 6.0 to 6.3 in soil. Below 5.8, iron and manganese can reach toxic levels while calcium and magnesium become unavailable. Above 6.8, iron, manganese, boron, and zinc start locking out, which shows up as interveinal chlorosis (yellowing between leaf veins) and stunted growth.
Outdoors, soil pH drifts slowly and rain helps buffer it. Indoors, in a small container with concentrated feeding, pH can swing faster. For most agronomic crops, University of Maryland Extension recommends an ideal soil pH between 6.0 and 6.5, with nutrient availability at its optimum between pH 6 and 7 pH can swing faster. Get a reliable pH meter (not cheap paper strips, which aren't accurate enough) and check your water and nutrient solution before every watering. Adjust pH using pH-up (potassium hydroxide) or pH-down (phosphoric acid) solutions. Also check your runoff pH periodically. If your input is 6.2 but your runoff reads 5.5, the soil is acidic and drifting toward lockout territory. Flushing with pH-corrected plain water usually resolves mild drift.
Common Indoor Soil Problems and How to Fix Them
Most indoor soil problems come down to four things: overwatering, compaction, nutrient issues (either excess or deficiency), and pest or disease pressure. Here's how to identify and fix each one.
Overwatering and Root Rot
Overwatering is the number one killer of indoor plants. The symptoms look confusingly similar to underwatering: drooping leaves, slow growth, yellowing. The difference is that overwatered leaves droop while still feeling firm and plump, whereas underwatered leaves feel thin and papery. The fix is straightforward but requires patience: let the soil dry out between waterings. Pick up the container when it's dry and when it's wet. You'll quickly learn the weight difference, and that's your best watering cue. In an LED tent, expect soil to dry out more slowly than you'd expect because the canopy temperature is lower. Factor that in.
If you suspect root rot (mushy, brown roots instead of white and firm), act fast. Remove the plant from the container, trim any brown root material with sterilized scissors, treat with a beneficial microbe solution (products containing Trichoderma or Bacillus subtilis help), and repot into fresh, well-aerated soil. Improve drainage going forward and let the soil dry more between waterings.
Soil Compaction
Over weeks of watering, soil can compact and lose its airier texture. You'll notice water pooling on the surface instead of absorbing quickly, and plants may look stressed despite a normal watering schedule. A topdressing of worm castings mixed with a little perlite can help, and gently aerating the top inch of soil with a fork or chopstick improves water penetration. The best long-term fix is building a mix with enough pumice and coarse perlite from the start, since these materials don't break down and maintain structure throughout the grow cycle.
Nutrient Deficiencies and Toxicities
Yellowing lower leaves usually indicates nitrogen deficiency, especially if the yellowing starts at the leaf tips and moves inward. Interveinal yellowing on new growth (the veins stay green, the tissue between them turns yellow) typically points to iron, manganese, or magnesium deficiency. Burned, crispy leaf tips are almost always a sign of excess nutrient salts or pH out of range. Before reaching for a deficiency fix, always check your pH first. A lockout caused by wrong pH will look exactly like a deficiency, and adding more nutrients to a locked-out plant makes things worse.
Fungus Gnats, Root Aphids, and Soil Pests
Fungus gnats are the most common soil pest in indoor grows. The tiny flies themselves are mostly harmless, but their larvae live in the top inch of soil and feed on roots, which stunts growth and opens the door for disease. The larvae need moisture to survive, so letting the top inch of soil dry out between waterings is your first line of defense. Yellow sticky traps catch the adult flies. For serious infestations, Bacillus thuringiensis israelensis (Bti), sold in products like Gnatrol or as mosquito dunks, applied as a soil drench, kills the larvae within a week or two. Diatomaceous earth on the soil surface also helps by cutting larvae that cross it.
Root aphids are harder to deal with. They live below the soil surface, feed directly on roots, and can devastate a crop before you see any clear sign above ground. Plants just look mysteriously stressed and slow. If you suspect root aphids, flush the soil and inspect the roots and pot walls. Treatment options include soil drenches with spinosad or insecticidal soaps rated for root-zone use, though prevention (clean tools, no contaminated soil reuse, careful clone sourcing) is far more effective than treatment.
Soil vs. Hydro vs. Soilless: Which Makes Sense for Your Indoor Grow?
Once you're comfortable with indoor growing basics, it's worth understanding where soil fits in the bigger picture of growing mediums. The site covers hydroponic methods and soilless systems in detail elsewhere, but here's the practical comparison to help you decide where to go next.
| Medium | Difficulty | Yield Potential | Control Level | Cost to Start | Best For |
|---|---|---|---|---|---|
| Soil (pre-amended) | Low | Good | Low to moderate | Low | Beginners, organic grows, low-maintenance setups |
| Soil (custom/living) | Moderate | Very good | Moderate | Moderate | Craft growers, organic cannabis, flavor-focused grows |
| Coco coir (soilless) | Moderate | High | High | Low to moderate | Growers ready to dial in feeding schedules daily |
| DWC hydroponics | High | Very high | Very high | Moderate to high | Experienced growers chasing maximum speed and yield |
| Ebb and flow / NFT | High | High | Very high | High | Commercial-scale or advanced hobby growers |
Soil is the most forgiving medium and the easiest starting point. It buffers pH swings, has built-in nutrient reserves, and doesn't punish mistakes as hard as hydro does. The tradeoff is that soil grows are slower and you have less precision control over what the plant gets and when.
Coco coir is an interesting middle ground. It's technically a soilless medium, meaning plants rely entirely on you for nutrients (like hydro), but it has a texture and watering cadence that feels more like soil. It's popular with indoor LED growers because it responds fast to nutrient adjustments, dries quickly under LED conditions, and produces results closer to hydro yields without the full complexity of a recirculating system.
Hydroponics (deep water culture, NFT, ebb and flow) offers the highest yield potential and fastest growth rates because nutrients go directly to the roots with no soil to navigate. But there's no buffer. A pH crash, pump failure, or nutrient mistake can devastate a crop in 24 to 48 hours in ways that soil gives you days to catch. If you're ready for that level of precision and monitoring, the yield gains are real. If you're not there yet, master soil first. You'll bring better instincts to hydro when you do make the switch.
A practical pathway many growers take: start with a quality pre-amended soil mix and added perlite. Run one or two full cycles to understand your plants' behavior, your watering rhythm, and how nutrients look in practice. Then try coco coir with liquid nutrients for tighter control. From there, hydro is a logical next step if you want to keep pushing yields. Each medium teaches you something the previous one didn't, and the skills stack.
Your Next Steps
If you're starting your first indoor grow today, pick up a quality potting mix, add perlite to bring it to about 30% aeration content, get a reliable mysoil soil test kit grow the best lawn & garden, and grab a set of fabric pots in the right size for your plants. That combination solves the majority of indoor soil problems before they start. Adjust your watering habits to let the soil partially dry between sessions, keep your feed pH in the 6.0 to 6.5 range, and hold off on supplemental nutrients for the first few weeks. From that foundation, you can add complexity as you get comfortable: custom amendments, organic teas, or eventually coco and hydro if your goals push in that direction.
FAQ
Can I use regular “potting mix” or should I only buy a grow-specific soil for the best soil for indoor grow?
You can start with regular potting mix only if it already drains fast and stays airy in a container. Many all-purpose mixes are too dense and stay wet too long indoors, especially under LED, so check texture (it should not clump into a heavy mass when lightly squeezed) and plan to add aeration materials like extra perlite or pumice before planting.
How do I know if my mix is aerated enough before I plant?
Do a simple water penetration test: fill a pot with your soil, water thoroughly, then observe how long it takes for the surface to stop glistening and for water to finish absorbing. If water sits on top for a long time or the pot feels heavy long after watering, the mix likely needs more coarse aeration (perlite, pumice, or lava rock).
What’s a good target aeration percentage if I’m not growing cannabis, for example leafy greens or houseplants?
Aim for enough airflow that the top layer dries between waterings. Practically, many growers land around 20% to 30% aeration materials by volume for indoor tents. If you consistently see fast drying and stalling, you can back off aeration slightly, but prioritize avoiding a soggy mix.
Do I need to pH test my soil, or is checking watering solution enough for indoor soil?
Testing the input (your water and nutrients) is not the whole story. Soil pH drift can happen as salts accumulate, so checking runoff pH periodically is useful. If runoff keeps consistently moving away from your target range, the soil is buffering poorly or nutrients are being added in a way that shifts pH.
How often should I check runoff pH, and when is it worth troubleshooting?
Check runoff when you start feeding, after any major change in fertilizer or water source, and if you see symptoms that could be pH-related (stalled growth, interveinal yellowing, crispy tips). If runoff shows a consistent large gap from your input pH, correct with properly pH'd plain water and reassess your feeding strength.
If my plant shows deficiency symptoms, should I correct nutrients right away?
Not always. First confirm pH, because lockout can mimic deficiency. A quick rule: if new growth and veins look mismatched (for example, veins stay green while tissue yellows), treat it as potentially pH or iron availability rather than immediately increasing fertilizer dose.
How do I avoid over-fertilizing during the early weeks in a pre-amended mix?
The safest approach is to delay supplemental feeding until around the time nutrients in the mix would be drawn down, then start at half-rate. Also, use a “less often, but correctly” mindset: if you’re unsure, wait for clear signs before adding anything, because pre-amended mixes can already be nutrient-rich.
Should I flush indoor soil, and how do I flush without causing more problems?
Flushing is mainly for salt buildup or suspected pH drift. To do it without harm, water with correctly pH'd plain water until you see about 10% to 20% runoff, then remove the runoff from the tray within a few hours. Let the soil partially dry before the next watering, rather than keeping it constantly wet.
Is there a recommended container size progression, and what if my plant outgrows its pot too slowly?
The usual progression is smaller for seedlings, then step up as roots fill the pot. If growth seems slow, avoid jumping to a much larger container immediately, because excess soil holds too much water. Instead, upsize one step at a time and ensure you are not overwatering in the current pot.
What’s the best way to prevent fungus gnats without heavy pesticide use?
The core prevention is letting the top inch dry between waterings and using yellow sticky traps for the adults. For persistent infestations, soil drenches with Bti (often sold as mosquito dunk products) target larvae, and diatomaceous earth on the surface can add extra control.
How can I tell if root rot is starting versus normal slow growth from under-watering?
Overwatering and underwatering can both cause droop, so check soil moisture and roots. Overwatered plants usually droop while the soil is still wet and leaves feel firm, while underwatered plants droop with thin, papery leaves and dry soil. If you suspect rot, remove the plant, look for brown, mushy roots, and repot into fresh aerated soil after trimming damaged tissue.
Can living soil work indoors if I use LED, and what changes compared to standard soil?
Living soil can work well indoors, but it still needs correct aeration and moisture management because LED environments can keep root zones wetter than expected. Expect setup and amendment loading to be front-loaded, water scheduling to be more about soil dryness than calendar timing, and slower “correction” compared to bottled salt systems.
What’s the easiest “upgrade” to make an indoor soil mix better if I already own it?
Add aeration rather than nutrients. A common, low-risk upgrade is mixing in extra perlite or pumice to reach roughly 20% to 30% aeration by volume for most LED indoor grows. If your mix is already chunky and drains fast, you may only need a smaller adjustment.