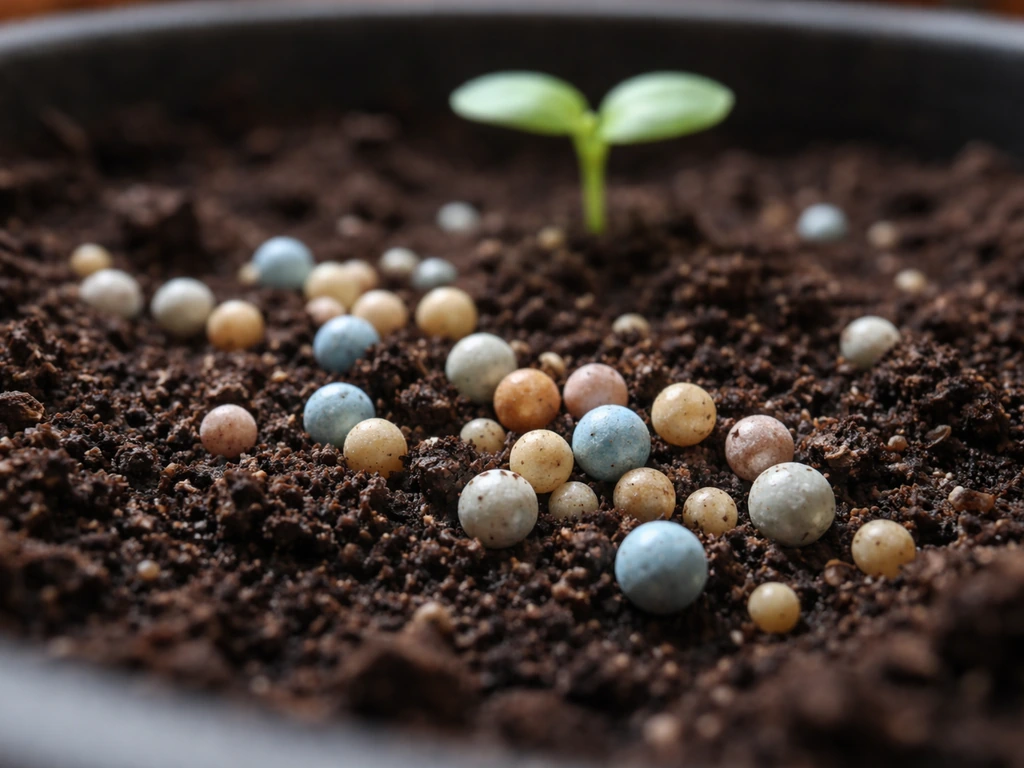
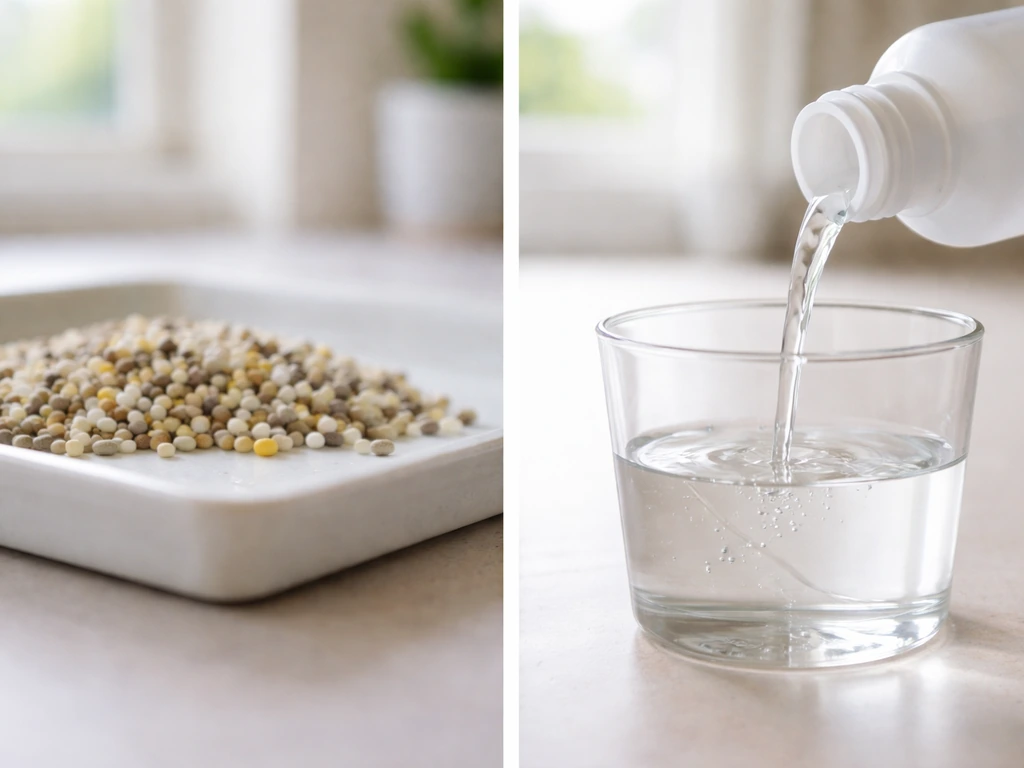
Slow grow fertilizer is any fertilizer formulated to release nutrients gradually over weeks or months rather than all at once. If you've been shopping for fertilizers and noticed terms like 'controlled-release,' 'slow-release,' 'coated granules,' or 'extended feed,' they all describe the same core idea: nutrients locked inside a coating or chemical form that breaks down slowly, giving your plants a steady, low-level feed instead of a big spike followed by nothing. For home growers working in soil, this is genuinely useful. For hydroponic growers, the picture is more complicated, and I'll get into exactly why.
Slow Grow Fertilizer Guide: Choose, Use, and Avoid Mistakes

Marcus Holloway
19 Apr 2026
What slow-release fertilizer actually is (and how it differs from liquid feeds)
Standard quick-release fertilizers, whether liquid concentrates or water-soluble powders, dump nutrients into your medium immediately. Roots take up what they can, and the rest leaches out or sits available until something uses it. That works fine if you're feeding on a precise schedule and checking your EC and pH constantly. But miss a feed, overfeed slightly, or hit a hot week, and you're either starving your plants or sending them into lockout.
Slow-release fertilizers work differently. The two most common commercial mechanisms are sulfur-coated urea (SCU) and polymer-coated urea (PCU). SCU uses a sulfur shell sprayed around urea granules; water is absorbed through the coating, dissolves the urea inside, and the nitrogen diffuses out slowly. PCU wraps urea in polymer layers, and the thickness of those layers controls exactly how fast nutrients pass through. PCU is technically called 'controlled-release' because the release rate is more predictable and consistent than SCU, where coating variability between particles means some granules release faster than others. Organic slow-release options (blood meal, bone meal, feather meal, composted manures) work via microbial breakdown rather than coating, so release speed depends on soil temperature, moisture, and microbial activity.
One thing worth knowing upfront: if coated granules get crushed, cracked, or mechanically damaged during mixing, the coating fails and those granules dump nutrients fast, behaving more like quick-release. That means you don't want to aggressively till or grind coated granules into your soil. Mix them in gently.
Choosing the right slow-release fertilizer for your setup
The first decision is whether you're growing in soil or a soilless/hydroponic system, because that changes everything about which product makes sense.
Soil and soil-based grows
For soil growers, slow-release granules are a genuinely practical choice. For many <a data-article-id="8F7AC7F5-618E-4CE9-B5CD-52761D6A6426">slow grow plants</a>, slow-release granules help keep nutrition steady over the first weeks and months, so growth doesn’t stall between feedings. For many <a data-article-id="8F7AC7F5-618E-4CE9-B5CD-52761D6A6426"><a data-article-id="8F7AC7F5-618E-4CE9-B5CD-52761D6A6426">slow grow flower co</a></a>, slow-release granules help keep nutrition steady over the first weeks and months, so growth doesn’t stall between feedings. You mix them into your medium before planting, and they do a lot of the feeding work for you over 2 to 6 months depending on the product. Look at the guaranteed analysis label and pay attention to three things: the NPK ratio, the release duration, and whether the nitrogen source is coated or organic. A balanced all-purpose granule with an NPK somewhere around 14-14-14 or 13-13-13 works well for vegetative growth. If you're growing flowering or fruiting plants, you'll want something with lower nitrogen and higher phosphorus and potassium in the mid-to-late stages, like a 5-10-15 or similar. Some growers use a pre-plant all-purpose granule for early veg and then supplement with liquid nutrients during flower, which is the hybrid approach I'll cover later.
Release duration matters a lot. A 3-month product will need topping up or supplementing if your grow runs longer. A 6-month product covers most full-season grows but can become a problem if you need to flush or adjust mid-cycle. For indoor container grows with 8 to 12 week cycles, a 3 to 4 month product usually fits well. Outdoor growers with longer seasons should lean toward 5 to 6 month formulations.
Hydroponic and soilless systems
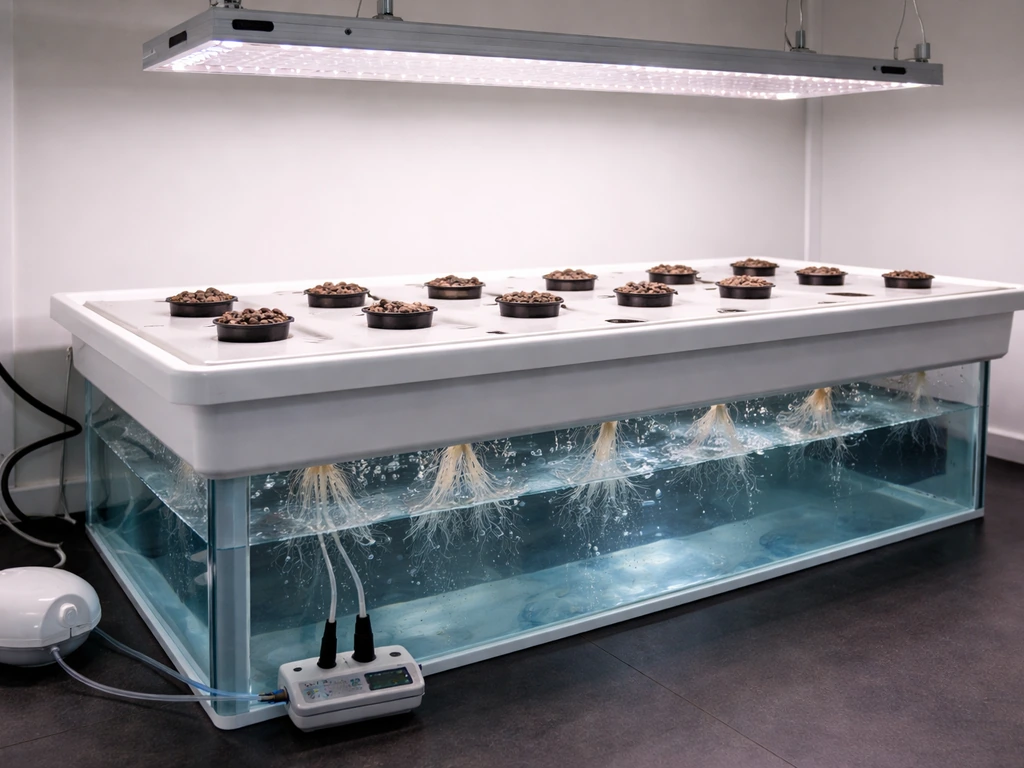
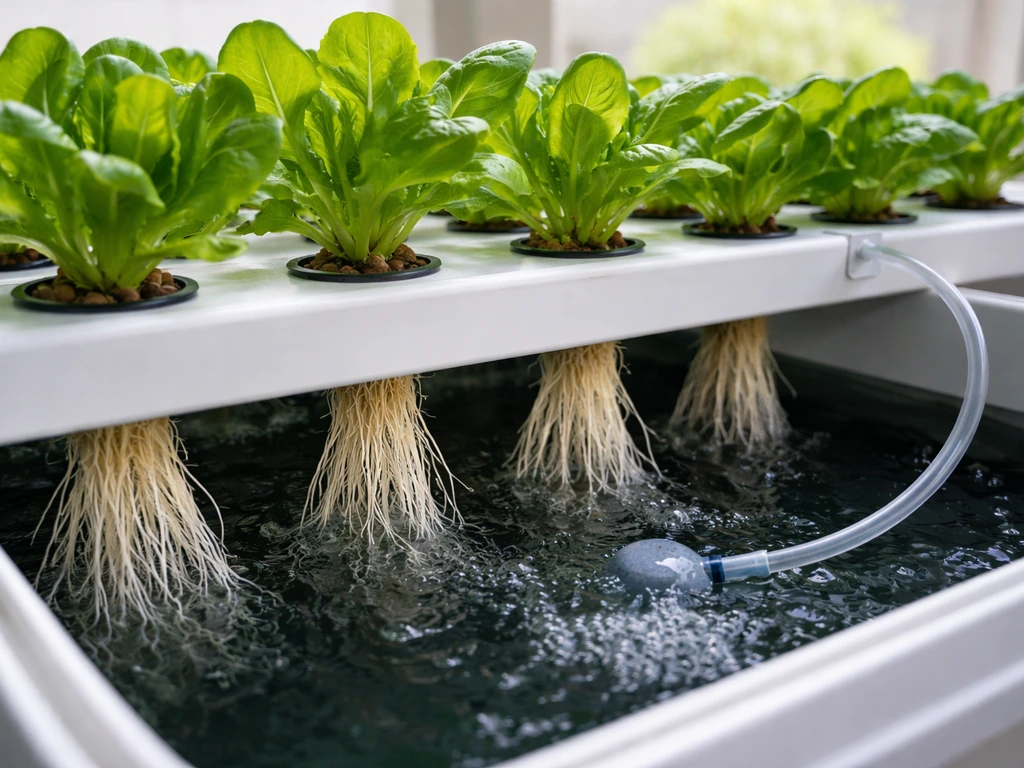
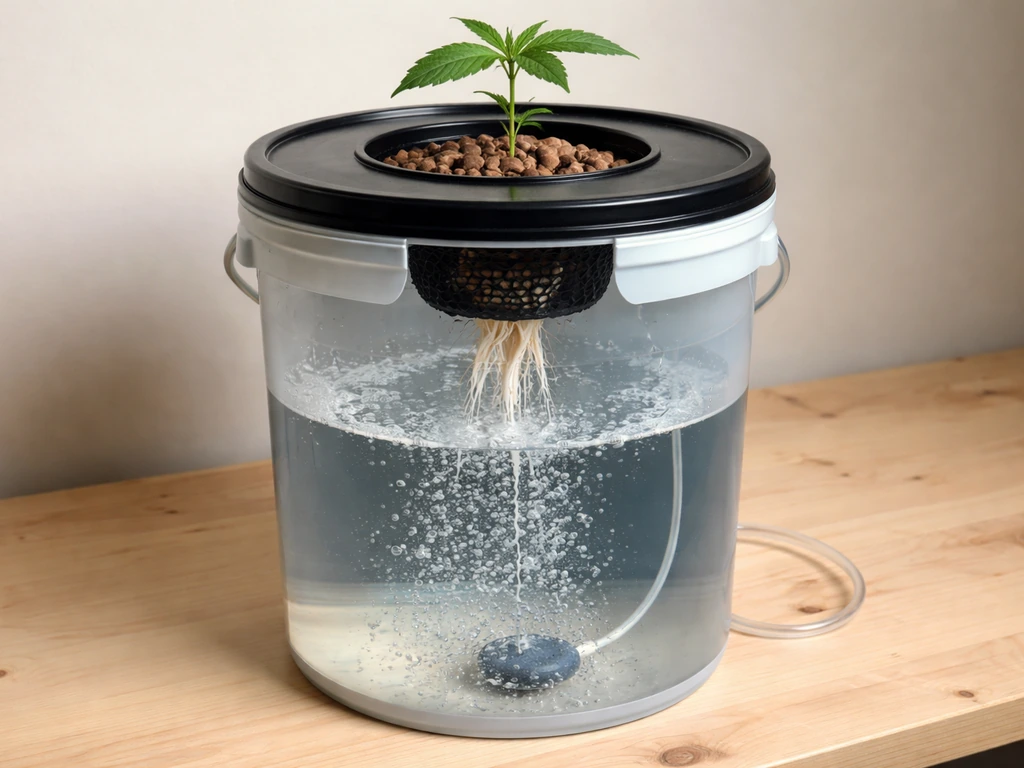
Standard coated granules are not designed for hydroponic systems and generally should not be used in reservoir-fed setups, flood-and-drain tables, or DWC buckets. The granules don't dissolve fully, can clog pumps and lines, and release nutrients unpredictably into solution, making it impossible to dial in your EC and pH with any precision. If you're running a true hydroponic system, stick to water-soluble liquid or powder nutrients where you have full control over concentration.
The exception is coco coir or perlite-heavy media where you're hand-watering or using drip irrigation without a reservoir. In that case, mixing a small amount of organic slow-release (like a composted amendment or an all-purpose organic granule) into your coco at transplant can provide a background feed, but you'd still be supplementing heavily with liquid nutrients through the cycle. This is more of a 'soil-like' approach even if the medium isn't traditional soil.
| Factor | Soil Grow | Hydroponic/Soilless |
|---|---|---|
| Best fertilizer type | Coated granules or organic slow-release | Water-soluble liquid or powder nutrients |
| Slow-release granules usable? | Yes, mix into medium | Not recommended in reservoir systems |
| EC/pH management | Monitor runoff pH/EC periodically | Check reservoir daily, adjust as needed |
| Release predictability | Moderate (depends on temp and moisture) | Fully controllable with liquid feeds |
| Supplement needed? | Yes, during flower/fruiting | Full liquid program required |
| Risk of overfeeding | Low if applied at label rate | Higher, requires precise measuring |
When and how to apply slow-release fertilizer
Timing your application correctly is where a lot of growers go wrong. The most effective approach for container or in-ground soil grows is to incorporate the granules before or at transplant, not after the plant is already showing deficiency symptoms. Once a plant is struggling, slow-release isn't fast enough to fix it. Think of slow-release as your baseline, your safety net between feedings, not your rescue tool.
Application rates and incorporation
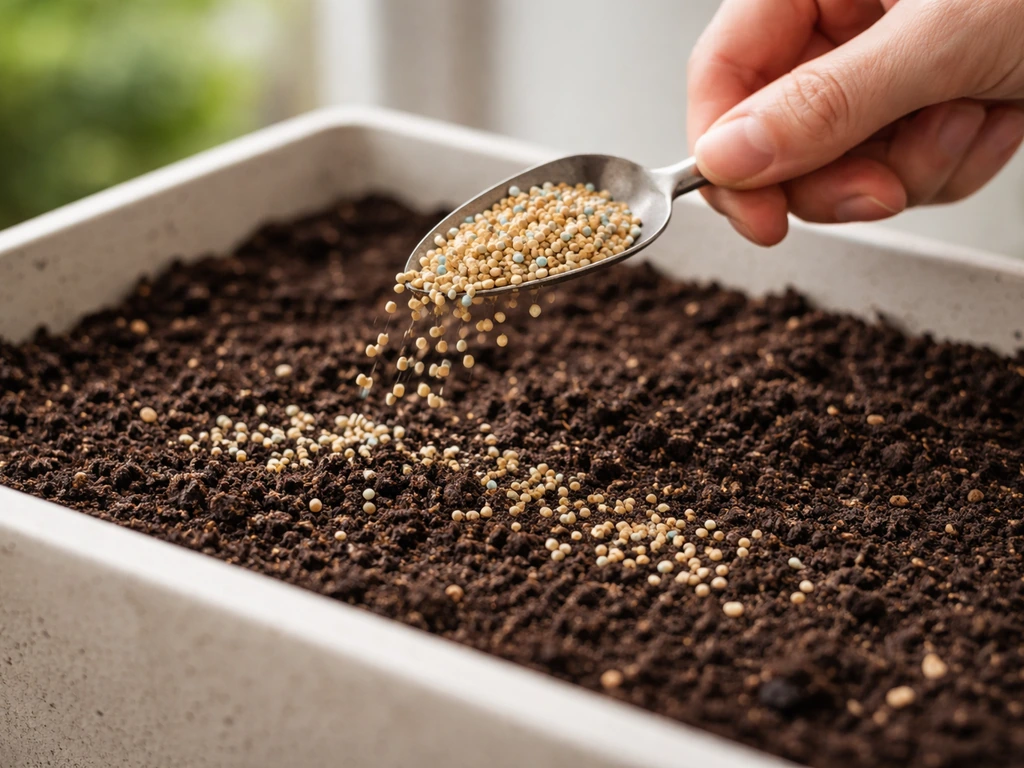
Always start at the lower end of the label rate and work up. Most granular slow-release products recommend somewhere between 1 and 3 tablespoons per gallon of soil or growing medium for container plants, but check your specific product because concentrations vary significantly between brands. For in-ground beds, typical rates are around 1 to 2 pounds per 100 square feet, though again, the label is your baseline. Mix granules evenly through the top 4 to 6 inches of soil rather than dumping them in one spot. If you're topdressing an established plant, spread granules across the surface, keep them away from direct stem contact to avoid burning, and water in thoroughly.
Temperature affects release rate significantly. Polymer-coated products release faster as soil temperature rises, so if you're running a warm indoor grow or you're in the middle of summer outdoors, the nutrients will release more quickly than the label's stated duration. In cool or cold conditions, release slows down, which can look like underfeeding even when product is present in the medium. Keep this in mind when troubleshooting.
The start-low-and-ramp approach
For new growers especially, I recommend starting at about 75% of the recommended application rate on your first grow with any slow-release product. You can always supplement with liquid nutrients to top up if plants show early deficiency signs, but you cannot easily pull back nutrients that are already in the medium. Getting a feel for how your specific product performs in your specific conditions, temperature, humidity, watering frequency, takes one full cycle. After that first run, you'll know whether you need to be at 100% or slightly above.
Feeding schedules by growth stage
Slow-release fertilizers provide a continuous background feed, but plant nutritional needs shift significantly between growth stages. Here's how to structure your approach across a typical grow cycle.
Seedling stage (weeks 1 to 3)
Do not apply full-strength slow-release granules to seedlings. Young roots are sensitive, and even a modest concentration of slow-release nutrients in the immediate root zone can stress or burn seedlings. If you're starting seeds in a dedicated seed-raising mix (which should be low in nutrients by design), don't add granules. This same idea applies when you’re using a seed-raising mix: keep it low in nutrients so tender seedlings can establish without stress grow better seed raising mix. You can begin incorporating a light dose of slow-release at transplant when seedlings move into their first container with a fuller growing medium. Some growers wait until the plant has at least 3 to 4 true leaf sets before exposing roots to any granular fertilizer.
Vegetative stage (weeks 3 to 8 for most cultivars)
This is where a balanced slow-release granule earns its keep. A ratio weighted toward nitrogen, something like 14-14-14 or even a higher-nitrogen option like 16-4-8, supports rapid leaf and stem development. For cacti and succulents, use a grow better cactus and succulent fertilizer that matches their low-nitrogen needs and supports steady, gentle feeding. If you incorporated granules at transplant, your veg phase should largely take care of itself. You may need to supplement with a diluted liquid nitrogen source around weeks 5 to 6 if growth starts to slow or leaves begin lightening, particularly in warm conditions where granules are releasing faster than expected.
Transition and early flower (weeks 8 to 10)
As plants flip from vegetative growth to flowering, nitrogen demand decreases and phosphorus and potassium become more critical. If your slow-release granule was a balanced N-heavy formula, you'll want to start supplementing with a liquid bloom feed at this point, something with an NPK profile weighted toward P and K like 2-8-4 or 0-5-4. You're not trying to replace the slow-release base, just steer the available nutrition toward what flowering plants need.
Full flower and fruiting (weeks 10 onward)
By this stage, most of the useful nitrogen in your slow-release application has been delivered. Depending on your product's stated duration, you may be near the end of its active release window. Increase liquid bloom and PK supplements. Many experienced soil growers run a full liquid bloom program through the last 4 to 6 weeks and treat the slow-release granules as veg support only. If you're growing plants with longer flowering windows (10 weeks or more), consider a second light application of a low-nitrogen slow-release granule at the beginning of flower to carry you through.
- Weeks 1 to 3 (seedling): No slow-release granules. Use a plain seed-raising medium.
- Week 3 to 4 (transplant): Mix slow-release granules into growing medium at 75% of label rate.
- Weeks 4 to 8 (veg): Monitor plant color and growth rate. Supplement with diluted liquid nitrogen if growth stalls.
- Weeks 8 to 10 (transition): Begin adding a liquid bloom supplement 1 to 2 times per week.
- Weeks 10 onward (flower/fruiting): Shift primary feeding to liquid bloom and PK boosters. Use slow-release as a background base only.
Mistakes that trip up growers using slow-release fertilizer
Slow-release sounds forgiving, and in many ways it is, but there are a handful of ways to mess it up that are worth knowing before you start.
Overfeeding and hot spots

The most common beginner mistake is applying too much granular fertilizer, reasoning that since it releases slowly, more is fine. It isn't. Even a slow-release product delivers nutrients continuously, and at double the recommended rate, the cumulative dose over weeks becomes excessive. You'll see tip burn, leaf curling, and eventually full nutrient toxicity. Always apply at or below label rate on your first run with any new product.
pH and EC problems
Sulfur-coated granules release sulfur as a byproduct of nutrient release, which can acidify your soil over time. If you're using SCU-based products in a longer cycle, check your runoff pH every 2 to 3 weeks. You're aiming for a soil pH between 6.0 and 7.0 for most plants, with 6.2 to 6.8 being the sweet spot for nutrient availability. If pH drops below 6.0, you risk locking out calcium, magnesium, and phosphorus even when those nutrients are present. Correct with a pH-up solution applied in watering, or amend with agricultural lime worked into the surface.
EC monitoring matters even with slow-release products. Periodically collect runoff from your container (pour water through and catch what comes out the bottom) and measure it. If your runoff EC climbs significantly above your input EC, salts are accumulating. A plain water flush can help bring this down without disrupting the granules in the medium significantly.
Nutrient lockout
Lockout happens when pH is out of range, salt buildup blocks uptake, or competing ions prevent absorption of specific nutrients. Slow-release grows can mask lockout because you assume feeding is continuous and forget to check the medium. If plants show deficiency symptoms (yellowing, purple stems, mottled leaves) but you've applied fertilizer correctly and recently, check pH and EC before adding more nutrients. Adding more fertilizer to a locked-out plant makes the problem worse.
Underfeeding in cool conditions
If your grow space or outdoor environment drops below about 60°F (15°C) for extended periods, coated granule release slows dramatically. The plant's metabolic rate also slows, but not always proportionally. If you're growing in a cool basement or during a cold spring, supplement with a diluted liquid feed to make up the difference. Don't double up on granules trying to compensate.
When to supplement with foliar sprays or liquid nutrients
A slow-release granule program works best as the foundation, not the whole structure. Most growers using slow-release as their base will still want a liquid supplement program ready for two situations: when the plant's needs outpace what the granules are delivering, and when specific micronutrients are needed that the slow-release doesn't provide.
Foliar spraying is the fastest way to address an acute deficiency because nutrients are absorbed directly through the leaf surface, bypassing root uptake entirely. If you spot signs of iron or magnesium deficiency (interveinal chlorosis, yellowing between leaf veins while veins stay green), a diluted foliar spray of chelated iron or Epsom salt solution (about 1 teaspoon per liter of water) can show visible improvement within 48 to 72 hours. Spray during lights-off or in the early morning outdoors to avoid leaf burn, and keep foliar sprays away from late flower to prevent mold issues.
Liquid bloom boosters should come in during the mid-to-late flowering stage regardless of what your slow-release is doing. Flowering plants need high volumes of phosphorus and potassium that most general slow-release granules simply weren't formulated to deliver at the right ratio for heavy flower production. Think of your granule as the nitrogen and general mineral base, and your liquid supplement as the targeted bloom driver. This hybrid approach, a slow-release base plus liquid top-ups, is what most experienced soil growers end up using. It takes the daily precision out of feeding while still letting you steer the plant's nutrition through key transitions.
If you're also growing in organic potting mixes or using all-purpose organic amendments alongside a slow-release program, be cautious about stacking too many nutrient sources without tracking the cumulative NPK load. This matters even more when you're trying to grow better organic potting mix health with a slow-release program, because the combined nutrients can add up quickly organic potting mixes. It's easy to accidentally overdose nitrogen when an organic potting mix, a slow-release granule, and a liquid veg booster are all contributing simultaneously.
Reading your plants: troubleshooting symptoms from slow-release feeding
Plants will always tell you what's going wrong if you know what to look for. The tricky thing with slow-release grows is that symptoms sometimes take longer to appear because the deficiency builds gradually rather than appearing suddenly after a missed feed. Here's how to interpret the most common issues.
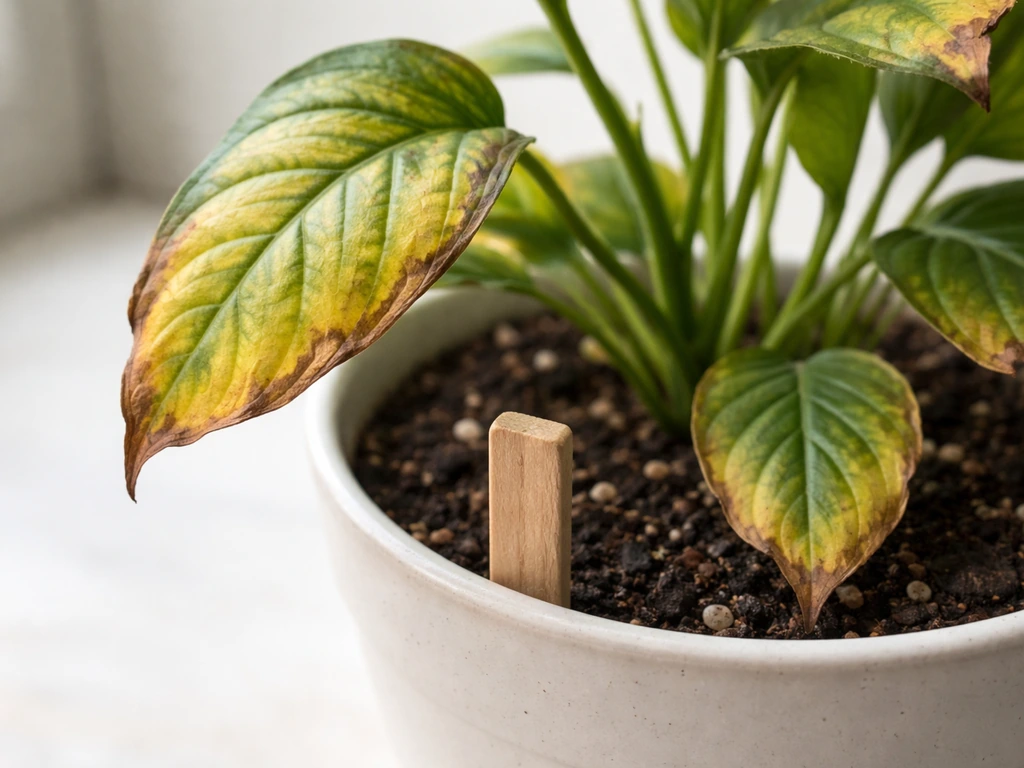
Yellowing leaves
Yellowing that starts on lower, older leaves and works upward is a classic nitrogen deficiency pattern. If you're past week 8 and your slow-release application is getting old, this is likely the granules running low. Supplement with a liquid nitrogen feed at around half strength to stabilize. If yellowing starts between veins on younger upper leaves, that's usually magnesium or iron deficiency, a pH or micronutrient issue rather than a nitrogen one. Check pH first before adding anything.
Stunted or slow growth
Stunting in a slow-release grow most often points to one of three things: underfeeding from low temperatures slowing granule release, a pH problem locking out nutrients, or root issues from overwatering. Check your ambient temperature, run a pH test on your runoff, and assess your watering frequency before adding more fertilizer. If everything checks out and growth is still sluggish, try a half-strength liquid all-purpose feed once and see if the plant responds within 5 to 7 days.
Tip burn and crispy leaf edges
Brown, crispy tips are the plant's signal that nutrient concentration is too high at the root zone, or that there's a calcium deficiency causing cell death at the leaf margins. If you recently topdressed or mixed in additional granules on top of an existing application, excess salt is the likely culprit. Run a plain water flush through the container (2 to 3 times the pot volume) and let the medium dry down slightly before your next watering. If tip burn appears alongside otherwise healthy dark green growth and you haven't overfed, calcium and/or humidity management is worth checking.
Uneven growth or leaf mottling
Patchy, irregular coloring across leaves that doesn't fit a standard deficiency pattern often points to inconsistent release from your granules, especially if you used SCU-type products where coating variability is higher. Some granules may have released a flush while others haven't broken down yet. The fix is usually a full flush followed by a balanced liquid feed to even out the nutrition, then continuing with liquid supplementation for the remainder of the cycle rather than relying solely on the remaining granules.
Your next steps as a grower
If you're new to slow-release fertilizers, start simple: pick a reputable balanced polymer-coated granule (look for PCU on the label or 'controlled-release'), apply it at 75% of the recommended rate when you transplant, monitor runoff pH and EC every couple of weeks, and have a liquid bloom supplement ready for when your plants hit the flowering stage. That combination, a slow-release base plus targeted liquid top-ups, gives you a genuine safety net without locking you into a rigid daily feed schedule.
If you're a more experienced grower looking to refine your approach, consider running a proper soil test or tracking runoff EC through your entire cycle to map exactly when your slow-release product is peaking and tapering. That data tells you precisely when to bring in liquid supplements and at what strength, which is how you get consistently heavy yields without deficiencies or lockout. The growers who get the best results with slow-release programs aren't the ones who set and forget; they're the ones who use the slow-release granule as a predictable base and actively manage the top layer of their nutrition program with targeted liquids and foliar feeds.
FAQ
Can I use slow grow fertilizer as a topdress after my plant is already established?
Yes, but only if the product is designed for soil container use and you have enough time for release. Topdressing can create hot spots if it lands too close to stems or clumps in the upper few centimeters, so spread it evenly, keep it off the main stem, and water in thoroughly. If you already applied granules at transplant, avoid adding a second full dose, instead use label guidance for “maintenance” or supplement with diluted liquid feed first.
I’m using coco. Can I use slow grow fertilizer even though it’s not traditional soil?
You can, but it depends on the granule type and your irrigation method. If you are using a reservoir-fed hydroponic system, coated granules are a poor match because they do not fully dissolve and can foul pumps and cause unpredictable EC swings. In coco or perlite-heavy media that you hand-water or drip without a reservoir, a small amount of organic slow-release can work as background feed, but plan on continuing strong liquid supplementation.
What’s the safest way to correct underfeeding if I suspect my slow grow fertilizer is too weak?
Follow the label rate by product and do not assume “more” is safer. Even slow-release can overload the root zone over weeks, leading to tip burn and nutrient toxicity. A practical approach for troubleshooting is to reduce future doses rather than keep adding, and if you need immediate correction, switch to a targeted diluted liquid feed or a brief flush rather than increasing granule amount.
How often should I check EC and pH with slow grow fertilizer, and what numbers matter?
Runoff testing is most useful when done consistently. Collect runoff from the same spot or representative area, test around every 2 to 3 weeks, and compare runoff EC to your input EC. If runoff EC is much higher, salts are accumulating, and a plain water flush (enough to move out concentrated salts) usually helps more than adding more granules.
What happens if the slow grow fertilizer granules get cracked during mixing?
Crushed or damaged coated granules release faster and unevenly, which makes symptoms look like quick-release overfeeding. When mixing, use gentle incorporation and avoid grinding, aggressive tilling, or breaking pellets by hand. If you notice lots of powder in the bag or soil surface after mixing, expect faster release and adjust later by using less granule the next time.
My plants look hungry, but the label says the slow grow fertilizer lasts months. Could temperature be the reason?
Lower soil temperatures can slow release, so your plant may look underfed even though granules are present. If your environment drops below about 60°F (15°C) for extended periods, consider a diluted liquid supplement to bridge the gap rather than adding extra granules, because doubling granules in cold conditions can become excessive once temperatures rise.
Can I start seedlings with slow grow fertilizer in the pot or tray?
For seedlings, do not apply full-strength slow-release to the immediate root zone. Many growers either skip granules entirely in seed-raising mix or wait until transplant into a fuller medium, sometimes waiting for multiple true leaf sets before adding any granular dose. If you need to start feeding early, use a very mild liquid approach rather than granules.
Do I need to change fertilizers at the start of flowering if I’m already using slow grow fertilizer?
If you used a balanced NPK slow-release for veg and then transition to flowering, you typically need to steer away from nitrogen-heavy feeding. A common mistake is continuing the same base program and only adding granules, which can leave you short on phosphorus and potassium for heavy flower demand. Instead, begin targeted bloom liquid feeding around the flip, and let the granules act as the general base while liquids provide the “flower driver.”
What’s the most common mistake when using slow grow fertilizer together with other fertilizers?
Yes, especially if you’re “stacking” sources like organic amendments plus slow-release granules plus liquid boosters. Track cumulative nitrogen and avoid adding a second nitrogen-rich product during the same window, because the combined feed can exceed what the plant can safely use. When in doubt, reduce or pause liquid boosters and rely on fewer, more controlled additions.
How can I tell if yellowing is a deficiency versus nutrient lockout when using slow grow fertilizer?
Suppose you see symptoms but you are unsure if they are deficiency or lockout. Because slow-release can delay symptom appearance, do not automatically add more fertilizer. Test runoff pH and EC, then correct the limiting factor first (for pH drift, use pH adjustment or liming; for salt buildup, flush). If the plant is locked out, adding more nutrients usually worsens the problem.
Can I rely on foliar feeding instead of liquid supplements when using slow grow fertilizer?
Foliar spraying is a helpful “patch” for specific micronutrient deficiencies, but it is not a replacement for root-zone feeding. Use foliar only for targeted problems (such as iron or magnesium), and keep it off late-flower if you are worried about mold or lingering moisture. If you foliar and do not see improvement quickly, the issue may be root-zone pH, EC, or salts, and you should troubleshoot those first.