Valerian grows best in moist, fertile, slightly acidic to neutral soil (pH 5.5–7.0), in full sun to partial shade, with consistent moisture and a long enough season (at least 120–150 days) to develop the thick, aromatic roots that make it worth growing. That's the short answer. If you landed here after searching 'valerian grow best Harry Potter,' you're probably either a fan of the magical herb references in the series or you've seen valerian described as a 'potion ingredient' and want to know if the real plant lives up to the mystique. It does. But growing it well takes a little more than waving a wand.
Valerian Grow Best: Soil and Hydroponic Guide for Home Growers

Marcus Holloway
14 Apr 2026

What valerian actually is, and what the Harry Potter connection means
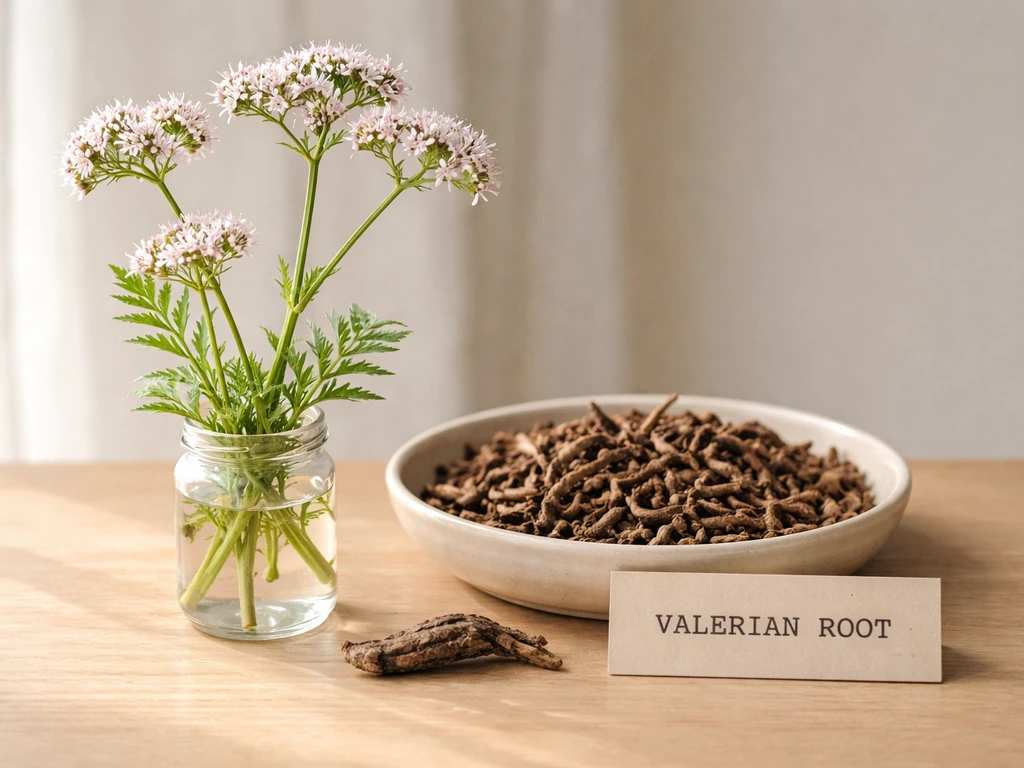
Valeriana officinalis is a hardy perennial herb native to Europe and parts of Asia. It grows tall (easily 3–5 feet), produces clusters of small pink or white flowers in summer, and has been used in herbal medicine for centuries. The European Medicines Agency officially classifies valerian root medicines around the underground part of Valeriana officinalis L., which is the part you're growing for: the roots and rhizomes harvested at the end of the second growing season.
In the Harry Potter universe, valerian root appears as a key potion ingredient. It's used in Sleeping Draught and Forgetfulness Potion, among others, and Professor Snape name-drops it in early classes. The fictional use tracks closely with real-world traditional medicine: valerian root has been used as a sleep aid and calming herb for over 2,000 years. So when people search 'valerian grow best Harry Potter,' they're usually asking: what exactly is this plant, and how do I actually grow the root that shows up in all those potion recipes? This guide answers exactly that, with real growing conditions, step-by-step instructions, and honest timelines.
One clarification worth making early: there are several plants called 'valerian' in different contexts. You want Valeriana officinalis for medicinal root production. Red valerian (Centranthus ruber) is a different plant entirely and won't give you the roots or compounds you're after. If you're curious about what makes valerian grow best in a broader sense, variety selection is your first decision.
Choosing your valerian variety and nailing the growing conditions
For root production, stick with Valeriana officinalis. Within that species, you'll sometimes find cultivated varieties labeled 'medicinal valerian' at herb nurseries, and these tend to have better root mass than wild-collected seed stock. The Royal Horticultural Society lists common valerian as a herbaceous perennial grown specifically for medicinal use, so sourcing from a reputable herb seed supplier rather than a generic wildflower mix is the smarter move.
Valerian is a cool-season-tolerant plant that genuinely thrives when given room, moisture, and a bit of patience. It's hardy to USDA zones 4–9, which covers most of North America and Europe. Here's what the plant actually needs to produce quality roots:
- pH: 5.5–7.0 (slightly acidic to neutral, soil or hydro solution)
- Light: Full sun to partial shade (6+ hours direct light, but tolerates afternoon shade in hot climates)
- Temperature: 60–75°F (15–24°C) for vegetative growth; survives frost and actually needs a cold dormancy period for good root development in year two
- Spacing: At least 12–18 inches between plants; roots need lateral room
- Water: Consistent moisture without waterlogging; never let roots sit dry for extended periods
- Season: Start seeds 8–10 weeks before last frost indoors, or direct sow after frost risk passes
Valerian is a biennial-to-perennial in practice. Most growers get usable roots by the end of year two, though some large-root cultivars can be harvested in a long first season if started early and given ideal conditions. Plan for a 12–18 month growing cycle if you want serious root mass.
Growing valerian in soil: setup and step-by-step care
Soil growing is the most beginner-friendly approach for valerian and the one most likely to reward patience with a dense, well-developed root system. The plant's deep taproot and fibrous secondary roots need a loose, well-draining, nutrient-rich medium that holds moisture without compacting.
Soil mix and container setup
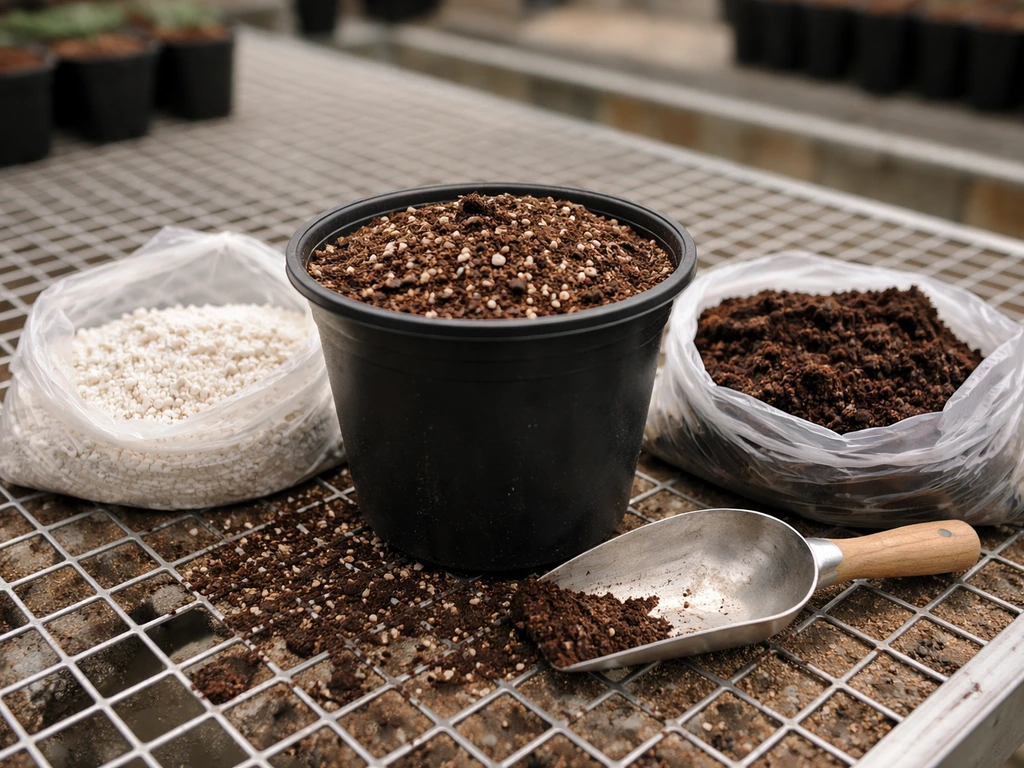
For container growing indoors or in a greenhouse, use a loamy mix: blend high-quality potting soil with 20–30% perlite for drainage and 10–15% compost or worm castings for slow-release fertility. A standard potting mix straight from the bag tends to be too dense for valerian roots over 12+ months. If growing outdoors in beds, amend heavy clay or sandy soils with compost to a depth of at least 12 inches since the tap root can go 8–10 inches deep by year two. Use containers no smaller than 5 gallons per plant (10-gallon fabric pots are ideal for container cultivation).
Germination and early weeks (weeks 1–6)
- Start seeds in seed trays or small cells indoors 8–10 weeks before your last frost date. Valerian seeds are light-dependent germinators: press them onto the surface of moist seed-starting mix and do not cover with soil.
- Keep the surface moist but not soaked. Use a spray bottle or bottom-watering tray. Germination is slow, typically 14–21 days at 65–70°F.
- Once seedlings reach 2–3 inches and have two sets of true leaves (around weeks 3–5), pot up into 4-inch containers.
- Week 6: Begin hardening off seedlings if transplanting outdoors. Move them outside for 1–2 hours per day in indirect light, increasing exposure over 7–10 days.
Transplanting and vegetative growth (weeks 6–20)
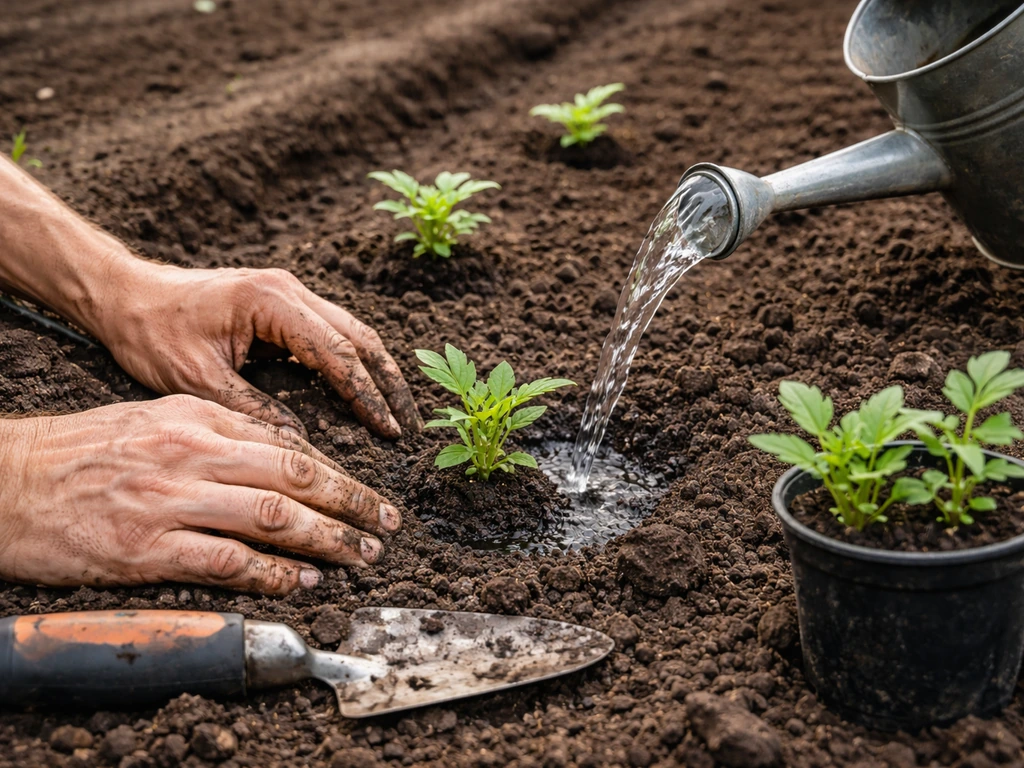
- Transplant to final containers or garden bed after the last frost date. Space plants 12–18 inches apart.
- Water deeply after transplanting. For the first two weeks, check moisture every 1–2 days by inserting a finger 2 inches into the soil. Water when the top inch is dry.
- Once established (around week 8), valerian in healthy soil needs watering every 3–5 days depending on temperature and container size. Outdoor bed plants may need less frequent watering if rainfall is consistent.
- Remove flower stalks in year one if your goal is root production. Flowering diverts energy away from root mass. This is one of the most common mistakes beginners make.
- Side-dress with compost or a balanced slow-release fertilizer at weeks 8 and 16 to support continued root development.
Overwintering and year-two root development (months 6–18)
For outdoor growers in zones 4–7, valerian will die back to the ground in fall and regrow vigorously in spring. This cold dormancy actually improves root quality. Mulch over the root zone with 3–4 inches of straw or shredded leaves after the first hard frost. In spring, growth resumes quickly. Continue removing any flower stalks that form in year two until late summer, when you can allow some flowering if you want seeds. Harvest roots in fall of year two for maximum root mass and compound concentration.
Growing valerian hydroponically: is it feasible, and how to set it up
Yes, valerian can be grown hydroponically, but it's a less common choice for a simple reason: the whole point is the root, and hydro systems are typically optimized for above-ground yields. That said, hydroponic valerian is absolutely doable, especially for growers who want more control over nutrition and growing speed, or who are experimenting with accelerated timelines. The trade-off is that you'll need a system that can accommodate large root masses without clogging, and you'll harvest differently than in soil.
Best hydroponic system for valerian
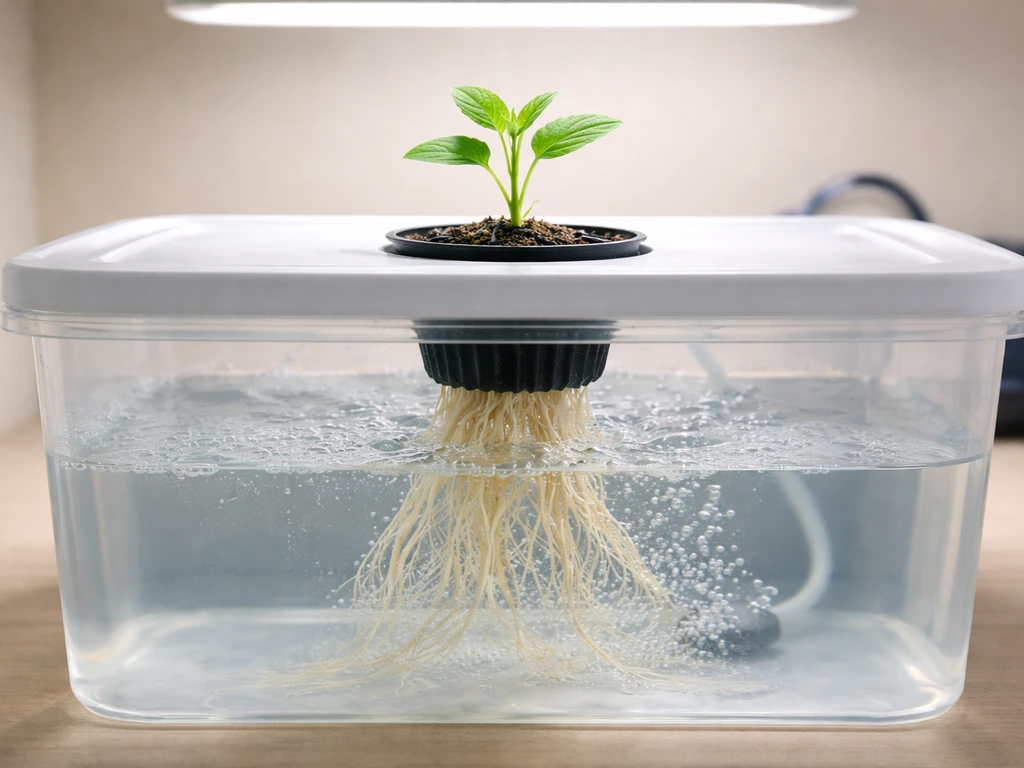
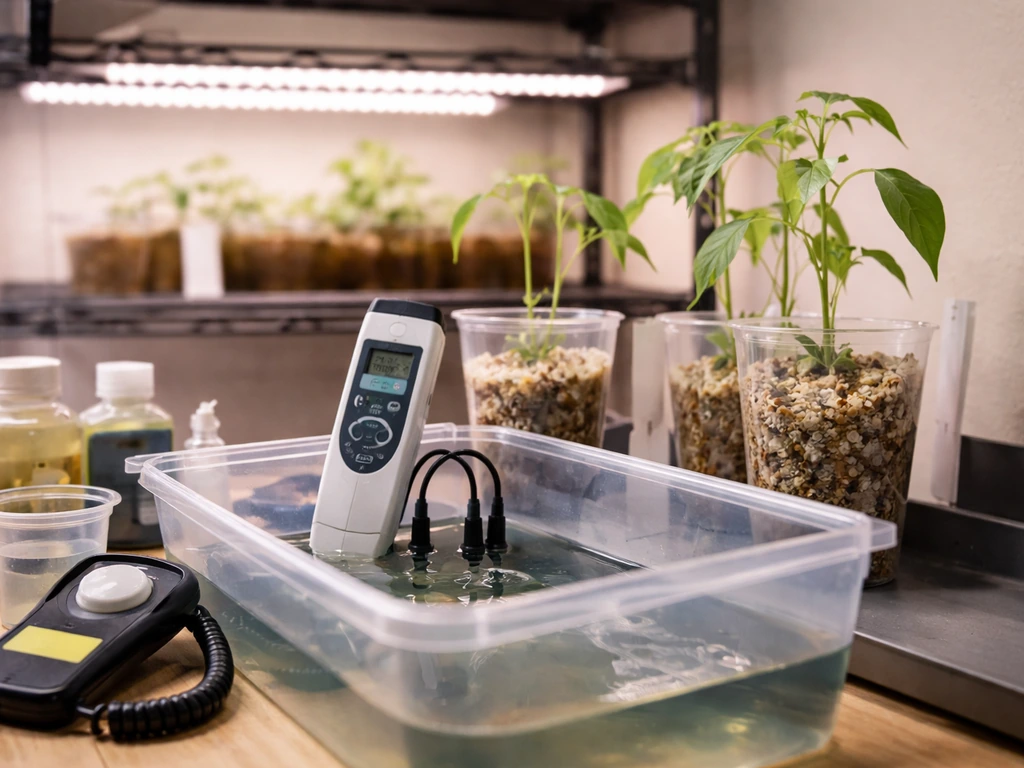
Deep Water Culture (DWC) and ebb-and-flow (flood-and-drain) systems work best for valerian. Nutrient Film Technique (NFT) is not recommended because valerian's large root system will overwhelm the channels within a few months. In a DWC setup, use 5-gallon buckets per plant, net pots filled with clay pebbles or hydroton, and keep the reservoir solution at pH 5.8–6.5. The oxygen-rich environment of DWC actively supports root development, which is exactly what you want.
For ebb-and-flow, use a flood table with a 3–4 inch medium layer (clay pebbles or coconut coir), flood twice daily for 15–20 minutes during the vegetative stage, and reduce to once daily during root bulking. Keep reservoir temperature at 65–68°F. Root zone temperature is critical for valerian: temperatures above 72°F in the reservoir will slow root development and invite pythium (root rot).
Hydroponic growing timeline
Start cuttings or rooted seedlings rather than seeds if possible in hydro, since valerian seed germination in a hydro environment is slow and unreliable. Transplant small rooted seedlings (with 1–2 inch root tails) into clay pebbles in net pots. Expect the plant to take 8–12 weeks to establish a robust above-ground canopy. Root bulking accelerates with consistent feeding and proper temperature control, but plan for at least 10–14 months total before harvest unless you're running the system in an environment that mimics year-round warm-cool cycles artificially.
Light, temperature, and humidity through the growing cycle
| Growth Stage | Light (hours/day) | Temperature (°F) | Humidity (%RH) |
|---|---|---|---|
| Germination / seedling | 14–16 hrs (indirect/artificial) | 65–70 | 60–70 |
| Early vegetative (weeks 3–10) | 14–16 hrs full-spectrum LED or HPS | 65–75 | 50–65 |
| Established vegetative (months 3–12) | 12–16 hrs or natural outdoor cycle | 60–75 | 45–60 |
| Overwintering / dormancy (outdoor) | Natural (short day) | Below 50 (cold dormancy) | Ambient |
| Year-two root bulking (spring/summer) | 14+ hrs or natural long day | 60–75 | 45–60 |
| Pre-harvest (fall, year two) | Reducing daylength triggers dormancy | 45–60 | 40–55 |
Indoors, a full-spectrum LED running 14–16 hours per day is your best bet for both speed and energy cost. Valerian does not need high-intensity light the way fruiting crops do. A moderate output LED (200–400 watts for a 4x4 space) kept 18–24 inches above the canopy is plenty. High-intensity lighting that drives leaf temperature above 80°F will stress the plant and reduce root quality. If you're considering CO2 supplementation, the incremental benefit for a slow-growing herb root crop is minimal. Your energy is better spent on temperature and water consistency. Worth noting: some growers who explore flora grow carbo CO2 alternatives for enrichment find that basic nutrient and pH management delivers more noticeable results for slow-maturing root crops like valerian.
Feeding valerian in soil vs. hydroponics, and how to fix deficiencies
Soil feeding strategy
Valerian is not a heavy feeder, but it does need a steady baseline of nitrogen early on for canopy development, then a shift toward phosphorus and potassium as root bulking becomes the priority. In soil, a slow-release balanced fertilizer (NPK around 5-5-5 or 10-10-10) applied at transplant and again at month 3 is usually sufficient if your base soil has good organic matter. In mid-season, shift to a lower-nitrogen, higher-P/K fertilizer (something like 3-8-8 or similar) to support root mass development rather than leafy growth. Avoid overfeeding nitrogen in months 4–12, as this pushes the plant into aggressive above-ground growth at the expense of roots.
One reliable approach is to use a liquid nutrient concentrate during active growth phases. Getting the terra grow dosage right for soil applications matters: start at half the recommended rate for the first 4–6 weeks and increase to full dose once the plant is well established, since valerian in rich soil can burn if pushed too hard too early.
Hydroponic nutrient schedule
In hydro, you have more precise control. Use a two-part or three-part liquid nutrient system designed for vegetative growth. Start at 25% of full strength during germination/seedling stage and ramp up to full strength by week 6. Electrical conductivity (EC) should stay in the range of 1.2–1.8 mS/cm during vegetative growth, dropping slightly to 1.0–1.4 mS/cm during root bulking phase. pH should be held at 5.8–6.5. Many growers ask about specific nutrient products for this style of grow. If you're using a one-part system, understanding how often to use floranova grow for continuous feeding versus reservoir top-offs makes a noticeable difference in consistency.
For precise mixing in your reservoir, knowing how much floranova grow per gallon to add during each phase will help you avoid the EC swings that stress slow-maturing plants like valerian. For one-part systems, a general starting point is 5–8 ml per gallon during the vegetative phase, adjusted based on your EC meter readings. And if you're cross-referencing products, checking the floranova grow dosage guidelines against your plant's visual response (not just the label) is the most reliable calibration method.
Common deficiency symptoms and fixes
| Symptom | Likely Deficiency | Fix |
|---|---|---|
| Yellowing lower leaves | Nitrogen (N) | Increase vegetative nutrient dose or top-dress with compost in soil |
| Purple/reddish leaf undersides | Phosphorus (P) | Check pH (P locks out below 5.5 or above 7.0); adjust and add P-focused supplement |
| Brown leaf edges, scorching | Potassium (K) or salt buildup | Flush with plain water, then resume at lower EC; check for overfeeding |
| Interveinal chlorosis (young leaves) | Iron (Fe) or Manganese (Mn) | Adjust pH to 5.8–6.5 in hydro; add chelated micro-nutrient solution |
| Slow growth, dull green color | General low fertility or pH drift | Test and correct pH first, then check EC; valerian is slow by nature but pH drift is a common culprit |
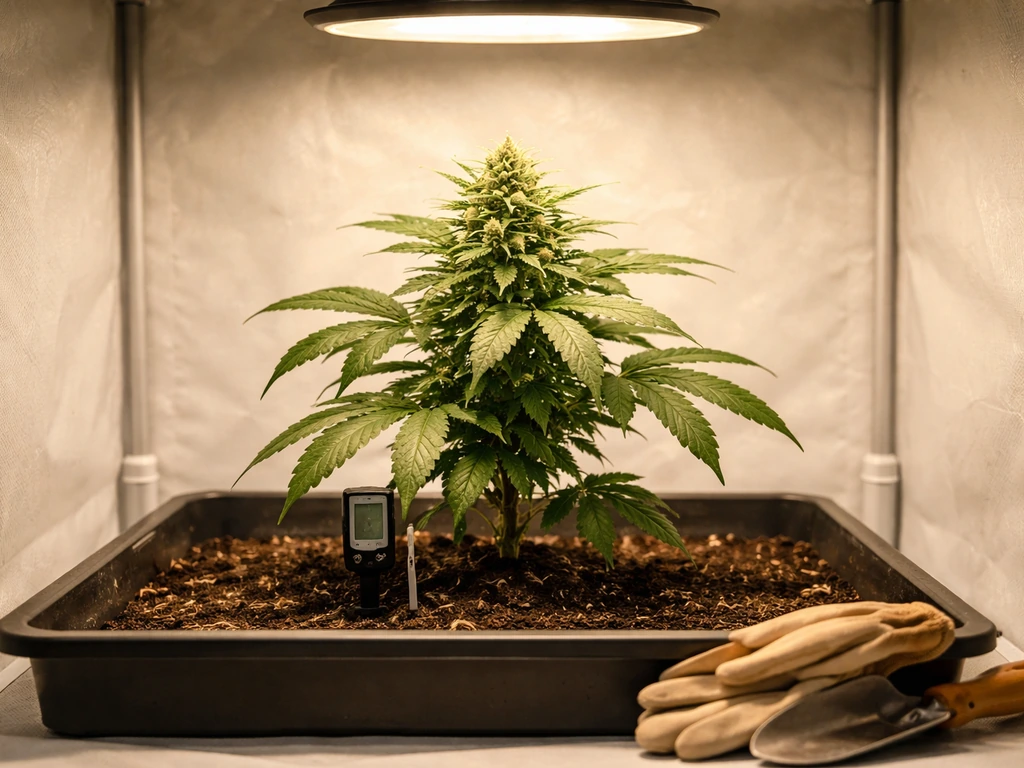
Harvesting, drying, and using valerian roots safely
The best time to harvest valerian roots is in the fall of the second growing year, after the above-ground foliage has begun to die back. At this point, the plant has accumulated its highest concentration of valerenic acid and other active compounds in the roots. For outdoor growers, this typically means October–November in the Northern Hemisphere. Hydroponic growers who have managed an artificial seasonal cycle can time harvest to match this physiological window.
How to harvest
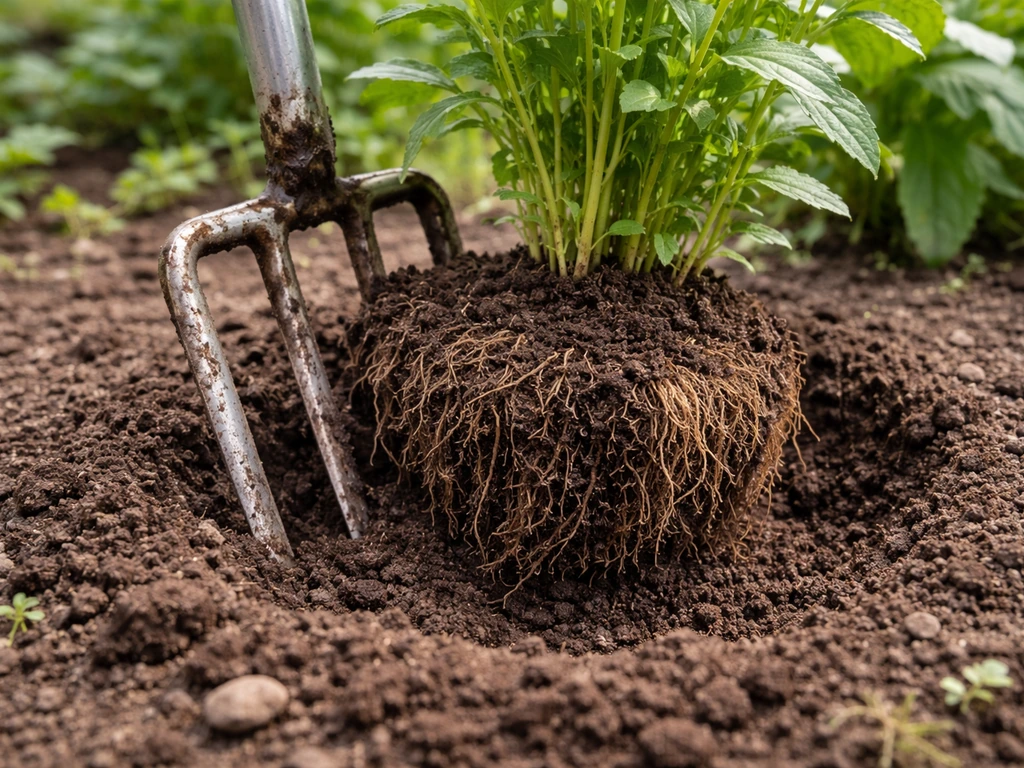
- Loosen the soil around the plant with a garden fork, starting 6–8 inches from the crown to avoid cutting the lateral roots.
- Lift the entire root mass carefully. The tap root can be 8–12 inches deep by year two.
- Shake off excess soil and rinse roots thoroughly under cool running water. Use a stiff brush to remove embedded soil from crevices.
- Trim the above-ground material and cut large roots into 1–2 inch pieces to speed drying.
- For container/hydro grows, simply lift the entire net pot or root ball and rinse.
Drying and curing to the right moisture content
Fresh valerian roots smell earthy and mildly unpleasant when fresh. After drying, the smell intensifies into something distinctly musty. This is normal and is caused by the breakdown of isovaleric acid during the drying process. Dry roots on mesh trays in a well-ventilated space at 95–105°F (35–40°C) until they reach a moisture content of approximately 10–14%. Post-harvest guidance from FiBL's technical research on herbs places dried roots in exactly that 10–14% moisture content range for safe, stable storage. At that level, the roots will snap rather than bend, feel papery dry on the outside, and will not mold in storage. A small food dehydrator set to low heat (around 95°F) is a practical tool for home growers. Avoid temperatures above 110°F, which can degrade the volatile compounds you're trying to preserve.
Storage and safe use
Store dried valerian roots in airtight glass jars, away from light and moisture. Properly dried roots stored this way will remain potent for 12–18 months. Valerian root has a well-established history of use as a sleep aid in traditional herbal medicine, as confirmed by the blank" rel="noopener noreferrer">EMA's HMPC assessment reports. That said, consult a qualified herbalist or healthcare provider before using valerian root products, particularly if you take sedative medications, since additive effects are possible. The information here covers growing and drying, not medical dosing.
Troubleshooting: when things go wrong
Slow growth
Valerian is a genuinely slow crop. Don't confuse normal pace with a problem. That said, if growth has visibly stalled (no new leaves for 3+ weeks during the warm season), check pH first, then EC, then root zone temperature. In hydro, reservoir temperatures above 72°F are the most common cause of stalled vegetative growth. In soil, compaction or waterlogging can suffocate roots. Lift a small amount of medium near the root zone: healthy soil should crumble, not clump into a wet mass.
Bolting (premature flowering)
Valerian bolts in response to long days and warm temperatures, especially in year two. If your goal is root mass, remove flower stalks as soon as they appear. If you're seeing bolting in year one (which does happen with older seed stock or heat stress), this is a sign the plant is trying to complete its lifecycle too early. Cut the flower stalk at the base, water consistently, and the plant will usually redirect energy back to root development. Avoid letting the plant go to seed in year one.
Pests and diseases
- Aphids: Common on soft new growth. Treat with insecticidal soap spray, targeting the undersides of leaves. Repeat every 5–7 days until resolved.
- Cats: Yes, cats are attracted to valerian root smell (similar to catnip). If growing outdoors, physical barriers (wire cloches) prevent digging.
- Powdery mildew: Appears as white coating on leaves in warm, humid, low-airflow conditions. Improve ventilation, reduce humidity below 55%, and treat with a dilute neem oil spray.
- Root rot (pythium): In hydro, caused by warm reservoir temperatures and low oxygen. Lower reservoir temp to 65–68°F, increase air stone activity, and treat with a beneficial bacteria product (Bacillus subtilis-based). In soil, caused by overwatering. Allow soil to dry down and improve drainage.
- Fungus gnats: In soil, indicate overwatering. Let the top 2 inches of medium dry completely between waterings and use yellow sticky traps to monitor adult populations.
Root development challenges in hydro
If roots are thin and sparse rather than thick and branching by month 4–6 in hydro, your phosphorus delivery is likely off. Check pH (P becomes unavailable above 7.0 or below 5.5), verify your P levels in your nutrient formula, and consider supplementing with a root-focused additive during weeks 8–16. Also confirm your root zone is not receiving light exposure, which can cause algae growth that competes with roots for oxygen and nutrients.
What to do this week based on where you are in the process
If you're starting from seed today (April 14, 2026): you're in a good window for indoor germination in most of the Northern Hemisphere. Start seeds indoors now, plan for a late May or early June transplant outdoors after frost risk has passed in your zone, and expect a late fall 2027 root harvest if you let the plant go through two full seasons. That's not a fast crop, but it's a rewarding one.
If you're transplanting seedlings or rooted starts this spring: get them in the ground or into final containers now. Focus the first season on building root mass (remove all flower stalks) and establishing a healthy canopy. Your job this week is to prepare your soil or reservoir, confirm your pH and nutrient plan, and set your light schedule if growing indoors.
If you're approaching root harvest (fall 2026 or later): start monitoring leaf die-back as a harvest trigger and get your drying setup ready. A food dehydrator, mesh drying trays, and airtight glass jars are what you need. Check your environment's moisture and airflow before you bring in the harvest. If you're unsure about what research-backed benchmarks to follow for your specific system setup, looking into what to grow with MHW botanical research methods offers a useful framework for applying evidence-based cultivation principles to slow-maturing medicinal crops like valerian.
The 'Harry Potter magic' is just this: valerian root actually works, it grows reliably with the right conditions, and it's one of the more satisfying crops to cultivate because the payoff is tangible and the process teaches you a lot about how root crops behave differently from leafy herbs. Give it time, manage pH and moisture, and the roots will come.
FAQ
Is it safe to grow valerian from the same plant people buy as “valerian tea” or “sleep herb” in jars?
You can, but check labeling first. Many “valerian” products are roots already processed and not viable for growing, and some sellers mix species or offer red valerian (Centranthus ruber). For best results, source living seed or starter plants specifically labeled Valeriana officinalis for cultivation, not product-grade material.
How can I tell if I accidentally have red valerian instead of medicinal valerian?
Look at the overall plant and flowers. Red valerian (Centranthus ruber) tends to have a more “spidery” look and different flower heads, and it typically behaves more like a showy garden perennial rather than the medicinal root plant people grow for harvested rhizomes. If your goal is roots for valerian, only keep plants clearly identified as Valeriana officinalis.
Can I harvest in the first year if I start very early or my plants look big?
You can sometimes pull smaller roots, but the article’s timeline matters for root quality. The strongest root mass and compound concentration are typically tied to finishing the second growing year. If you harvest early, expect thinner, less developed rhizomes and lower potency, even if the foliage is tall.
What’s the best way to prevent rot in hydroponics when using DWC or ebb-and-flow?
Control reservoir temperature and oxygen, but also manage cleanliness. Keep pH in the recommended range, avoid warm stagnant water (above 72°F is a common trigger for pythium), and do not let the medium and net pots stay submerged longer than your system design allows. Use fresh, well-mixed nutrient solution and sanitize equipment between cycles if you see recurring sliminess or sour odors.
My valerian is growing leaves but roots are staying small. Should I increase nitrogen?
Usually no. More nitrogen often boosts above-ground growth at the expense of root bulking. Instead, verify pH first (staying within about 5.5 to 7.0 in soil, and 5.8 to 6.5 in hydro), then review phosphorus and potassium delivery during weeks 8 to 16. Also confirm root zone temperature is not running too warm, since that slows root development.
How do I know whether my soil is too compacted for valerian taproots?
After watering, check how the soil behaves near the root zone. Healthy medium should crumble and drain without forming a wet, tight clump. If it stays dense or waterlogged, the taproot can struggle to penetrate, leading to thin roots despite good top growth.
Do I need a deep pot for indoor growing, or is a wide one enough?
Deep and stable beats just wide. Valerian forms a deep taproot, so shallow containers can limit root length even if the plant looks healthy above ground. If you are using fabric or plastic containers, prioritize depth and avoid going smaller than the recommended container size, and place the plant where temperatures stay steady.
Is it okay to let valerian flower to “improve” the plant before harvest?
For medicinal root production, flowering is mostly optional and can divert energy. In the second year, if you want maximum root mass, remove flower stalks promptly until late in the season. Letting it go to seed too early is more likely to reduce root size and shift the plant toward completing its lifecycle.
Why does my valerian look like it’s stalling in summer, even though I’m watering?
Don’t jump to more fertilizer. First check pH and then EC, in both soil and hydro, because nutrient availability can be blocked even when you are feeding. In hydro, the most common cause is root zone heat above about 72°F, and in soil, waterlogging or compaction can suffocate roots. Verify by lifting a small sample of medium near the root zone and confirming it crumbles rather than clumps.
What should I do with bolting plants, and will cutting flowers truly help the roots?
Cut flower stalks at the base as soon as you see them and resume consistent watering and growing conditions. Bolting is the plant trying to finish early, so removing the reproductive growth can redirect energy back toward vegetative survival and later root development. If bolting happens in year one, it often points to older seed stock or heat stress, so review temperature and seed/start quality too.
How should I dry valerian roots to avoid mold without overheating the active compounds?
Use gentle heat and strong airflow. Dry on mesh trays in a well-ventilated space, aim for about 95 to 105°F, and stop once the roots reach a low moisture level (the article notes about 10 to 14% moisture content). If you see case-hardening (dry outside but soft inside), slow down and extend drying rather than raising temperature.
Can I store dried valerian in plastic bags or regular containers?
Prefer airtight glass jars over flexible packaging. Airtight jars help reduce exposure to light and moisture, which preserves quality for the long storage window described. If you store in anything permeable, the roots can reabsorb humidity and lose stability over time.
I see conflicting advice about CO2 or special additives. Do I really need them for valerian root?
Typically no. Valerian is a slow root crop where stable pH, temperature, and moisture matter far more than CO2 enrichment. If you choose to experiment, treat additives as secondary trials and first lock in correct reservoir or root zone temperatures, correct EC, and a sensible nutrient shift toward phosphorus and potassium for bulking.