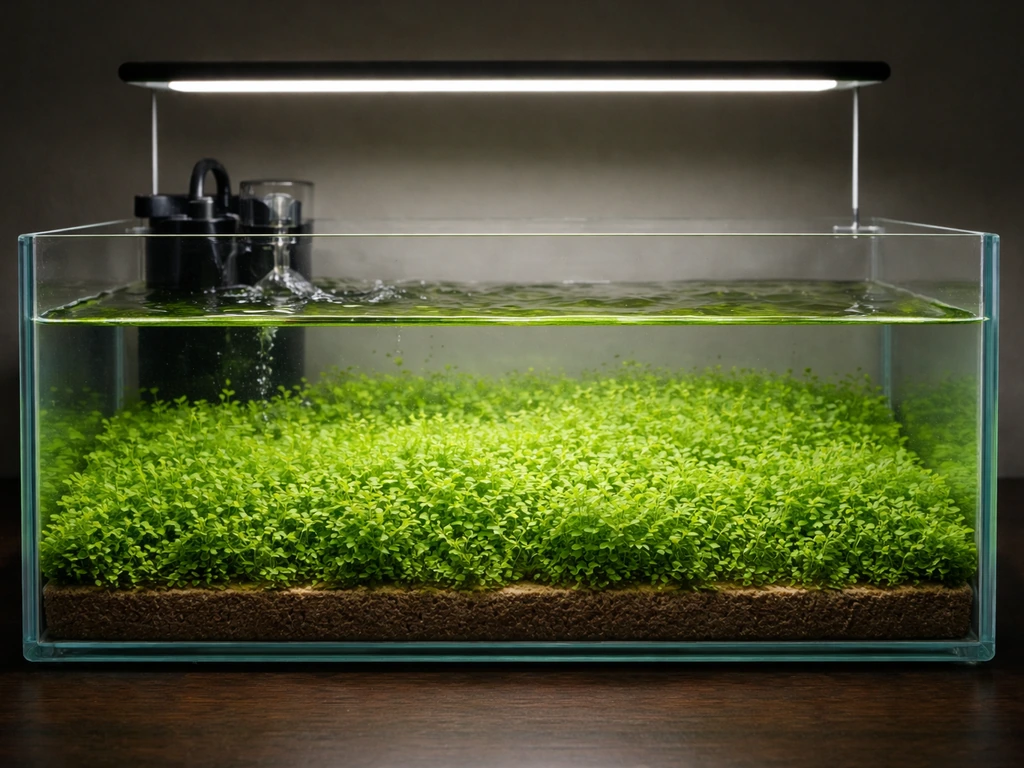
CO2 enrichment works, but only when everything else is already dialed in. If your light intensity is too low, your temperatures are off, or your plants are in a slow growth phase, pumping extra CO2 into your grow space will do almost nothing. That's the honest starting point. When conditions are right, though, raising CO2 from the ambient 400 ppm up to 1000–1500 ppm during lights-on can meaningfully increase yield and canopy density. This guide walks you through every step: setting targets, choosing a CO2 source, distributing it properly, integrating it with the rest of your grow environment, and automating the whole system so you're not babysitting a tank.
How to Grow With CO2: Setup, Targets, and Control Steps

Marcus Holloway
13 Apr 2026
What CO2 actually does for your plants (and when it doesn't help)

Plants fix carbon through photosynthesis, and the simplified version is: more CO2 available at the leaf surface means more raw material for building sugars and plant matter. The biochemistry behind this (the Farquhar framework, if you want to look it up) treats photosynthesis as constrained by whichever factor is most limiting at any given moment: CO2 availability (Rubisco carboxylation), light-driven electron transport, or carbon sink capacity. This is why adding CO2 when your lights are weak or your plants are tiny just doesn't move the needle. The system won't speed up if light is already the bottleneck.
Michigan State University extension material puts it plainly: CO2 enrichment is a modifier that only works when light is driving photosynthetic capacity. Research on greenhouse tomatoes confirms this point dramatically. In a closed greenhouse under bright sunlight, CO2 levels can actually crash to around 150 ppm as plants consume it faster than it's replenished. That's well below ambient outdoor levels, and it actively suppresses growth. So CO2 enrichment in a tightly sealed, high-light environment isn't optional luxury spending; it's actively replacing what your plants are consuming.
One more thing worth knowing: most cannabis and vegetable crops grown indoors are C3 plants. C4 plants (corn, sugarcane) already have a built-in CO2-concentrating mechanism and respond much less to elevated atmospheric CO2. If you're growing C3 crops, you're in the right territory for meaningful CO2 enrichment gains. If you're experimenting with whether a plant like Monte Carlo can grow without CO2, knowing whether your specific species is C3 or C4 matters more than most growers realize.
Setting your CO2 goals: ppm targets, timing, and measurement
The practical target range for indoor cultivation is 1000–1500 ppm during lights-on. Howard Resh's hydroponics reference recommends targeting approximately 2–3 times ambient (roughly 800–1200 ppm) for vegetable crop production, and grower-oriented guides commonly cite 1000–1500 ppm as the sweet spot where most C3 crops respond well without diminishing returns or safety concerns. Going above 1500 ppm adds little photosynthetic benefit in most home setups and wastes CO2. Greenhouse growers using good horizontal airflow can often work effectively in the 1000–1200 ppm range.
Timing matters as much as target level. CO2 enrichment should run only during your photoperiod, when lights are on and photosynthesis is happening. Running CO2 at night is pure waste; plants aren't fixing carbon in the dark, so the gas just accumulates and leaks out. Most commercial controllers include a daylight mode using a photocell sensor to automatically enable CO2 injection only when lights are on. Some advanced algorithms go further and add CO2 only when the plant's integrated light dose (DLI) is tracking below target, avoiding waste during already high-light periods. That's more than most home growers need, but it illustrates the principle: CO2 without photosynthetic demand is money going up in smoke.
Measurement is where a lot of growers go wrong. Don't assume your injection rate equals your canopy CO2 level. Hobby growers report achieving anywhere from 800–1200 ppm during lights-on without precise control, which illustrates how variable real-world results are without proper monitoring. You need an NDIR (non-dispersive infrared) CO2 sensor placed at canopy height, not near the ceiling or near an injection point. Sensor accuracy specs to look for: ±70 ppm or ±5% of reading (whichever is greater) in the 0–2000 ppm range, with a response time under 2 minutes for a 63% step change. Calibrate your sensor every six months using outdoor air (approximately 400–420 ppm) as your baseline. Don't breathe near the sensor during calibration. NDIR sensors drift over time, and an uncalibrated sensor will give you confidently wrong readings.
Choosing your CO2 source: tanks, generators, and dry ice

You have three realistic options for home growers: compressed gas tanks, CO2 generators (propane or natural gas burners), and dry ice. Each has real trade-offs.
| Source | Best For | Pros | Cons | Safety Notes |
|---|---|---|---|---|
| Compressed CO2 Tank | Dedicated grow rooms, tents, small to medium spaces | Clean, no combustion byproducts, precise control, works with regulators and controllers | Tank rental/refill costs, needs regulator, solenoid valve, and tubing | Low fire risk; CO2 can accumulate in enclosed spaces if there's a leak |
| CO2 Generator (Propane/NG) | Larger grow rooms with adequate ventilation | High output, cost-effective at scale | Produces heat, water vapor, and combustion byproducts; needs ventilation; flame monitoring needed | Incomplete combustion (flame color change) indicates CO risk; always vent properly |
| Dry Ice | Very small spaces, short-term or low-budget setups | No equipment needed, cheap to start | Rapid sublimation can spike CO2 above 2000 ppm; unreliable control | ~1 lb sustains ~1300 ppm in a 100 sq. ft. area for a day; can spike if added too quickly |
For most home growers, a compressed CO2 tank with a regulator and solenoid valve is the cleanest and most controllable option. You connect the regulator to the tank, run tubing to your grow space, and let a controller trigger the solenoid to inject timed bursts. The gear list isn't complicated: tank (from a local welding or beverage supplier), a dual-stage regulator with a flow meter, a normally-closed solenoid valve, and tubing. That's it on the hardware side.
CO2 generators are cost-effective at larger scales but add complexity. Burning propane or natural gas releases CO2, but also heat and water vapor, which means your temperature and humidity management gets harder. More critically, incomplete combustion produces carbon monoxide, which is genuinely dangerous. If the burner flame turns yellow or orange instead of blue, shut it down. Unvented generators in a sealed room can be a serious safety risk.
Real safety numbers you need to know
CO2 is not just a plant gas; it's a real indoor air hazard at high concentrations. NIOSH lists the IDLH (immediately dangerous to life and health) at 40,000 ppm, and the recommended exposure limit (REL) as a 9-hour TWA of 5,000 ppm. OSHA's permissible exposure limit aligns closely with that 5,000 ppm threshold. For context, your 1500 ppm target is well below occupational limits, but a leaking tank in an airtight room can climb fast. Install a CO2 alarm set to alert at 5,000 ppm. Never enter a sealed enriched grow space without ventilating first. If you feel dizzy or short of breath in your grow area, get out and ventilate. These aren't theoretical risks with high-output generators or large tanks in small rooms.
Distributing CO2 so it actually reaches your canopy
CO2 is heavier than air (about 1.5 times denser), so it sinks. Left alone, it stratifies near the floor while your canopy, sitting at mid- to upper-room height, stays CO2-depleted. This is one of the most common reasons growers inject gas and see no improvement: the CO2 never reaches the leaves. The fix is active circulation.
Position your injection point above the canopy or at canopy level, not near the floor. Use horizontal oscillating fans to distribute the gas across the entire canopy without creating windburn. In larger rooms, multiple injection points prevent concentration gradients. The goal is gentle, even airflow across leaf surfaces, not high-velocity blowing that desiccates plants or creates cold spots.
Enclosure tightness is a major variable. A loosely sealed grow tent or greenhouse with frequent door openings can require up to 50% more CO2 production volume to maintain target ppm compared to a tight enclosure. Research from USDA ARS notes that even a 'sealed' commercial greenhouse typically sees 0.5–1.0 air changes per hour, which has a significant impact on how much CO2 you need to inject. Measure your actual ppm rather than calculating from injection rate alone. If your sensor shows you're consistently below target despite what seems like adequate injection, check for air leaks around vents, doors, and ducting penetrations.
In grow tents, keep the exhaust fan on a lower duty cycle during enrichment periods, or use a controller that pauses exhaust when CO2 is injecting and resumes ventilation periodically to manage heat. In greenhouse setups with horizontal airflow fans (HAF), you'll naturally get better mixing, which is why greenhouse guidance often recommends the lower end of the 1000–1200 ppm range; better mixing means more efficient use of each ppm you inject.
Integrating CO2 with light, temperature, humidity, and nutrients
CO2 enrichment is not a standalone upgrade. It's the last variable you turn up after you've optimized everything else. If your light is insufficient, your temperature is suboptimal, or your nutrient program is off, adding CO2 won't fix any of that. Think of it as a performance multiplier, not a rescue tool.
Light intensity
This is the biggest one. CO2 enrichment only pays off at high photosynthetic photon flux densities (PPFD). At low light (under ~400 μmol/m²/s), your plants simply cannot use the extra CO2 fast enough to justify the expense. The sweet spot for CO2 enrichment is typically 600–1000+ μmol/m²/s at the canopy. If you're running fluorescent T5s or underpowered LEDs, get your light sorted first. Lettuce research shows that supplementing CO2 up to around 1600 ppm can partially compensate for lower DLI, but this is a diminishing trade; it's not infinitely scalable and works best when you have a solid baseline of light.
Temperature
Elevated CO2 allows plants to tolerate slightly higher temperatures because stomata partially close (reducing transpiration), which means leaf temperature rises less under heat stress. In practice, growers using CO2 enrichment often run room temps 2–4°F higher than they would without it. That said, pushing past 85°F (29°C) with CO2 enrichment still causes heat stress in most crops. CO2 generators add significant heat, so factor that in when calculating your cooling load.
Humidity and VPD
When stomata partially close under elevated CO2, transpiration decreases. This means your room humidity may trend higher than usual. Watch your vapor pressure deficit (VPD); if stomata are already somewhat closed due to high CO2, letting humidity spike can reduce transpiration to the point where nutrient uptake slows. Aim to maintain VPD in the 0.8–1.2 kPa range during vegetative growth and 1.0–1.5 kPa during flowering, even with CO2 running.
Nutrition
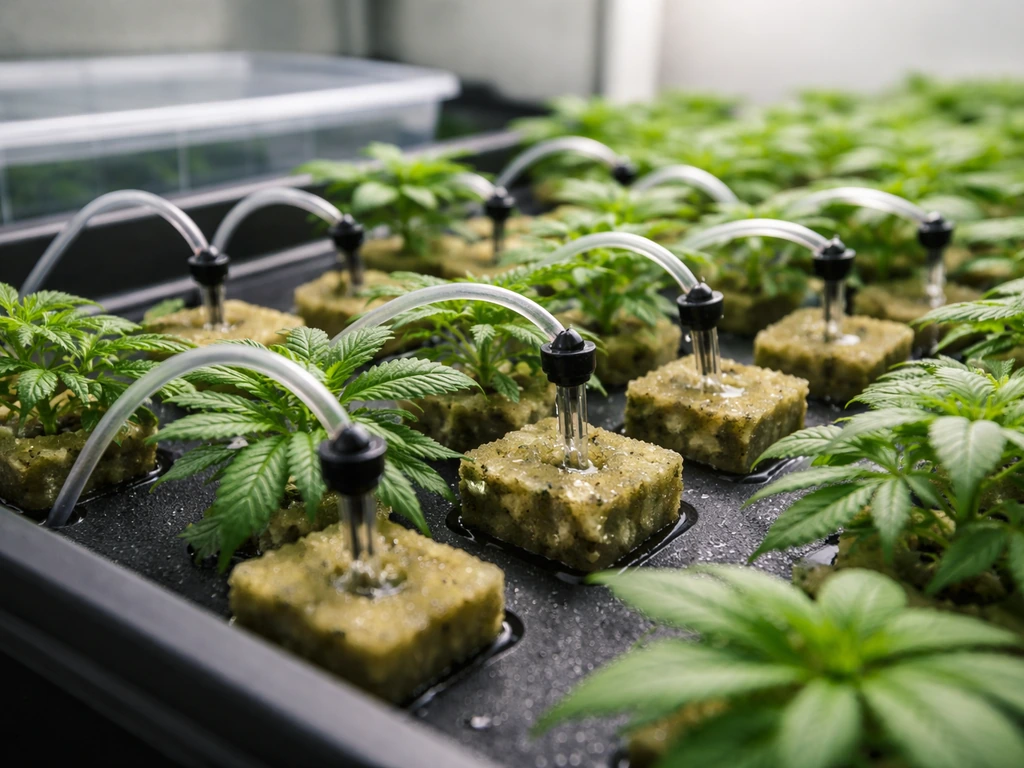
Faster growth from CO2 enrichment means faster nutrient uptake. If you're not feeding accordingly, you'll see deficiency symptoms even when your base nutrient program was previously adequate. Nitrogen and potassium demand in particular tends to increase with elevated CO2 and high light. If you're following a nutrient schedule like the flora grow dosage guide, expect to dial up quantities incrementally as your plants respond to enrichment. Similarly, flora grow carbo dosage adjustments may be needed since carbohydrate metabolism increases under elevated CO2 conditions. Monitor EC and run-off pH closely during the first few weeks of CO2 enrichment to stay ahead of any deficiency.
If you're using a structured nutrient system, the floraflex grow approach pairs well with CO2 enrichment because its feeding schedule is built around growth phases that align naturally with when you'd be running enrichment. Adjusting feed concentration alongside CO2 ramp-up is easier when you're already working from a structured program.
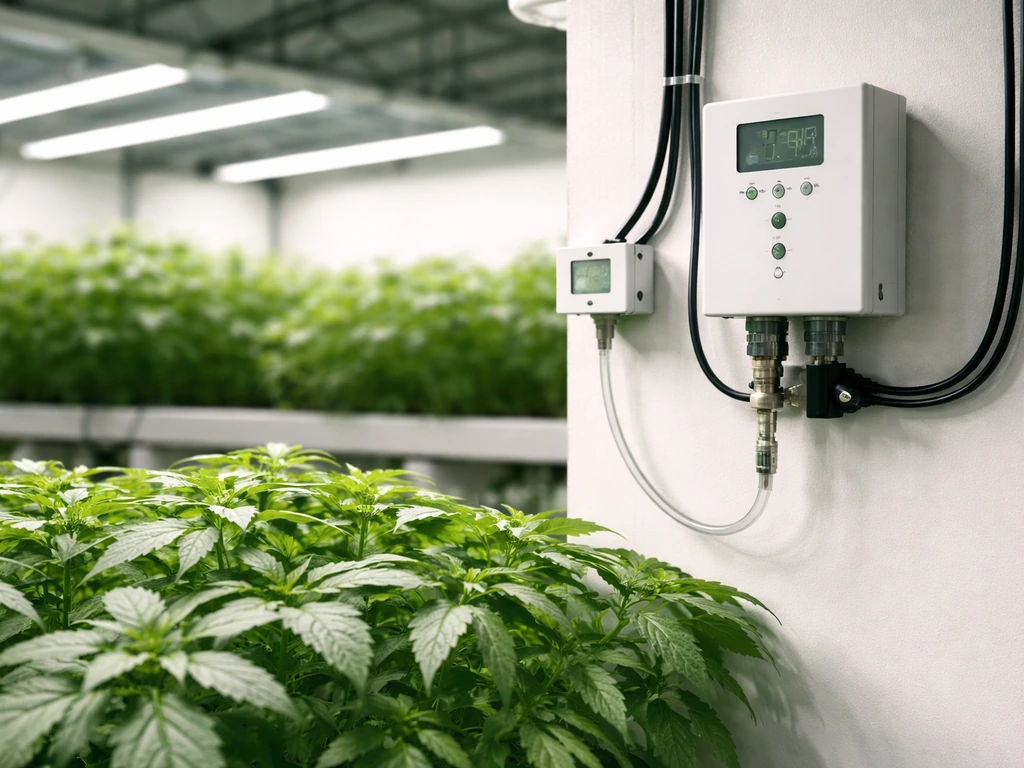
CO2 control systems: what to buy and how to set it up
A basic CO2 control setup has four components: the CO2 source (tank or generator), a regulator, a solenoid valve, and a controller with a sensor. The controller reads CO2 ppm from the sensor and opens or closes the solenoid to inject gas when levels drop below your setpoint. The regulator sets your flow rate. That's the whole system.
The key settings you'll configure on any CO2 controller are: setpoint (your target ppm, typically 1000–1500), dead-band (the buffer below setpoint that triggers re-injection, for example, inject when ppm drops to setpoint minus 100 ppm), and daylight mode (photocell or timer-linked, so CO2 only runs during your photoperiod). Controllers like those from AGROWTEK specify daytime-only injection and a dead-band for reactivation. TrolMaster's BETA-8 uses a built-in photocell for day/night control. These are the features to look for in any controller you buy.
For small grow tents, an all-in-one CO2 controller in the $150–$300 range handles everything you need. For larger rooms or automation integration, look at expandable systems that connect with your other environmental controls (temperature, humidity, lighting). Some advanced setups link CO2 injection to light intensity readings so the system injects more when PPFD is high and less (or nothing) during low-light periods, avoiding waste when photosynthetic demand is low.
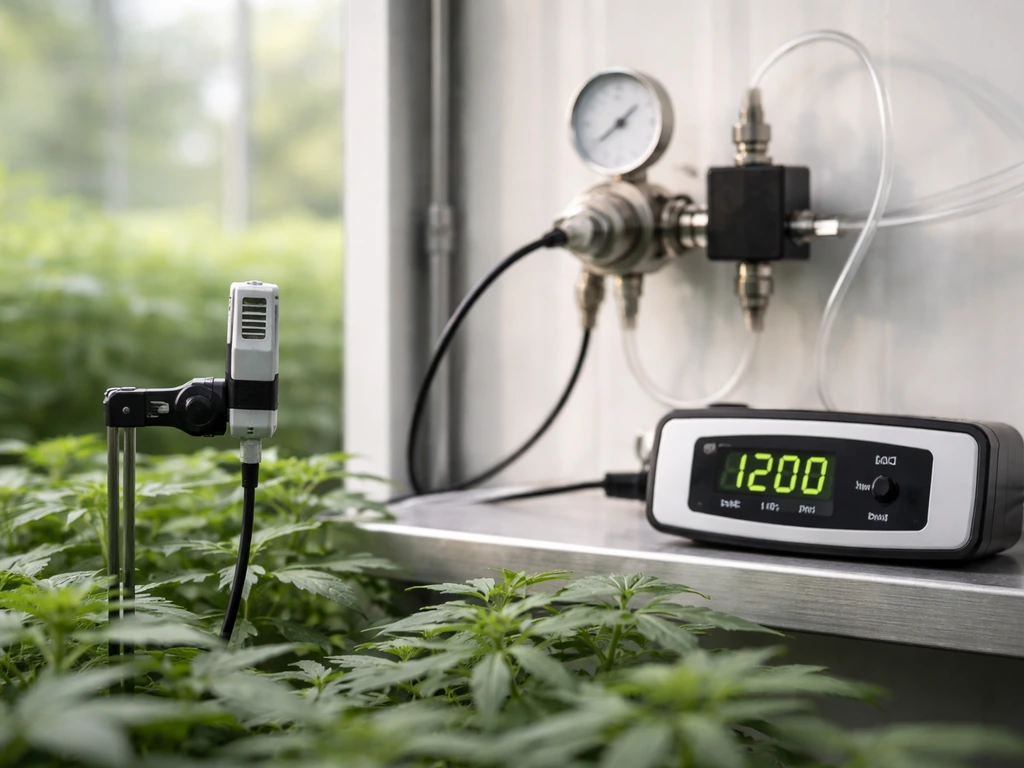
Sensor calibration and accuracy
Calibrate your NDIR CO2 sensor every six months. The standard procedure is to take the sensor outdoors or to a well-ventilated area where CO2 is close to ambient (400–420 ppm), then trigger the calibration mode per your controller's instructions. Don't breathe near the sensor during calibration; your exhaled breath is around 40,000 ppm CO2 and will throw off the baseline reading. NDIR sensors drift over time; skipping calibration means your controller may be chasing a phantom setpoint. Also be aware that most sensors have a response time of under 2 minutes for a 63% step change in concentration, so readings lag real-time conditions slightly.
Monitoring results and fixing common problems
Even with a good setup, things go wrong. Here's a troubleshooting framework organized by symptom:
- CO2 readings won't hit your target ppm: Check for air leaks first (ducting, door seals, vent gaps). Confirm your flow rate on the regulator matches room volume requirements. Verify your sensor is calibrated and placed at canopy height, not near vents or injection points. Check if your exhaust fan is running during injection and overwhelming the CO2 input.
- CO2 readings look fine but plants aren't responding: This usually means light is the limiting factor, not CO2. Check PPFD at canopy. If you're under 500 μmol/m²/s, CO2 enrichment won't produce meaningful results. Also check temperatures; heat stress suppresses growth even with optimal CO2.
- CO2 being wasted (tank draining faster than expected): Look for leaks in fittings, solenoid valve stuck open, or CO2 injecting during night/off-hours. Check that your daylight mode is functioning. Also audit air exchange; a leaky room exports CO2 as fast as you inject it.
- Uneven CO2 distribution across canopy: Add or reposition circulation fans to improve mixing. Injection point may need to be raised or redistributed. In multi-light setups, use multiple injection points.
- Plants showing heat or light stress symptoms (bleaching, leaf curling, tip burn): Don't assume CO2 deficiency. Rule out temperature spikes from CO2 generators and check your lights aren't too close. CO2 enrichment doesn't cause these symptoms directly; it enables higher temps to be tolerated, but only up to a point.
- Humidity spiking during CO2 enrichment: Reduced transpiration from partial stomatal closure is normal. Adjust your dehumidifier or ventilation strategy. Don't let RH exceed 60–65% during flowering regardless of CO2 status.
- Nutrient deficiency appearing after starting CO2 enrichment: Faster growth demands more nutrients. Increase your EC slightly and check for pH drift. Run-off testing will tell you if salt buildup is causing lockout.
Your first CO2 setup: a practical starting plan
If you're setting this up for the first time, here's the sequence that makes sense. Don't skip steps or jump straight to equipment purchases before your environment is ready.
- Audit your light first. Make sure you're hitting at least 600 μmol/m²/s PPFD at the canopy during your target growth phase. If not, upgrade lighting before investing in CO2 infrastructure.
- Seal your space. Walk around your grow room or tent and seal any obvious air gaps around vents, ducting, and doors. You don't need an airtight vault, but reducing unnecessary air exchange makes CO2 enrichment far more efficient.
- Buy your gear: a 20 lb compressed CO2 tank (from a local welding supply, homebrew shop, or beverage gas supplier), a dual-stage regulator with a built-in flow meter, a normally-closed solenoid valve, and a CO2 controller with NDIR sensor. Budget approximately $300–$600 for this kit depending on controller quality.
- Set your controller: target ppm at 1000–1200 ppm to start, dead-band of 100 ppm below setpoint, daylight mode enabled. Don't jump to 1500 ppm immediately; let your system prove it can hit and hold 1200 first.
- Place the sensor at canopy height, not at ceiling level or near injection points. Run for 3–5 days and log your readings throughout the photoperiod.
- Evaluate plant response after 2–3 weeks: look for increased internode spacing (vegetative), faster canopy development, and deeper green color. If you see deficiency signs, dial up your nutrient EC. If you see heat stress, lower temps before increasing CO2.
- Calibrate your sensor at the 6-month mark, and again whenever you suspect readings seem off.
CO2 enrichment done right is one of the highest-ROI upgrades in a mature indoor grow. But it earns that reputation only when it's the last variable you optimize, not the first. Get your light, temperature, humidity, and nutrition dialed in, then bring CO2 into the picture. When all those pieces are working together, the difference in canopy density and final yield is real and repeatable.
FAQ
Can I run CO2 at night if my lights cycle on and off but I want smoother growth?
You generally should not. In the dark, photosynthesis is essentially stopped, so CO2 only accumulates and then leaks out or stratifies. If you want continuity, run CO2 only during photoperiod, and use a controller with photocell or timer-linked daylight mode so injections stop automatically when lights go off.
What should I do if my CO2 sensor reads the target ppm but my plants still look unchanged?
First confirm the sensor is at canopy height and not near an injection point or ceiling. Then check mixing and airflow distribution, since CO2 can pool in one zone while leaves stay depleted. A practical test is to watch how ppm behaves when fans cycle, and verify your injection point is at canopy level or above, with gentle circulation across the whole canopy.
How do I set a dead-band so I do not waste CO2 or create big ppm swings?
Use a moderate dead-band (for example, trigger injection at about 100 ppm below setpoint) and ensure your controller injection pulse size does not overshoot. If you repeatedly see ppm bouncing up and down, reduce max flow or shorten injection duration rather than raising the setpoint.
Is 1500 to 2000 ppm ever worth it, or does it always waste CO2?
Above about 1500 ppm, most home and small-enclosure setups see diminishing returns because other factors like PPFD, airflow mixing, and nutrient limitations become the bottleneck. If you want to test higher ppm, do it gradually while monitoring yield response and watching for heat and humidity drift that can reduce plant performance.
How do I know whether CO2 enrichment will pay off for my current light level?
Check whether you are actually delivering high light at the canopy (DLI or PPFD). As a rule, if canopy PPFD is consistently under about 400 μmol/m²/s, the extra CO2 usually provides little benefit. Focus on lighting power, distance, and uniformity first, then raise CO2.
Should I increase temperature to match CO2, or keep my usual setpoints?
Often you can run a little warmer with CO2 because stomata partially close and transpiration drops. A common approach is raising setpoints by a few degrees within crop tolerance, but do not exceed roughly 85°F (29°C) for most crops. If your temps already run near the upper end, do not rely on CO2 to fix heat stress.
How does CO2 change humidity and VPD targets in practice?
Because stomata may close slightly under elevated CO2, relative humidity can trend higher, and VPD can drop. Instead of using only a humidity number, manage VPD to your growth stage goals (vegetative roughly 0.8 to 1.2 kPa, flowering roughly 1.0 to 1.5 kPa). If VPD falls too low, consider ventilation or dehumidification adjustments to avoid slowed nutrient uptake.
Do I need to change my nutrient schedule when adding CO2?
Not always immediately, but many growers do need to increase feeding incrementally as growth accelerates. Watch EC, runoff pH, and early leaf tissue response, especially nitrogen and potassium demand. If you keep nutrients unchanged while CO2 increases, deficiencies may appear sooner due to higher uptake rate.
Can I use CO2 enrichment with recirculating or closed-loop ventilation systems?
Yes, but you must prevent controllers from fighting each other. If your ventilation strategy flushes air frequently, it can erase the CO2 concentration you are trying to maintain. Use CO2-daylight control and coordinate exhaust duty cycle so CO2 injection periods do not coincide with aggressive air exchanges.
What is the safest way to size my CO2 alarm for a small tent or room?
Set alarms well below dangerous levels and treat them as a last line of defense, not an automation substitute. For enriched spaces, a common practice is configuring the alarm around 5,000 ppm and ensuring you have forced ventilation before anyone enters. Also place the alarm appropriately (not only at the floor), because gas stratification can be uneven.
How far should my CO2 injection tubing be from the sensor?
Avoid placing the sensor near the injection outlet where it may read artificially high. Aim for canopy-level sensing in the breathing zone and distribute injection above or at canopy height. If you must test placement, move the sensor temporarily and observe whether controller behavior becomes more stable or less stable.
How often should I calibrate my CO2 sensor, and what if it seems inconsistent day to day?
Calibrate about every six months using air near ambient (around 400 to 420 ppm) and follow your controller’s calibration mode steps. If readings drift or change drastically between sessions, check for warm-up time, sensor contamination, and whether someone recently breathed near the sensor during calibration, since exhaled CO2 can bias the baseline.
What mistake most commonly causes ‘CO2 isn’t working’ results?
The most common cause is poor delivery to the leaves, usually from CO2 stratifying near the floor or injection being placed where the gas never mixes into the canopy. Fix enclosure sealing, injection location, and circulation first, then evaluate setpoints and controller behavior.
Is dry ice practical, and how do I avoid over-accumulation?
Dry ice can work for short windows, but it is harder to control precisely because sublimation rate varies with temperature and room conditions. If you use it, treat it like a burst method, monitor ppm continuously at canopy height, and design for rapid ventilation once the setpoint is reached to avoid overshooting.