The best container for growing tomatoes hydroponically is a 5-gallon (or larger) deep water culture (DWC) bucket for most home growers. It gives tomato roots the volume they need, keeps oxygen levels high when you run an air pump, and it's cheap, beginner-friendly, and easy to troubleshoot. That said, "best" shifts depending on how much space you have, whether you're growing compact determinate varieties or sprawling indeterminate ones, and how comfortable you are with plumbing. This guide walks through every realistic container option, gives you exact sizing guidance, and ends with a week-one action plan so you can start today.
Best Container to Grow Tomatoes Hydroponically: A Guide

Marcus Holloway
10 Apr 2026
How to pick the right container (the criteria that actually matter)
Before comparing bucket vs. channel vs. grow bag, it helps to know what you're actually optimizing for. Tomatoes are heavy feeders with aggressive root systems, so the container has to do more work than it would for lettuce or herbs. Here's what to weigh.
- Root volume: Tomato roots can reach several feet in length. A container that limits that volume will cap your yield and stress the plant, especially during fruiting.
- Oxygen delivery: Roots sitting in stagnant, warm water die fast. Your container choice determines how oxygen reaches the root zone, either through active aeration, air gaps, or flow.
- Water temperature control: Water holds more dissolved oxygen at lower temperatures. Warm reservoirs (above 75°F/24°C) lose oxygen quickly and invite pathogens. Larger containers buffer temperature swings better than small ones.
- Stability: Indeterminate tomatoes grow 5 to 8 feet tall and get heavy with fruit. A top-heavy plant in a small container tips over. Physical stability matters as much as horticultural performance.
- Ease of monitoring: Because hydroponic systems have no soil to buffer pH or nutrients, you're managing both artificially. Your container setup should make it easy to check and adjust EC and pH daily or every few days.
- Disease risk: Containers that trap debris, allow light into the reservoir, or restrict airflow around roots create conditions for Pythium and other root rot pathogens.
- Budget and scalability: A single 5-gallon DWC bucket costs under $20 to build. A recirculating multi-site system can run hundreds. Know what you're signing up for before you buy.
Thinking through what to grow hydroponically before you commit to a container type is worth the five minutes. Tomatoes are one of the more demanding crops in a hydroponic system, and a container that works great for leafy greens may actively hurt a tomato plant.
Your real container options, compared honestly
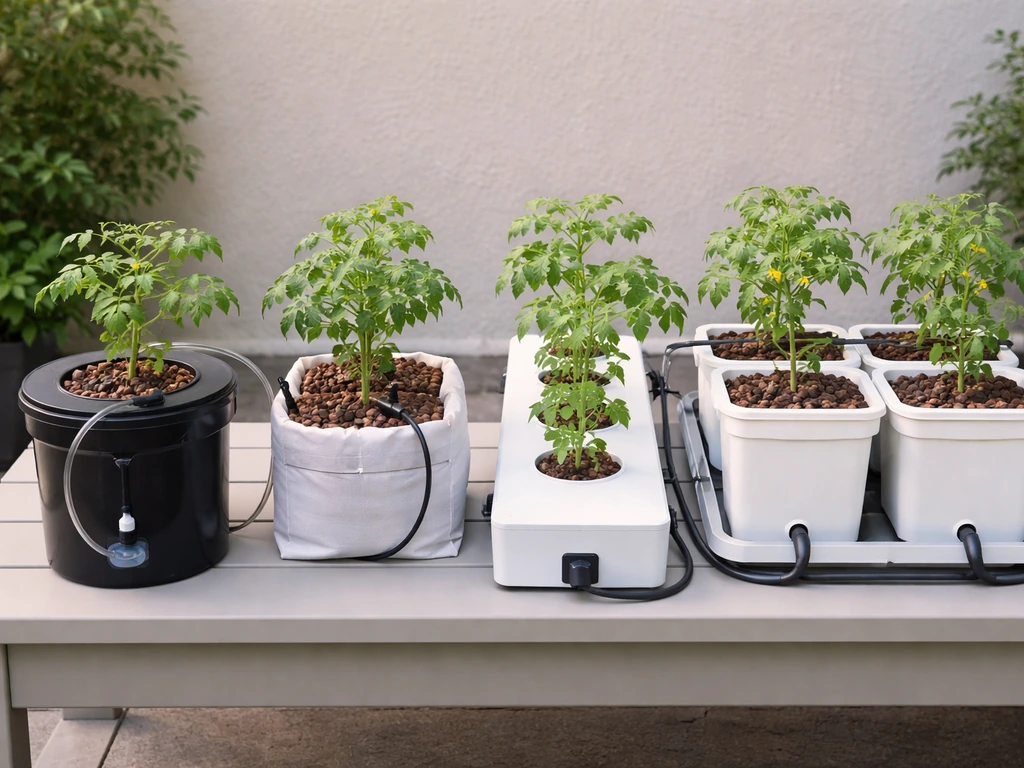
There are six container approaches home growers realistically use for tomatoes. Each has a clear best-fit scenario and a clear "avoid if" caveat.
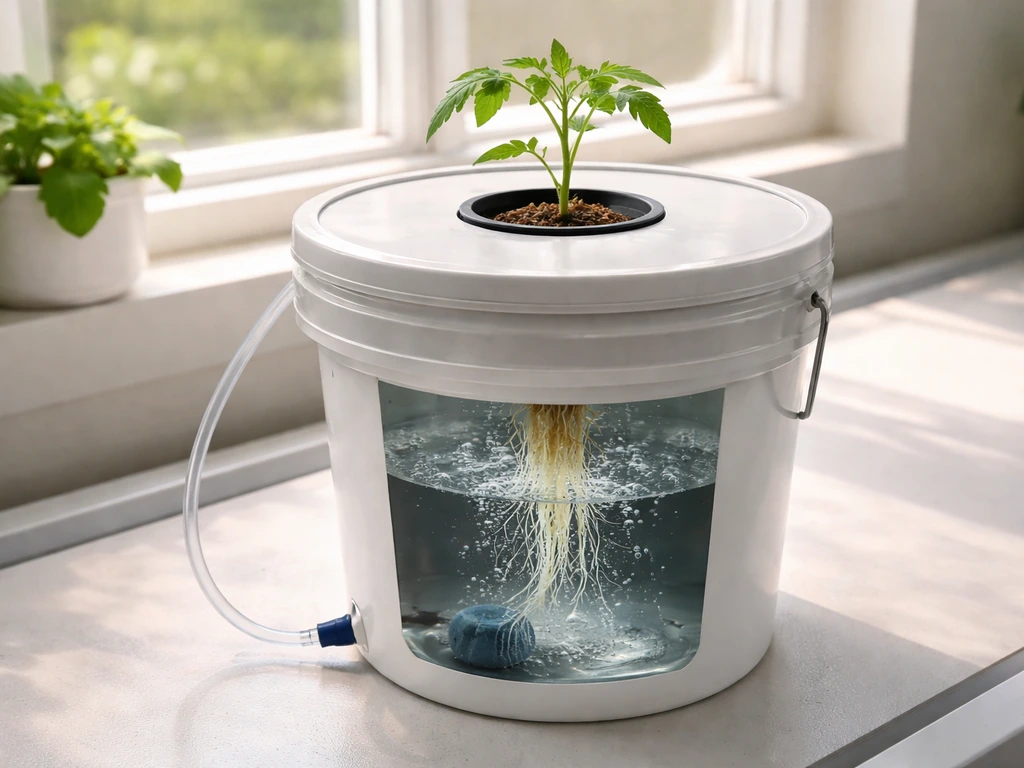
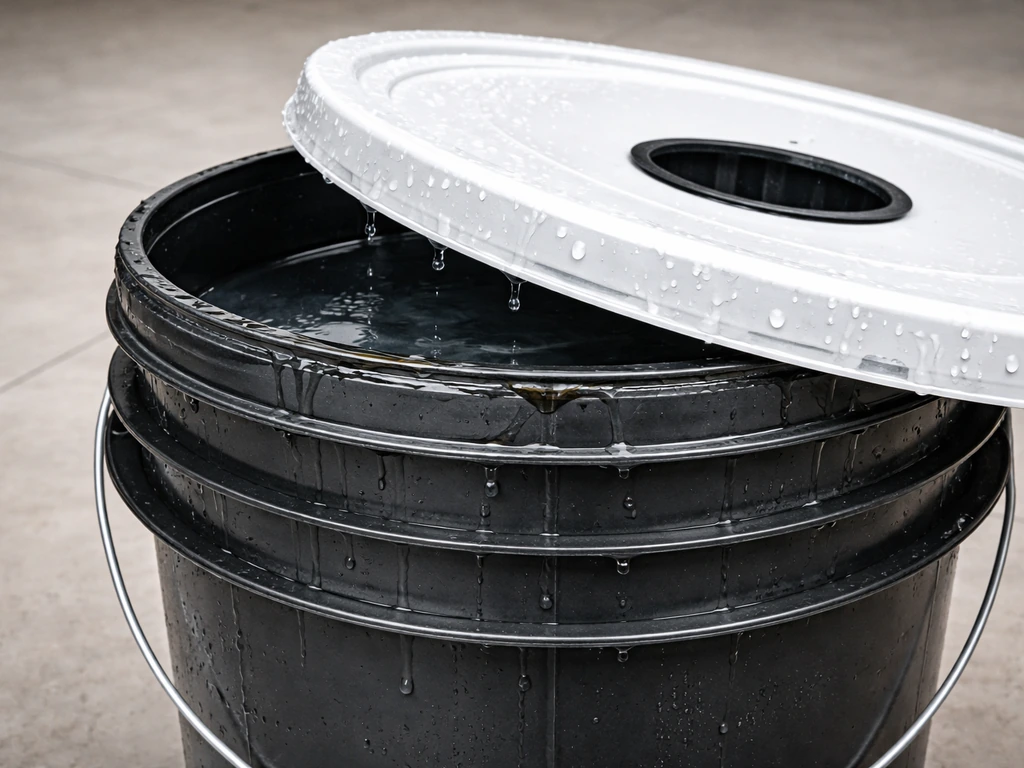
DWC buckets (deep water culture)
This is the go-to for most home growers and my top recommendation. You fill a 5-gallon (or larger) opaque bucket with nutrient solution, suspend the plant in a net pot lid, and run an air stone connected to an air pump to keep dissolved oxygen above 6 ppm, which is the practical minimum for healthy root function. The plant's roots hang directly into the oxygenated solution. DWC is forgiving, easy to inspect, and scales well from one bucket to a recirculating multi-bucket system (called RDWC) as your confidence grows. The main vulnerability is water temperature: if your reservoir climbs above 72-75°F, oxygen drops and Pythium moves in fast.
Kratky-style passive reservoirs
The Kratky method is a passive hydroponic approach where the plant sits above a sealed nutrient reservoir and, as roots consume the solution, an air gap forms naturally between the water surface and the net pot. Roots in the lower zone absorb water and nutrients; roots in the upper air gap absorb oxygen. No pump, no electricity, no moving parts.
It sounds ideal, but for tomatoes it has a serious limitation: the plant consumes water faster than the air gap forms predictably, especially during fruiting. You end up manually topping off the reservoir constantly, which disrupts the air gap. Kratky works well for tomatoes during the seedling and early vegetative stage, or for small determinate varieties in cooler environments, but most growers switch to active aeration before fruit set.
Grow bags used as hydroponic containers
Fabric grow bags filled with an inert medium (perlite, expanded clay, or coco coir) work well in drain-to-waste hydroponic systems. You irrigate on a schedule using a pump and drip emitters, the solution drains out the bottom, and you don't recirculate. The fabric sides promote air pruning of roots, which improves root density and oxygen exposure. A 5-gallon fabric bag is the minimum for determinates; go 7 to 10 gallons for indeterminate varieties. The trade-off is that you're using more nutrient solution overall (drain-to-waste discards runoff), and you have to monitor EC and pH in both the input solution and the runoff to catch drift before it hurts the plant.
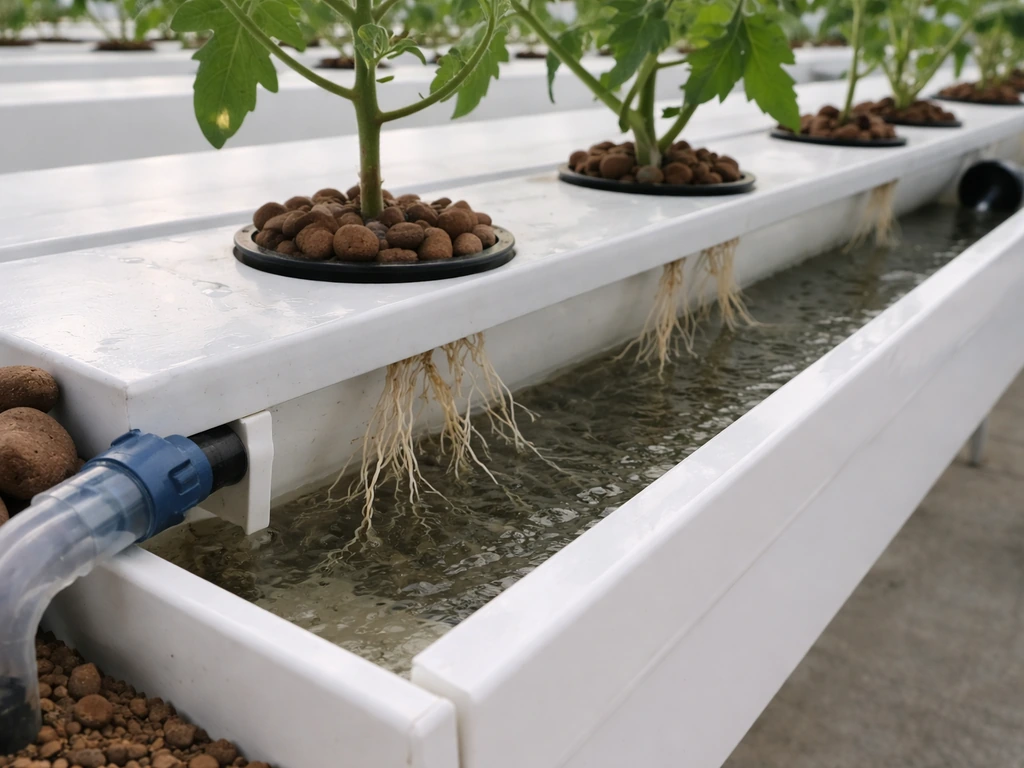
NFT (nutrient film technique) channels
NFT channels are typically about 4 inches wide and 1. 5 to 2 inches deep, with a thin film of nutrient solution flowing continuously over the roots. NFT is excellent for leafy crops and herbs with modest root systems, but tomatoes are a different story. The limited rooting space inside a standard NFT channel cannot support the root mass an indeterminate tomato develops, especially once fruiting starts.
If the pump fails even briefly, roots dry out almost immediately because there's almost no solution volume in the channel. Channels also clog with biological growth over time, requiring regular sanitizing. If you want to explore what to grow in an NFT system, tomatoes can work in a modified, wider channel setup, but they're not the easiest fit and require more attentive management than DWC or grow bags.
Dutch bucket (Bato bucket) systems
Dutch buckets are 2-gallon bucket-shaped containers filled with perlite or other inert media, connected in a line with a shared drain pipe that either recirculates or runs to waste. Each bucket feeds individually via a drip emitter. This is what most commercial greenhouse tomato operations use, and it scales from 2 buckets to 200. The media buffers the root zone from temperature swings better than pure DWC, and the individual containers make it easy to remove a sick plant without disturbing the whole system. For a serious home setup with 4 to 12 plants, Dutch buckets are hard to beat.
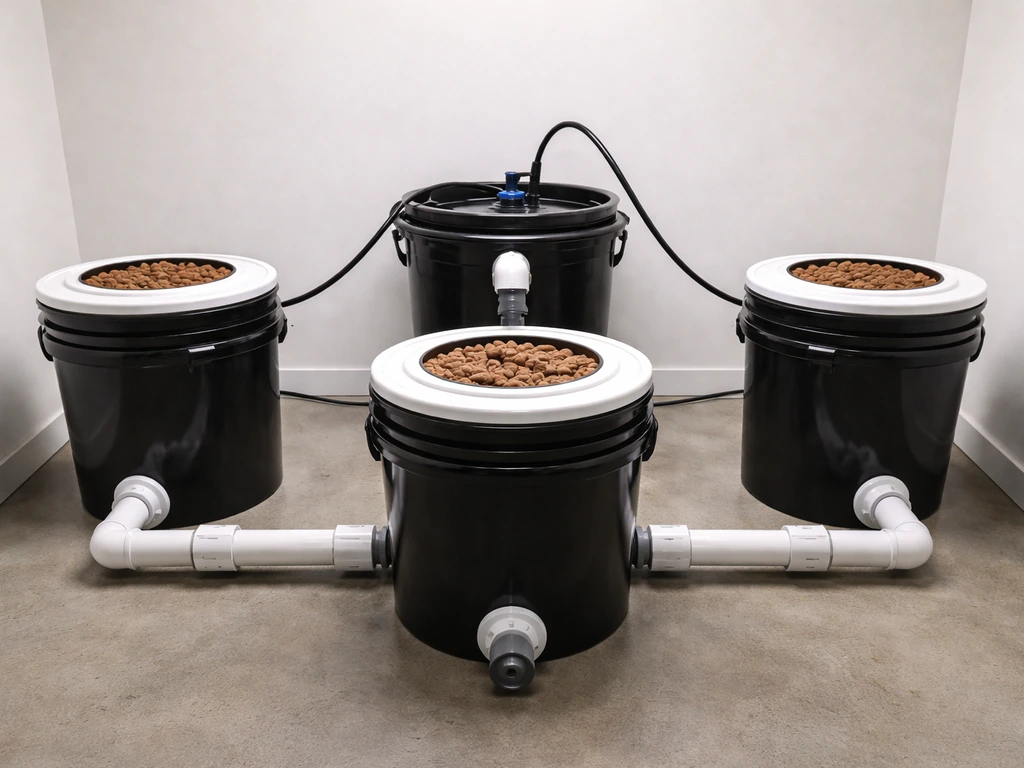
Top-feed DWC and recirculating systems (RDWC)
RDWC connects multiple DWC buckets to a central reservoir with a water pump that circulates solution continuously. This keeps EC and pH consistent across all plants and means you only need to adjust one reservoir instead of checking each bucket. The downside is more plumbing, more failure points (pump failure, leaks at fittings), and a higher upfront cost. For experienced growers running 4 or more plants, RDWC pays off in consistency and yield.
| Container Type | Best For | Root Volume | Oxygen Method | Skill Level | Rough Cost (single site) |
|---|---|---|---|---|---|
| DWC Bucket | Beginners, 1-4 plants | High (5+ gal) | Air pump + stone | Beginner | $15-$30 |
| Kratky Reservoir | Early veg, small determinates | Moderate | Passive air gap | Beginner | $10-$20 |
| Fabric Grow Bag (DTW) | Outdoor/indoor, any experience | High (5-10 gal) | Air pruning + drainage | Beginner-Intermediate | $5-$15 |
| NFT Channel | Leafy crops; tomatoes with caution | Low | Thin film flow | Intermediate | $30-$80+ |
| Dutch Bucket (Bato) | Serious home grows, 4+ plants | Moderate-High | Media + drip feed | Intermediate-Advanced | $20-$40 |
| RDWC System | Experienced growers, max yield | High (shared reservoir) | Recirculating pump | Advanced | $100-$300+ |
Container size and shape: match these to your tomato type
Determinate tomatoes (Roma, Celebrity, Bush Early Girl) stop growing at a genetically fixed height, usually 3 to 4 feet, and set all their fruit in a concentrated window. Indeterminate varieties (Beefsteak, Cherry tomatoes, Big Boy) keep growing until you cut them or the season ends, regularly reaching 6 to 8 feet in a supported hydroponic setup. These growth habits dictate minimum container specs.
Determinate varieties
A 5-gallon container (roughly 12 inches deep and 11 inches in diameter) is the minimum for a determinate variety, and it works well for most of them. Compact patio types can get away with 3 to 4 gallons if you're monitoring closely, but yield suffers. Wider is usually better than deeper for determinates because their root systems spread horizontally more than they descend. A squat, wide bucket or a large-diameter net pot setup serves them well.
Indeterminate varieties
Go bigger: 5 gallons is the floor, and 7 to 10 gallons is where indeterminate tomatoes really perform. The root mass of a full-season indeterminate in a hydroponic system is substantial. In a DWC setup, I've seen root balls that fill a 5-gallon bucket completely by week 10. If you're cramming that much root into too little volume, the plant will signal stress through yellowing lower leaves and stalled fruit development even when your EC and pH look correct. For Dutch bucket systems, most commercial growers use 2-gallon Bato buckets but space them per-plant rather than crowding them, which effectively gives each plant generous media volume per linear foot of run.
Shape matters for stability too. A tall, narrow container that works fine for lettuce becomes a liability when an indeterminate tomato reaches 6 feet and gets loaded with fruit. Keep the base-to-height ratio broad: if you're using a bucket, a 5-gallon wide-mouth style is more stable than a standard tapered 5-gallon pail. If you're running grow bags, place them inside a plastic saucer or on a weighted base when the plants get tall.
Root zone and airflow: the stuff that kills plants if you ignore it
The single biggest cause of hydroponic tomato failure isn't nutrient deficiency or pH drift. It's poor oxygen delivery to the roots. Here's what's actually happening and how to fix it before it becomes a problem.
Dissolved oxygen targets and temperature
You want dissolved oxygen above 6 ppm in your nutrient solution at all times.
Water physically holds more oxygen at lower temperatures, so a reservoir at 65°F holds significantly more oxygen than one at 75°F, and at 80°F+ the oxygen drops to levels that invite Pythium and other root rot pathogens. The practical target for root-zone temperature is 68 to 75°F (20 to 24°C).
In a DWC setup during summer, keeping a reservoir below 75°F often requires insulating the bucket (wrapping it in foam or a reflective sleeve), placing it away from direct light, or using a small aquarium chiller in extreme heat. This is one area where grow bags filled with media have a natural advantage: the media itself buffers temperature swings.
Water level management in DWC and Kratky
In a DWC setup, keep the water level about 1 to 1.5 inches below the bottom of the net pot during the seedling stage. As roots grow and dangle into the solution, you can drop the water level slightly to expose more root mass to oxygenated air. Some growers run the air stone so aggressively that the water surface stays turbulent, which itself introduces oxygen, and then they don't worry much about the gap. Either approach works. What you want to avoid is roots sitting in completely still, warm water with no air stone: that's the recipe for a dead plant in under a week during summer.
Light exclusion
Any light getting into your reservoir grows algae. Algae competes with your plant for oxygen and nutrients, and algae mats can clog net pots and drain lines. Use opaque containers (black or dark-colored), cover any holes with light-blocking net pot lids, and tape over any gaps. If you're using a white bucket because that's what you had on hand, spray it flat black on the outside or wrap it in black plastic sheeting.
Matching nutrient delivery to your container choice
The container you choose determines how nutrients reach roots, how you monitor solution health, and how tolerant your setup is to neglect. Here's how nutrient delivery maps to each system.
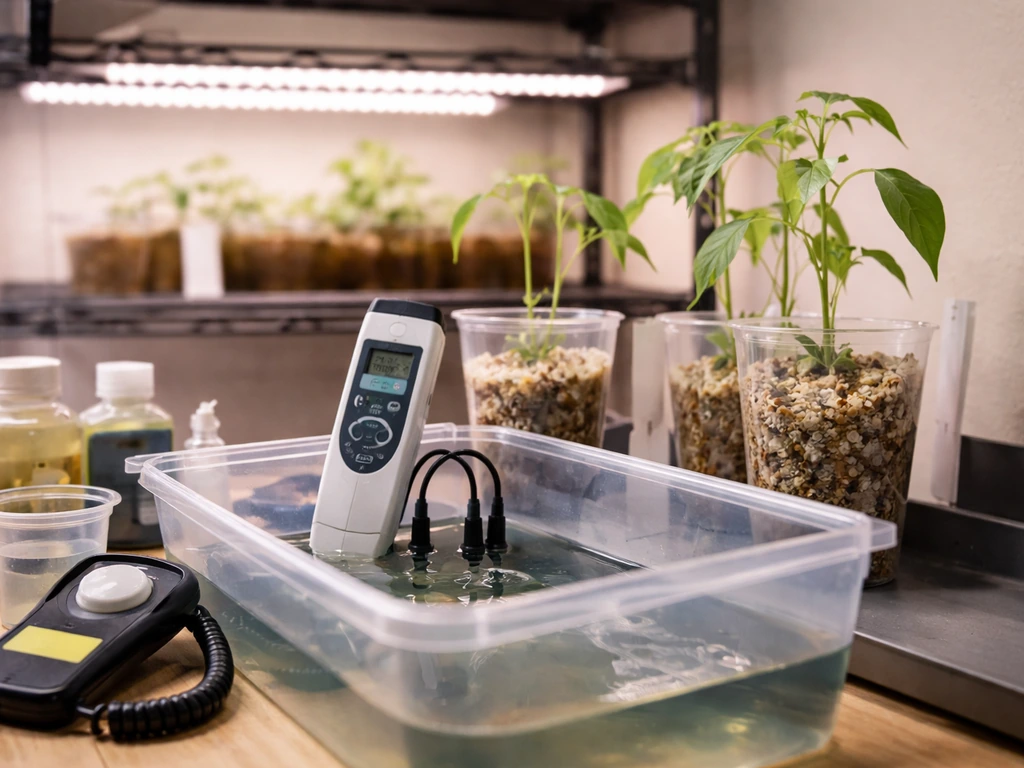
EC and pH targets for tomatoes
For hydroponic tomatoes, target an EC of 2.0 to 4.0 mS/cm, with 2.0 dS/m being a good starting point in early vegetative growth and stepping up toward 2.4 dS/m and beyond as the plant matures and sets fruit. pH should stay in the 6.0 to 6.5 range for maximum nutrient availability. Letting pH drift above 6.5 locks out iron and manganese; dropping below 5.5 causes calcium and magnesium deficiencies. Because hydroponic systems have no soil to buffer these values, they can shift fast, especially in small reservoirs where the plant is drawing down nutrients rapidly. Check EC and pH every 1 to 2 days during fruiting.
Recirculating vs. drain-to-waste
DWC and RDWC are recirculating systems: you mix a reservoir and the plant draws from it continuously. This is efficient on nutrients but means EC and pH drift over time as the plant preferentially uptakes certain elements. A 5-gallon reservoir serving one indeterminate tomato may need topping off with plain pH-adjusted water every 1 to 2 days. Full reservoir changes every 7 to 14 days keep salt buildup from accumulating. Drain-to-waste (grow bags, Dutch buckets with runoff to drain) uses more solution but gives you a fresh start with every feed cycle. Monitoring runoff EC and pH tells you whether the plant is eating more than it's drinking (rising EC in runoff) or the opposite.
When using inert growing media like perlite or expanded clay pellets in grow bags or Dutch buckets, the root-zone EC and pH will closely mirror what you're feeding, which simplifies monitoring considerably. You're not fighting soil chemistry, just solution chemistry.
Aeration in media-based containers
In grow bags and Dutch buckets, aeration comes from the drainage structure of the media itself, not from an air pump. This is why the media choice matters: perlite and expanded clay drain freely and hold air pockets between particles. Coco coir holds more water and less air, so it needs more frequent but shorter irrigation cycles. If you're feeding on a timer, aim for 4 to 6 short feed cycles per day during peak growth, enough to keep media moist but not waterlogged. Waterlogged media in a container is functionally the same as an under-aerated DWC bucket: roots suffocate.
If you're curious about experimenting with clones before committing to a full tomato setup, understanding how to grow clones hydroponically can help you start multiple plants cheaply and transplant the strongest ones into your container system.
Setup tips, maintenance, and the failure points that catch people off guard
Building your DWC bucket the right way
- Use a 5-gallon opaque bucket with a lid that accepts a 2-inch or 3-inch net pot. Cut the hole yourself or buy a pre-drilled lid.
- Drill a small hole near the top rim for the air tubing. Route the tubing to an air stone on the bucket floor.
- Run the air pump continuously, 24 hours a day. Never shut it off while plants are in the system.
- Fill to about 1 inch below the net pot bottom for seedlings. Drop the level as roots grow.
- Wrap the outside of the bucket in black plastic or foam insulation to block light and buffer temperature.
- Label your bucket with the start date and variety so you track feeding history accurately.
Leaks and plumbing failures
In a single DWC bucket, leaks usually come from a cracked lid or a loose air tube grommet. Check the lid fit before filling. In recirculating or Dutch bucket systems, leaks come from fittings, especially if you used push-fit connections without proper thread tape on NPT fittings or if PVC cement wasn't given full cure time (24 hours minimum before running solution). Run your system with plain water for 24 hours before adding nutrients, both to check for leaks and to flush any plastic off-gassing.
Algae: prevent it, don't treat it
Once algae establishes in a reservoir, it's extremely difficult to eliminate without breaking down the whole system. Prevention is the only real strategy: 100% light exclusion on reservoirs and any solution-carrying components. If you see green slime on the outside of an NFT channel or inside a lid, that light exclusion has failed somewhere. Find the gap and seal it. Don't add hydrogen peroxide or other algaecides while plants are in the system unless you know what you're doing: the concentrations that kill algae can also stress roots.
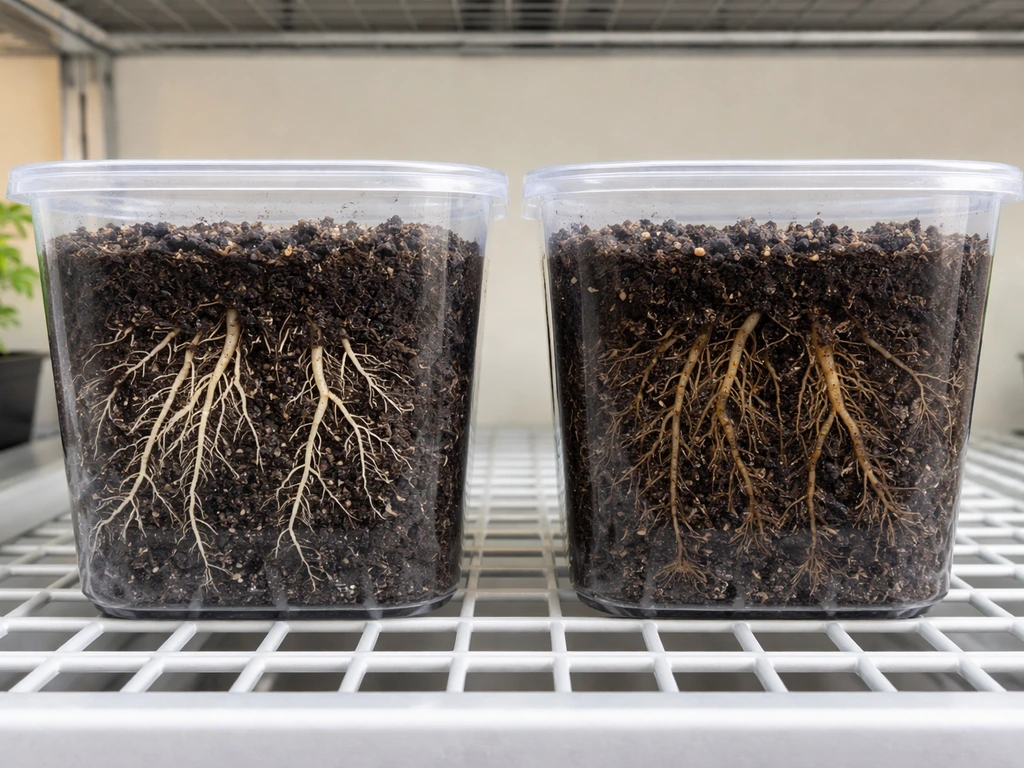
Root rot and Pythium
Healthy hydroponic tomato roots are white or off-white with a slight fuzz of root hairs. Brown, slimy, or foul-smelling roots mean Pythium or a related pathogen is present, almost always triggered by warm water, low oxygen, or both. If you catch it early, dropping the reservoir temperature and increasing aeration can stop the spread. Remove visibly rotted root sections with sterile scissors. In severe cases, you may need to replace the entire solution, sterilize the container with a 10% bleach solution (rinsed thoroughly), and replant. Prevention through temperature control and consistent aeration is far easier than remediation.
Clogging in drip and NFT systems
Drip emitters clog from mineral deposits and biological growth. Use a separate filter inline before your emitters (100 to 200 micron mesh works well), and flush your lines with pH-adjusted water every 2 to 3 weeks. NFT channels clog at the inlet and along the channel floor with biological growth, especially if your solution temperature runs warm. Inspect channels weekly and run a sanitizing solution (dilute citric acid or food-grade hydrogen peroxide) through the system between crop cycles.
Weekly monitoring checklist
- Check EC every 1 to 2 days; adjust by topping off with plain water (EC rising) or adding diluted nutrients (EC falling).
- Check pH every 1 to 2 days; adjust with pH Up or pH Down in small increments.
- Inspect root color once per week by lifting the net pot or checking through a container port.
- Verify reservoir water temperature; act if it exceeds 75°F.
- Check air pump function: you should hear it and see bubbling in the reservoir.
- Look for any light leaks into the reservoir or channels.
- Flush and top off reservoirs fully every 7 to 14 days in active DWC systems.
Which container wins, and for whom
If you're a beginner or intermediate grower with 1 to 4 plants and standard indoor space: build or buy a 5-gallon DWC bucket setup. It's cheap, transparent in how it works, and easy to troubleshoot. Use it with a 2-inch net pot lid, a reliable air pump, and an air stone, and you'll get excellent results with both determinate and indeterminate varieties as long as you manage temperature.
If you're growing indeterminate varieties seriously and want to scale: move to RDWC or a Dutch bucket system with 5 to 7 gallon volume per plant. The consistency of recirculating nutrient delivery and the root volume available in these systems translates directly to higher fruit yield and less daily intervention per plant once the system is dialed in.
If you're outdoors or semi-outdoors with a deck or greenhouse: fabric grow bags in a drain-to-waste drip setup are the most practical choice. They're portable, inexpensive, and forgiving of irrigation timing errors. Go 7 to 10 gallons for indeterminate types and don't skip the timer-controlled drip emitters: hand-watering inert media is inconsistent and leads to wet/dry cycles that stress the plant.
Avoid NFT for tomatoes unless you're specifically running a wider modified channel (6 inches or more) and are experienced with flow rate management and system sanitation. The limited rooting space in a standard NFT channel is a structural mismatch for tomato root mass, and the consequence of pump failure is immediate and severe.
One more note for anyone experimenting across different setups: if you've ever wondered how game simulations handle crop prioritization, the best food to grow in RimWorld hydroponics is a fun rabbit hole that actually mirrors some real-world crop selection logic, even if the stakes are considerably lower than your actual harvest. And if you're still exploring what crops fit your system before locking in tomatoes, it's worth browsing what to grow in RimWorld hydroponics as a thought experiment for comparing high-value, high-maintenance crops against simpler options.
Your first week: what to buy, build, and monitor
If you're starting from scratch today, here's the minimum viable setup for a single-plant DWC tomato system: one 5-gallon opaque bucket with a lid, one 2-inch or 3-inch net pot, one small aquarium air pump rated for at least 2 watts, 2 feet of air tubing, one air stone, and a hydroponic nutrient kit with a two or three-part formula designed for tomatoes. You'll also need a pH meter, an EC meter, pH Up and pH Down solutions, and your growing medium for the net pot (hydroton/expanded clay or rockwool cube to start the seedling).
Day 1: Assemble the bucket, run it with plain tap water for 24 hours to check for leaks and off-gassing. Day 2: Mix your nutrient solution to EC 2.0 dS/m, adjust pH to 6.2, and add your transplant or seedling. Day 3 onward: check EC and pH daily for the first two weeks until you understand how fast your plant is consuming nutrients and water. Keep water temperature below 75°F, run the air pump 24/7, and keep all light out of the reservoir. That's it. Everything else is refinement.
FAQ
Can I use a regular plastic storage container or tote instead of a 5-gallon DWC bucket for hydroponic tomatoes?
If your goal is tomatoes, avoid “just use any bucket” thinking. A white or clear bucket only works if it is fully light-blocked, and even then it won’t help with temperature control. For best results, use an opaque (black/dark) container, insulate it in warm weather, and still plan on active aeration (air pump plus air stone) to keep dissolved oxygen above your practical minimum.
What container shape matters most for indeterminate tomatoes, not just volume?
For indeterminate tomatoes, the container must stay stable under both height and fruit weight. If you choose a bucket, prioritize a wide-mouth, wider base-to-height shape rather than a tall narrow pail. For grow bags, use a weighted base or saucer so it cannot tip when plants get heavy, and keep trellising tied in so the root mass does not get stressed by leaning.
What should I do if my hydroponic reservoir often exceeds 75°F?
If you cannot keep the reservoir below about 75°F, the “best container” often changes from pure DWC to something with better temperature buffering. Grow bags with inert media generally handle heat swings better because the media moderates temperature. If you stay with DWC, you will likely need insulation and, in extreme heat, a small aquarium chiller.
How much does tomato health depend on uninterrupted aeration, and what about power outages?
Yes, but only if you avoid the real failure mode: oxygen collapse. During power or pump interruption, the plant can quickly decline in high-demand stages. If you are using DWC or RDWC, consider a simple backup plan like a battery air-pump or an alarm that alerts you when the pump stops, especially for indeterminate plants.
How often should I check EC and pH in my hydroponic tomato system?
Aim for a practical “maintenance schedule” based on stage and system type. During fruiting, check EC and pH every 1 to 2 days in recirculating setups because drift can happen quickly. Also watch trends, not one readings, because the plant can cause EC to climb or drop depending on what it is preferentially taking up.
My reservoir or net pot area gets algae, what’s the fastest fix?
If algae appears, it usually means light is reaching nutrient or solution-carrying parts. Do not treat it casually with additives while plants are in the system. The most reliable fix is full light exclusion, then locate the leak in your light-blocking (lid fit, gaps around net pots, exposed tubing, or reservoir walls).
Can I use the same fertilizer I used for soil tomatoes in my DWC system?
Yes, but there is a trap: “hydroponic nutrients” and “soil fertilizers” are not interchangeable. Use a two or three-part hydroponic tomato formula, then verify EC and pH after mixing. If you use incorrect nutrients, you can end up with wrong ratios (like calcium or micronutrients) even if pH looks acceptable.
What’s the most common cause of uneven feeding in Dutch bucket or grow bag systems?
If your drip emitters or lines clog, you lose even irrigation and oxygen delivery where the root zone should stay consistent. Prevent clogs with an inline filter rated for about 100 to 200 microns, flush lines periodically with pH-adjusted water, and treat clogged systems as a distribution problem first, not a nutrient problem.
How can I tell if my container choice is causing oxygen problems before my plants collapse?
Usually. The biggest oxygen-related sign is root condition, not leaf color alone. Healthy roots should look white or off-white with slight root hairs, while brown, slimy, or foul-smelling roots strongly suggest Pythium or related problems driven by warm, low-oxygen conditions.
Do I need a bigger container if I’m starting with a small tomato plant, not a full-grown one?
The safest approach is to match container size to the variety’s growth habit and not just its current size. Determinates often do fine near the low end of container sizing, while indeterminates tend to stall or stress if you use the minimum too long. If you want maximum yield and easier maintenance, move toward 7 to 10 gallons per plant for indeterminates rather than trying to “make 5 gallons work.”
Is smaller always better for beginners, or does reservoir volume change how forgiving a system is?
Small reservoirs increase the speed of EC and pH swings, especially during peak fruiting, and that can make container choice feel “more fragile.” If your household schedule means you can’t check daily, pick a system with more stability (larger volume and/or better buffering). DWC and RDWC also benefit from consistent aeration and temperature control to reduce rapid changes.