Yes, you can absolutely grow hydroponics outside, and in many ways it works better than indoors once you get the basics dialed in. Free sunlight, natural airflow, and larger growing space are real advantages. The catch is that outdoor hydroponics introduces variables you just don't have indoors: rain diluting your nutrient solution, temperature swings stressing roots, wind knocking things over, and algae blooming the moment your reservoir sees direct sun. None of those problems are deal-breakers, but you need to plan for them before you set up, not after your first heatwave.
Can You Grow Hydroponics Outside? Setup, Crops, and Care

Marcus Holloway
8 Apr 2026
Is outdoor hydroponics actually feasible (and when does it work best)
Outdoor hydroponics is feasible in virtually every climate where plants can grow, but the setup you choose and the crops you pick need to match your local conditions. In mild climates with stable temperatures between 60 and 85°F and moderate humidity, outdoor hydro is almost effortless. In hotter or colder regions, it still works, but you'll need shade structures, insulated reservoirs, or season-extension tools like row covers and cold frames to keep root-zone temperatures in a safe range.
The sweet spot for outdoor hydroponics is late spring through early fall in most temperate zones. That window gives you 12 to 16 hours of natural light, warm ambient temperatures, and enough dry weather to manage your reservoirs without constant rain-dilution correction. In subtropical and tropical climates, outdoor hydro can run year-round, but you'll need serious shade and good airflow management during peak heat months. High-desert growers face intense UV and wide day-night temperature swings that can crash pH and stress roots, so reservoir insulation and pH monitoring become non-negotiable.
The conditions that make outdoor hydroponics fail are predictable: sustained temperatures above 85°F in the root zone (which tanks dissolved oxygen and invites root rot), heavy unmanaged rain that dilutes nutrients and splashes pathogens between plants, and unshaded reservoirs that turn into algae farms. Plan around those three risks and you're ahead of 90% of first-time outdoor growers.
Outdoor hydroponic system types and how to set them up
Not every hydroponic system handles outdoor conditions equally. Some are naturally more forgiving of weather variability; others will frustrate you with the first unexpected rainstorm. Here's how the main options stack up for outdoor use.
Deep Water Culture (DWC) and bucket systems
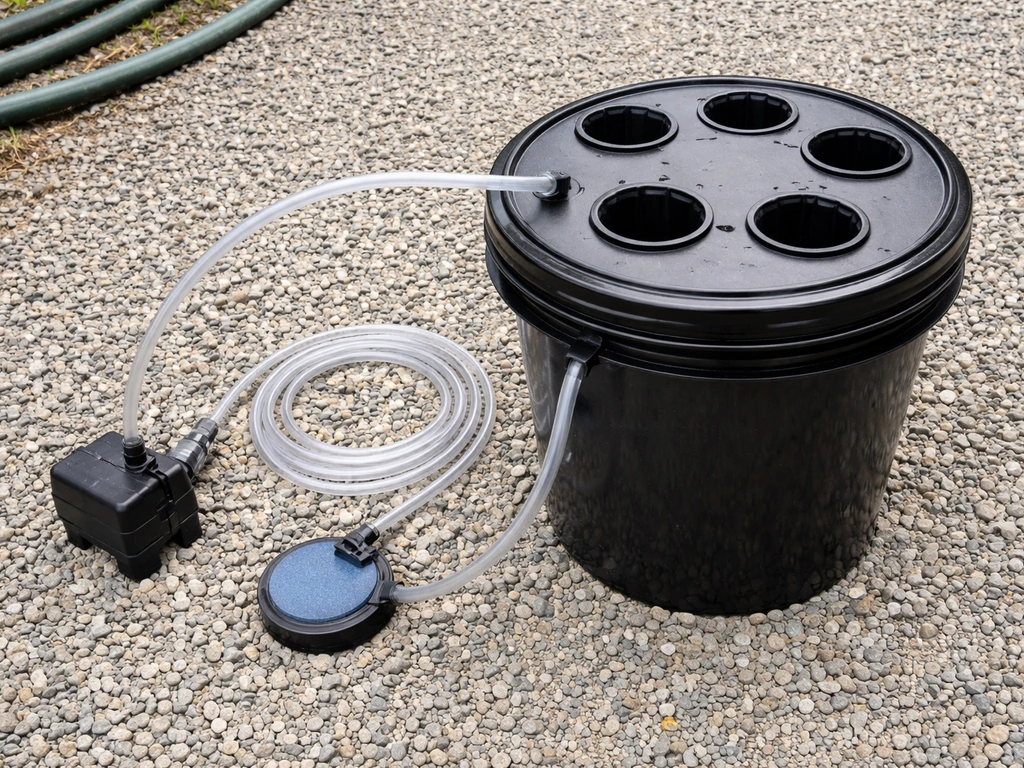
Five-gallon DWC buckets are probably the most beginner-friendly outdoor setup. Each bucket is self-contained, so if one plant crashes, it doesn't take the whole system down. Buckets are also easy to insulate (wrap them in reflective insulation or slip them inside a larger container with air gap) to buffer root-zone temperature swings. The downside is that you're doing more manual top-offs and pH checks per bucket compared to a shared reservoir system. Use dark, opaque buckets only, never translucent ones, because any light reaching the solution will trigger algae within days in outdoor sun.
NFT (Nutrient Film Technique) channels
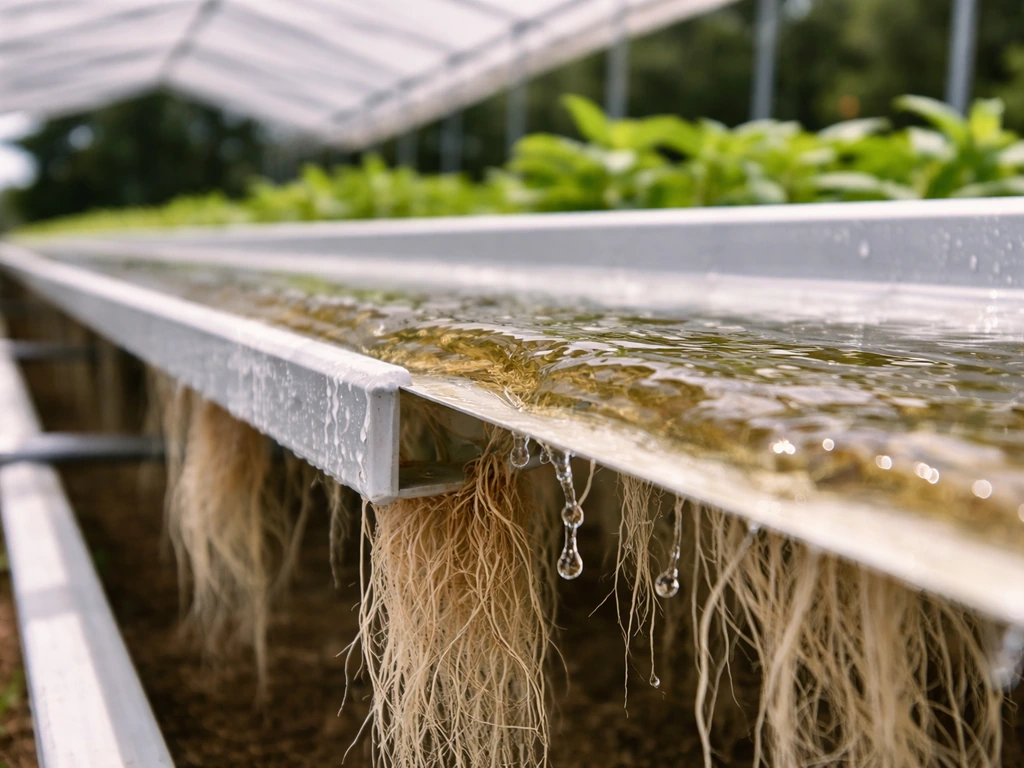
NFT channels work outdoors with modifications. The thin film of solution flowing through channels means the roots get excellent oxygenation, but it also means they're vulnerable to temperature swings faster than a large DWC reservoir. Keep NFT channels shaded and insulated on the sides. Slope them at the standard 1:30 to 1:40 ratio and make sure your pump never fails during hot weather, because roots in a stopped NFT channel will dry out and die within hours on a hot day. A battery backup or a second pump on standby is worth it outdoors.
Kratky and passive container systems
Passive Kratky containers (no pump, no power) are a surprisingly practical outdoor option for leafy greens and herbs. Since there's no pump, there's nothing mechanical to fail. The main limitation is that you need to top off more frequently outdoors because heat and plant uptake both accelerate solution use. Check levels every one to two days in warm weather and top off with properly pH-adjusted water. Kratky works best for smaller plants with moderate nutrient demands.
Wicking and media-bed systems
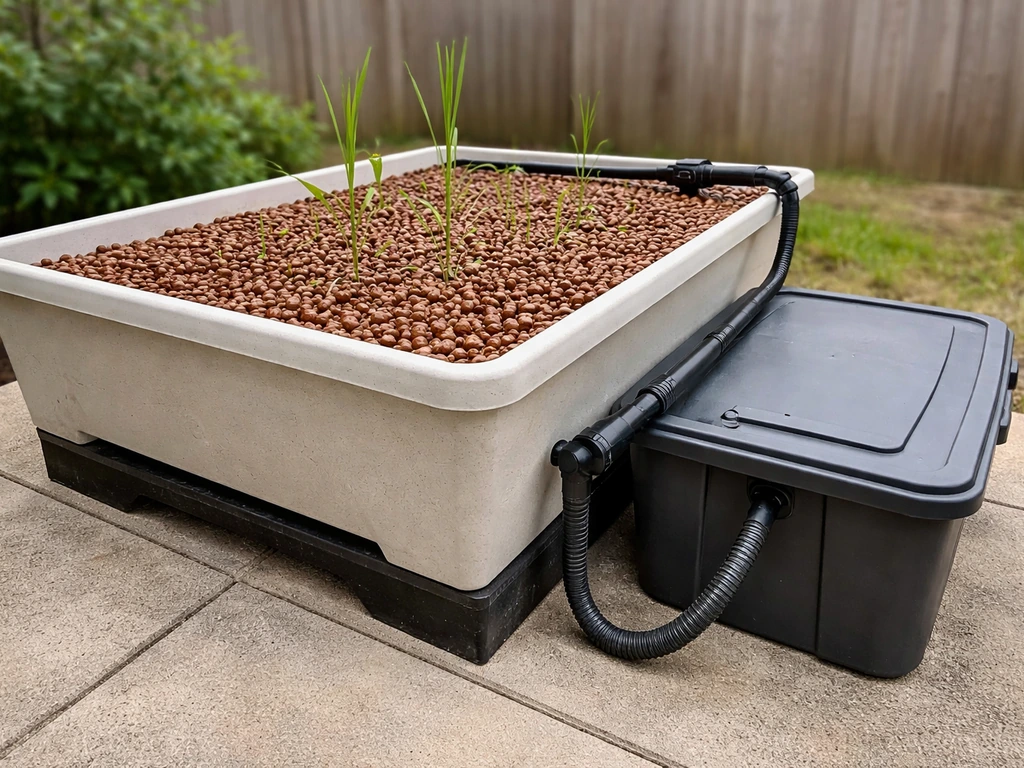
Media beds (flood-and-drain or top-drip with coco coir, perlite, or expanded clay) tolerate outdoor variability better than most systems because the media buffers both temperature and moisture fluctuations. They're heavier to move and harder to inspect roots, but for tomatoes, peppers, and cucumbers that need a more stable root environment, media beds in raised containers are often the most reliable outdoor choice.
| System | Outdoor Suitability | Best For | Main Risk |
|---|---|---|---|
| DWC / Bucket | High (with insulation) | Tomatoes, peppers, cannabis | Root zone overheating |
| NFT Channels | Medium (needs shade, backup pump) | Lettuce, herbs, strawberries | Pump failure, drying roots |
| Kratky Passive | High for small crops | Leafy greens, herbs | Rapid solution depletion in heat |
| Media Bed (flood-drain) | Very High | Large fruiting plants | Weight, root inspection difficulty |
| Aeroponics | Low (complex outdoors) | Advanced growers only | Wind/debris clogging nozzles |
If you're curious whether aeroponics might fit your outdoor goals, it's worth exploring what you can grow with aeroponics before committing to that system outdoors, because the maintenance demands in open-air conditions are considerably higher than the other options.
Picking plants and varieties that actually thrive outside in hydro
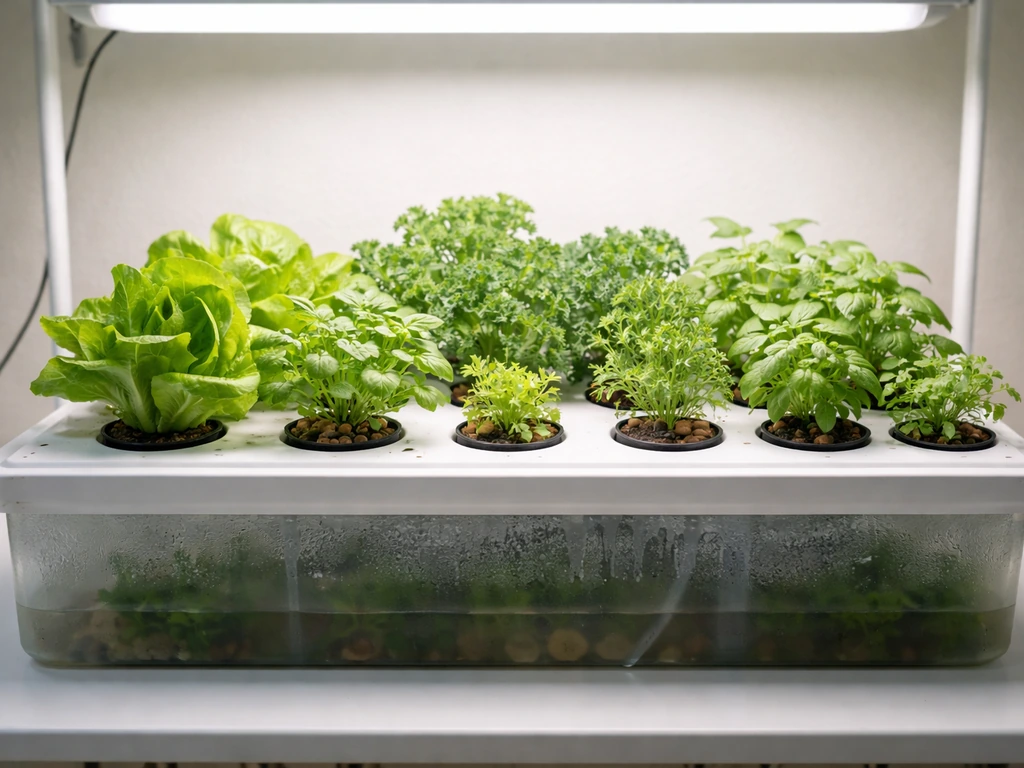
The outdoor hydroponic environment rewards crops that tolerate some variation in EC, pH, and temperature. Leafy greens like lettuce, spinach, kale, and Swiss chard are the easiest starting point. They grow fast, have modest nutrient demands, and are forgiving of mild EC fluctuations. Herbs including basil, mint, cilantro, and parsley perform excellently and are nearly as forgiving. Research on culinary herbs shows that yields remain stable across a wide EC range from roughly 0.5 to 4.0 mS/cm, which matters a lot outdoors where rain events can temporarily push EC down and evaporation can push it up.
Fruiting crops are absolutely achievable outdoors in hydroponics, but they need more attention. Tomatoes, cucumbers, zucchini, and peppers love the direct sun and warmth of outdoor growing, but they need consistent EC management, good root-zone cooling, and structural support for their root systems and above-ground growth. Choose compact or determinate tomato varieties like Bush Early Girl or Patio for containers to keep top weight manageable. Indeterminate varieties can work but need robust staking or trellis systems that can handle wind.
For a broader sense of what crops are genuinely suited to soilless growing, the full breakdown of what you can grow hydroponically is worth reading before you plan your plant list, because some crops simply don't justify the outdoor setup complexity they require.
Spacing matters more outdoors than indoors because plants get unrestricted sun from multiple angles and tend to grow larger. Give lettuce heads at least 8 to 10 inches between net cups. Tomatoes need 18 to 24 inches in media beds, and fruiting vines like cucumbers should have 12 to 18 inches between plants with a vertical trellis. Crowded plants outdoors shade each other, trap moisture, and become disease hubs.
Nutrients, pH, and water management when the weather keeps changing
This is where outdoor hydroponics gets genuinely tricky, and where most beginners run into trouble. Your nutrient solution is a living, shifting balance, and outdoor conditions attack that balance constantly. Heat accelerates plant uptake and evaporation (pushing EC up), rain dilutes the solution (pushing EC down), and wide temperature swings shift pH because biological activity in the solution changes with temperature.
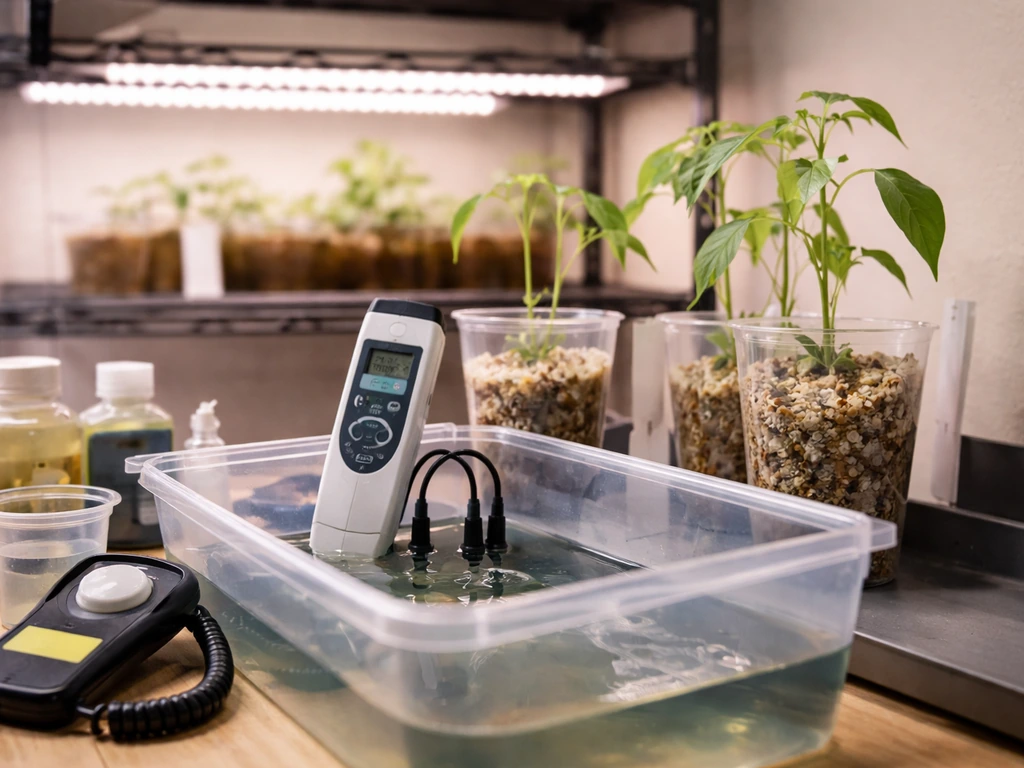
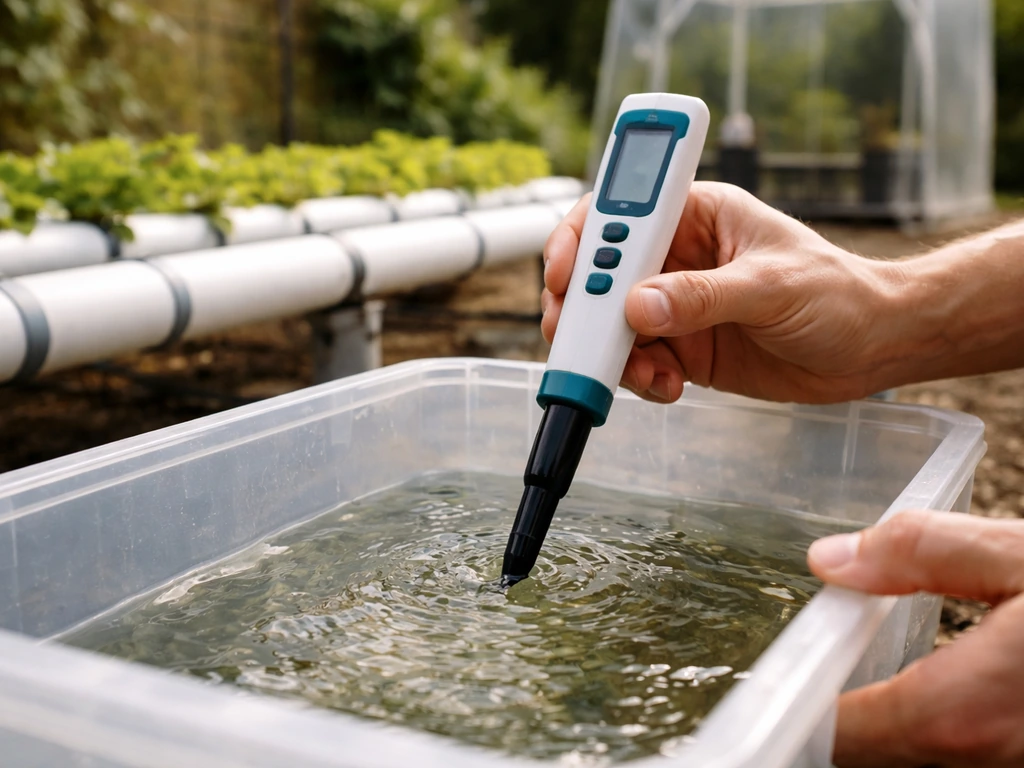
Keep a reliable pH meter and EC meter beside your system, not in a drawer inside. Check pH and EC every day during hot or variable weather, and at minimum every two days in stable conditions. For lettuce and leafy greens, target EC between 1. Oklahoma State University Extension lists lettuce with an EC around 1.
2 to 1. 8 mS/cm and a pH around 6. 0 to 7. 0 [For lettuce and leafy greens, target EC between 1.
](https://extension. okstate. edu/fact-sheets/electrical-conductivity-and-ph-guide-for-hydroponics). 4 and 1.
8 mS/cm and pH between 6. 0 and 7. 0. For fruiting crops, nudge EC up to 2.
0 to 3. 0 mS/cm once fruiting begins. If you let pH drift outside the 5. 5 to 7.
0 range for more than a day or two, nutrient lockout kicks in and your plants will show deficiency symptoms even though your reservoir is full of nutrients.
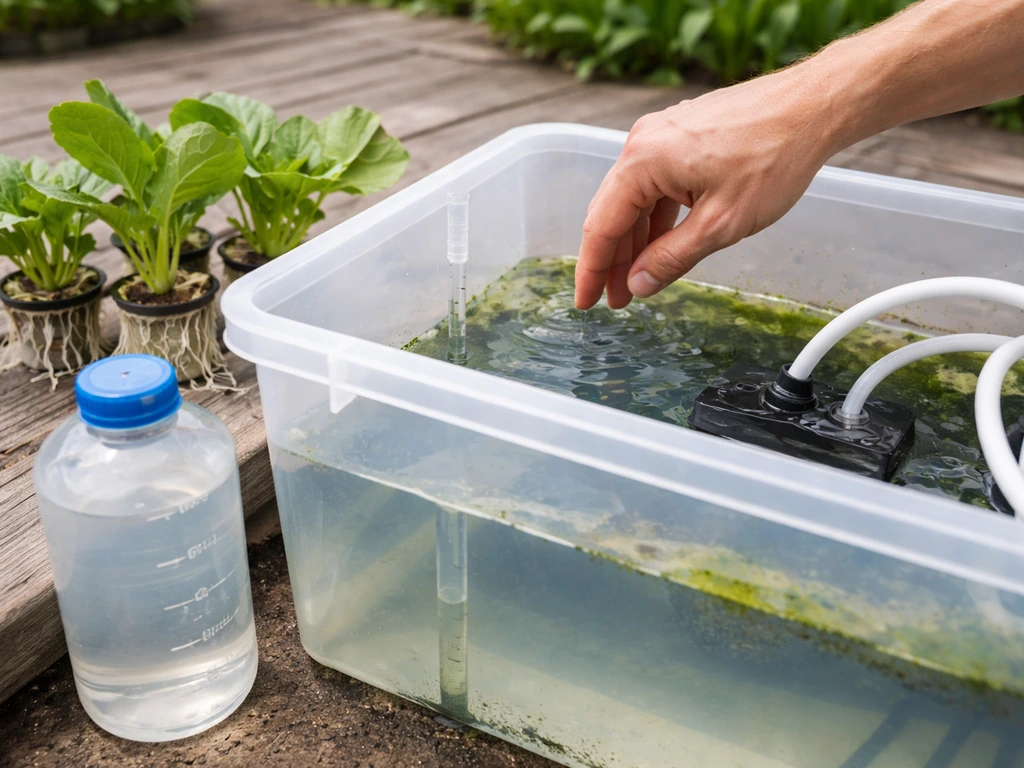
After a heavy rain, check EC immediately. If it drops below 1. Oklahoma State University Extension explains that if EC drops, you can correct it by diluting with more water and then rechecking the EC [EC drops below 1. 0 mS/cm](https://extension.
okstate. edu/fact-sheets/print-publications/hla/electrical-conductivity-and-ph-guide-for-hydroponics-hla-6722. pdf). 0 mS/cm, add a measured dose of your nutrient mix back to the reservoir and recheck.
Do not just dump in more nutrients without measuring first, because you can easily overshoot if the rain wasn't as diluting as you thought. The key principle here, backed by extension research, is that EC can appear on target while individual nutrients are still imbalanced depending on what's in your source water, so using a complete balanced nutrient formula matters more outdoors than indoors where conditions are stable.
Water sourcing outdoors is also worth thinking through. Rainwater is naturally low in EC and can be a good top-off source if you collect it cleanly, but test it first because it can carry dust, pollen, and contaminants from your collection surface. Municipal tap water usually has a baseline EC of 0.1 to 0.5 mS/cm from minerals and chlorine, which is manageable but factors into your formula mixing. Well water can have high dissolved mineral content that throws off your nutrient ratios in ways that aren't obvious from EC alone. If your plants are showing unexplained deficiencies despite good EC, water quality is the first thing to investigate.
One thing worth noting for growers focused on cannabis or other crops with specific input questions: whether you can grow without adding nutrients is a common question, and the short answer outdoors is no, you really can't in a hydroponic system without a nutrient-rich water source like aquaponics, because there's no soil biology to buffer deficiencies.
Managing light, heat, wind, and rain without losing your mind
Sunlight and placement
Most fruiting crops want 8 or more hours of direct sun per day, and leafy greens perform well with 6 hours. Orient your system to take advantage of your best sun exposure, usually a south-facing location in the northern hemisphere. Avoid placing systems where they'll be shaded by structures or trees during peak afternoon hours unless you're in a climate where afternoon shade is actually beneficial for temperature control.
Reservoir placement is separate from plant placement. Reservoirs should be shaded even when plants are in full sun. Use white or reflective containers, shade cloth over reservoirs, or bury them partially in the ground to keep root-zone temperatures below 72°F. The optimal root-zone temperature range for healthy hydroponics is roughly 68 to 72°F. Above 75°F, dissolved oxygen levels in the solution drop sharply, and above 80°F, Pythium root rot (the number one hydroponic disease killer) becomes a serious risk. This is not a theoretical concern: root rot can wipe out a crop in 48 to 72 hours during a heatwave.
Temperature and shade management
For most outdoor setups, 30% to 50% shade cloth over the whole system during peak summer is a smart precaution, especially for leafy crops that bolt in heat. Shade cloth reduces leaf temperature and indirectly helps keep reservoir temps lower. In very hot climates, run an aquarium chiller on your reservoir or freeze water bottles and rotate them into the reservoir to keep temperatures manageable.
Wind and rain protection

Wind is underrated as a threat to outdoor hydroponics. It snaps plant stems, tips over containers, dries out NFT channels faster than expected, and can blow debris into your reservoir. Position your system near a windbreak (fence, hedge, wall) or install a simple mesh wind barrier on the prevailing wind side. For taller plants, stake everything proactively because wind damage usually happens before you expect it.
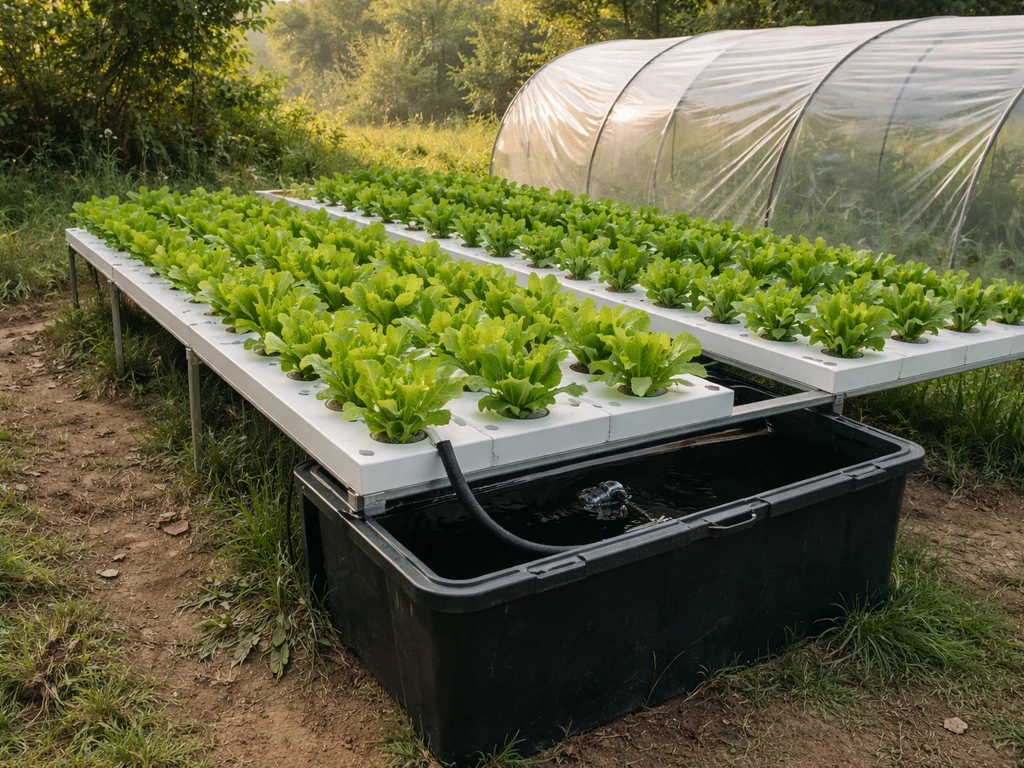
Rain protection doesn't have to mean a full greenhouse. A simple clear polycarbonate cover or tarp on a frame over your system protects reservoirs from rain dilution while letting light through. Even a basic greenhouse or cold frame setup dramatically reduces how often you need to correct EC and pH after weather events. If you can't build a cover, at minimum put lids on all reservoirs and use net cup covers to keep rain from entering directly.
Pests, algae, and disease: the outdoor-specific risks
Outdoor hydroponics brings you into contact with a much wider pest population than indoor growing. Aphids, spider mites, whiteflies, caterpillars, and fungus gnats are all common depending on your region and season. The good news is that hydroponic plants growing vigorously with properly balanced nutrients tend to be more resilient to pest pressure than stressed soil plants. The bad news is that once an infestation gets going in a hydroponic system, it can spread fast because plants are often close together.
Inspect plants daily, focusing on the undersides of leaves. At the first sign of aphids or mites, hit affected areas with insecticidal soap or neem oil spray in the early morning or evening to avoid leaf burn. Yellow sticky traps hung near the system give you early warning of flying pest populations. Keep the area around your system clear of weeds and debris, which harbor pests and provide a highway into your grow.
Algae is one of the most common and annoying outdoor hydroponic problems. Green or blue-green algae thrives when sunlight, warm water, and nutrients combine in an open container. It competes for oxygen and nutrients, clogs pumps and drip emitters, and creates a slimy mess around net cups. The prevention is simple: block all light from reaching your nutrient solution. Cover reservoirs with opaque lids, wrap channels in black polyethylene film, and cover the top of net cups and media so no light penetrates. If algae does establish, drain the reservoir, scrub everything with a dilute hydrogen peroxide solution (3%), rinse thoroughly, and restart with fresh nutrients.
Disease spread outdoors is a real concern that indoor growers rarely deal with to the same degree. Rain splash is a major vector: a raindrop hitting an infected leaf or media surface can carry Pythium, Fusarium, or bacterial pathogens to neighboring plants through water runoff. Extension guidance on this is clear: keep plants spaced so they don't touch, avoid overhead watering or rain hitting media directly, and maintain good drainage so water doesn't pool around roots. Sanitize any tools that touch plant material between plants, especially if you see any sign of root rot or wilting.
Understanding what you can grow hydroponically in the context of disease risk is useful here, because some crops are significantly more disease-susceptible than others in outdoor conditions, and choosing resistant varieties makes a real difference in how much disease management you'll need to do.
Your outdoor hydroponic maintenance schedule and troubleshooting guide
Daily and weekly maintenance rhythm
- Daily: Check reservoir levels and top off with pH-adjusted water if more than 10% depleted. Visually inspect plants for wilting, discoloration, or pest activity. Check that pumps and air stones are running.
- Every 2 days (or daily in heat): Test pH and EC. Adjust pH if outside your target range using pH Up or pH Down in small increments. If EC has dropped from rain or uptake, add a measured dose of nutrients.
- Weekly: Do a full reservoir change or partial change (replace 25 to 50% of solution) to prevent nutrient imbalances from accumulating. Flush and clean any filters or pump screens. Check roots if accessible.
- After any rain event: Test EC and pH immediately. Check for water pooling near system bases. Inspect for signs of splash-spread disease on lower leaves.
- Monthly: Full system inspection, check tubing and connectors for algae or clogging, calibrate your pH and EC meters using fresh calibration solution.
Common outdoor problems and how to fix them
| Problem | Likely Cause | Fix |
|---|---|---|
| Plants wilting despite full reservoir | Root zone overheating, root rot, low dissolved oxygen | Shade reservoir, add air stone, check roots for brown slime, reduce water temp |
| pH keeps drifting up daily | High heat, algae activity, calcium/carbonate in source water | Increase monitoring frequency, treat algae, consider RO water or pH buffer |
| EC drops rapidly after warm days | High plant uptake plus evaporation | Top off with nutrient solution, not plain water, and test before topping |
| EC drops after rain | Rainwater dilution | Measure actual EC, add nutrients to correct, cover reservoir better |
| Yellowing lower leaves | Nitrogen deficiency or pH lockout | Check pH first; if in range, raise EC slightly with nitrogen-rich formula |
| Green slime in reservoir or channels | Algae from light exposure | Block all light, drain and clean with H2O2, restart with fresh solution |
| Pump stopped or reduced flow | Algae/debris clog, overheating pump | Clean pump and filter screens, check for debris in lines, run pump in shade |
| Root rot (brown, slimy roots) | Pythium from warm low-oxygen water | Lower water temp to under 72°F, increase aeration, consider hydrogen peroxide treatment (1ml/L at 3%) |
| Plant growth suddenly stalls | Nutrient imbalance, heat stress, or pH lockout | Full solution change, recheck pH and EC, check for root issues |
Your starter checklist before you set up outside
- Choose your system: DWC buckets for beginners, media beds for fruiting crops, Kratky for hands-off herbs.
- Pick opaque, UV-stable containers in dark colors or wrap existing containers in reflective insulation.
- Select your location: maximum sun for plants, maximum shade for reservoirs.
- Get a pH meter, EC meter, pH Up, pH Down, and a complete hydroponic nutrient formula (three-part or two-part).
- Set up reservoir covers and net cup covers to block all light from the solution.
- Install a wind barrier or position near an existing windbreak. Stake tall plants before they need it.
- Plan your rain protection: a polycarbonate panel frame, greenhouse, or at minimum waterproof reservoir lids.
- Set up an air pump and air stones in any DWC or static reservoir, especially for hot climates.
- Establish your monitoring schedule: pH and EC every two days minimum, daily during heat waves.
- Do a test run with plain pH-adjusted water for two to three days before adding plants to confirm pumps, flow, and drainage are working.
Outdoor hydroponics rewards growers who set up thoughtfully and monitor consistently. The system failures that feel sudden almost always started days earlier with an EC drift nobody caught or a reservoir that got a few degrees too warm. Check your numbers, protect your roots from heat, block light from your solution, and you'll find that growing hydroponics outside is not just possible but genuinely rewarding, especially when you're harvesting lettuce or tomatoes that never saw a bag of soil.
FAQ
Can I use clear tubs or buckets for outdoor hydroponics to watch the water level?
Yes, but don’t rely on it unless you use a reservoir cover and opaque components. Even brief sunlight on the nutrient solution can trigger algae, so use dark, light-proof containers and keep any exposed solution surfaces under lids or covers.
What happens if the power goes out outdoors, and how long is it safe?
It depends on your system design. In DWC and media beds, you can often pause the feed/pump for a short window if roots stay wet, but in NFT the thin film can dry quickly. If you do not have power backup, choose DWC or media beds, or add a backup pump plus an alarm so you know within minutes.
Are there any outdoor material or hardware issues that can ruin nutrient stability?
Use pH-safe, food-grade tubing and reservoirs, and avoid materials that leach or degrade in sun. Also, rinse new tubing before use and check for kinks after windy days, since small flow restrictions can cause local EC and pH “pockets.”
Can you grow hydroponics outside without adding nutrients?
Yes. In most outdoor setups, you still need nutrient supplementation because plants consume more than plain water can provide. A related approach is aquaponics, but if you mean “no bottled nutrients at all,” you’ll need an alternative nutrient source and biofilter process to prevent deficiency.
After a storm, should I just add more nutrients to fix what rain diluted?
Best practice is to treat rain as a dilution event. After heavy rain, measure EC and pH first, then adjust using measured nutrient stock to bring EC back to target, and only fine-tune pH after. This avoids the common mistake of “adding more fertilizer” blindly.
If my outdoor plants look nutrient-deficient, what should I check first?
If your first crop is failing, the most common cause is root-zone temperature plus oxygen. Aim to keep the reservoir near the 68 to 72°F range using insulation, shading, and water temperature buffering, and prioritize oxygenation (especially for DWC) rather than only changing nutrient recipes.
How do I protect outdoor hydroponics from wind without constantly redoing the setup?
For wind, anchor everything. Stake plants early, secure buckets and channels so they cannot tip, and add a windbreak. Wind also speeds solution evaporation, which raises EC, so expect to top off more often and monitor EC daily during gusty periods.
Can I check pH and EC less often outdoors if plants look healthy?
Not always. Some crops handle fluctuation, but “not seeing pH problems” can be misleading, because lockout can start within 1 to 2 days. Use daily checks during hot or variable weather, and don’t skip measurements just because plants look green.
Why do my plants show issues even when EC readings look correct?
Don’t assume EC alone guarantees nutrients are balanced. If EC is on target but plants show recurring deficiencies after rain or with certain water sources, suspect nutrient ratio imbalance. In that case, confirm your water source and use a complete balanced nutrient formula rather than only correcting EC.
What’s the fastest way to reduce pests like fungus gnats outdoors?
Fungus gnats and other pests tend to increase when there’s standing organic debris and damp surfaces. Keep the area weed-free, remove algae and slime promptly, and avoid overwatering media so it doesn’t stay soggy.
If algae keeps coming back, what cleanup steps actually stop it in outdoor systems?
Most algae outbreaks are preventable by blocking light to the solution and covered tops. If algae appears, drain the reservoir, scrub all surfaces, disinfect with a diluted hydrogen peroxide approach, then restart using fresh nutrient solution and fully opaque components.
How much spacing should I use outdoors to avoid disease and moisture problems?
Space based on crop type, plus allow airflow. Outdoors, overcrowding increases humidity pockets and spreads disease via splash and contact, which is why wider spacing often improves outcomes even though it reduces total plants per area.