Yes, you can use regular dirt to grow plants, but whether it will actually work depends on what that dirt is made of, where it came from, and how you prepare it. Backyard soil or field dirt is not a guaranteed growing medium the way a bagged potting mix is. It can be perfectly fine for in-ground vegetable beds once you test and amend it, but it will almost certainly fail you in containers without serious modification. The short version: regular dirt can work in the ground with the right prep, it rarely works in pots, and there are a handful of situations where you should skip it entirely and go a different route.
Can You Use Regular Dirt to Grow Plants Successfully?

Marcus Holloway
7 Apr 2026

What "regular dirt" actually means for your plants
When most people say "regular dirt," they mean native soil dug from the yard, field soil from a construction or agricultural site, or cheap bulk soil sold without amendment. This is fundamentally different from bagged potting mix, which is engineered for drainage, aeration, and disease suppression. Native soil is a mix of mineral particles (sand, silt, clay), organic matter, microbes, and whatever else ended up in it over time. That background varies enormously by location, which is why two people can try the same approach and get completely different results.
For in-ground beds, you are working with what is already there, so the goal is to understand it and improve it. For containers and raised beds, you have more flexibility to build a better mix from scratch. Understanding where soil grows best comes down to knowing what that soil contains and how it behaves when wet.
How to judge your soil before you plant anything
Before you touch a shovel, you need a quick read on four things: texture and compaction, drainage, nutrient levels, and pH. None of these tests require a lab, though a soil test is worth the $15 to $25 most extension labs charge.
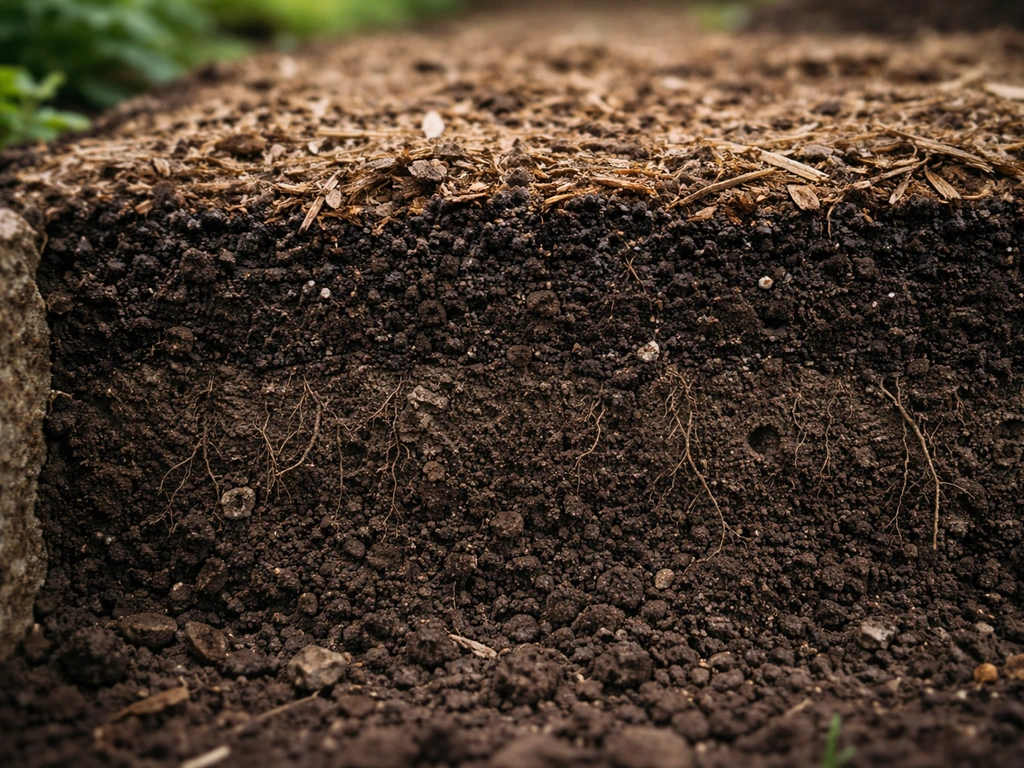
Texture and compaction
Grab a handful of moist soil and squeeze it. Sandy soil crumbles apart immediately. Clay soil holds a dense ribbon when you push it between your fingers and feels slick. Silty soil feels smooth, almost powdery. You want something in between, a loam that holds its shape briefly but breaks apart with light pressure. Heavy clay is the most common problem: it compacts, restricts root growth, and holds water so long that roots rot. Soils with a lot of clay have very small pores, which makes them genuinely hard to wet, aerate, and drain. If your soil forms hard, cracked chunks when it dries, you are dealing with clay, and it needs work before vegetables will thrive in it.
Drainage
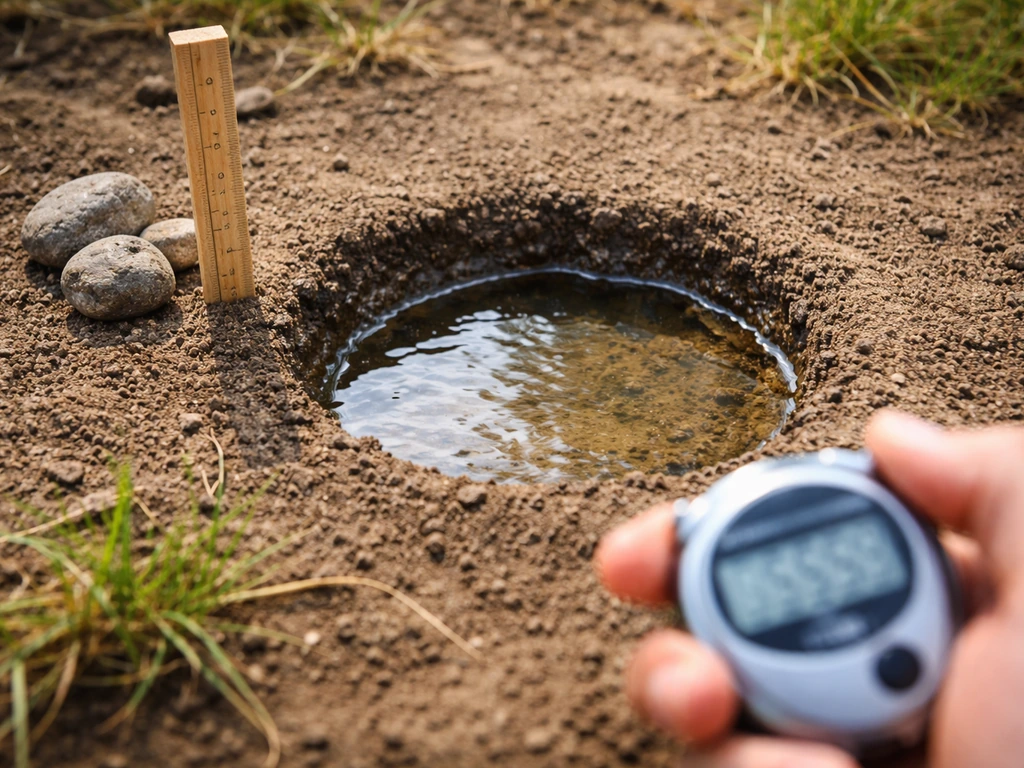
Dig a hole about 12 inches deep, fill it with water, and see how fast it drains. A well-draining soil drops about an inch per hour or faster. Clay and clay-silt soils can drain as slowly as 0.5 inches per hour, while sandy or well-structured soils can drain 20 to 45 inches per hour. If your hole still has standing water after 3 to 4 hours, drainage is a problem that will drown vegetable roots and invite fungal disease. That needs to be fixed before planting, not after.
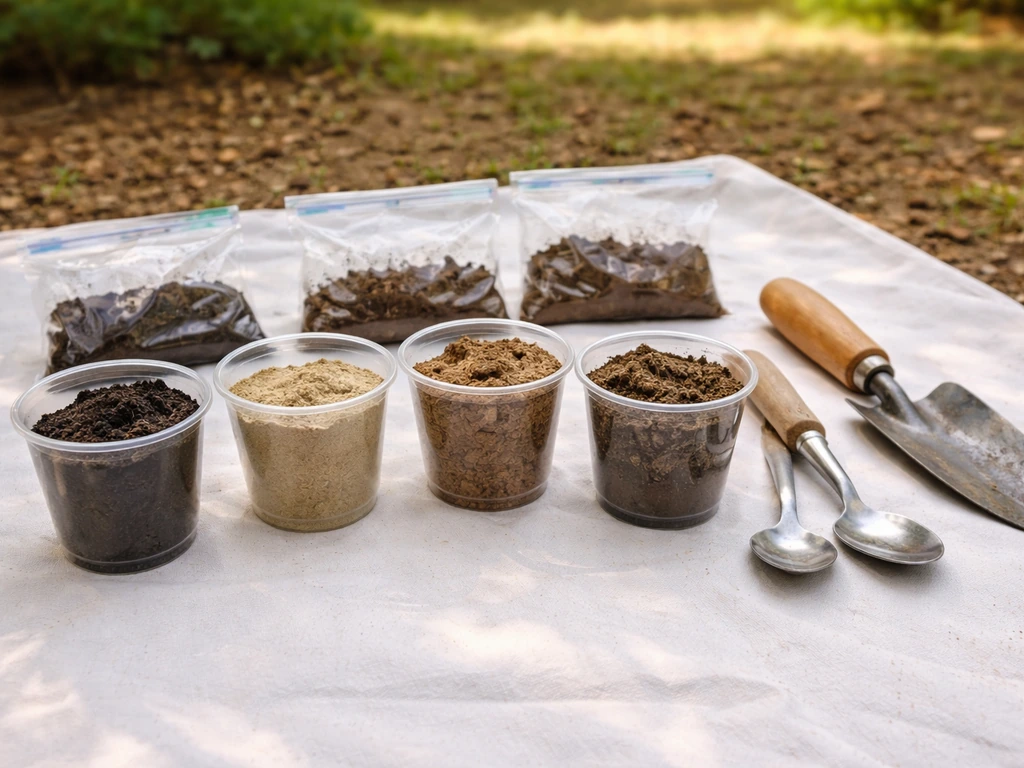
Nutrients and organic matter
A basic soil test from your local extension service will tell you nitrogen, phosphorus, potassium, and organic matter levels. Collect samples from several spots in your proposed bed at a depth of 6 inches, mix them together, and send about a pint to your extension lab. Most extension services recommend sampling at 0 to 6 inches for vegetable and horticultural gardens. This test is the only way to know whether you actually need fertilizer or whether you are about to waste money and over-apply nutrients that can cause their own problems downstream.
pH
pH is the single most important number in that test report. Most vegetables perform best at pH 6.0 to 7.0, with the sweet spot around 6.2 to 6.8. Outside that range, plants cannot take up nutrients efficiently even if the nutrients are present in the soil. If your pH is off, no amount of fertilizer will fully compensate. A soil test will tell you whether to add lime (to raise pH) or sulfur (to lower it), and how much.
How to prepare and amend regular dirt for growing
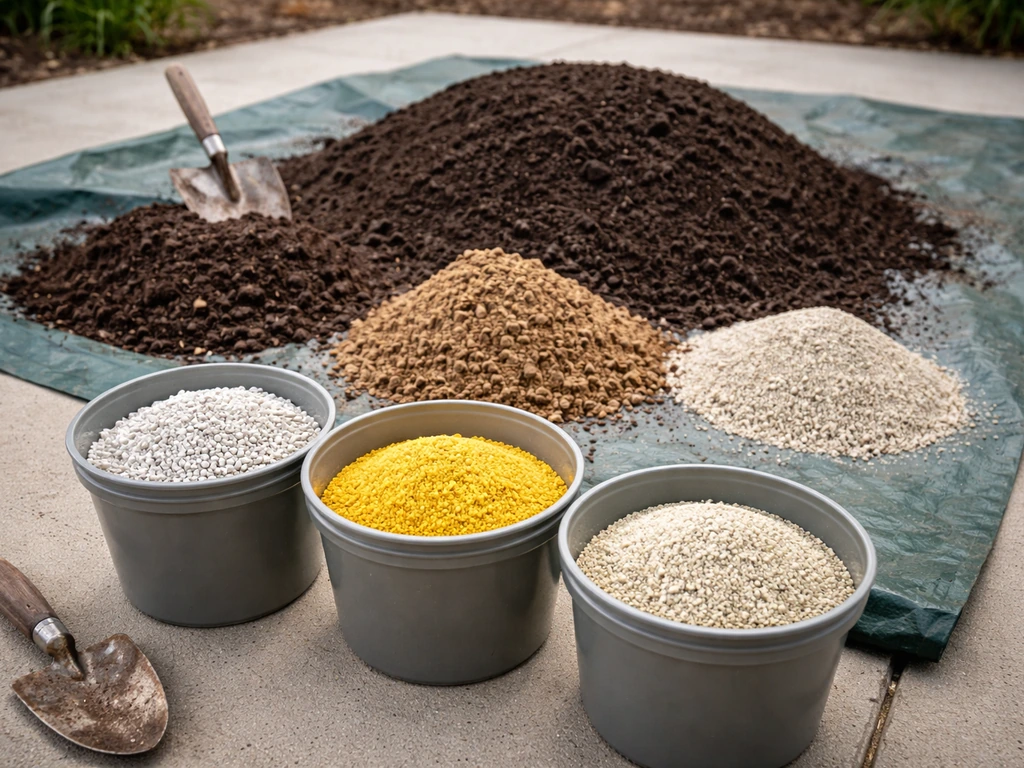
Once you know what you are working with, amending regular dirt is straightforward. The goal is to hit three targets: good drainage and aeration, adequate organic matter, and the right pH.
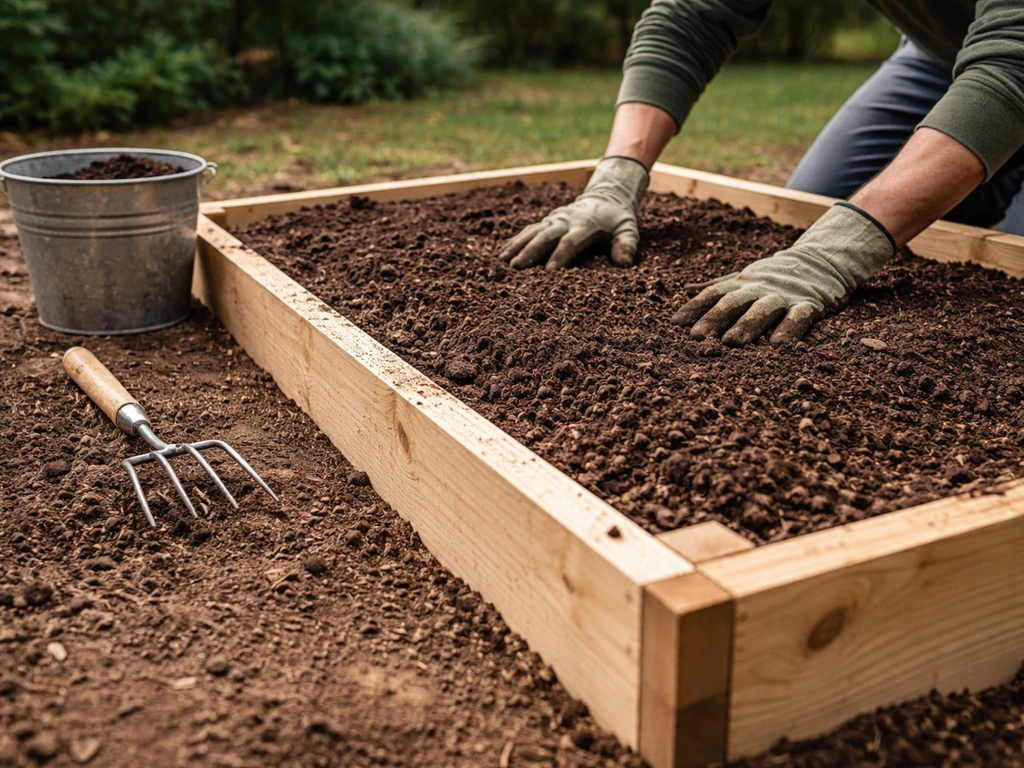
For in-ground beds
- Clear the area and till to at least 8 to 12 inches deep. Deeper tillage helps break up compaction layers.
- Add compost at a rate of about 2 to 3 inches spread across the surface, then till it in. A 70/30 ratio of soil to compost is a practical target for improving structure without overdoing organic matter.
- Adjust pH based on your soil test. Use ground limestone to raise pH and elemental sulfur to lower it, following the lab's recommendations for your specific soil type.
- If your soil test shows low nitrogen and your organic matter is below 3%, add a balanced granular fertilizer at about 0.1 lb of nitrogen per 100 square feet before planting.
- Let the bed rest and settle for a few days before transplanting.
A word on compost quantities: more is not always better. Adding too much compost can create nutrient imbalances, particularly phosphorus build-up over multiple seasons, and excess nitrogen from quick-release fertilizers can leach out of the root zone. Stick to the soil test recommendations. If you are sourcing quality material to amend your beds, products like Grow Max top soil are formulated to make this process easier, though you still need to know your starting point before adding anything.
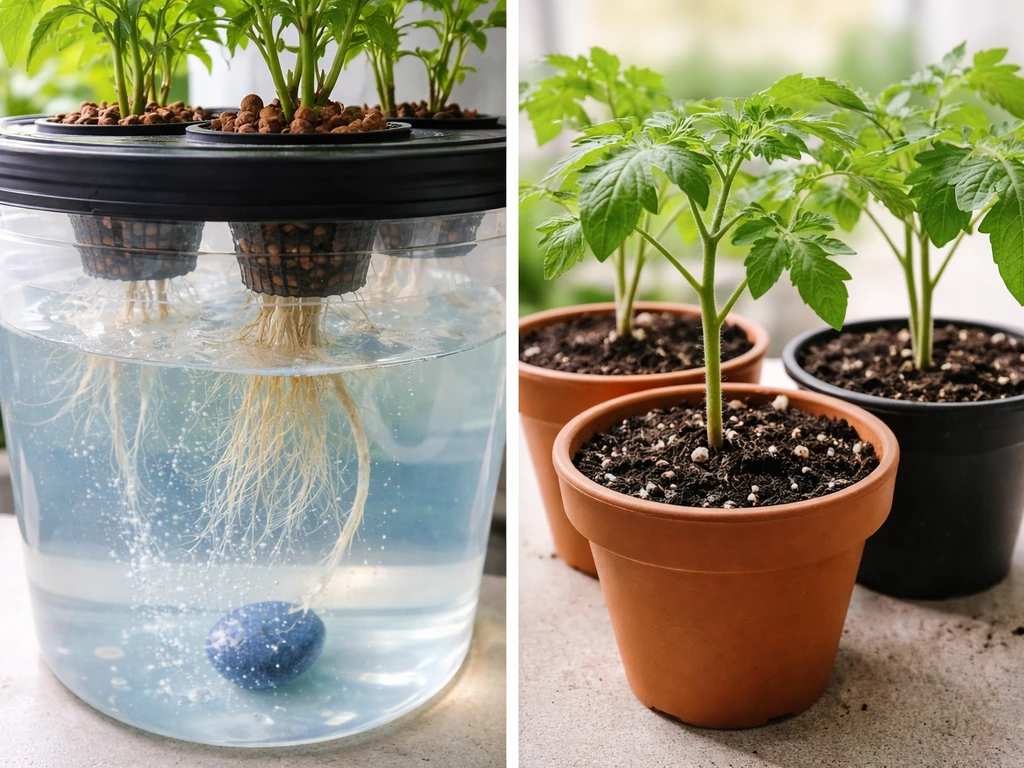
For containers: why regular dirt almost always fails
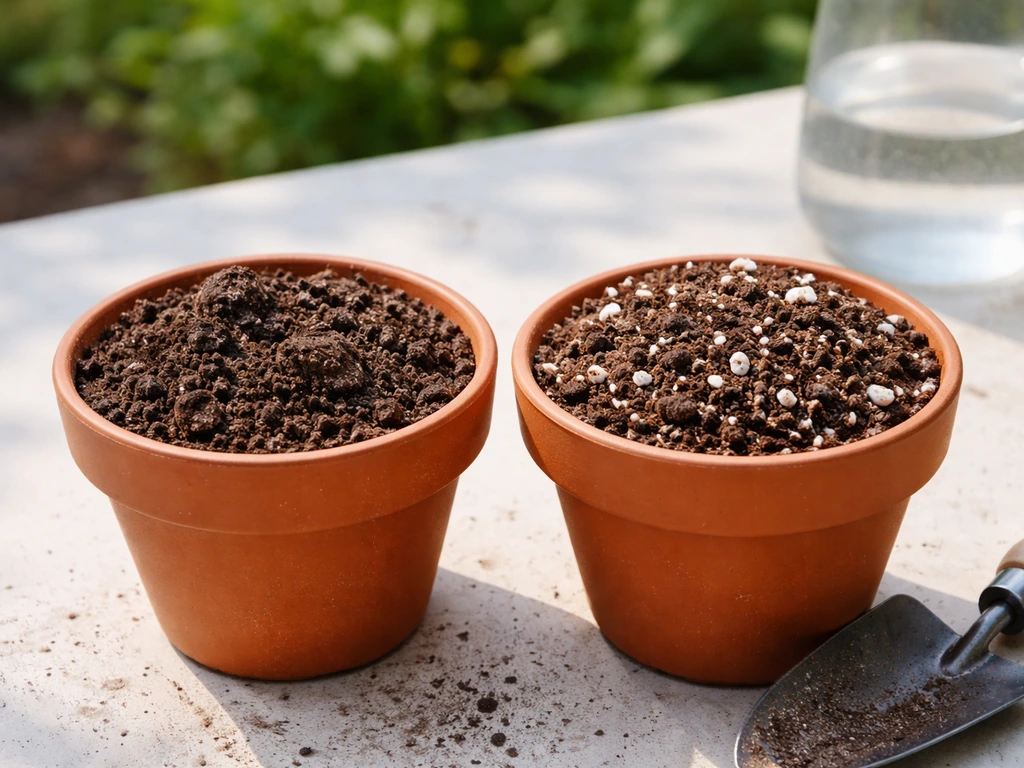
Using field soil in containers is not recommended, and this is not just a preference. When native soil goes into a pot, the drainage physics change completely. Field soil compacts under its own weight, pores close off, drainage slows to a crawl, and roots suffocate. Good container media contain peat moss or ground bark for moisture and nutrient retention, vermiculite to hold water, and perlite to keep air in the mix. Field soil has none of those engineered properties. If you want to push the limits of unconventional media, there is interesting reading on whether alternatives like you can grow plants in Orbeez, but for containers, a quality potting mix is genuinely the right call, not a premium upsell.
Watering, fertilizing, and feeding once your bed is ready
Once your amended in-ground bed is planted, watering and feeding are what keep it productive through the season.
Watering
Most vegetables need about 1 inch of water per week from rain or irrigation. Water deeply and less frequently rather than shallowly every day. Deep watering encourages roots to go down rather than staying near the surface where they are vulnerable to heat and drought. Check soil moisture at 2 to 3 inches deep before watering: if it is still damp, hold off. If it is dry, water thoroughly. Morning watering is better than evening because foliage dries faster, reducing fungal disease pressure.
Pre-plant and early-season fertilizing
If your soil test showed deficiencies, apply a balanced granular fertilizer before planting and work it into the top few inches of soil. Organic amendments like compost and composted manure typically contain only 2% to 4% nitrogen, which is often not enough for heavy-feeding vegetables like corn, tomatoes, or squash. Follow your soil test numbers rather than guessing: over-applying nitrogen early leads to leafy growth at the expense of fruit and can leach into groundwater.
Midseason side-dressing
Most vegetables benefit from a midseason nitrogen boost, especially fast-growing fruiting crops. Side-dressing means scattering a small amount of granular nitrogen fertilizer near the base of plants (not directly on stems) and watering it in. This is typically done 4 to 6 weeks after transplanting, or when you notice plants starting to pale or slow down. Apply fertilizer beside the plants rather than on top, and water immediately after to move nutrients into the root zone. This approach is more effective than a single large pre-plant application for season-long production.
When regular dirt is a bad idea, full stop
There are real situations where no amount of amendment makes regular dirt safe or practical to grow in. Knowing these situations upfront saves you from a wasted season or a food safety problem. The US EPA also lists TSCA Section 403 hazard standards for lead in bare soil, including 400 ppm for children’s play areas and 1200 ppm for bare soil in the rest of the yard blank" rel="noopener noreferrer">Hazard Standards for Lead in Paint, Dust and Soil.
- Lead and heavy metal contamination: The EPA recommends avoiding vegetable growing in soil with lead levels above 400 ppm. Urban gardens near older homes, high-traffic roads, or industrial sites are at real risk. If lead is above 1,200 ppm, the site is not recommended for vegetable gardening at all. Testing costs vary but a basic lead/arsenic/cadmium panel is available through most university extension labs. If contamination is a concern, the answer is raised beds or containers filled with clean, imported growing media, not amendments.
- Persistent poor drainage: If your percolation test shows water still pooling after several hours and your soil is deeply compacted clay, amending the top layer will not fix the underlying drainage problem. Vegetables sitting in waterlogged soil will develop root rot regardless of how good your fertilizer program is.
- Chemical contamination: Soil near old industrial sites, treated wood structures (especially pre-2004 lumber treated with arsenic-based preservatives), or areas that received heavy herbicide or pesticide application may carry residues that harm plants or accumulate in food crops.
- Pet waste and sewage areas: Soils regularly exposed to pet waste can harbor pathogens that pose food safety risks in edible gardens.
- Reusing old container soil: Potting soil from a previous season can carry disease organisms from prior crops. This is true even for commercial potting mixes, not just garden dirt. Never reuse container soil from a diseased plant.
If any of these apply, don't try to work around it. The risk is real, and there are better options that don't require you to gamble on contaminated ground.
Upgrade paths when regular dirt isn't cutting it
Raised beds
Raised beds are the most practical upgrade for poor native soil. Building up just 6 inches above existing grade significantly improves drainage on its own. For most vegetables, a minimum depth of 8 inches is workable for shallow-rooted crops like lettuce, beans, and cucumbers, but 12 inches is better for root vegetables and fruiting crops, and Rutgers NJAES recommends a minimum 12 inches of imported topsoil for a proper root zone. Fill raised beds with a blended mix, targeting roughly 70% quality topsoil and 30% compost for structure and organic matter. Organic matter content should run about 25% to 50% by volume. Avoid buying topsoil that smells foul, feels chalky or overly sticky, or has obviously poor texture.
If you are building raised beds, using a quality bagged topsoil as a base takes a lot of the guesswork out of the process. Earth Grow top soil is one option worth looking at if you are sourcing material for a raised bed fill, particularly when you need a consistent starting product to blend with compost.
Compost and soil mix upgrades
For borderline in-ground soil, a targeted amendment program, compost plus a pH adjustment, often transforms a frustrating bed into a productive one within a single season. The key is to test first, then amend to a specific target rather than adding compost because it seems like a good idea. If you are curious about what mulch products can add to your soil health program alongside amendments, understanding what Earth Grow mulch is and how it fits into a bed management plan is useful context.
Soil-less and alternative growing media
If container growing is your goal and you want to stay soil-based, the right answer is a quality soilless potting mix, not modified garden dirt. Commercial potting mixes are lighter, drain better, come free of weed seeds and pathogens, and hold moisture and nutrients more consistently. There are also more experimental options for container and indoor growing: if you have ever wondered whether you can grow plants in eco earth, that kind of coco-coir based medium is actually a solid lightweight alternative that addresses most of the problems field soil creates in pots.
Hydroponics: when soil is the wrong tool entirely
If your site has contamination issues, you are growing indoors year-round, or you want maximum control over nutrients and growth rate, hydroponics removes soil from the equation entirely. Home hydroponic systems can produce vegetables year-round and use significantly less water than conventional soil gardening. The tradeoff is setup cost and a steeper learning curve, but for indoor growing or contaminated sites it is often the most practical long-term solution. A side-by-side look at a hydro vs soil grow comparison is worth reading if you are weighing whether to invest in a hydro setup or stick with amended ground beds.
Regular dirt vs. your other options: quick comparison
| Growing Medium | Best Use Case | Main Strengths | Main Weaknesses | Recommended For |
|---|---|---|---|---|
| Native/Regular Dirt (amended) | In-ground beds | Free, sustainable, supports large plantings | Variable quality, requires testing and amendment, contamination risk | Home growers with decent native soil and space to test/amend |
| Quality Topsoil + Compost Blend | Raised beds | Consistent texture, controllable organic matter, good drainage | Costs money, needs to be sourced carefully | Growers with poor native soil or contamination concerns |
| Commercial Potting Mix | Containers and pots | Lightweight, well-drained, disease-free, consistent | Expensive at scale, needs regular fertilizing, breaks down over time | Container and patio growers |
| Soilless / Coco Coir Mix | Containers, indoor growing | Lightweight, renewable, great drainage and aeration | Requires supplemental nutrients, less forgiving of watering errors | Indoor growers and container gardeners wanting a peat alternative |
| Hydroponics | Indoor, contaminated sites, year-round growing | Maximum control, water-efficient, no soil contamination risk | Higher setup cost, learning curve, ongoing monitoring | Indoor year-round growers, contaminated site workarounds |
Your next steps, starting today
Here is what to actually do right now, depending on where you are starting from. If you have a potential in-ground bed, do the squeeze test and the drainage percolation test today, both take under 30 minutes. Order a soil test from your local extension service if you haven't done one, and collect your 6-inch samples while you wait for the kit. If you are in an urban area or near older structures, include a heavy metals panel.
When the results come back, you will have a specific amendment plan rather than guessing. If you are planning containers, buy a quality potting mix and skip the field soil entirely. If your native soil is problematic or contaminated, price out a raised bed frame and a bulk topsoil delivery. The cost is usually less than a wasted season of trying to grow in unsuitable ground.
Regular dirt can absolutely grow great vegetables when you know what is in it and fix what needs fixing. The people who fail with it are usually the ones who skip the testing step. Thirty minutes of simple tests and a soil report will tell you more than a year of trial and error.
FAQ
Can I use dirt from my yard for vegetables in containers?
Yes, but only if you treat it as native soil and not as a ready-made potting medium. Use it for in-ground beds after you test and amend (texture, drainage, pH, and nutrients). In containers, even “good” yard dirt usually compacts and drains poorly, which is why container success typically requires a quality potting mix or a coco-coir style medium.
What happens if I mix yard soil with potting mix in a pot?
Mixing “a little” potting mix with “a little” field soil can still fail because the soil’s particle texture and compaction dominate the drainage behavior once the mix settles. If you want to blend, test first and aim for enough potting-mix volume that the blend stays light, drains quickly, and does not stay saturated for hours after watering. If you cannot reliably achieve that, skip the blend and use potting mix alone.
How do I know when amendments won’t fix my in-ground soil?
Don’t rely on appearance alone. If the squeeze test shows ribboning clay, or your percolation test leaves standing water after 3 to 4 hours, assume you have a drainage problem that amendments might not fully fix in that season. In that case, consider raised beds or at least sub-surface drainage improvements before planting, because drowned roots are hard to reverse mid-season.
How quickly will lime or sulfur fix soil pH?
If your pH is low, applying lime is the usual fix, but it is not instant. Lime works best when mixed into the top several inches and given time to react, so plan to amend well before heavy feeding crops. If your soil test recommends sulfur, it also needs time, so avoid expecting immediate results after one application.
Where should I add compost or fertilizer, and should I mix it into the soil?
Prefer broad, shallow pre-plant incorporation of amendments, then avoid constantly disturbing the soil once plants are established. For midseason feeding, side-dress granular fertilizer and water it in right away, do not sprinkle it on top and leave it. That reduces nutrient loss and helps prevent fertilizer burn.
Can I skip soil testing if I’m only growing lettuce or herbs?
If you are growing leafy greens, you may tolerate more nitrogen than fruiting crops, but you still should avoid guessing. Use your soil test to set the pre-plant and midseason amounts, and watch color and growth rate. Pale plants may need nitrogen, but slow growth can also be a drainage or pH issue, so don’t automatically increase fertilizer if the soil tests are off.
What if my soil gets waterlogged after rain?
Yes, but many “regular soil” problems show up after re-wetting, especially in clay or compacted areas. If your area floods, stays waterlogged, or has heavy runoff, prioritize raised beds with clean blended fill or install drainage solutions first, then test the new root-zone mix. Otherwise you can end up with oxygen-poor conditions even after you amend.
Is it okay to add extra compost “just in case”?
A basic compost guideline is not “more is better.” Compost can raise phosphorus over time, and it can also mask other issues by making soil feel richer while pH or drainage still limits uptake. Use the soil test report to decide whether to add compost at all and how much, then re-test in future seasons if you keep building the bed.
My plants look unhealthy, should I just add more fertilizer?
Check the nutrient and pH results first. If nutrients are adequate but plants look weak, drainage and root health are often the culprit. A common mistake is chasing symptoms with more fertilizer when the real problem is compacted soil, poor drainage, or off-target pH that prevents nutrient uptake.
If my yard soil might be contaminated, can raised beds solve it?
In raised beds you have more control, but you still need to consider safety if the original ground is contaminated. If contamination is a concern, use a clean imported blended fill for the bed interior (and avoid mixing contaminated soil into it). If you suspect heavy metals, the safest approach is raised beds with clean fill rather than trying to amend contaminated ground indefinitely.