Most autoflowers grown indoors take 8 to 10 weeks from seed to harvest, with some faster strains finishing in as little as 70 days and slower or higher-yielding varieties pushing out to 14 weeks. That 8–10 week window is the practical sweet spot you should plan around. Seedfinder lists Royal Critical Auto with a flowering time of about 8, 10 weeks and indicates roughly 9, 10 weeks from seed to harvest blank" rel="noopener noreferrer">about 8–10 weeks. Outdoors, the timeline is broadly similar in calendar length, but environmental swings mean you have less control over that window.
How Long Do Autoflowers Take to Grow Indoors? Seed-to-Harvest Timeline

Marcus Holloway
12 May 2026
Typical Indoor Autoflower Timeline: Seed to Harvest
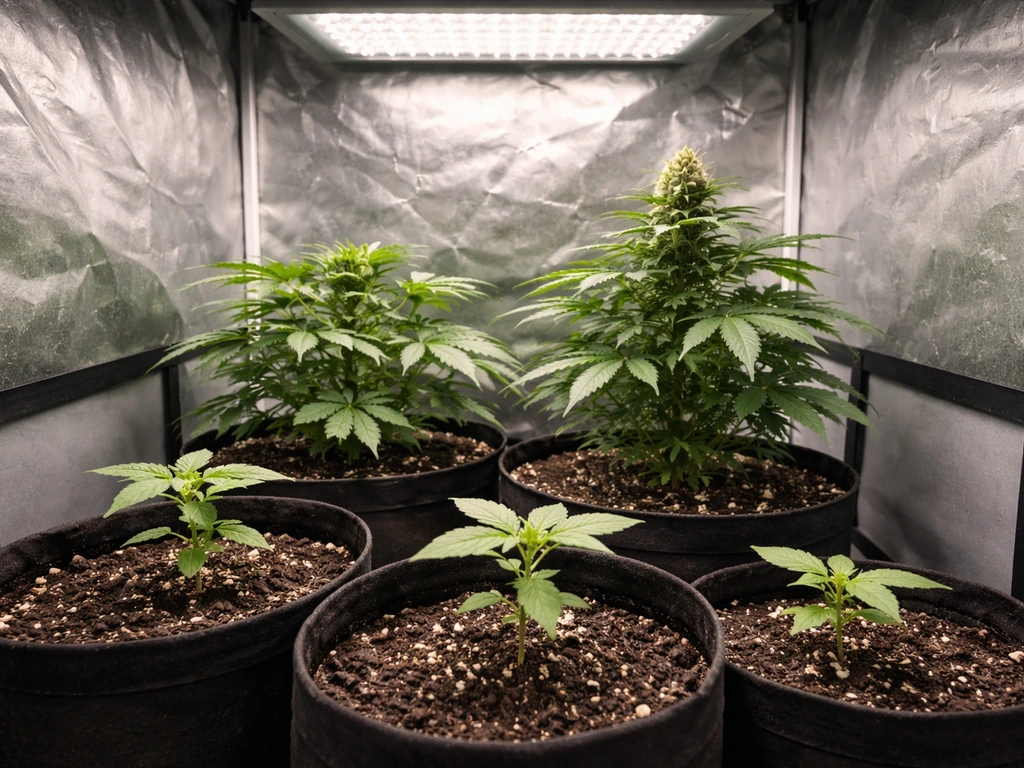
Indoors, you control every variable, which is exactly why autos thrive in that environment. From the moment a seed cracks to the day you chop, a typical autoflower moves through roughly four stages: germination and seedling, vegetative, flowering, and final ripening. Each stage has a predictable length, and knowing those lengths is what lets you forecast your harvest date with real confidence.
| Stage | Typical Duration | What's Happening |
|---|---|---|
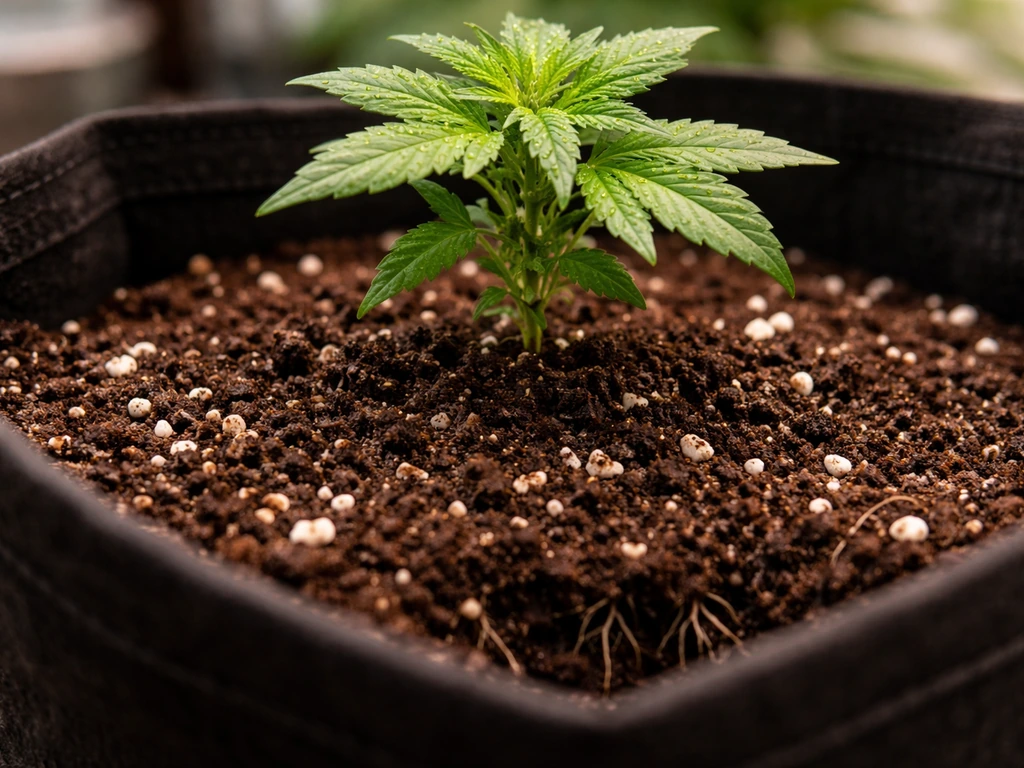
| Germination & Seedling | Days 1–14 | Tap root emerges, first true leaves appear, plant establishes |
| Vegetative | Days 15–28 | Rapid stem and leaf growth, root zone expanding, minimal stretch |
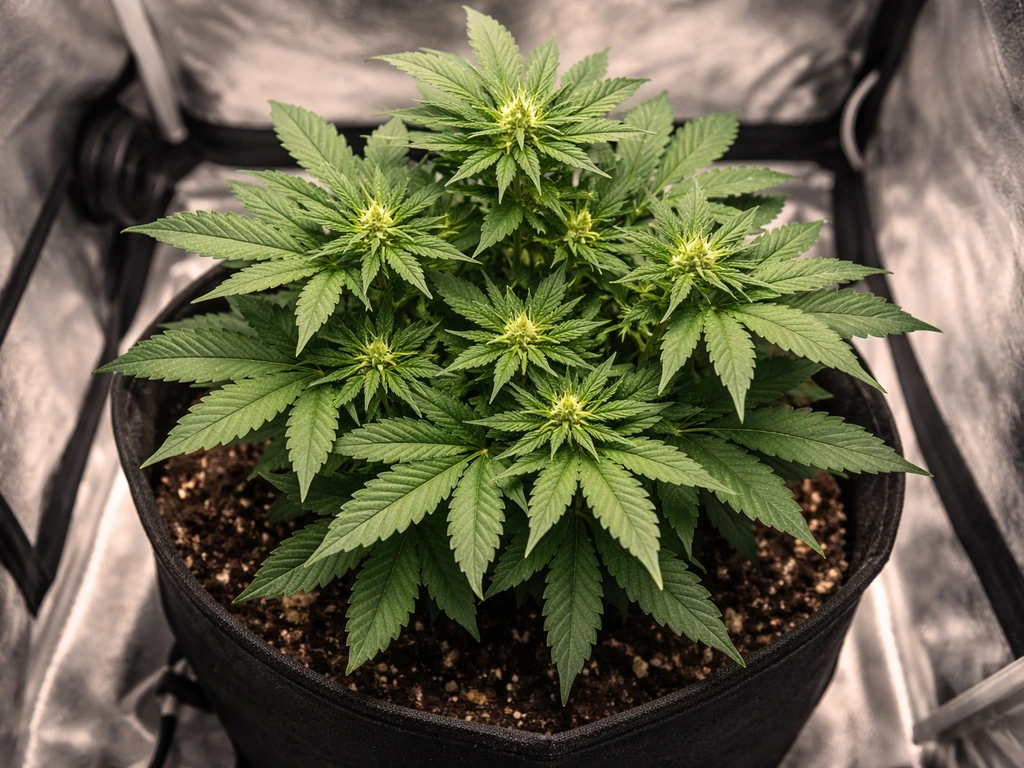
| Pre-flower & Early Flower | Days 29–49 | First pistils visible around day 21–28, bud sites forming rapidly |
| Mid to Late Flower | Days 50–63 | Buds stacking and swelling, trichome production accelerating |
| Final Ripening | Days 64–77 | Pistils browning, trichomes clouding and ambering, plant nearing harvest |
Most quality auto strains will hit that final ripening window somewhere between day 63 and day 77. Royal Queen Seeds documents strains like Royal Critical Auto finishing at 70–80 days after germination, which lines up with what I've consistently seen in practice. Royal Queen Seeds lists Royal Critical Auto finishing at about 70, 80 days after germination, matching the timeline range discussed here Royal Critical Auto finishing at 70–80 days after germination. Budget an extra week of buffer for any first-time grow or if you're running a new strain you haven't dialed in yet.
Outdoor Autoflower Timeline: What Changes vs Indoors
Outdoors, the calendar length stays roughly the same, still 8 to 10 weeks in most cases, but the experience is messier. You're not controlling light intensity, temperature swings, humidity, or pest pressure. A cold night in week three can stall vegetative growth by several days. A heat wave during flowering can stress the plant and compress bud development. The result is a timeline that's harder to predict with precision.
The biggest outdoor advantage is that blank" rel="noopener noreferrer">autos don't care about your day length the way photoperiod strains do. You can start a seed outdoors in late spring or even midsummer and still get a harvest before cold weather sets in. In a stable, warm climate you might finish in the same 70-day window as indoors. In a climate with cool nights or inconsistent sun, plan for 10 to 12 weeks minimum. Indoors you simply have far tighter control over that outcome.
What Speeds Up or Slows Down Your Grow
The timeline isn't fixed, it's a range, and where your plant lands in that range depends almost entirely on the decisions you make in the first few weeks. These are the variables that actually matter.
Light Intensity and Schedule
Autos don't need a light-cycle change to flower, but they still respond to light intensity. More photons equals more photosynthesis, which means faster development and heavier yields. Most experienced indoor growers run 18 hours of light and 6 hours of dark from seed to harvest. Some push to 20/4 or even 24/0, but I've found 18/6 hits the right balance between growth rate and giving the plant a rest period. Weak or distant lights, especially underpowered blurple LEDs more than 18 inches from canopy, will visibly slow the vegetative stage and thin out bud development.
Temperature and Humidity
Keep your grow space between 72°F and 82°F (22°C to 28°C) during lights-on. Temperatures below 65°F slow metabolism noticeably, you'll see it in sluggish growth and darker, clawing leaves. During late flower, dropping temps slightly to around 68°F at lights-off can encourage trichome production and help purple hues develop in strains that carry that trait. Humidity should sit around 60–70% in veg and drop to 40–50% in flower to prevent mold in dense bud sites.
Nutrients and Feeding Strategy
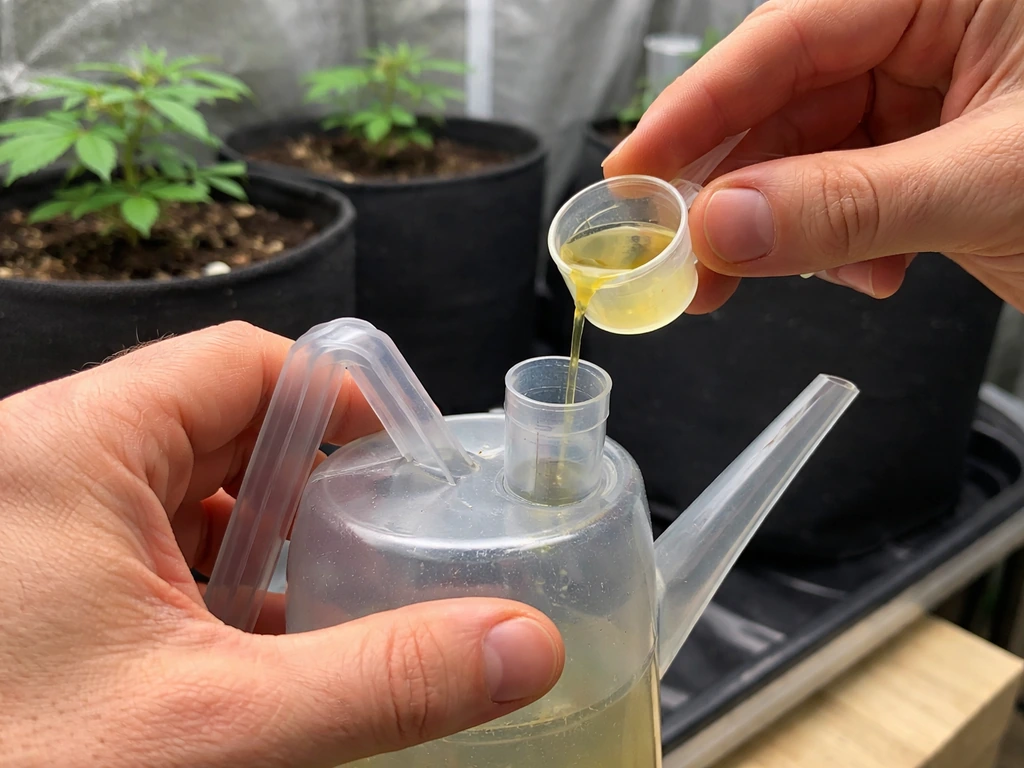
Autos are lighter feeders than photoperiod strains, especially early on. Overfeeding in the seedling stage is one of the most common ways growers accidentally stall their plants. Start nutrients conservatively, around half the label rate, during weeks two and three, then ramp up as the plant enters pre-flower. During mid-flower, push phosphorus and potassium while tapering nitrogen. Flush or reduce feeding in the final one to two weeks before harvest.
Growing Medium: Soil vs Hydroponics
The medium you choose has a real impact on speed. Hydroponic setups, particularly DWC (deep water culture), can shave a week or more off your total timeline compared to soil, because roots have direct access to oxygenated, nutrient-rich water at all times. I've seen autos finish in 63–65 days in a well-dialed DWC setup versus 75–80 days in a quality amended soil. That said, soil is far more forgiving for beginners, and a good organic living soil will buffer pH and nutrient issues that would crash a hydro run. Getting the best soil to grow autoflowers means choosing a medium that stays evenly moist, drains well, and supports steady root growth throughout the full cycle soil is far more forgiving. If you're choosing a medium for your first auto grow, soil is the safer starting point. Hydroponics rewards experience and discipline.
Pot Size
Most autoflowers do well in 3- to 5-gallon containers. Going smaller restricts root development and stalls growth right around the transition to flower, the worst possible time. Going larger than 5 gallons rarely adds meaningful yield for indoor autos and just wastes soil and space. Fabric pots are worth using because they air-prune roots and prevent the waterlogging that soil growers often run into.
Transplanting and Handling Stress
Autos are notoriously sensitive to transplant stress. Because their flower trigger is time-based rather than light-cycle-based, any stress or recovery period eats directly into their vegetative window, and you can't get that time back. The standard advice is to germinate directly in the final container. If you're starting in a seedling plug or small peat pot, transplant as early as possible and handle roots with extreme care.
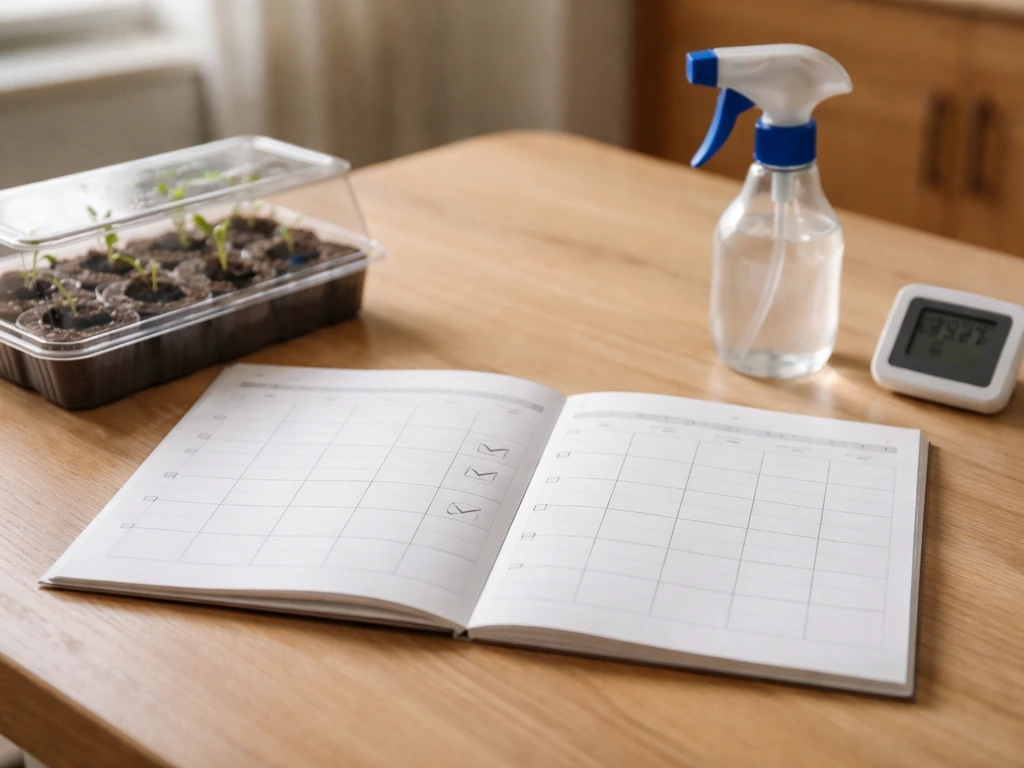
Week-by-Week Indoor Grow Calendar
| Week | Stage | What to Do |
|---|---|---|
| Week 1 | Germination / Seedling | Germinate in final container, light at 18/6, no nutrients yet, keep humidity at 70%, temps at 75°F |
| Week 2 | Seedling | First true leaves developing, introduce very light nutrients (25–50% dose), water sparingly around stem |
| Week 3 | Late Seedling / Early Veg | Growth accelerating, increase feeding to 50% dose, watch for first pre-flower signs toward end of week |
| Week 4 | Veg / Pre-flower | Pistils often visible by day 21–28, ramp nutrients toward full dose, LST (low stress training) if desired |
| Week 5 | Early Flower | Bud sites stacking, switch nutrient focus toward P and K, maintain humidity at 50% |
| Week 6 | Mid Flower | Buds swelling visibly, strong odor developing, keep temps stable, watch for cal-mag deficiencies |
| Week 7 | Mid-Late Flower | Trichomes forming, check with loupe, continue P/K feeding, reduce nitrogen |
| Week 8 | Late Flower | Pistils beginning to darken, trichomes going cloudy, start reducing nutrient load |
| Week 9 | Ripening | 70–80% of pistils turning orange/brown, trichomes mostly cloudy with amber appearing, flush if desired |
| Week 10 | Harvest Window | Cut when trichomes read mostly cloudy with 10–30% amber depending on desired effect |
Outdoor Week-by-Week Calendar (Adjusted)
Outdoors, the same stages apply but compress or stretch based on conditions. A rough outdoor calendar for a mid-spring start in a temperate climate looks like this:
| Week | Stage | Outdoor Notes |
|---|---|---|
| Week 1–2 | Germination / Seedling | Start indoors or under cover to protect from cold nights, harden off before moving outside |
| Week 3–4 | Veg / Pre-flower | Move outdoors to full sun, watch for slugs and early pest pressure |
| Week 5–6 | Early to Mid Flower | Natural day length irrelevant for autos — they'll flower regardless, water more frequently in heat |
| Week 7–8 | Mid-Late Flower | Watch for bud mold (botrytis) if humidity spikes, consider light shading during extreme heat |
| Week 9–11 | Late Flower / Ripening | Monitor pistils and trichomes, harvest window often slightly longer outdoors due to temperature swings |
| Week 11–12 | Harvest | Cut in the morning for best terpene preservation, move inside immediately to begin drying |
Is Your Plant on Schedule? Signs to Watch For
The easiest way to know if your autoflower is on track is to check flowering onset. A healthy indoor auto should show its first white pistils somewhere between day 21 and day 28. If you're at day 35 and still seeing no signs of flowering, something is off, usually stress, root restriction, or a light issue. That's not a disaster, but it's a flag that your harvest date just moved back.
Signs the Plant Is On Track
- Pistils (white hairs) visible at the bud sites by day 21–28
- New growth every 24–48 hours during veg — you can almost see it happen
- Leaves a healthy medium green with no spotting, curling, or yellowing (outside of end-of-life senescence)
- Buds stacking and swelling noticeably from week 5 onward
- Strong resin smell developing by week 6
- Trichomes visible with the naked eye by week 7
Signs the Plant Is Stalling or in Trouble
- No pistils by day 35 — check light schedule, root space, and stress history
- Leaves yellowing or showing spots in early veg — likely a pH issue blocking nutrient uptake or overfeeding
- Clawing, dark-green leaves — nitrogen toxicity from overfeeding early on
- Slow, stunted growth in week 2 or 3 — often root restriction, underwatering, or cold temps
- Buds not swelling after week 6 — check light intensity and P/K feeding
- Bud development stopping entirely — could be heat stress, root issues, or severe deficiency
What to Do When You Spot a Problem
First, don't panic and don't overcorrect. The most common mistake I see is growers stacking multiple interventions at once, flushing, adjusting pH, changing nutrients, and repositioning lights all in the same 24 hours. Pick the most likely cause and fix one variable. Check pH first because it's the root cause of more problems than people realize. Soil should run 6.0–7.0, hydro should run 5.5–6.5. If pH is off, correct it and wait 48 hours before touching anything else. If the plant was heat-stressed, drop temps and increase airflow. Give the plant 72 hours to respond before diagnosing further.
Harvest Timing: When to Cut and How Long the Final Push Takes
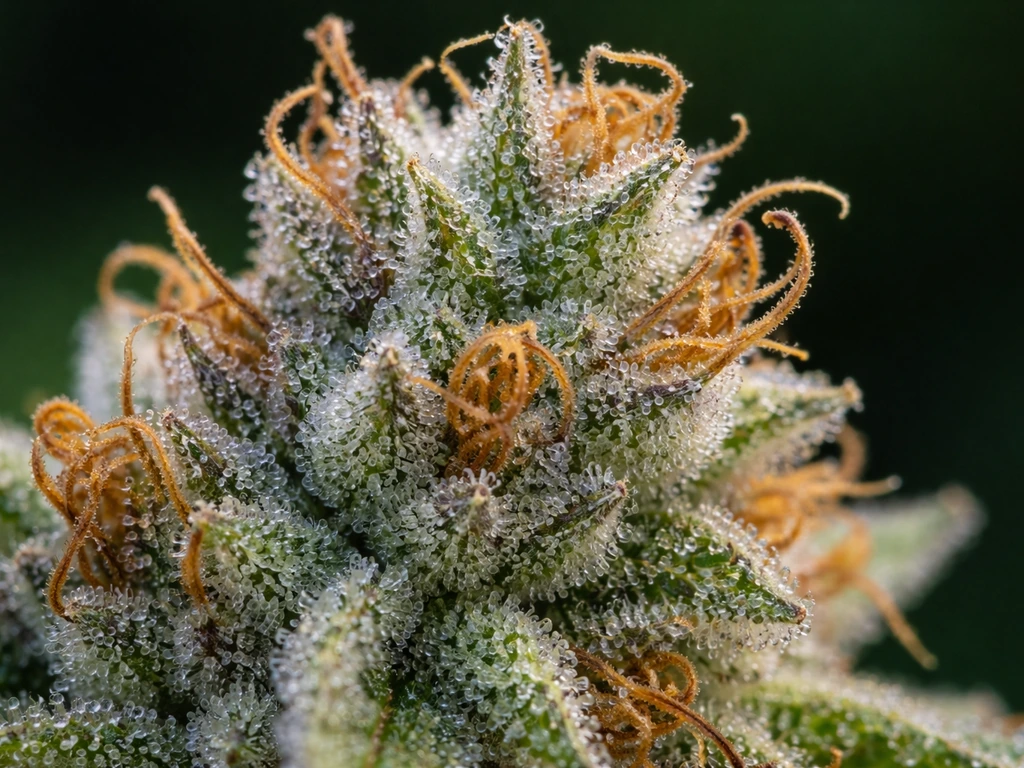
The finish line isn't a specific day, it's a trichome and pistil reading. The two most reliable harvest indicators work together: pistil color and trichome opacity. When 70 to 80 percent of your pistils have turned orange or brown and your trichomes are mostly cloudy with 10 to 30 percent amber under a jeweler's loupe or pocket microscope, you're in the optimal harvest window. Clear trichomes mean the plant isn't done yet. All-amber trichomes mean you've gone past peak potency.
The final ripening push, from first pistil browning to actual harvest, typically runs one to two weeks. Don't rush it. That last week is when bud density and trichome coverage make real jumps. If you're seeing the pistils just starting to turn at day 63, you're probably looking at a harvest around day 70–77. If you want a more sedative, body-heavy effect, let amber trichomes climb to 20–30 percent before cutting. For a more clear-headed, energetic effect, harvest when trichomes are mostly cloudy with minimal amber.
A $15–20 pocket microscope (60–100x magnification) is non-negotiable for making this call accurately. Guessing by calendar day alone will cost you yield or potency more often than not. Invest in the tool, check trichomes under consistent lighting, and let the plant tell you when it's ready rather than the calendar.
The Flush and Final Days
Whether you flush before harvest is a debate in the growing community, but many growers running synthetic nutrients choose to run plain water for the final 7–14 days. If you're in an organic living soil, flushing isn't necessary and can actually disrupt the microbial activity that's still feeding the plant. Either way, the final days before harvest should involve no heavy feeding. Watch for natural lower-leaf yellowing and senescence, that's normal at this stage and actually a sign the plant is redirecting energy into bud production. Once you've confirmed trichome readiness, cut in the morning before lights-on for best terpene preservation, and move directly into your drying space.
Choosing the Right Strain Matters for Your Timeline
Not all autoflowers are equal on the clock. Compact, ruderalis-dominant strains can genuinely finish in 63–70 days. Strains bred for yield or flavor complexity, especially those with significant sativa genetics, often push 10 to 12 weeks. Before you start any grow, read the breeder's published seed-to-harvest figure and treat it as a minimum, not a guarantee. If you're optimizing for speed on your first grow, look for strains specifically labeled as fast or express autoflowers. If you're more interested in flavor or yield potential, you might find the right strain by exploring dedicated resources on the best autoflowers to grow and which autos are easiest for new growers, strain selection genuinely changes the growing experience from week one through harvest. If you want the easiest option, start with a fast, newcomer-friendly autoflower strain and follow the same seed-to-harvest care plan what is the easiest autoflower to grow. If you want the best auto flower to grow, focus on fast, beginner-friendly strains that match your preferred grow setup and timeline. If you want a reliable starting point, a best autoflower grow book can help you line up your strain choice with the timelines, feeding, and harvest cues that matter most.
The bottom line: plan for 8 to 10 weeks, watch your first pistils appear around day 21–28, start checking trichomes seriously from week 7 onward, and harvest when the plant reads ready rather than when the calendar says so. Do those four things and you'll consistently hit clean harvests without leaving yield on the table.
FAQ
Do autoflowers take the same time indoors even if I keep them under 24 hours of light?
They usually do not, 24/0 can speed some early growth but it can also increase stress and heat. Many growers still see the same 8 to 10 week seed-to-harvest range, because flowering is time-based and your limiting factors become temperature, nutrition stability, and light intensity. If you experiment with longer schedules, keep temps stable and monitor for clawing or slowed leaf growth, then adjust rather than adding multiple changes at once.
How long do autoflowers take indoors if the seedling stage is slow or stunted?
A slow first 1 to 2 weeks typically pushes the whole harvest back, since autos still run on their internal clock. The fastest recovery strategy is usually stabilizing environment first (72 to 82°F lights-on, correct humidity, and gentle feeding around half-strength), then waiting about 72 hours before diagnosing. If you see no flowering signs by about day 35, treat it as a red flag for root restriction, light distance, or pH/nutrient imbalance.
Can I force an autoflower to finish earlier if I want a faster harvest?
You cannot reliably “force” earlier harvests, because the flowering trigger is not controlled by switching light cycles. The best you can do is choose a genuinely fast strain, start with direct germination in the final container, and avoid stress. Practices like flushing early, heavy pruning, or repeated light changes usually do the opposite and can extend the timeline.
What is the most useful day to track indoors besides total weeks?
Track flowering onset and trichome maturity. First pistils usually appear around day 21 to 28, and that milestone is a better predictor than calendar day alone. Then switch to serious trichome checks starting in week 7 (around day 49 to 56), because harvest window timing is defined by trichome opacity and pistil color, not just when you planted.
Do harvest indicators change if I have mostly cloudy trichomes but many pistils are still white?
Yes, use both signals, but interpret them together. If trichomes are mostly cloudy with some amber yet pistils remain mostly white, the buds may still be filling in your last 3 to 10 days. In that situation, give it extra time rather than cutting immediately, because clear trichomes typically indicate it is not ready even if some pistils have not fully browned.
Is flushing mandatory before harvesting an indoor autoflower?
No, it is not mandatory. If you are using an organic living soil, heavy flushing is often unnecessary and can disrupt microbes that help feed the plant. With synthetic nutrients, some growers use plain water in the last 7 to 14 days, but the key is avoiding overcorrecting or starving too long. Watch runoff and leaf condition, and stop heavy feeding regardless of whether you flush.
How long will drying and curing affect the “total time” from seed to usable product?
Seed-to-harvest is usually 8 to 10 weeks, but the final usable experience often adds extra time. Drying commonly takes about 7 to 14 days depending on humidity and airflow, and curing is frequently several weeks for best flavor and smoothness. If you are planning a schedule, separate harvest day from consumption readiness.
Do different container sizes change how long autoflowers take indoors?
They can, especially if you go too small. Containers smaller than about 3 gallons often restrict roots right around pre-flower to early flowering, which can delay flowering onset and push your harvest later. Larger than about 5 gallons usually adds little speed or yield for indoor autos, and it mostly affects how much space and soil you manage.
What should I do if my autoflower is past day 35 and has not started showing pistils?
Treat it as an optimization problem, not a lost cause. Stabilize the basics first, check pH (soil 6.0 to 7.0, hydro 5.5 to 6.5), confirm light is not too weak or too far from the canopy, and ensure temps and airflow are in range. Then wait roughly 48 to 72 hours to judge response, because stacking multiple interventions within a day often worsens timing.