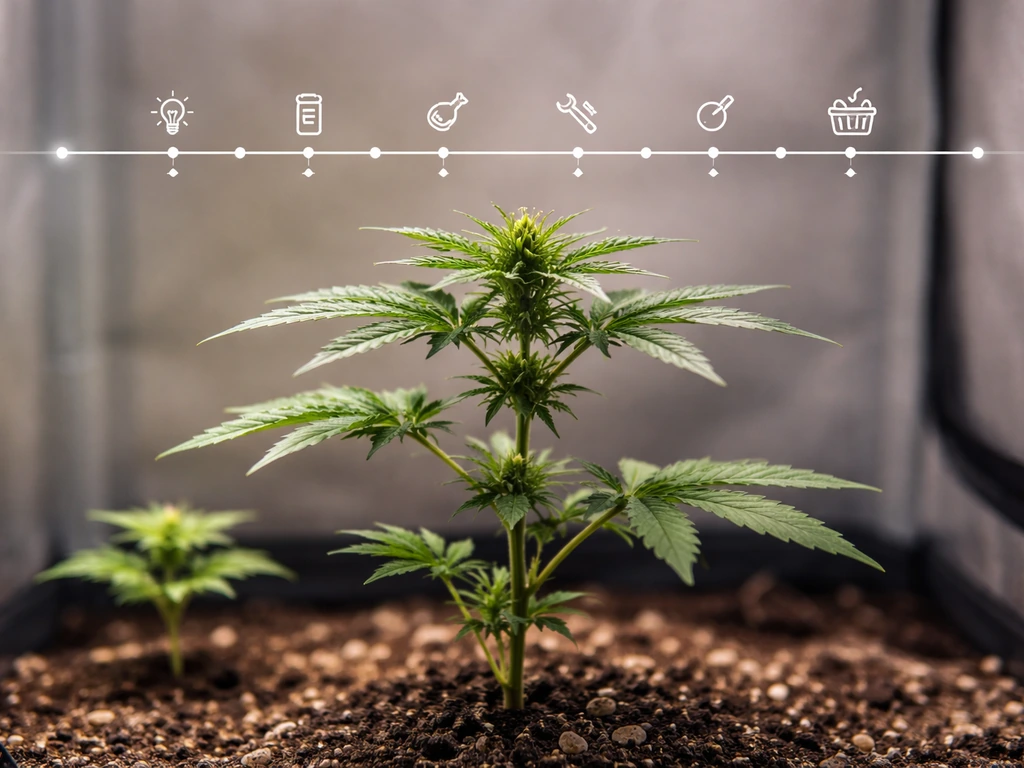
Growing autoflowers organically is one of the most rewarding ways to cultivate plants at home. The workflow is straightforward: build a living organic soil, drop your seed, keep the environment consistent, feed lightly with amendments and compost teas, and let the plant do the rest. Autoflowers finish on their own schedule (typically 8–10 weeks from seed to harvest regardless of light cycle), which means you get less room to course-correct but also a faster payoff. This guide walks you through every stage, from choosing your strain to drying your final harvest, with specific numbers and decisions at each step.
How to Grow Autoflowers Organically: Step-by-Step Guide

Marcus Holloway
15 Apr 2026
Choosing your strain and planning the grow (indoor vs outdoor)
The first real decision is whether you're growing indoors or outdoors, because it shapes everything from container size to your feeding timeline. Autoflowers are genuinely flexible here. Most compact varieties stay between 0.9 and 1.1 m tall indoors, which makes them ideal for tents, closets, and small spare rooms. Outdoors, they fit naturally into balconies, greenhouses, and garden corners, and you can start multiple rounds per season because they don't depend on photoperiod changes.
When picking a strain, look at the seed-to-harvest window and realistic yield expectations. A fast variety like Royal Automatic finishes in about 8–9 weeks. Something like GMO Autoflower from Barney's Farm runs 70–75 days but can push up to 600 g/m² indoors and 200–300 g per plant outdoors under good organic conditions. Royal Kush Automatic is another compact 8–9 week option that handles both indoor and outdoor environments well.
For beginners, shorter cycle strains are forgiving because there are fewer weeks where something can go wrong. If you want to push yield and quality and you're confident in your organic soil build, a 70-75 day variety gives you more canopy development time and bigger harvests. And if you're interested in growing a specific popular variety, something like autoflower Gorilla Glue is a great example of a high-resin strain that responds well to organic soil methods.
For indoor planning: decide on your container size and light before you germinate (more on both below). For outdoor planning: in the northern hemisphere, you can start autoflowers from April onward and run multiple cycles through September. Each plant finishes independently of the sun's schedule, so you can stagger starts every 3–4 weeks for a rolling harvest. If you want a detailed autoflower week-by-week grow calendar, that's worth bookmarking alongside this guide for stage-by-stage checkpoints.
Building your organic medium: soil mix, containers, and drainage
The organic medium is the foundation of this whole approach. A well-built living soil feeds the plant through microbial activity rather than bottle nutrients, which means you're doing more work upfront and less work during the grow. The goal is a mix that's rich, airy, and well-draining so autoflower roots stay oxygenated and never sit in waterlogged conditions.
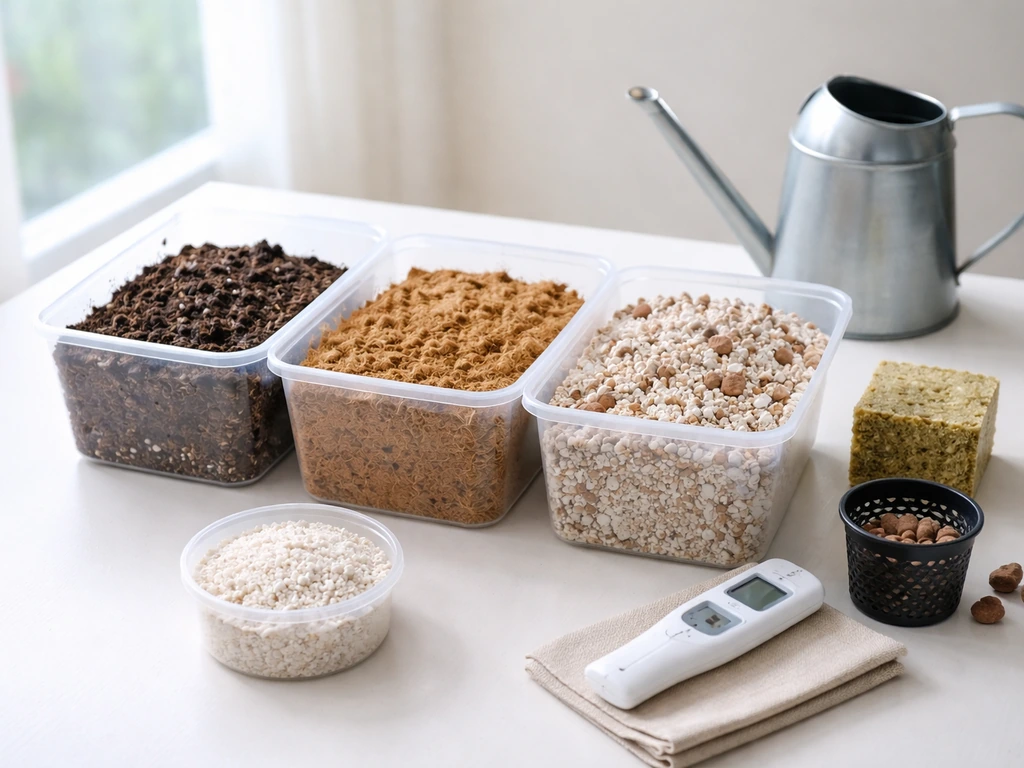
A solid beginner-friendly base recipe looks like this: 60% high-quality compost or worm castings-amended base soil, 20% perlite for drainage and aeration, 10% coco coir for water retention, and 10% biochar or additional perlite depending on your water habits. If you want to build a more advanced no-till or super soil style mix, add dry organic amendments like kelp meal, neem cake, fish bone meal, and rock dust at rates of roughly 1–2 tablespoons per gallon of mix. These slow-release amendments break down over 4–6 weeks and feed the plant progressively through its life cycle. A good-quality potting mix can actually carry autoflowers through their entire 8–10 week life with minimal added nutrients, which is one of the reasons organic soil and autos pair so naturally.
For containers, autoflowers do best when transplanted as little as possible (ideally never). Start in your final container to avoid transplant stress, which can cost you days of recovery time on a plant that only has 60–75 days total. A 3-gallon pot works for most compact varieties indoors. A 5-gallon pot gives larger varieties room to express their full root system and is the better choice for outdoor grows or if you're targeting maximum yield.
Use fabric pots if you can: they air-prune roots naturally, prevent overwatering, and improve microbial diversity in the rhizosphere. If you're still deciding on medium type or weighing alternatives, a full breakdown of the best grow medium for autoflowers covers the trade-offs in more depth.
Drainage is non-negotiable. Every container needs holes at the bottom, and you should always water to about 10–15% runoff so salts and waste don't build up. In organic soil, pH still matters even though living soil buffers better than synthetic setups. Aim for a soil pH of 6.2–6.8. Check it occasionally (especially if you're adding compost teas or liquid amendments) using a basic soil pH meter.
Germination and the first two weeks

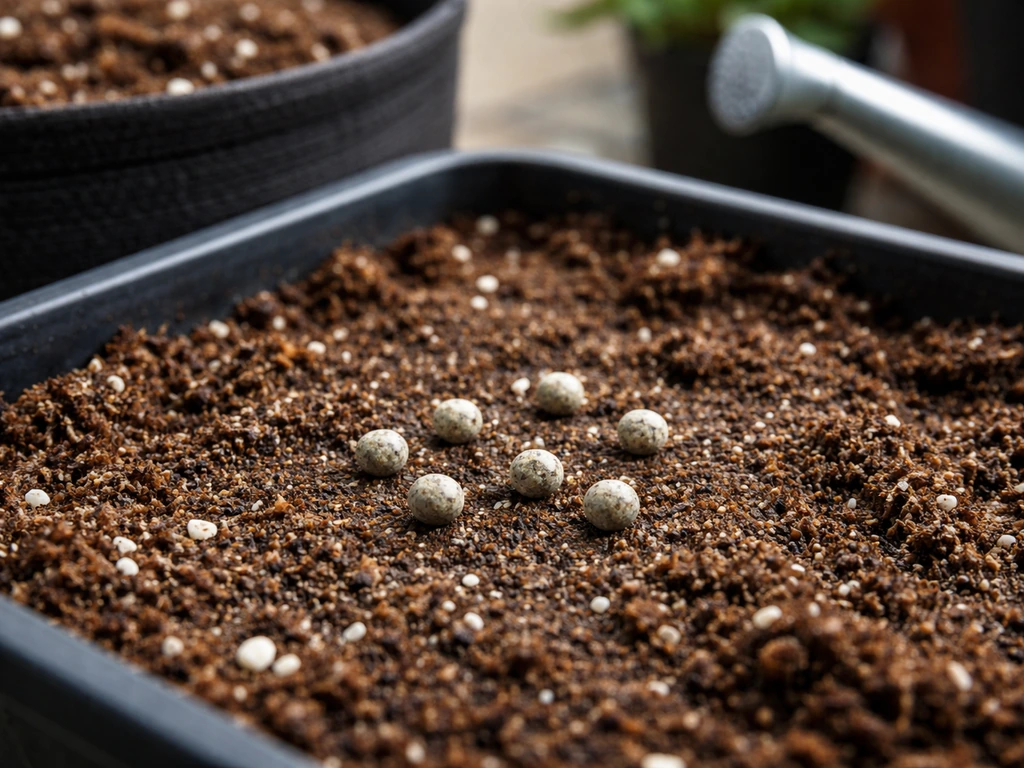
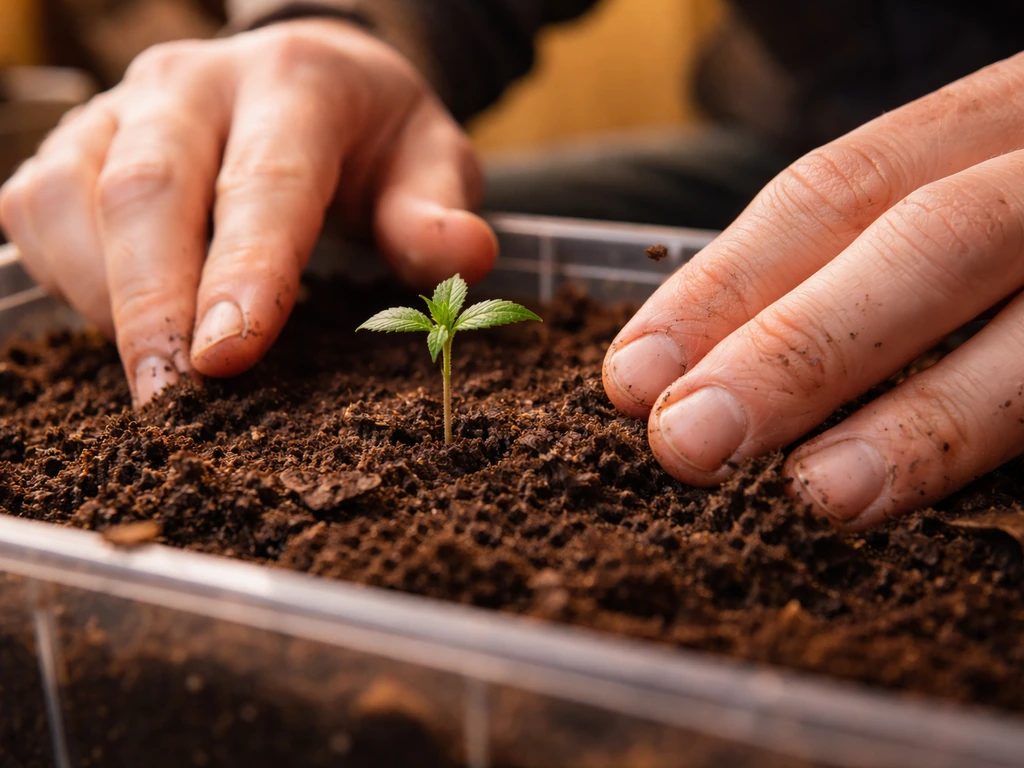
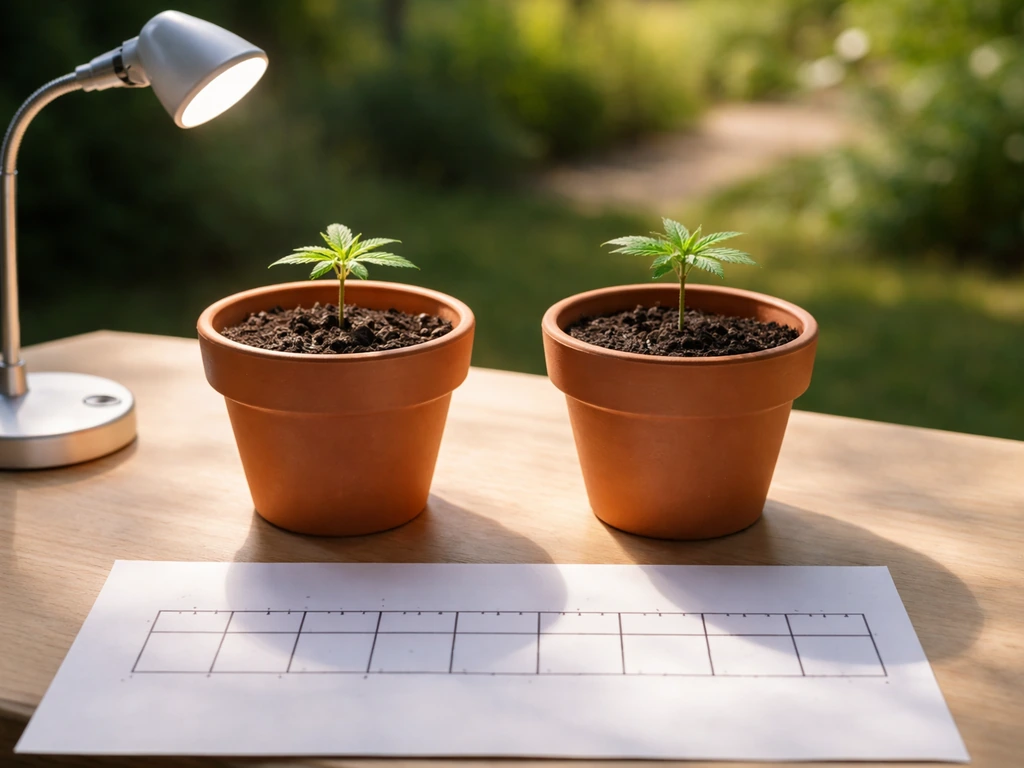
Autoflower germination is simple but worth getting right because those first days set the pace of the entire grow. The paper towel method works reliably: place your seed between two damp paper towels, seal them in a zip-lock bag or between two plates, and keep them at 70–77°F (21–25°C). A taproot will appear in 24–72 hours for most fresh, quality seeds. Once the taproot is 0.5–1 cm long, place the seed taproot-down about 1 cm deep in your pre-moistened organic soil and cover lightly.
Days 1–3 after planting: keep the medium consistently moist but not wet. Spray the surface gently rather than watering heavily. Germination typically completes in 3–5 days and the seedling breaks the surface. Days 4–7: the cotyledons (seed leaves) open up and the seedling starts photosynthesizing.
Keep humidity at 65–70% and temperature around 72–77°F. At this stage, the root system is tiny, so water in a small circle around the stem rather than flooding the pot. By the end of week 2, the first true leaves appear and the plant is ready to begin ramping up. At this point, a Triple G Automatic grow trial showed the plant reaching about 9.
4 inches by the end of week 3, which gives you a good benchmark for whether your conditions are dialed in.
One important organic seedling tip: don't feed anything in weeks 1–2 if your soil is already amended. Seedlings in a rich organic mix will burn easily because their root systems can't yet handle concentrated nutrients. Trust the soil. If your mix is light (like straight perlite-heavy coco coir), you can introduce a very diluted compost tea or a gentle seaweed extract at around 25% of normal dose starting in week 2.
Lighting, watering, and environment across the full lifecycle
Autoflowers don't need a light schedule change to trigger flowering, which is what makes them so manageable. They'll flower automatically based on age, not light. That said, light intensity and duration still drive photosynthesis and yield. The most practical indoor schedule is 18 hours on and 6 hours off from seed to harvest. Some growers run 20/4 to maximize light input, and a few go 24/0. The 18/6 schedule is the sweet spot for most setups because it balances energy costs, equipment heat, and plant recovery time during the dark period.
For light intensity: seedlings need low intensity (around 200–300 PPFD). Vegetative stage plants want 400–600 PPFD. During flowering, push to 600–900 PPFD if your LED or HID can deliver it. Keep lights at the manufacturer-recommended distance and watch leaf tips for light stress (bleaching or clawing). Outdoors, autoflowers thrive anywhere they get 6+ hours of direct sun, and perform best in full-sun locations with 10–14 hours of light daily during summer months.
Watering in organic soil follows a simple lift-and-feel method. Lift the pot when dry, lift it after watering, and learn the weight difference. Water when the pot feels noticeably lighter and the top inch of soil is dry. Overwatering is the most common beginner mistake and it kills more autoflowers than any nutrient issue. A practical guide number: as plants reach peak vegetative growth, they'll drink around 0.5 liters per day under good conditions. Adjust that number up or down based on pot size, humidity, and temperature. Never water on a fixed schedule regardless of what the plant tells you.
For temperature and humidity, follow these targets by stage: seedling (70–77°F, 65–70% RH), vegetative (70–82°F, 50–60% RH), early flower (68–79°F, 45–55% RH), late flower (64–75°F, 40–50% RH). Lower humidity in late flower reduces mold risk, which is especially important in dense autoflower buds. Indoors, a small oscillating fan improves air circulation, strengthens stems, and discourages mold and fungus gnats at the same time.
Organic feeding: amendments, compost teas, and what to avoid
If you built a properly amended organic soil, your feeding job is mostly about maintenance and supplementation, not heavy dosing. Think of it in three phases: the soil feeds the plant for the first 3–4 weeks, you start supplementing lightly in weeks 4–6 as the plant ramps up into flower, and you shift to bloom-focused amendments and teas in weeks 6–8 before flushing naturally in the final week.
| Stage | Weeks | Organic Feeding Approach |
|---|---|---|
| Seedling | 1–2 | No added nutrients. Amended soil only. Light moisture management. |
| Early veg | 2–4 | Optional diluted compost tea or seaweed extract at 25–50% dose once per week. |
| Late veg / pre-flower | 4–6 | Introduce worm castings top-dress or balanced compost tea 1–2x per week. Fish hydrolysate as a light nitrogen boost if plant looks pale. |
| Early flower | 6–8 | Shift to phosphorus and potassium-focused inputs: kelp meal tea, bat guano (high-P), or a bloom-specific organic liquid at 50% dose. |
| Late flower | 8–harvest | Plain water or light molasses solution (1 tsp/gal) to feed soil microbes. Stop amendments 7–10 days before harvest. |
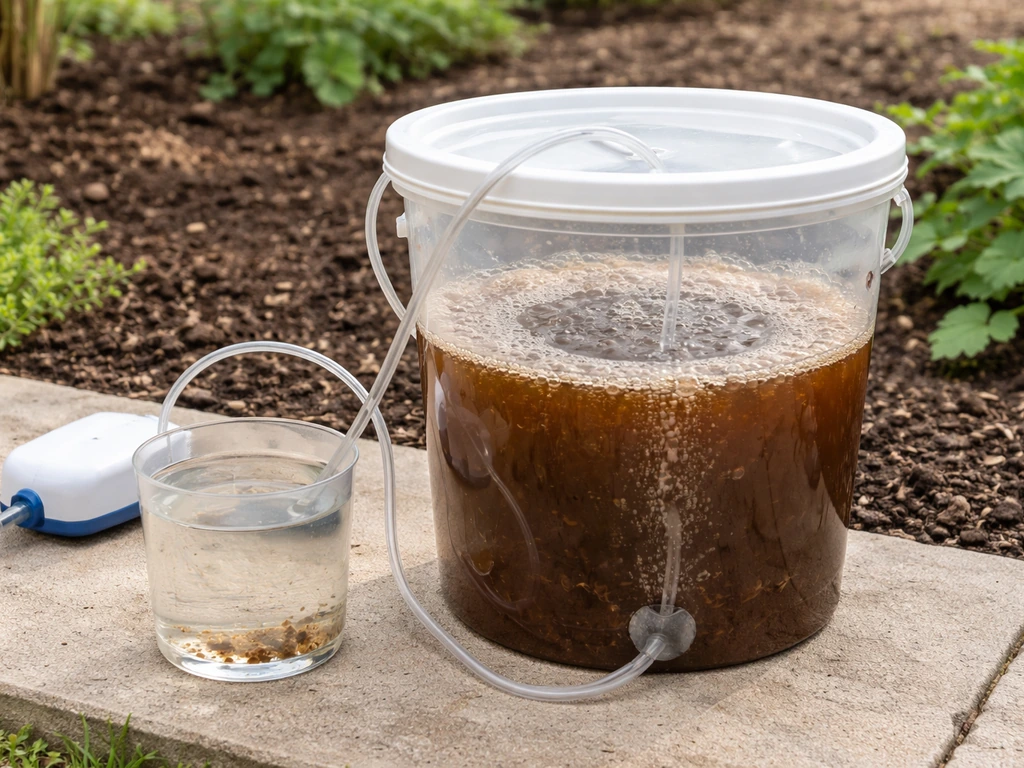
Compost teas are one of the most powerful tools in organic autoflower growing. AACT guidance notes that chloramine or chlorine can harm the microbes you are trying to grow, so [dechlorinate your water and validate that your pump or airstone is providing effective aeration](https://www. iuhoakland. com/COMPOST%20TEA.
pdf) during brewing. A simple actively aerated compost tea (AACT) uses worm castings (1 cup per gallon of water), a small amount of molasses (1 teaspoon per gallon), and an air pump running for 24–36 hours. A simple actively aerated compost tea (AACT) can be brewed longer in cooler temperatures, with typical brew times around 36 to 48 hours [an air pump running for 24–36 hours](https://www. compostcheck.
com/academy/composting/compost-tea-brewing-the-best-for-your-plants). Apply it to the soil immediately after brewing. It inoculates your root zone with beneficial bacteria and fungi that improve nutrient availability and disease resistance. Use it every 1–2 weeks during veg and early flower.
When it comes to pre-mixed organic products, there are some standout options worth knowing. Some growers prefer slow-release granular products for their simplicity. If you're curious about how grow dots work for autoflowers, that's a solid deep-dive into one of the more popular set-and-forget amendment approaches. Alternatively, Dr. Earth products are a widely trusted brand in the organic growing space, and there's a full guide on how to grow autoflowers with Dr. Earth if you want a brand-specific approach to this feeding method.
The most common organic feeding mistakes: over-amending the initial soil mix (which causes nutrient burn in seedlings), applying high-nitrogen inputs during flowering (which delays bud development and reduces quality), and using compost teas on stressed or waterlogged plants (which can worsen anaerobic root conditions). Always observe the plant first. A healthy, dark green plant in week 3 doesn't need extra nitrogen. A pale, slow-growing plant in week 4 might benefit from a fish hydrolysate foliar or soil drench.
Training autoflowers: what actually works (and what to skip)
Autoflowers are more sensitive to training stress than photoperiod plants because they can't take a recovery week mid-veg the way a photoperiod strain can. If you stress them too hard or too late, the plant shifts into flower before it has canopy structure and you lose yield. That said, low-stress training (LST) done early is very effective and genuinely worth doing.
LST means gently bending and tying main branches outward (not snapping or cutting) to open the canopy and expose lower bud sites to light. Start LST in weeks 2–3, when the plant has 4–6 nodes and the stems are still flexible. Use soft plant ties or pipe cleaners, anchor them to the pot rim or stakes, and adjust every 2–3 days as growth accelerates. Done right, LST can meaningfully increase your yield without adding any recovery time to the plant's schedule.
What to avoid: high-stress training (HST) methods like topping, FIMing, and super cropping. These require 5–10 days of recovery time, which an autoflower on a 60–75 day schedule simply can't spare. Some very experienced growers top autoflowers at node 3 or 4 with specific fast-growing strains, but for most growers, the risk-to-reward math doesn't work out. If your priority is maximizing what you get from each plant, there are better ways to grow bigger autoflowers without putting the plant through that kind of stress. Defoliation should also be kept minimal: removing 2–3 fan leaves that are blocking bud sites is fine in early flower, but avoid heavy defoliation that removes more than 20% of leaves at once.
Pest and disease management the organic way
Prevention is genuinely more effective than treatment in organic growing, and it's especially critical with autoflowers because you don't have weeks to battle an infestation while the plant waits. A clean grow environment, good airflow, controlled humidity, and healthy soil biology eliminate most pest and disease pressure before it starts.
Build prevention into your routine from day one. Start with sterile or pasteurized soil to avoid bringing fungus gnat larvae and mites into your grow space. Keep the top inch of soil slightly dry between waterings (fungus gnats only lay eggs in moist topsoil). Use yellow sticky traps as early warning indicators rather than reactive tools. Introduce beneficial insects like predatory mites (Hypoaspis miles) or nematodes (Steinernema feltiae) as a biological control layer if you're growing in a space where pests have been a problem before.
For common organic treatments when problems do appear:
- Spider mites: spray leaves (top and underside) with diluted neem oil (2–3 ml/L) or insecticidal soap. Repeat every 3 days for 2 weeks. Don't apply neem after week 6 of flower.
- Fungus gnats: let the top 2 inches of soil dry out between waterings. Apply a Bacillus thuringiensis israelensis (BTi) soil drench (e.g., Mosquito Bits dissolved in water) to kill larvae. Works fast.
- Powdery mildew: improve airflow immediately. Apply a diluted potassium bicarbonate spray (1 tsp/L water) to affected leaves. Hydrogen peroxide (3%) diluted to 1% in water also works as a contact treatment. Lower humidity to below 50% in the affected area.
- Root rot: almost always caused by overwatering and poor drainage. Fix the watering schedule first. Beneficial microbes like Trichoderma and Bacillus subtilis applied as a soil drench help the root zone recover and resist future infection.
- Aphids and thrips: introduce predatory insects (Amblyseius cucumeris for thrips, Aphidius ervi for aphids) or apply neem cake top-dress as a systemic deterrent.
One rule worth following in organic grows: avoid spraying any oil-based or systemic product during flowering. Neem oil residue on flowering buds affects taste and quality, and it doesn't fully break down before harvest. Stick to water-based biological sprays (BTi, potassium bicarbonate, insecticidal soap made from potassium salts) if you absolutely need to spray during flower.
Troubleshooting common autoflower problems
Even with a dialed-in organic setup, issues come up. Here's how to diagnose and fix the most common ones quickly, because in a 60–75 day grow, every day of stress costs you in final yield and quality.
| Symptom | Most Likely Cause | Organic Fix |
|---|---|---|
| Yellowing lower leaves in veg | Nitrogen deficiency or soil pH too high | Top-dress worm castings or apply fish hydrolysate drench. Check and adjust soil pH to 6.2–6.8. |
| Dark green, clawing leaves | Nitrogen toxicity from over-amended soil | Flush with plain water at correct pH. Skip feeding for 1–2 weeks. |
| Slow growth or stunted plant | Overwatering or rootbound conditions | Let the medium dry out more between waterings. Check if roots are circling pot bottom. |
| Purple stems in seedling | Phosphorus lockout or cold temps | Warm the root zone above 65°F. If temps are fine, assess soil pH. |
| Brown leaf tips and edges in flower | Potassium deficiency or salt buildup | Water to heavy runoff with plain water. Apply kelp meal tea or banana peel extract. |
| Pale yellowing in flower | Natural senescence OR magnesium deficiency | If mid-flower, apply diluted Epsom salt drench (1 tsp/gal). If late flower, this is normal. |
| No flowering by week 5 | Light leak during dark period (indoor) OR poor genetics | Check tent for light leaks at night. Verify seed source. Autoflowers should begin showing preflowers by weeks 3–4. |
In organic soil, pH-related lockouts are less common than in synthetic grows because living soil buffers naturally. But they still happen, especially if you've been adding too many liquid amendments or if your water source is very hard or soft. A basic soil pH pen used every 2–3 weeks gives you peace of mind and early warning of any drift. Target 6.2–6.8 consistently. If you're also curious about hydroponic alternatives, understanding growing autoflowers in DWC helps clarify why organic soil is actually more forgiving for most home growers when it comes to pH management.
Harvest timing, drying, and curing
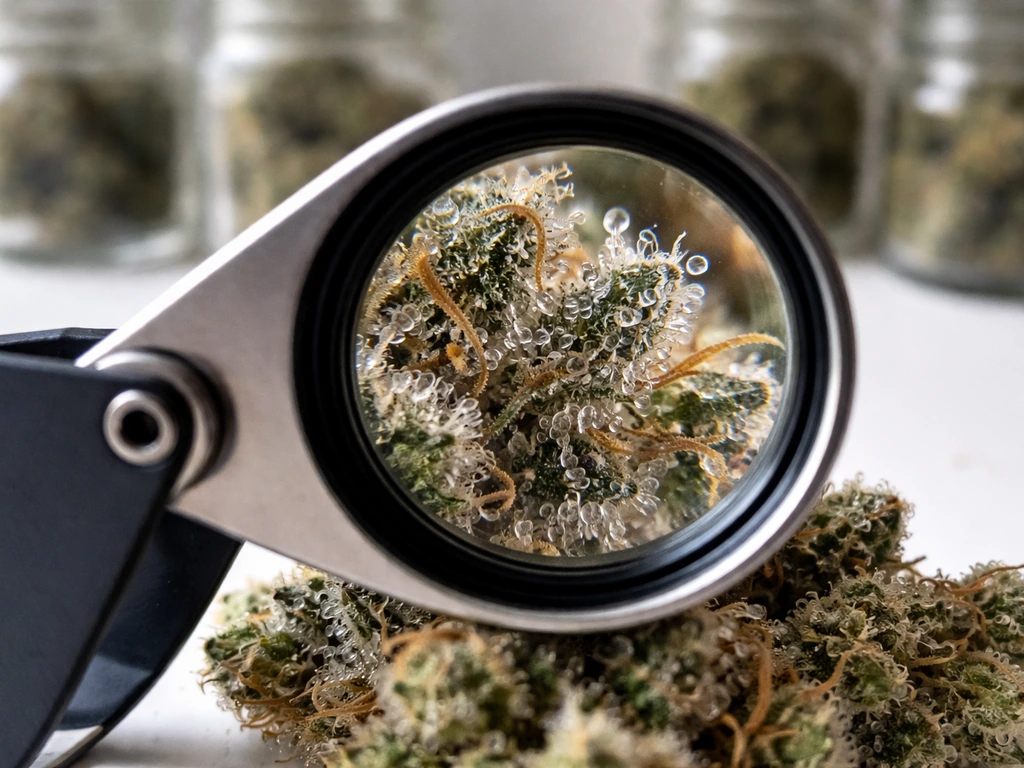
Harvest timing is one of the most impactful decisions in the entire grow, and it's based on trichome observation, not calendar date. Buy a jeweler's loupe (30–60x) or a digital microscope and look at the trichomes on the buds (not the sugar leaves). Clear trichomes mean the plant is not ready. Cloudy (milky white) trichomes mean peak potency is approaching. Amber trichomes indicate THC is degrading into CBN, which produces a more sedative effect. For most growers, the target is mostly cloudy with 10–20% amber, which hits the balance of potency and body effect.
In the final 7–10 days before harvest, stop all amendments and water with plain, pH-adjusted water only. This gives the soil microbes time to process any remaining inputs and the plant to use up stored nutrients, which improves the taste and smoothness of the final smoke. This organic flush happens naturally in a living soil without the aggressive salt-flushing that synthetic grows sometimes require.
After harvest, drying conditions matter as much as anything in the grow. Hang branches upside down or use drying racks in a dark room at 60–65°F and 55–60% relative humidity. Aim for a slow dry of 10–14 days. Drying too fast (below 50% RH or above 70°F) locks in harshness and destroys terpenes. Once the small stems snap rather than bend, the buds are ready to cure. Place them in airtight glass jars at 60–65% RH (use Boveda 62 packs to dial it in). Burp the jars once or twice daily for the first 2 weeks, then once every few days for weeks 3–4. A minimum 4-week cure transforms the flavor dramatically compared to freshly dried bud.
What to do right now to start your organic autoflower grow
If you're starting from zero today, here's the practical sequence. First, decide on indoor or outdoor and pick your strain based on your space and the seed-to-harvest window you're comfortable with. Order seeds from a reputable breeder. Second, build or source your organic soil mix and prepare your containers.
Get fabric pots in the right size for your chosen variety (3-gallon for compact strains, 5-gallon for larger ones). Third, set up your light (indoor) or identify your full-sun outdoor spot. Configure your 18/6 timer before you germinate. Fourth, germinate your seed using the paper towel method and plant it into your final container.
Start low-intensity light immediately after emergence. Fifth, follow the stage-based feeding schedule above, resist the urge to over-feed or over-water, and do weekly visual checks against the troubleshooting table.
The biggest thing most growers get wrong on their first organic autoflower run is doing too much. The organic soil is doing work you can't see. The microbes are feeding your plant. Your job is to keep the environment right, water correctly, and resist intervening unless the plant is clearly telling you something is wrong. Once you harvest your first successful organic autoflower, replicating it is mostly about building a better soil and dialing your environment tighter each time. The process compounds quickly.
FAQ
Can I reuse my organic soil for another autoflower run?
Yes, but only if it stayed relatively clean and you’re comfortable rebuilding biology and fertility. After harvest, remove visible roots and debris, then “top-dress” with fresh compost or worm castings plus a small amount of dry amendments (for example, kelp meal and rock dust). Let the soil rest for a few weeks if possible, and don’t expect the same vigor from reused soil without rebalancing aeration, especially if it compacted or held water too long.
How do I know if my compost tea is too strong or harming the plants?
If leaves look scorched, tips curl downward, or the plant suddenly stalls after applying tea, it may be too concentrated or the tea may have been brewed improperly. Use only properly aerated AACT, apply to soil immediately after brewing (don’t store it), and start at lower frequency (every 2 weeks) until you see stable growth. Also avoid brewing with high sugar amounts or skipping aeration, which can shift the biology you’re trying to add.
Is it safe to start germination in the same potting medium I’m using for my final grow?
It can be, and it reduces transplant stress. However, make sure the seed-start medium is pre-moistened evenly and stays consistently moist during the first days. If your main mix drains fast (lots of perlite or coco), seedlings can dry out quickly, so keep a light misting pattern rather than heavy watering. For most setups, a final-container sowing works best when the mix is balanced for both moisture retention and oxygen.
What if my autoflower starts flowering early, like during week 2 or 3?
Early flowering is usually triggered by stress or root disruption. Common causes are letting the seedling dry out, overwatering and oxygen starvation, heavy early feeding in an already-amended mix, or aggressive training done too late. Since autos can’t pause for recovery, the fix is mostly environmental: dial in moisture, stop supplements immediately, and use gentle, consistent light and temps while the plant rebuilds. If you used a very rich soil, consider reducing amendments for future seeds rather than “saving” this run with extra nutrients.
Do I need to measure soil pH if I’m only using compost teas and dry amendments?
It’s still useful, especially if your water quality is extreme or you use frequent liquid inputs. Living soil buffers, but hard or very soft water can shift the available nutrient profile over time. A simple check every 2 to 3 weeks helps you catch drift before you see symptoms like slow growth, yellowing, or stalled flowering. If you want to simplify, adjust water pH first, then minimize frequent liquid feeding.
How can I tell the difference between nutrient issues and watering issues in organic soil?
Organic “nutrient problems” often look similar to drought or overwatering. A practical check is to assess soil moisture first. If the pot feels light and the top inch is dry, increase watering gently and consistently. If the pot stays heavy, has a sour smell, or the seedling looks weak with drooping despite wet soil, the real issue is oxygen and drainage, not missing nutrients. Fixing root-zone moisture usually resolves many problems faster than changing amendments.
Should I foliar spray during flowering with organic products?
Only with careful choice and timing. Light misting for biological foliar support can work, but avoid oil-based treatments and anything likely to leave residues on flowers. If you spray, do it early in the light cycle, keep droplets minimal, and ensure airflow so buds don’t stay wet. If your flowering humidity is high or buds are dense, skip foliar sprays and focus on soil-based feeding instead.
What’s a good way to prevent fungus gnats without drowning the seedling?
Letting the top inch dry slightly between waterings is key, because adults lay eggs in consistently moist media. Use yellow sticky traps as monitoring, not the main solution. If you’ve had recurring problems, add beneficial biological controls like predatory mites or beneficial nematodes, and keep airflow strong. Avoid overwatering just to “keep seedlings happy,” and use small, targeted waterings around the stem.
Can I use LST on an autoflower more than once, and how often should I adjust ties?
Yes, as long as you avoid snapping stems and you start early enough. Adjust ties every 2 to 3 days during the period of rapid growth, because the branch angle changes quickly and a loose tie can become an injury point. If you notice stems rubbing against hard material, switch to softer ties or re-anchor so the plant can move slightly without damage.
What should I do if my leaves taco or curl in organic soil?
Leaf curling is often an early sign of either light stress or inconsistent moisture. Check temperature and light distance first, look for bleaching or clawing, and confirm you are not overheating the canopy. Then check the pot weight and top layer moisture. In autos, avoid reacting with heavy fertilizer changes. Start by correcting water consistency and environmental targets, then reassess after a few days.
How do I choose harvest day if trichomes look mixed (some clear, some amber)?
Choose a “majority target,” not perfect uniformity. If most trichomes are cloudy with a small portion amber (for example, around 10 to 20%), you’re often close to the window described for balanced effects. If many trichomes are still clear, waiting a few more days typically increases potency and terpene development. If you see mostly amber, harvest sooner because further amber increase can shift the effect more sedative.
Is “natural flushing” enough in living soil, or should I do a harsher flush?
In living organic soil, natural flush is usually sufficient. The goal is to stop amendments and use only pH-adjusted water for the final week so microbes process remaining inputs and the plant uses stored nutrients. Avoid aggressive salt-style flushing, because it can disrupt soil biology and sometimes worsen flavor. If your soil was extremely rich, you can start the amendment stop slightly earlier, but don’t starve the plant abruptly during late flowering.
How do I avoid overdrying during winter or in a dry home?
Drying success depends on relative humidity, not just temperature. If indoor RH is low, use a humidifier in the drying room to keep conditions around the target range, since drying too fast harms terpenes. If RH runs high, increase airflow slightly (fan on the air, not directly blasting buds) to prevent mold pockets. Monitor daily with a hygrometer and adjust room conditions, not the plant.