The <a data-article-id="553D3360-EC9E-4151-BCB6-EF3EA9DA9289">best soil to grow flowers</a> for an outdoor grow is one that drains freely, holds enough moisture to stay hydrated between waterings, feeds your plants without burning them, and sits at the right pH so nutrients actually get used. That's the short answer. Everything else in this guide is about how to build that soil, fix what you've got, and keep it working from transplant through harvest.
Best Soil for Outdoor Grow: Mix, Prep, and Care Guide
Marcus Holloway
24 Mar 2026
What 'Best Soil' Actually Means for an Outdoor Grow
Good outdoor soil comes down to four things working together: drainage, aeration, nutrients, and pH. Get all four right and plants practically grow themselves. Miss even one and you'll spend the season chasing problems instead of enjoying the grow.
Structurally, ideal soil is roughly 50% solid material (mineral particles and organic matter) and 50% pore space. That pore space should be split fairly evenly between air and water. When soil is too compacted or too fine, most of the pores fill with water and oxygen disappears from the root zone, which is the exact condition that causes root rot and stunted growth. On the flip side, soil that's too sandy or too chunky drains so fast that roots can't pull enough moisture or nutrients between waterings.
For a productive outdoor grow, aim for air porosity in the 15–25% range in your finished mix. That's the target used in professional greenhouse production and it translates well to outdoor containers and raised beds. In-ground native soil rarely hits this target on its own, which is why amending matters so much.
pH is not just a number to hit. It controls which nutrients dissolve into the soil solution and become available to roots. Below pH 5.5, manganese can reach toxic levels. Above pH 6.5, phosphorus, iron, and manganese become progressively less available. For most outdoor crops including cannabis, keeping pH in the 6.0 to 6.8 range gives you the widest window of nutrient availability with the least risk of deficiency or toxicity. Test before you plant, not after problems appear.
Outdoor Weed vs. General Outdoor Plants: Where the Soil Needs Differ
Most vegetables, flowers, and herbs are forgiving about soil. If you want a simple baseline for the best soil to grow plants, start by matching drainage, aeration, nutrients, and pH to the kind of outdoor plants you are growing. If you want a weed-focused benchmark alongside general guidance, check the best grow soil for weed to compare your drainage, pH, and nutrient setup. Cannabis is not. It has a narrower pH window, a heavier demand for phosphorus and potassium during flowering, and a strong sensitivity to overwatering and salt buildup. If you're growing weed outdoors, you need to treat the soil with more precision than you would for tomatoes or zucchini. Using the <a data-article-id="A5FBFFDD-F6E7-4E9C-8523-85897E66E07E">best grow soil for weed</a> is key to keeping nutrients available and avoiding root problems outdoors.
For general outdoor plants, a decent garden soil amended with compost gets you most of the way there. For outdoor cannabis specifically, you want to think more like an indoor soil grower: controlled drainage, known nutrient load, predictable pH, and no guessing about what's in the ground. That usually means either building a custom mix in containers or heavily amending a raised bed so you control the variables. Buying a bag of whatever topsoil is on sale at the hardware store and dropping plants into it is how you end up with a mediocre yield.
The other major difference is EC (electrical conductivity) management. Cannabis roots are sensitive to salt buildup from fertilizers and from over-amended composts. EC monitoring becomes more important when you're pushing heavy feed schedules through the season. Elevated EC shifts soil pH out of range and causes nutrient lockout, which looks like deficiency even when nutrients are present. General garden plants rarely need this level of monitoring, but it's worth understanding if cannabis is your focus.
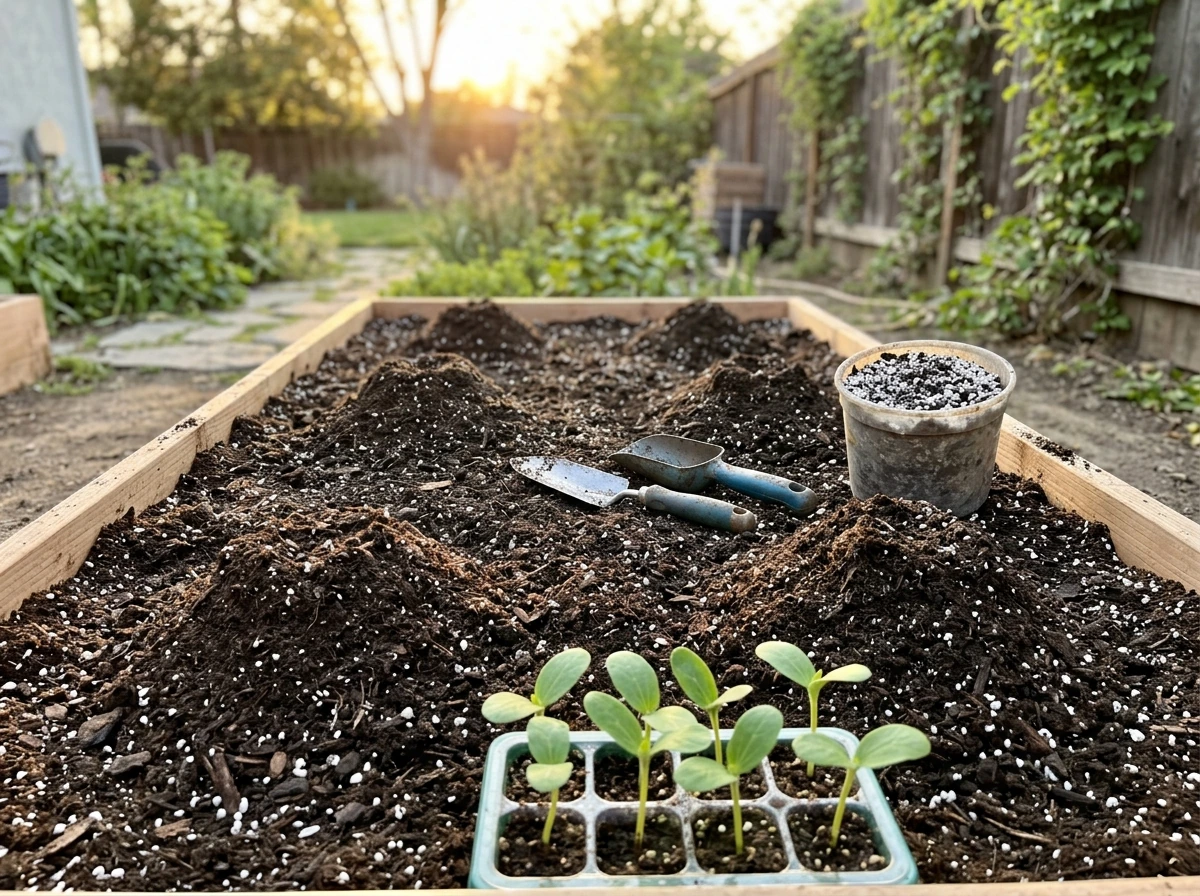
Soil Mix Recipes You Can Actually Use
These are working recipes, not theoretical ideal formulas. Adjust ratios slightly based on your climate: wetter climates benefit from more perlite, drier climates can lean heavier on water-retentive components like coco or worm castings.
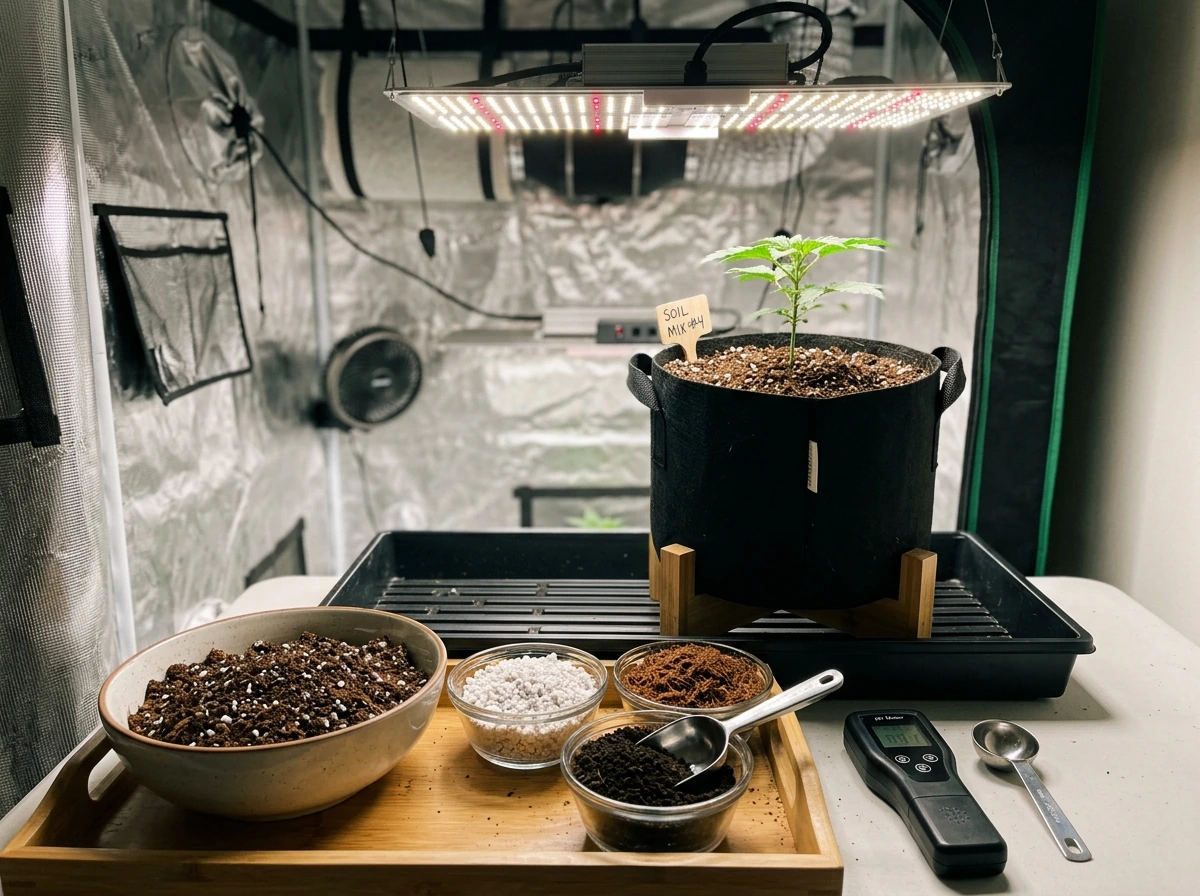
All-Purpose Container Mix (works for cannabis and most vegetables)
- 40% quality potting mix or coco-based soil (avoid mixes with heavy slow-release synthetic fertilizer pellets if you want feeding control)
- 25% compost or worm castings (if your potting mix already contains compost, drop this to 20% and adjust accordingly)
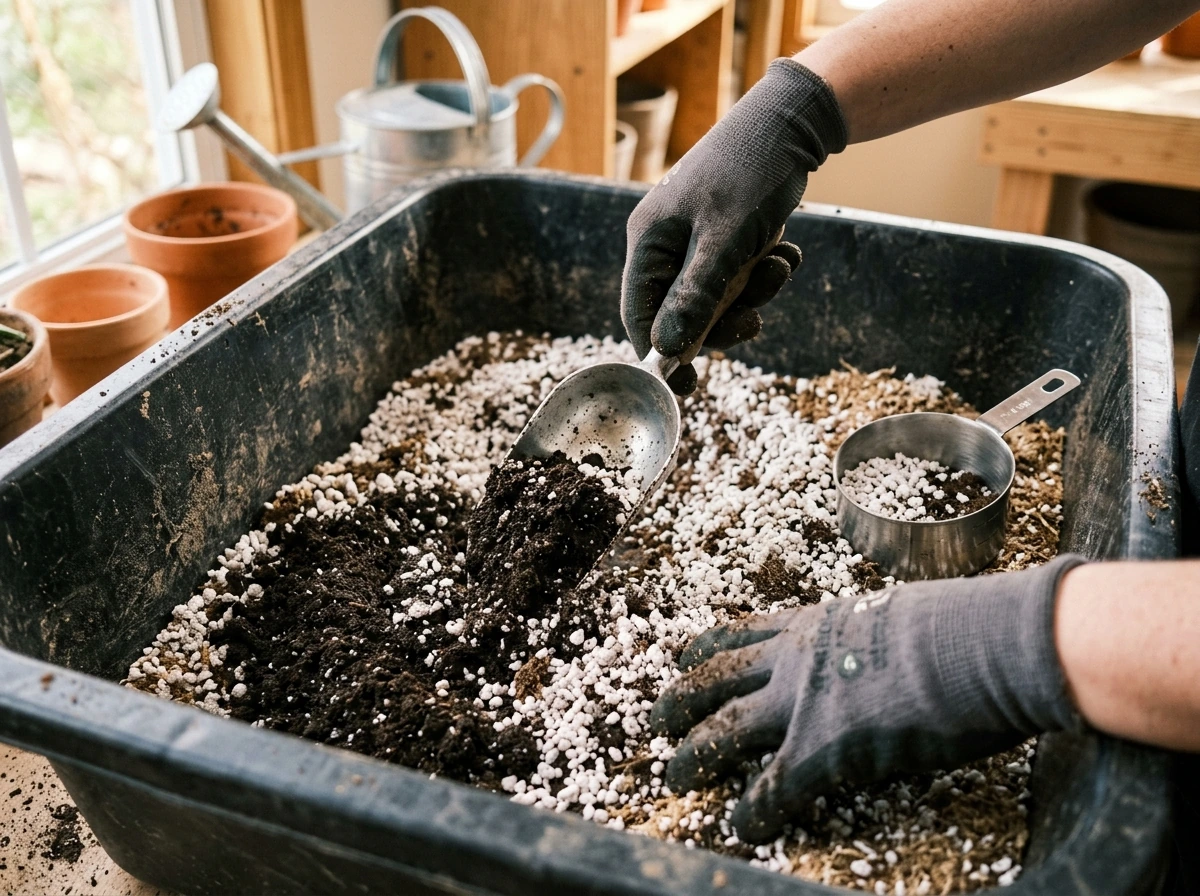
- 25% perlite (improves aeration and prevents oxygen loss in wet conditions; perlite holds no water itself, which is the point)
- 10% aged compost or composted manure as a slow nutrient base
This mix drains aggressively, which is what you want in containers. Containers lose drainage efficiency over time as roots and organic matter break down and compress, so starting loose gives you a longer useful life before you need to re-pot.
Outdoor Weed Container Mix (higher performance, more precise)

- 35% quality amended potting soil (something like a 'super soil' base or a well-reviewed cannabis-specific potting mix)
- 20% worm castings
- 20% perlite or pumice
- 15% coco coir (improves aeration and moisture retention simultaneously, pH neutral)
- 10% composted bat guano or seabird guano (adds phosphorus and trace minerals)
This mix can carry a cannabis plant through most of veg without additional feeding if you start with a quality base. You'll want to start supplementing phosphorus and potassium as flowering begins, since outdoor plants in containers exhaust available nutrients faster than in-ground plants.
In-Ground Raised Bed Mix
- 50% topsoil or screened native soil (if your native soil is decent loam; skip if clay or sandy)
- 30% compost (well-finished, dark, crumbly, earthy smell, no visible chunks of original material)
- 15% perlite or coarse horticultural sand
- 5% worm castings
For raised beds, you can go deeper on native soil inclusion because the volume is large enough that drainage through the bed bottom matters less than it does in a container. Build your raised bed at least 18 inches deep for cannabis and deep-rooted vegetables. Shallow beds compact faster and dry unevenly.
Starting from Whatever Soil You've Got
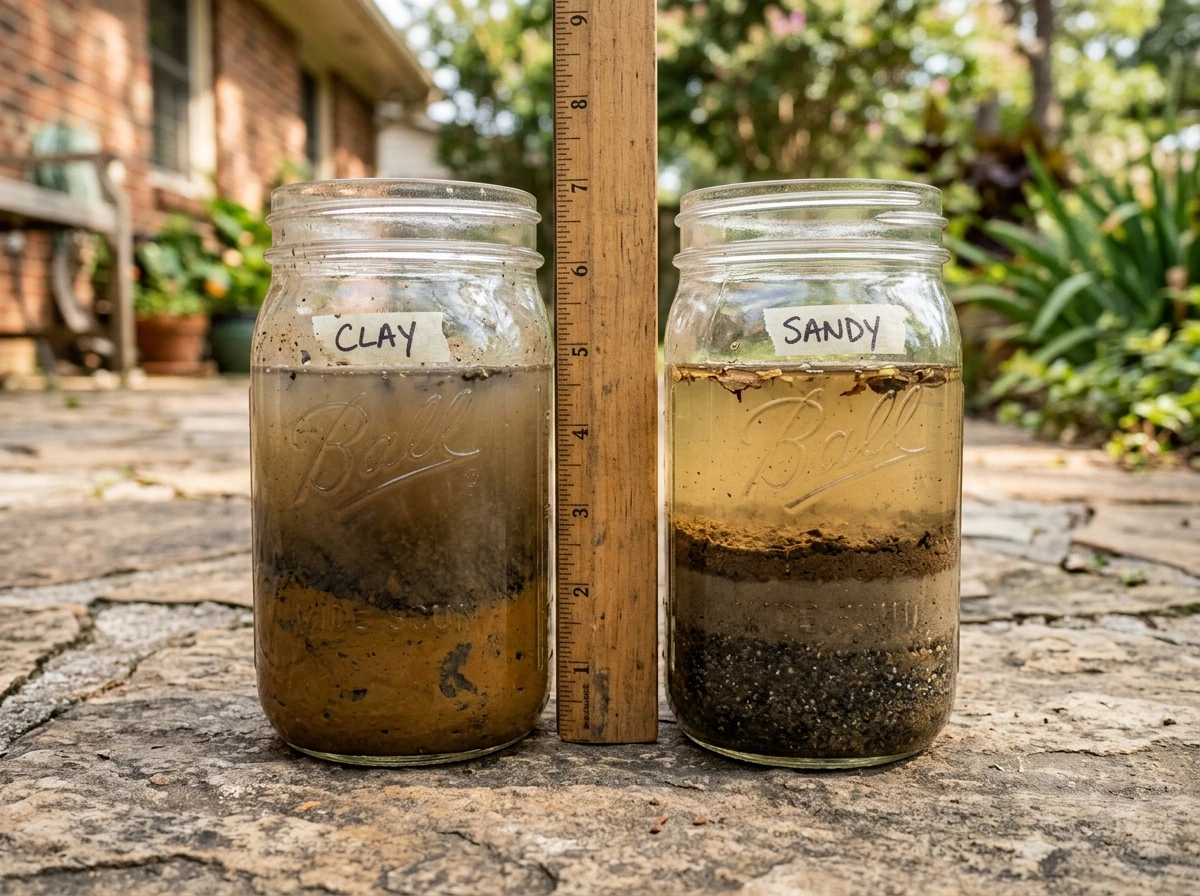
Most outdoor growers don't start with perfect loam. You're working with what's in your yard, which is often somewhere between compacted clay, sandy gravel, or depleted topsoil stripped during construction. Here's how to fix each.
| Soil Type | Main Problem | Primary Fix | Supporting Amendment |
|---|---|---|---|
| Heavy clay | Poor drainage, compaction, anaerobic zones | Add perlite, coarse sand, and gypsum to break structure | Gypsum improves water infiltration in clay and removes sodium in sodic soils; compost adds biology |
| Sandy / gravelly | Drains too fast, low CEC, low nutrient retention | Add compost and worm castings heavily (30–40% by volume) | Coco coir helps retain moisture; worm castings improve nutrient-holding capacity |
| Depleted / compacted native soil | Low organic matter, poor structure, low biology | Till in compost at 4–6 inches depth; top-dress with worm castings | Cover crop or mulch between grows to rebuild organic matter |
| High pH (alkaline) soil | Nutrient lockout, especially P, Fe, Mn | Sulfur application (elemental sulfur lowers pH slowly over weeks) | Acidic organic amendments like pine bark fines |
| Low pH (acidic) soil | Possible Mn toxicity below 5.5; limited bacterial activity | Agricultural lime (calcitic or dolomitic); dolomite adds magnesium too | Compost buffers pH moderately in both directions |
A note on gypsum: it works specifically for clay soils with compaction and sodium problems. It doesn't significantly change pH, which surprises a lot of growers. If your clay is compacted but not sodic, gypsum still helps by improving water infiltration and percolation. But it's not a substitute for organic matter, so add both.
Prepping Before You Plant: pH, EC, Compost Quality, and Safety
The most common mistake I see from newer outdoor growers is skipping the prep work and going straight to planting. Then they wonder why their plants are struggling in week three. Prep takes maybe a weekend and saves you months of frustration.
Test pH First, Always
pH is the single most useful piece of information you can have before planting. It tells you which nutrients will be available, whether your amendments will work as expected, and what your baseline correction needs look like. A basic soil pH meter or a test kit works fine. For more accurate measurements, mix a soil sample with distilled water (roughly 10 grams of soil to enough water to create a slurry) and test the solution. Do this consistently each time you test so your readings are comparable season to season. If you want a full picture including buffer capacity and nutrient levels, a lab test from your local cooperative extension is worth the $20 to $30.
The same pH reading can require very different lime or sulfur rates depending on how well-buffered your soil is. Sandy soils respond to amendments quickly. Dense clay and high-organic soils buffer more and need larger applications to shift pH by the same amount. This is why following a soil test recommendation beats guessing from a chart.
EC and Salt Baseline
If you're growing cannabis, check your water's EC before the season starts. High EC in source water or in a heavily amended soil mix signals salt buildup risk. High salt concentrations push pH out of the optimal range and cause nutrient lockout. Most outdoor soil grows sit fine without EC monitoring if you're using well-finished compost and standard watering, but if you're adding liquid fertilizers on top of an already-amended mix, you're doubling up on soluble salts. Keep an eye on it.
Compost Quality: This Matters More Than People Think
Cheap or immature compost is one of the most common ways growers accidentally burn their plants or introduce weed seeds and pathogens. Finished compost should be dark, crumbly, and smell like earth, not like ammonia or rotting material. If it smells off or still has visible chunks of recognizable material, it hasn't finished breaking down and the nitrogen can burn roots on contact.
Weed seed kill in compost depends on the pile reaching at least 145°F (63°C) throughout, including the edges and surface. Commercially bagged compost labeled as OMRI or similar certified often meets this standard. Homemade compost is great if you're confident in your process, but inconsistent hot composting leaves risk. Recontamination from weed seeds blowing into a finished pile is also a real issue, so store finished compost covered.
Soil Sterilization for Containers
If you're reusing containers or soil from a previous season, sterilize them before reuse. Old soil from a diseased plant can harbor Pythium and other soilborne pathogens as resting spores that survive through winter. Rinse containers with a dilute bleach solution (1 part bleach to 9 parts water), let them dry completely, then refill with fresh or refreshed soil. Reusing old soil is fine if the previous grow was healthy: add fresh compost, worm castings, and perlite to restore structure and nutrients.
Feeding and Re-amending Through the Season
A well-built soil mix can carry your plants for the first several weeks without additional feeding. After that, outdoor plants in containers deplete nutrients faster than in-ground plants because nutrients leach out with every watering. In-ground grows hold nutrients longer but still need replenishment as the season extends.
General Feeding Timeline for Outdoor Cannabis
- Weeks 1 to 3 after transplant: no feeding needed if your mix has compost and castings; let roots establish and don't stress them with excess nutrients
- Weeks 4 to 8 (mid-veg): introduce a light nitrogen-heavy liquid feed at half the label rate; watch for leaf color response before increasing
- Pre-flower transition (roughly when days shorten to 14 hours outdoors): switch to a balanced or slightly P/K-heavy feed; top-dress with worm castings at about 1/4 inch depth around the drip line
- Early to mid-flower: reduce nitrogen, increase phosphorus and potassium; avoid high-nitrogen compost top-dresses at this stage
- Late flower (last 2 to 3 weeks): flush with plain pH-adjusted water to clear excess salts; no additional soil amendments
For in-ground and raised bed grows, top-dressing is your main re-amendment tool through the season. Apply finished compost at about 1/2 inch depth across the bed surface every 4 to 6 weeks during active growth. Worm castings are gentler and less likely to burn than raw compost or manure, so they're the safer top-dress option if you're uncertain about compost maturity. Scratch them lightly into the top inch of soil and water in.
Nutrient burn from over-amending is more common than deficiency in outdoor soil grows. The symptoms are tip burn on leaves, dark green coloration, and curling. If you see these signs, stop all feeding, water with plain pH-adjusted water to flush excess salts, and wait for recovery before reintroducing nutrients at a lower rate. It's always easier to add more than to undo too much.
Troubleshooting Common Outdoor Soil Problems
Wet Roots and Root Rot (Pythium)

Pythium is the most common root rot pathogen in outdoor soil grows and it thrives in exactly the conditions you're most likely to create accidentally: soggy, poorly aerated soil with warm temperatures. It survives as resting spores in soil and old growing media, waiting for wet conditions to activate. Prevention is the entire strategy because once Pythium takes hold, it spreads fast and is very hard to stop.
The practical fixes are: improve drainage by adding perlite and raising your bed or container off the ground, avoid overwatering by letting the top inch or two of soil dry between waterings, and use drip irrigation rather than overhead watering when possible. Raised beds reduce compaction and keep root zones better aerated. If you're in a wet climate, these aren't optional upgrades: they're essential baseline practices.
Nutrient Deficiencies
Most deficiencies in outdoor soil grows trace back to pH being out of range, not to actual nutrient absence. Yellow leaves during veg usually mean either nitrogen deficiency or pH-locked phosphorus. Purple stems can mean phosphorus lockout from low temperatures or incorrect pH. Test pH before you start adding more nutrients: adding more of something that's already present but locked out doesn't help and may worsen salt buildup.
Genuine iron and manganese issues tend to show up in alkaline soils above pH 6.5. Correcting pH with a sulfur amendment or acidifying fertilizer resolves most of these without needing micronutrient supplementation. If you're in a naturally alkaline or calcareous soil region, regular pH monitoring through the season is important because soil alkalinity can creep back up even after initial correction.
Soil Pests: Fungus Gnats, Root Aphids, and Weed Pressure
Fungus gnats love wet soil surface conditions. The fix is simple: let the top inch of your soil dry out completely between waterings. Larvae live in the top 2 to 3 inches of soil and can't survive without moisture. Yellow sticky traps help you monitor adult population levels. Persistent infestations may indicate you're overwatering structurally, which goes back to drainage and aeration in the mix.
Weed seeds in compost or native soil are a constant outdoor challenge. Mulching the soil surface with 2 to 3 inches of wood chip mulch or straw suppresses most germination and also moderates soil temperature, reduces evaporation, and feeds soil biology as it breaks down. Using well-finished compost that was properly hot-composted is the upstream fix.
Root aphids are harder to detect because they live underground. Signs include sudden wilting, yellowing, and failure to respond to watering or feeding. If you pull a plant and see small insects clustered on roots, that's root aphids. They're most common in containers where conditions are concentrated. Preventive measures include using fresh or sterilized soil each season and avoiding reusing soil from any plant that showed stress symptoms without fully understanding the cause.
Soil Compaction Over the Season
Soil compacts from repeated watering, foot traffic, and organic matter breakdown. Compaction reduces pore space, which cuts off both air and water movement. The symptom is water pooling on the surface instead of absorbing. Top-dressing with worm castings or compost and very lightly cultivating the surface (not deep tilling, which damages roots) helps restore structure during the season. Between seasons, cover cropping with something like crimson clover or daikon radish actively breaks compaction with root action.
When Soil Might Not Be Your Best Choice Outdoors
Soil is the right choice for most outdoor growers. It's forgiving, cheap to build, and buffers environmental stress better than any hydroponic medium outdoors. That said, there are scenarios where a more controlled approach makes sense.
If you're in a very wet climate with persistent drainage problems, or if you need to move plants frequently (for light chasing or privacy), containerized coco in a drain-to-waste setup gives you much tighter control over root zone conditions. Coco is pH neutral, drains perfectly, and eliminates most soil pathogen risk. The trade-off is that you're fully responsible for all nutrients via fertigation since coco holds almost nothing on its own. It's closer to how an indoor grower operates and requires more attention day to day. For most outdoor growers who want a seasonal plant-and-manage-it approach, soil is still the better fit. If you want to explore the comparison further, our guide on the best soil for indoor grows covers how the medium choice shifts when you move plants inside. best soil for indoor grows
Putting It Together Before You Plant
Here's the practical sequence to follow right now if you're prepping for an outdoor grow this season:
- Test your native soil or water pH with a basic kit or meter; get a lab test if you want nutrient levels and buffer index too
- Choose your setup: in-ground bed, raised bed, or containers; pick based on your native soil quality and drainage situation
- Build your mix using one of the recipes above; buy components separately for the best ratio control, or find a quality pre-amended cannabis potting mix as your base
- Verify your compost is finished: dark, crumbly, earthy smell, no ammonia odor, no visible undecomposed chunks
- Adjust pH with lime (too acidic) or sulfur (too alkaline) if needed; allow at least 2 to 3 weeks for amendments to integrate before planting
- Check EC of your water source; if it's above 0.5 mS/cm from the tap, account for that in your feeding plan
- Transplant into your prepped medium, water in gently, and hold off on any additional feeding for at least the first 2 to 3 weeks
- Mulch the surface, set up a watering schedule that allows for dry-down between waterings, and monitor pH every 4 to 6 weeks through the season
Outdoor growing rewards the grower who puts effort into setup. The soil is where the season is won or lost. Get this part right and you spend the rest of the grow watching plants thrive instead of troubleshooting problems that trace back to what's under the surface.
FAQ
My yard soil tests low or high pH, when should I adjust it (and with what) for the best soil for outdoor grow?
Start with a soil pH test before planting, then choose amendments based on the target range (roughly 6.0 to 6.8 for most outdoor crops discussed). If your pH is already in range, focus on structure and organic matter quality first, because adding lime or sulfur “just in case” can push pH the wrong direction and create nutrient lockout later.
How do I make sure my soil pH testing is accurate for outdoor grow beds or containers?
Don’t trust only a single jar reading. Check pH using the same method each time (including the same soil-to-water ratio and whether you’re measuring slurry or extract). If results vary a lot within the bed, take multiple subsamples (for example, corners plus center) and average them, then amend the whole area based on the average.
What practical checks tell me whether my soil mix has the right drainage and aeration for outdoor containers?
For containers, the most reliable sign is whether water drains evenly without pooling, and whether the plant stays hydrated between waterings without staying soggy. If you see standing water after watering or the top dries slowly while lower sections stay wet, you likely need more aeration (perlite or other coarse components) and better structural airflow.
If my plants look deficient in an outdoor grow, how can I tell if it’s actually nutrient lockout from salt buildup?
If you’re growing cannabis in pots, avoid adding high-salt fertilizers on top of already rich compost unless you’re tracking EC. Elevated EC can mimic deficiency symptoms, so before adding more nutrients, test or at least flush with plain pH-adjusted water and resume at a lower rate once growth normalizes.
Can I use fresh or hot compost in the best soil for outdoor grow, and what’s the risk?
Yes, but it can make things worse if the compost is immature or too “hot.” Skip raw manure and partially finished compost, and if using compost regularly, keep it well-matured and use smaller top-dress amounts rather than mixing large volumes into the whole container at once.
Do I need to completely replace soil each year, or can I reuse it safely for an outdoor grow?
If you reused containers or amended soil, sterilizing containers is one part, but you still need to restore structure and re-balance nutrients. Add fresh compost and perlite (or other aeration) to fix compaction, and consider a pH re-test if you changed fertilizer or compost sources since last season.
How do I know when to start feeding instead of relying on a pre-built mix all season?
Compost-based mixes can often carry plants for the early weeks, but containers typically deplete faster than in-ground soil. Plan on monitoring, and switch to a lighter feeding schedule once the plant shows it is using available nutrients, rather than adding full strength on day one.
What watering routine best prevents Pythium and fungus gnats in outdoor soil grows?
Letting the top inch dry between waterings is a key approach to prevent fungus gnats and reduce Pythium risk. If you’re using drip, still check soil moisture manually, because “on a schedule” dripping can keep the surface too consistently wet.
If I correct pH at the start, do I still need to monitor pH later in the season for outdoor grows?
Yes, especially in alkaline regions. Even if pH starts in range, soil alkalinity can creep back up after corrections, so re-test periodically through the season (for example, after major additions or every few weeks during active growth) and adjust the amendment plan accordingly.
When should I use gypsum, and when is it a waste for the best soil for outdoor grow?
In compacted clay, use gypsum only if you have sodium-related issues or compaction plus poor infiltration, and in most cases still pair it with organic matter to rebuild structure. Gypsum won’t reliably fix pH by itself, so confirm with a pH test before deciding it’s “the solution.”
What’s the safest way to re-amend or loosen soil during the season without harming roots?
Avoid deep tilling when you already have plants, because it can damage roots and open new air channels that increase drying and stress. During the season, prefer top-dressing (like finished compost or worm castings) and very light surface cultivation only if you need to incorporate gently.
What are common early-season mistakes that cause poor establishment even when my soil sounds “good”?
If seedlings fail to establish, also look at planting depth and water contact, not just nutrient availability. Very wet soil, immature compost, and high salts can stop roots early, so check for surface sogginess, compost maturity, and signs of burning before you add more fertilizer.
When does switching from soil to container coco make more sense for outdoor growing?
If you need to move plants, containers can be more practical, but soil choices differ from in-ground. A drain-to-waste coco setup reduces pathogen risk and gives tighter root-zone control, but you must fertigate consistently because coco contains little nutrition on its own.