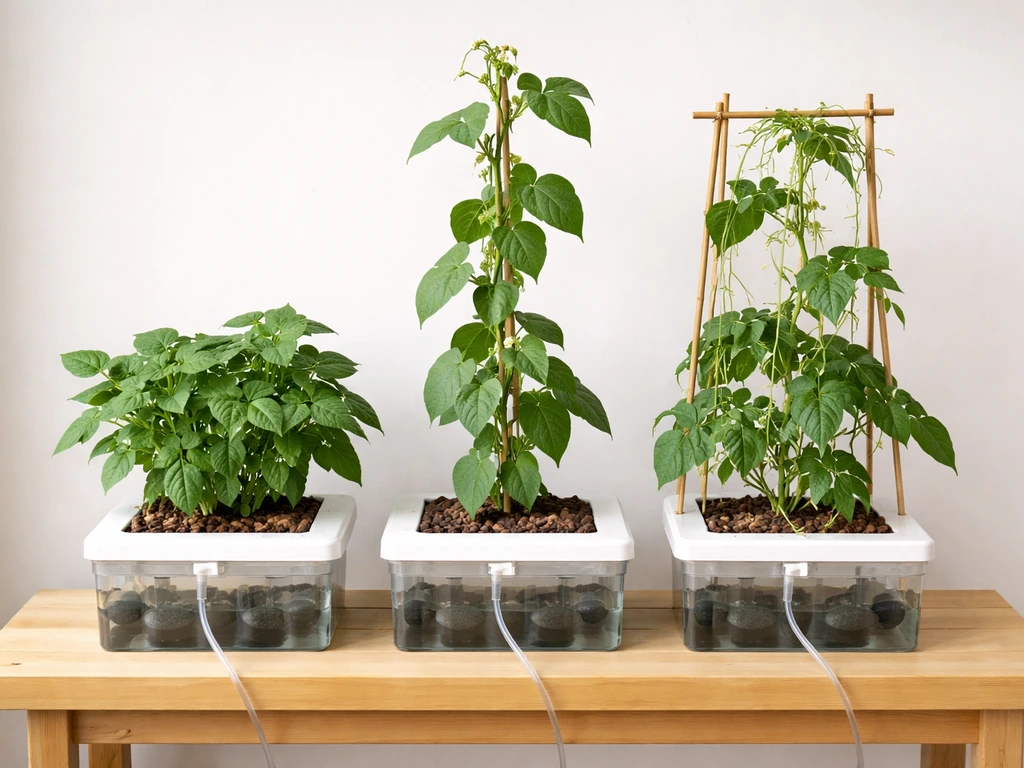
Bush beans are the best beans to grow hydroponically for most home growers. They stay compact, don't need heavy trellising, produce pods in as little as 50 days, and handle the controlled conditions of an indoor system well. If you have vertical space and want higher yields per square foot, pole beans are worth the extra setup. Either way, beans are genuinely rewarding in hydroponics once you get the root zone aeration, pollination, and light dialed in. Here's exactly how to do it.
Best Beans to Grow Hydroponically: Varieties and How-To

Marcus Holloway
20 Apr 2026
Which bean types actually do well in hydroponics
Not all beans behave the same in a hydroponic system, and growth habit is the biggest variable. There are three types you'll run into: bush beans, pole beans (sometimes called runner beans), and specialty types like French filet beans (haricots verts). Each has a different relationship with your space, your support structure, and your harvest window.
Bush beans
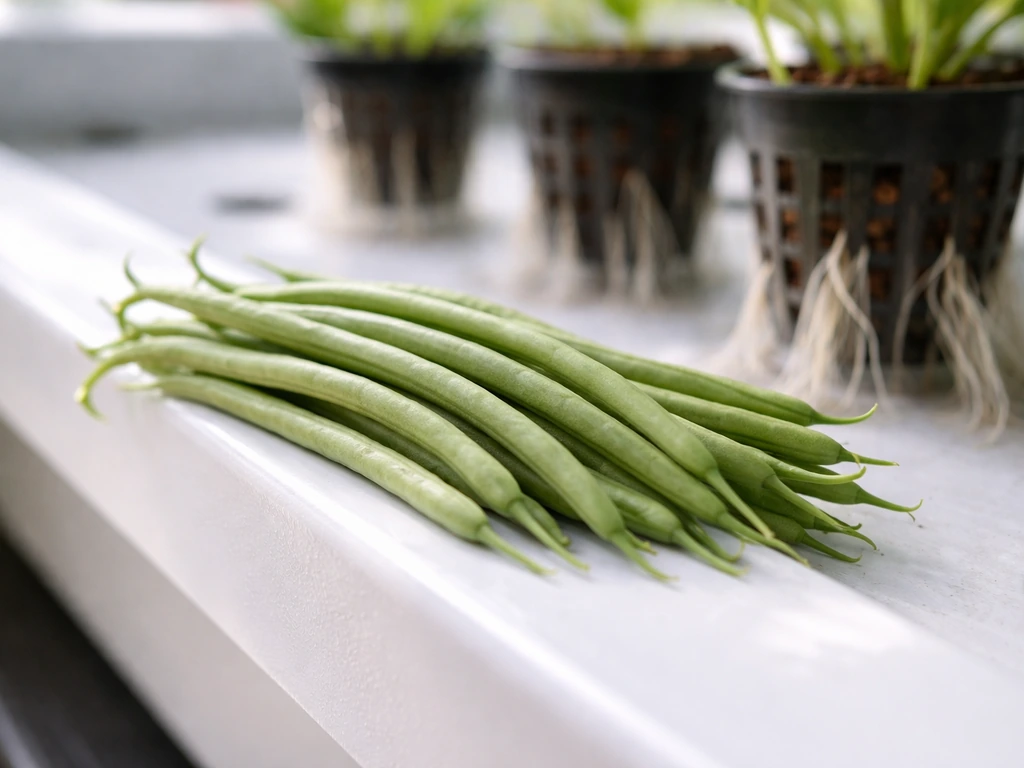
Bush beans are the go-to recommendation for indoor hydroponics. They top out at 18 to 24 inches tall, produce a concentrated harvest over two to three weeks, and need nothing more than a stake or light cage for support. Varieties like Blue Lake 274, Provider, and Contender are proven performers. Provider is especially worth noting because it germinates fast even at slightly lower temperatures and has strong disease resistance. Blue Lake 274 produces classic straight pods with excellent flavor and typically matures in 50 to 55 days from seed. For a compact system where space is tight, bush beans are the clear choice.
Pole beans
Pole beans are a different commitment. They'll climb 5 to 8 feet if you let them, which means you need a real trellis system and enough vertical clearance in your grow space. The payoff is a longer, continuous harvest that can run 6 to 8 weeks instead of the concentrated flush you get from bush types. Kentucky Wonder, Rattlesnake, and Seychelles (a modern commercial pole variety) are reliable choices. Seychelles in particular is popular with hydroponic growers because of its uniform pod set and strong production in controlled environments. If you're running a dedicated grow tent or room with 6-plus feet of clearance, pole beans will out-yield bush types over the full season.
French filet beans
French filet beans like Maxibel or Masai are compact, produce thin elegant pods, and are harvested young (around 3 to 4 inches) for peak flavor and tenderness. They're technically bush types but tend to be shorter and earlier than standard American bush beans. They're a good choice if you're growing for flavor and cooking quality rather than maximum yield, and they work well in smaller DWC buckets or NFT channels.
How to pick the right variety for your setup
When you're scanning seed catalogs or online listings, ignore the marketing language and focus on five practical traits: days to maturity, plant height, pod set concentration, disease resistance package, and whether the variety is open-pollinated or a hybrid. Here's how each one matters for hydroponics specifically.
- Days to maturity: Aim for 50 to 60 days for bush types or 60 to 70 days for pole types. Anything over 75 days is better suited to outdoor growing where extended seasons make sense.
- Plant height: Under 24 inches for bush beans means you can stack grow spaces or use a standard 4-foot tent without the canopy hitting your lights. Pole beans need 5 to 8 feet minimum.
- Pod set concentration: Bush beans that set pods over a tight 2 to 3 week window are easier to manage in a hydroponic cycle where you're draining and cleaning the system between runs.
- Disease resistance: Look for resistance to bean mosaic virus (BMV) and powdery mildew. In a humid indoor environment these are your most likely disease problems.
- Hybrid vs. open-pollinated: Hybrids like Maxibel or Seychelles typically offer more uniformity and disease resistance. Open-pollinated varieties like Blue Lake 274 let you save seed but may show more variation between plants.
One thing many beginners overlook: beans are relatively large seeds that need good moisture contact to germinate quickly. Germination temperature matters more for beans than for many greens. You want your germination medium (rockwool, rapid rooter plugs, or peat pellets) at 75 to 85°F. Below 60°F, germination stalls or fails entirely. At optimal temps, most bush bean varieties emerge in 5 to 8 days.
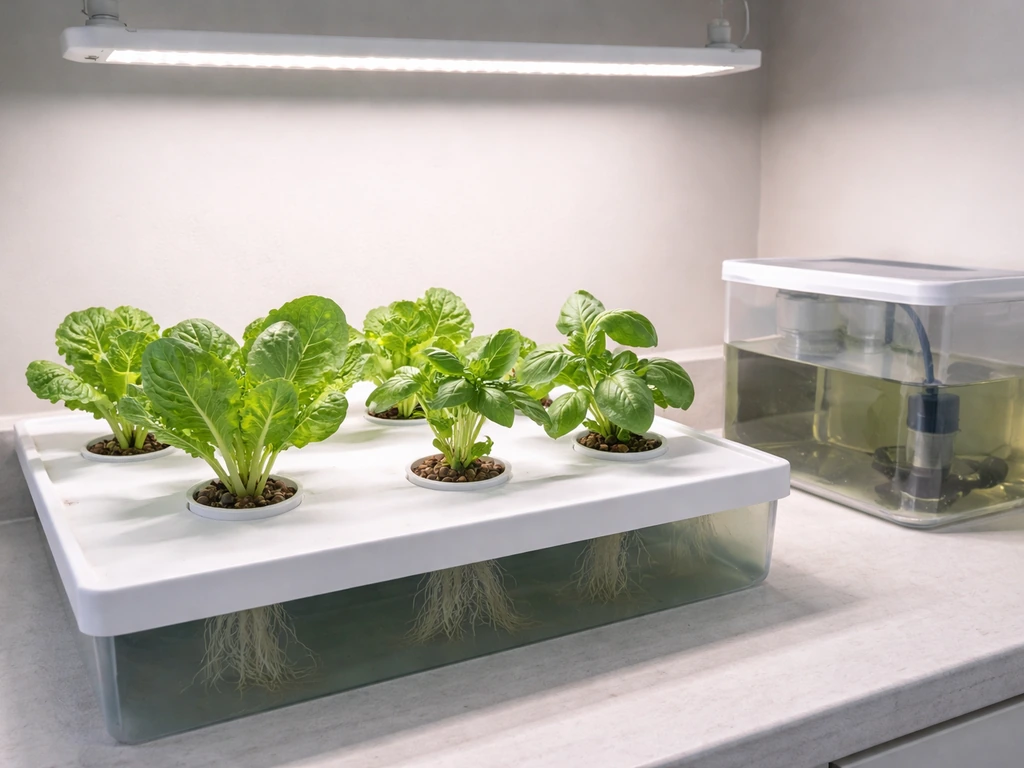
Best hydroponic systems and root zone setup for beans
Beans have bigger, more aggressive root systems than lettuce or herbs. The root zone setup you choose will directly affect whether your plants thrive or suffocate. Here's an honest comparison of the main system types and how they handle bean roots.
| System Type | Root Zone Aeration | Best For | Main Drawback |
|---|---|---|---|
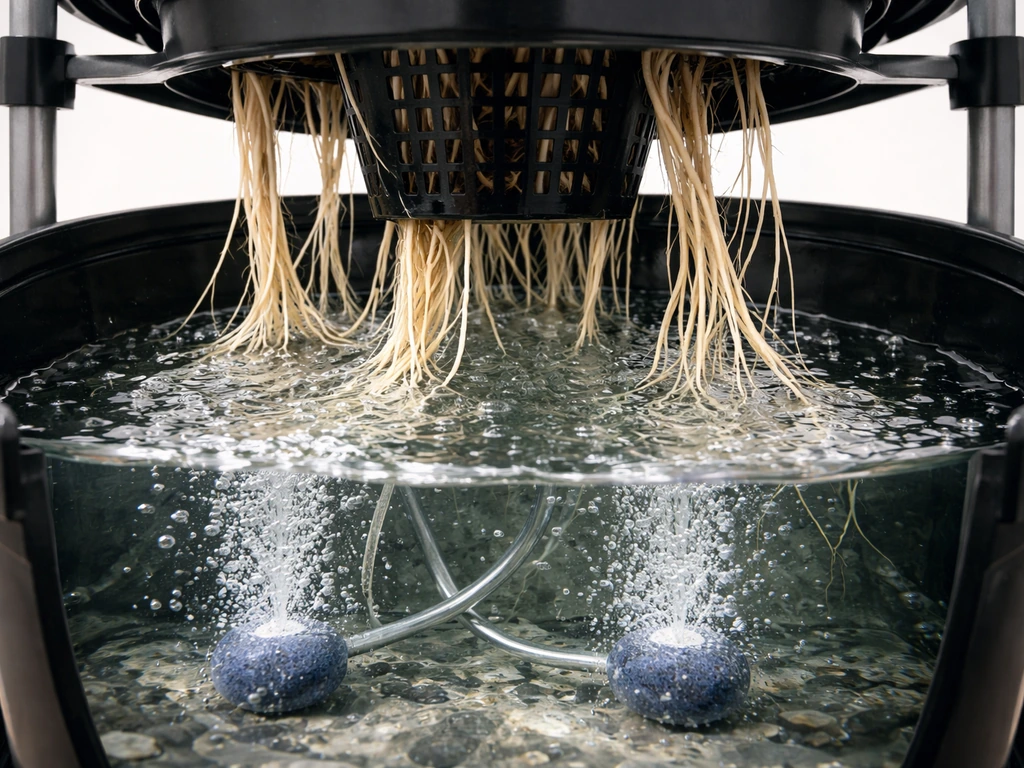
| DWC (Deep Water Culture) | Air stones essential — roots sit in oxygenated water | Bush beans, 1 to 4 plants per bucket | Root rot risk if air pump fails; needs monitoring |
| Drip / Top Feed | Medium stays moist but drains freely; good O2 levels | Bush and pole beans; scalable | Drip emitters can clog; timer management needed |
| Ebb and Flow (Flood & Drain) | Excellent — medium dries between floods | Bush beans in trays; good for beginners | Not ideal for tall pole beans without extra support |
| NFT (Nutrient Film Technique) | Very high aeration; thin film over bare roots | Compact bush beans and filet types | Roots can overfill channels quickly; not ideal for large plants |
| Kratky (Passive DWC) | Air gap above solution provides O2 | Small-scale bush beans; no pump needed | Nutrient depletion management is manual; less control |
My honest recommendation: a drip system or ebb-and-flow setup with a coco coir/perlite blend (70/30) is the most forgiving for beans at home. The medium buffers pH slightly, holds moisture well, and drains fast enough to keep roots oxygenated. DWC works too, but you need a reliable air pump with a backup and you need to stay on top of root health. NFT is better suited to smaller crops like the greens and lettuces covered elsewhere on this site, bean roots will overwhelm a standard NFT channel within 4 weeks.
For net pot size, go with 3.5 to 5-inch net pots for bush beans and 5 to 6-inch for pole beans. Anything smaller and you'll see root restriction affecting pod set. Fill with clay pebbles (hydroton), coco/perlite blend, or rockwool cubes for the main grow medium. Make sure your system has at least a 1-inch air gap between the base of the net pot and the solution surface in DWC, this oxygen zone is critical.
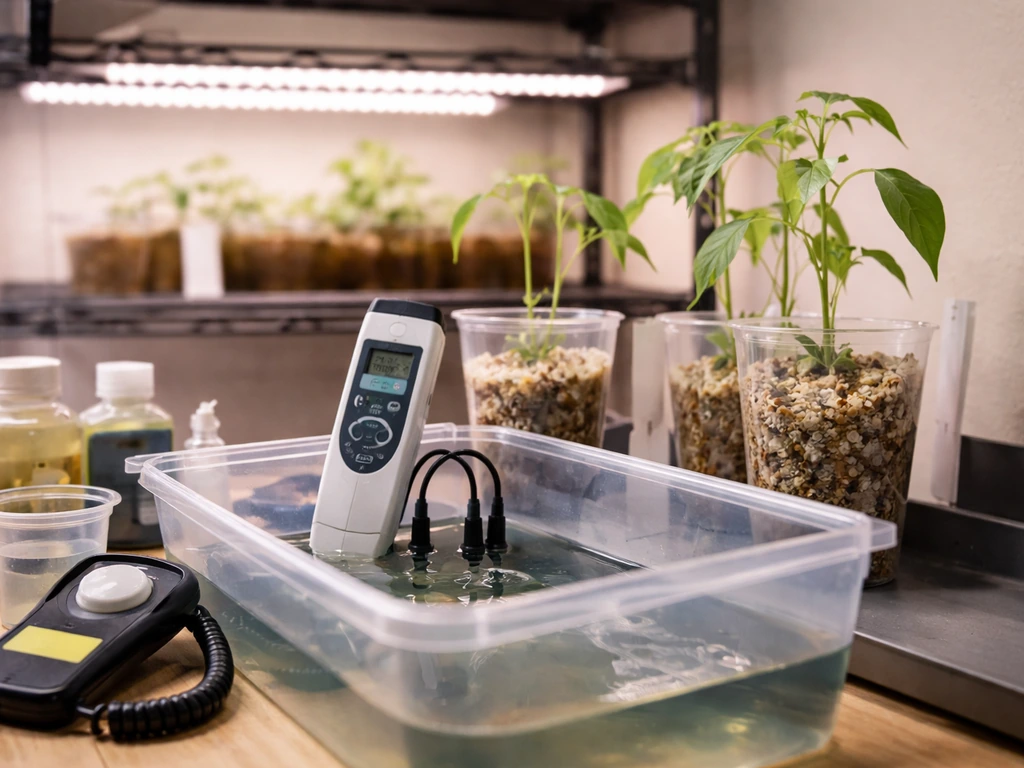
Nutrients, pH, EC, and water management
Beans are legumes and can fix some nitrogen from the air through root bacteria in soil, but in hydroponics that nitrogen fixation essentially doesn't happen, you're providing everything through the solution. That said, beans need less nitrogen than leafy greens and more phosphorus and potassium as they transition into flowering and pod set.
pH and EC targets
Target a pH between 5.8 and 6.2 for beans. This is slightly higher than what you'd run for lettuce or herbs, and it keeps phosphorus, calcium, and magnesium in their most available forms. The general hydroponic recommendation is a pH range of 5.0 to 6.0, and beans sit comfortably at the upper end of that window. Check pH daily during the first two weeks and every other day once plants are established. A 0.3 unit drift in either direction is normal and fine. Beyond 0.5 units, you'll start seeing nutrient lockout symptoms.
EC (electrical conductivity) tells you how concentrated your nutrient solution is. For beans, target 1. For beans, OSU Extension recommends an optimal EC range of 2.0 to 4.0 dS/m and lists a pH value of 6 for beans For beans, target 1.. 8 to 2.5 dS/m during vegetative growth and bump it to 2.0 to 2.8 dS/m once plants are flowering and setting pods. The general hydroponic range is 1.5 to 3.0 dS/m, beans thrive in the middle of that range. Don't push EC above 3.0 or you risk tip burn and salt stress, which shows up as brown leaf margins and stunted new growth.
Nutrient profile by growth stage
You can use a standard 3-part general hydroponics formula (Grow, Micro, Bloom style) and get solid results with beans by adjusting the ratio at each growth stage. During the first 3 to 4 weeks (seedling to early vegetative), run a balanced or slightly nitrogen-forward ratio to build canopy. Once you see the first flower buds, usually around week 4 to 5 for bush beans, shift toward a bloom-forward mix that increases phosphorus and potassium while dialing back nitrogen. Add a cal-mag supplement at 1 to 2 ml per gallon throughout the full cycle. Calcium deficiency is common in beans and shows as brown pod tips and distorted new leaves.
| Growth Stage | Week Range | Target EC (dS/m) | Target pH | Nutrient Focus |
|---|---|---|---|---|
| Germination / Seedling | Weeks 1–2 | 0.8–1.2 | 5.8–6.0 | Plain water or 1/4 strength solution |
| Early Vegetative | Weeks 2–4 | 1.8–2.0 | 5.8–6.2 | Balanced N-P-K, add cal-mag |
| Late Vegetative / Pre-flower | Weeks 4–5 | 2.0–2.3 | 5.8–6.2 | Reduce N slightly, maintain P and K |
| Flowering and Pod Set | Weeks 5–8 | 2.2–2.8 | 6.0–6.2 | Bloom-forward, higher P and K, maintain cal-mag |
| Final Harvest Flush | Final 5–7 days | 0.5–1.0 | 6.0 | Plain pH-adjusted water to flush residual salts |
Change your reservoir water completely every 7 to 10 days. Top up daily with plain pH-adjusted water between changes (plants drink water faster than nutrients, so the solution gets more concentrated between changes). This is especially important during peak flowering when bean plants are transpiring heavily.
Lighting, temperature, and growth stage scheduling
Beans are day-neutral plants, which means they don't require a change in light cycle to trigger flowering, they'll flower based on age and size, not photoperiod. This makes them far easier to manage indoors than photoperiod crops. Run an 16-hours-on / 8-hours-off light schedule from germination through harvest and beans will perform well.
Light intensity and spectrum
Beans are higher-light crops compared to lettuce or herbs. You want at least 400 to 600 µmol/m²/s PPFD (photosynthetic photon flux density) for vegetative growth, increasing to 600 to 800 µmol/m²/s during flowering and pod fill. A quality LED grow light rated at 200 to 400 watts (actual draw) in a 4x4 foot space will cover a standard home bean setup. Full-spectrum LEDs with strong red and blue output work well. If you're running older T5 fluorescents, beans will grow but yields drop significantly once the plant enters pod fill and the energy demand increases.
Temperature targets
Keep daytime air temperature between 70 and 85°F (21 to 29°C). Beans are warm-season plants and will stall noticeably below 60°F, don't let your grow space drop into that range even at night. Night temps between 62 and 68°F are fine. Solution temperature is equally important: keep your nutrient reservoir at 65 to 72°F. Warmer solution holds less dissolved oxygen and accelerates bacterial and algal growth. If your reservoir is running above 75°F, add a small aquarium chiller or move it to a cooler location.
A realistic seed-to-harvest timeline
- Days 1–7: Germination in moistened rockwool or rapid rooter plugs at 75–80°F. Keep covered to maintain humidity.
- Days 7–14: Transplant seedlings with 1–2 true leaves into net pots. Begin 1/4-strength nutrient solution.
- Days 14–28: Rapid vegetative growth. Increase EC to full strength. Install light stake or trellis early for pole types.
- Days 28–35: First flower buds appear on bush beans. Shift to bloom-forward nutrient ratio.
- Days 35–45: Flowers open and pods begin setting. Hand-pollinate daily (see pollination section).
- Days 50–60: First pods ready to harvest on bush bean varieties. Begin harvesting before seeds swell inside pods.
- Days 60–80+: Continued harvest for pole beans; bush beans taper off after concentrated 2–3 week window.
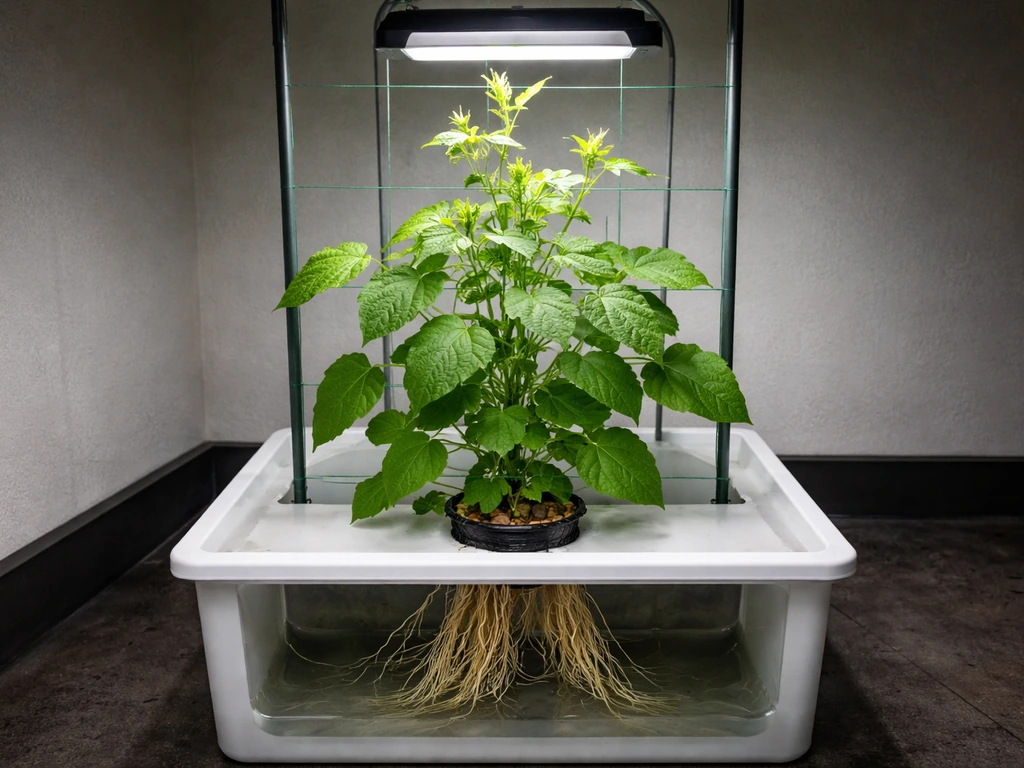
Support, trellising, and spacing
Bush beans are self-supporting up to about 18 inches but benefit from a light bamboo stake or small wire cage once heavy pods start pulling branches down. Space bush bean net pots at least 8 to 10 inches apart center-to-center. In a 4x4 system, that gives you 9 to 12 plants, which is a good home harvest. Don't be tempted to crowd them, poor airflow in a humid bean canopy is a recipe for powdery mildew.
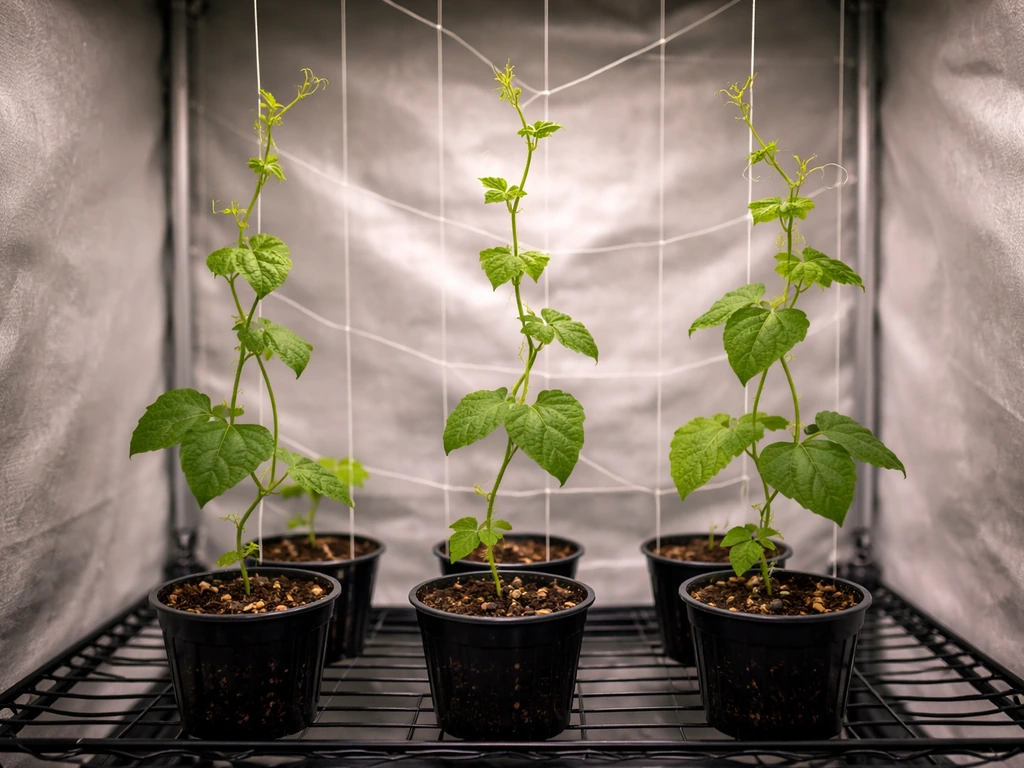
Pole beans need a real trellis from the start. Pole beans are climbing plants, so they need a real trellis and enough vertical clearance to grow properly [Pole beans need a real trellis from the start. ](https://content. ces.
ncsu. edu/pole-bean-production). A simple vertical string trellis works: run horizontal anchor lines at 12-inch intervals up to your max canopy height, then drop individual strings from the top line down to each plant's base. Bean tendrils will grab and climb on their own, but guide the main stem weekly for the first three to four weeks.
Space pole bean plants at least 10 to 12 inches apart. In a DWC or drip system, that typically means no more than 4 to 6 plants in a 4x4 space to leave room for the trellis and airflow.
One practical tip that trips people up: set up your trellis or support structure before transplanting, not after. Retrofitting a trellis around established plants in a hydroponic system almost always damages roots or disrupts your net pots. Build the structure first, then place your plants.
Pollination, harvest timing, and fixing common problems
Pollination indoors
This is the number one reason indoor hydroponic bean crops fail to produce pods: no pollination. Outdoors, wind and insects handle it. Inside a grow tent, you need to step in. Common beans (Phaseolus vulgaris) are self-fertile, meaning each flower contains both male and female parts and can pollinate itself, but they still need physical agitation to move pollen from stamen to pistil.
Do this once a day while flowers are open: gently shake each flowering branch for two to three seconds, or use a small electric toothbrush or pollination wand held against the base of each flower for one second. You'll know it's working when small pods appear at the base of spent flowers within 3 to 4 days. If you're seeing flowers drop without setting pods, insufficient pollination is almost certainly the cause.
Harvest timing
Harvest beans young for the best flavor and to keep the plant producing. For standard green beans, pick when pods are 4 to 6 inches long and you can feel tiny seeds inside but they haven't swelled enough to visibly distort the pod wall. Once seeds bulge the pod, the bean becomes starchy and the plant reads it as a completed seed cycle and slows new pod set. For filet types, harvest even earlier at 3 to 4 inches. Check plants every day or every other day once pods start forming, they can go from perfect to overripe in 48 hours in a warm grow environment.
Troubleshooting the most common problems
- Yellowing lower leaves: Usually nitrogen deficiency or a pH that's drifted above 6.5 locking out nutrients. Check pH first, correct if needed, then assess EC. Adjust your nutrient formula if pH was correct.
- Tip burn on new leaves: Calcium deficiency, often caused by EC too high (over 3.0) or solution temperature too warm. Flush, reset EC to 2.0, add cal-mag, and check reservoir temp.
- Stalled growth after transplant: Transplant shock combined with solution too strong for young roots. Back off EC to 1.0 to 1.2 for 5 to 7 days, then ramp up gradually.
- Brown, slimy roots: Root rot, almost always caused by insufficient dissolved oxygen or solution temperature above 75°F. Increase aeration immediately, lower reservoir temp, and consider adding a beneficial bacteria product (like Hydroguard) to outcompete the pathogen.
- Flowers dropping without pods: Pollination failure (most likely), temperatures above 90°F during flowering, or low humidity below 40%. Hand-pollinate daily and check environment.
- Powdery mildew on leaves: Caused by poor airflow and high humidity. Add an oscillating fan, space plants further apart, and lower humidity to 50 to 60% during the day.
- Slow germination: Germination medium too cold (below 70°F) or too wet. Check temperature with a probe thermometer, not the ambient air reading.
Your next steps to get started
If you're starting from scratch today, here's the shortest path to your first hydroponic bean harvest. First, pick your setup size and commit: a 2x4 or 4x4 footprint with a drip or ebb-and-flow system handles 4 to 12 plants comfortably. Buy one of three beginner-friendly varieties: Provider bush bean (fastest, most forgiving), Blue Lake 274 (classic, reliable), or Maxibel filet bean (compact, gourmet quality). Order seeds and a bag of coco/perlite blend alongside your net pots and basic 3-part nutrients plus a cal-mag supplement.
For your light, match intensity to plant count: a 200-watt LED for a 2x4 space, a 400-watt LED for a 4x4. Make sure your grow space can hold temperatures between 70 and 85°F, if you're in a garage or basement that drops below 60°F at night, get a small space heater with a thermostat before you start. Build or install your trellis before germinating seeds if you're growing pole beans.
Germinate in rockwool plugs or rapid rooter cubes at 75 to 80°F, transplant at day 7 to 10 when roots emerge from the plug, and follow the nutrient schedule in this guide. Mark your calendar for daily pollination once you see the first flower buds around week 4 to 5. At day 50 to 55, you'll be harvesting your first pods. It's a faster, more satisfying cycle than most people expect from a fruiting crop grown hydroponically.
Beans are a natural next step once you've grown leafy greens or herbs hydroponically, they push your system a bit harder, reward you with real produce, and teach you the pollination and pod management skills that carry over to other fruiting crops. If you want a head start on what to plant, this guide to the best greens to grow hydroponically can help you choose reliable varieties leafy greens.
If you're still deciding whether beans fit your goals or whether another crop is a better match for your system, comparing beans against other high-value hydroponic crops is worth thinking through before committing your grow space to a full bean cycle. If you want a quick shortlist, explore the best strains to grow hydroponically for reliable yields in home setups.
If you're wondering what to prioritize for maximum profits, compare beans with other high-yield, high-demand options and pick the most profitable hydroponic crops to grow for your setup highest-value hydroponic crops.
FAQ
Can I grow beans hydroponically year-round if my garage or basement gets cool at night?
Yes, but only if your water and system can keep oxygen high and your temperatures stable. Run a chiller or relocate the reservoir so it stays in the 65 to 72°F range, use an air pump with strong, consistent airflow, and avoid letting the grow medium dry between feed cycles. If you cannot reliably hold cooler solution temps, drip or ebb-and-flow is usually more forgiving than DWC for beans.
My plants flower but pods never form, what should I troubleshoot first?
If you do not see tiny pods forming within about 3 to 4 days after flowers open, the first check is pollination (gentle shaking once per day). Next, confirm you are providing adequate PPFD during flowering, and that EC is not too low, since under-feeding can cause flowers to drop even when pollination is happening.
What are the signs I am overfeeding beans, and how should I correct it?
It is usually better to start with a clean nutrient target and avoid “feeding heavier” as a quick fix. If you see slow growth plus leaf tip browning, test pH and EC, then reduce EC slightly and bring pH back toward the upper 5.8 to 6.2 range. For beans, prolonged high EC stresses tips and can also reduce pod set efficiency.
Should I prune or defoliate hydroponic bush or pole beans to increase yields?
Skip heavy pruning in most hydroponic bean setups. Instead, manage airflow by not crowding plants, and remove only leaves that are clearly yellowing or blocking too much light. Over-pruning can reduce the number of flowering sites, especially on pole varieties where a longer harvest depends on continuous side growth.
My bush beans are short and pod set is weak, could it be the net pot size or root restriction?
Net pot size affects more than root space, it also affects how quickly nutrient conditions drift. If you are using 3.5 to 5 inch pots for bush beans and still see poor pod set, increase pot size and also check you have good root oxygen (in DWC, maintain that 1 inch minimum air gap). Root restriction and low oxygen together are a common cause of disappointing harvests.
How do I prevent powdery mildew in hydroponic bean crops?
Yes, but aim for prevention rather than relying on “spraying.” Use spacing for airflow (especially for bush beans that form a humid canopy), keep solution temperatures controlled, and remove infected leaves promptly. For powdery mildew risk, consistent air movement in the grow space matters as much as variety choice.
Why does my pH keep drifting even though I adjust it regularly?
If your reservoir is being topped off daily but you are not changing water on schedule, salts and nutrient ratios drift, which can show up as lockout symptoms. Follow a full reservoir change every 7 to 10 days, and when you notice consistent pH drift greater than about 0.5 units, do a test, then replace rather than trying to correct repeatedly with pH up or down.
What causes brown pod tips and distorted new leaves, and what should I change first?
Do it by limiting how much solution contacts the developing stems and crowns. Start with gentle pollination and harvesting earlier (beans young, 4 to 6 inch pods for standard types). If you are consistently getting pod tips that brown early, check calcium availability using a cal-mag supplement and confirm pH stays near 5.8 to 6.2.
How often should I harvest hydroponic beans, and does picking too late reduce total yield?
For most homes, harvesting more frequently improves overall yield. Check every day (or at least every other day) once pods begin to size, and remove pods as soon as they reach the target length. Waiting until pods bulge shifts the plant into “completed seed cycle” mode, which reduces the next pod wave.
Should I increase nitrogen if my bean plants look leafy but pod production is low?
Most bean failures come from poor pollination or conditions that suppress flowering, not from lack of nitrogen. Beans need less nitrogen than leafy greens, so if you increase nitrogen to “make them grow,” you can get lots of foliage with fewer pods. Instead, shift to a bloom-forward nutrient ratio when you see flower buds around week 4 to 5.