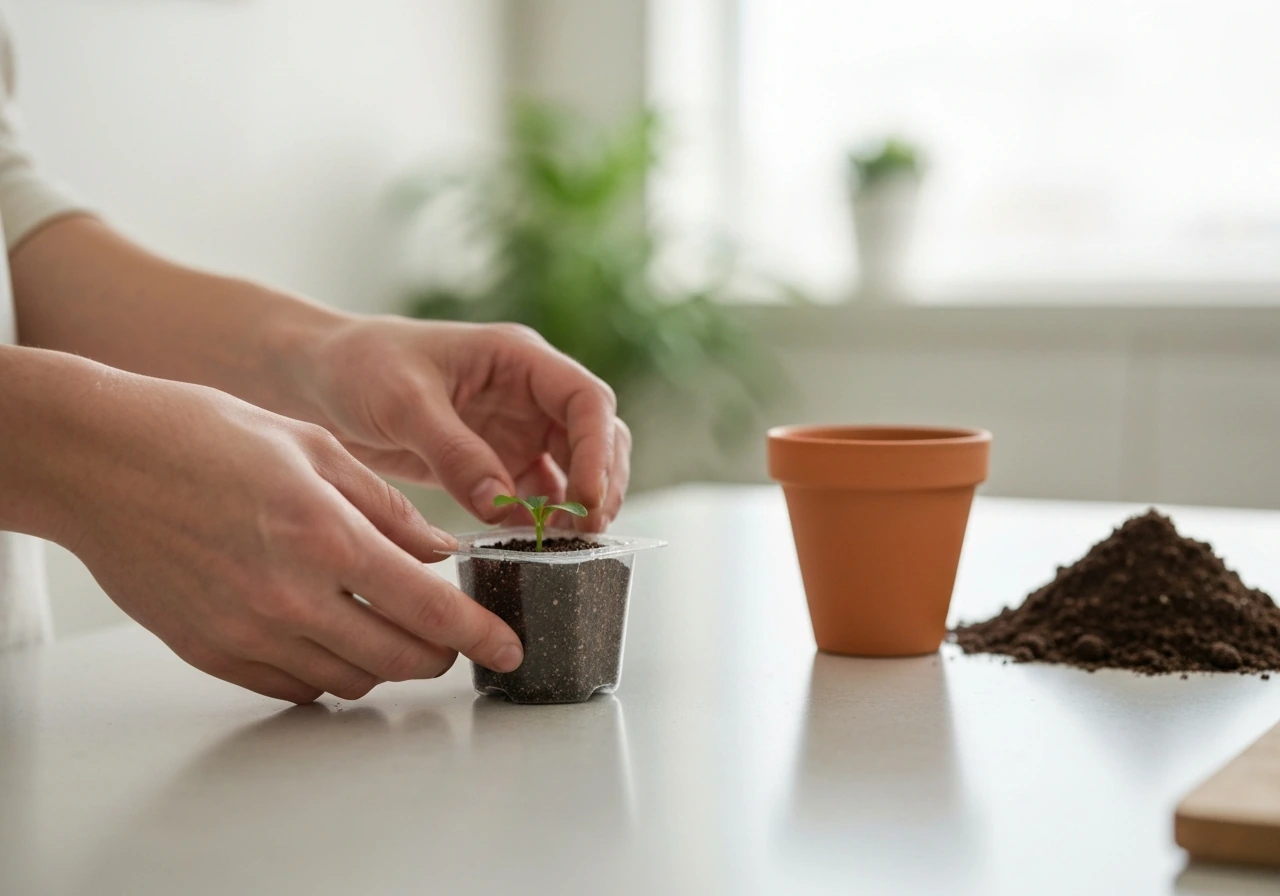
Yes, you can transplant a Click & Grow seedling out of its pod into soil or a hydroponic system, and plenty of growers do it successfully. The catch is timing: move too early and the roots aren't established enough to survive the transition; move too late and you're fighting a root-bound plant that's already stressed. Click & Grow themselves acknowledge this is possible, though they stop short of guaranteeing results once a plant leaves their device. Done right, transplanting gives your plants room to grow beyond what the compact smart garden allows.
Can You Transplant Click and Grow Seed Pods Safely

Marcus Holloway
1 May 2026
What 'transplant Click & Grow' really means

When people search this, they usually mean one of two things: either moving a plant from its Click & Grow pod into a traditional soil container, or moving it into a hydroponic setup. Both are valid, but the mechanics are a little different than standard transplanting because of how the pod system works.
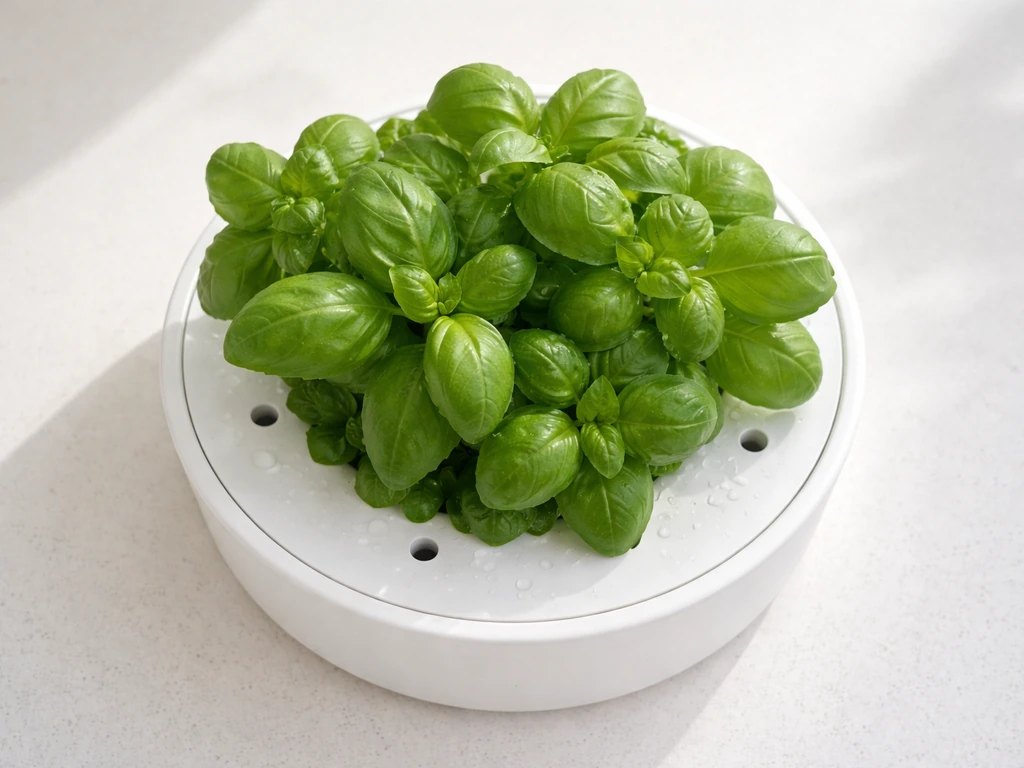
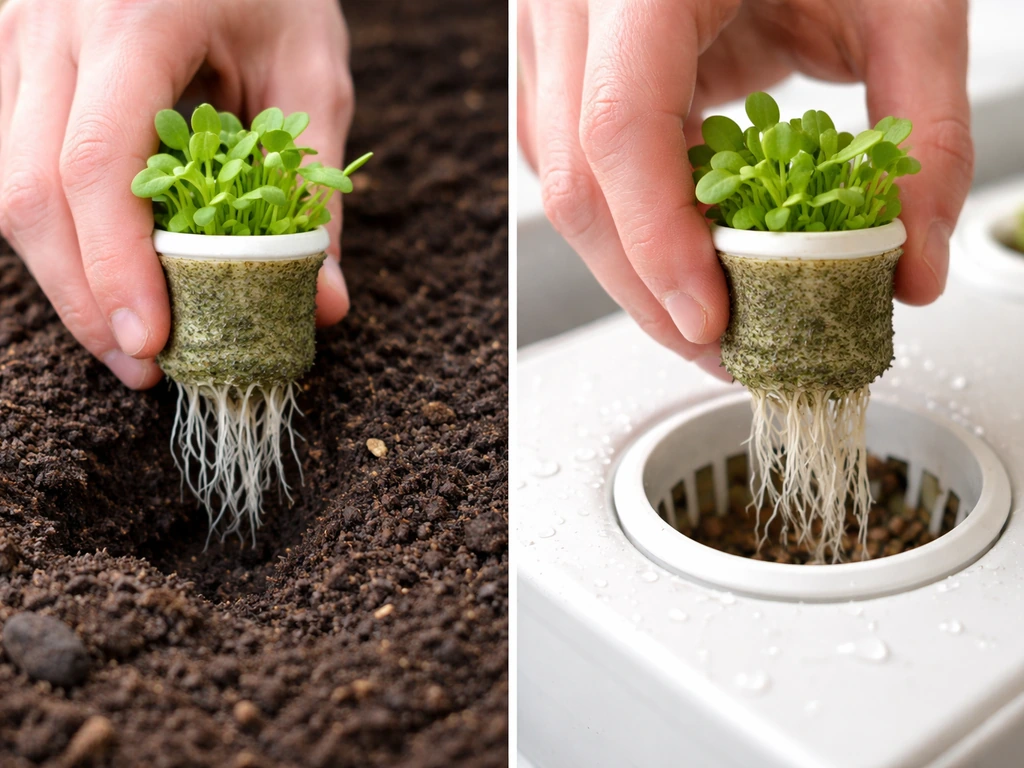
Each Click & Grow pod is a self-contained unit: a seed embedded in a specially formulated growing medium, housed in a small white plastic cup. The pod sits in the device and wicks up water from the reservoir. When you 'transplant,' you're removing that pod, separating the plant and its root ball from the plastic cup, and moving it into a new growing environment. Critically, Click & Grow confirms you can pull the plant out of the white plastic case and put the plant, soil included, directly into a bigger pot of regular soil. You're not stripping the roots bare. The existing pod medium goes with the plant, which dramatically reduces shock.
This is different from repotting within the Click & Grow system itself. This is different from repotting within the Click & Grow system itself, so if you’re asking can you repot click and grow plants, you’ll want to follow the steps for leaving the device entirely. Transplanting means leaving the device entirely, which changes how you handle light, water, and nutrients going forward. If you've been reading about whether Click & Grow plants can be repotted within the system, or whether the setup is even hydroponic by nature, those are related questions but a different process than what this guide covers.
When it's safe to transplant (timing and plant stage)
Timing is the single most important variable here. Move too soon and the seedling doesn't have enough root mass to anchor itself or take up nutrients in a new medium. Move too late and the roots are severely compacted inside the pod, which means more damage during extraction and a harder recovery.
The sweet spot is when you can see roots starting to emerge from the bottom of the pod cup, the plant has developed its first true leaves (not just seed leaves), and it looks structurally healthy with a green, upright stem. For most herbs and leafy plants in Click & Grow, this happens somewhere between 3 and 6 weeks after sprouting, depending on species. Click & Grow notes that plants generally last 2 to 6 months in the device, and they specifically advise transplanting before the natural life cycle ends. Don't wait until the plant looks cramped and struggling. Transplant when it's thriving, not when it's desperate.
- Wait until the plant has true leaves, not just cotyledons (seed leaves)
- Look for roots visible at the base or bottom of the pod
- Transplant while the plant is actively growing and looks healthy
- Avoid transplanting if the plant has already started to flower and decline
- Don't transplant seedlings younger than 2 to 3 weeks from sprouting
One thing worth knowing: Click & Grow says if plants haven't sprouted after 3 to 4 weeks, something is off with germination. If you're at that point, transplanting isn't your solution. But once you have a healthy seedling with established roots, you have a workable window of several weeks to make the move.
Tools and prep for soil vs hydroponic moves
Getting your setup ready before you touch the plant cuts your transplant time in half and keeps the roots from drying out. The tools differ depending on which direction you're going.
For moving into soil
- A pot with drainage holes, roughly 6 inches (15 cm) in diameter for most Click & Grow herbs and greens (don't oversize it)
- Nutrient-rich, well-draining potting mix, not garden soil, which compacts too easily
- A small trowel or spoon for making the planting hole
- Room-temperature water (18 to 24°C / 68 to 75°F matches the growing conditions the plant is used to)
- Optional but useful: a humidity dome or clear plastic bag to cover the plant for the first few days
For moving into hydroponics

- A hydroponic net pot sized to hold the pod medium (typically 2 to 3 inch net cups)
- Clay pebbles or hydroton to support the plant in the net pot
- A diluted, pH-balanced nutrient solution (start at 25 to 50% of full-strength to avoid nutrient burn on transplant day)
- pH meter and pH adjustment solution (target 5.5 to 6.5 for most leafy plants and herbs)
- Clean scissors to trim any damaged or rotting roots before placing in the system
- Your hydroponic reservoir, already filled and running, so the plant goes straight into stable conditions
In both cases, pre-moisten your medium before the plant goes in. Dry soil or dry clay pebbles next to freshly disturbed roots is a recipe for wilting within hours.
Step-by-step: transplanting into soil or containers
- Water the Click & Grow pod thoroughly about an hour before you start. Moist medium holds together better and stresses roots less during removal.
- Gently squeeze and twist the white plastic pod cup to loosen the sides. Tip it upside down and let the pod medium slide out with the plant. Don't pull by the stem.
- Inspect the root ball. Carefully loosen any tightly coiled or matted roots with your fingers. Click & Grow specifically recommends this to stimulate new root growth. Don't try to remove all the original pod medium, just free up the densest root knots.
- Fill your container about halfway with pre-moistened, nutrient-rich potting mix. Make a hole in the center sized to fit the root ball.
- Set the plant in at the same depth it was growing in the pod. Burying the stem too deep invites rot; too shallow leaves roots exposed.
- Fill in around the root ball with soil and gently pat it down to eliminate air pockets and improve root-to-soil contact.
- Water thoroughly until it drains from the bottom holes. This initial soak helps roots settle into the new medium.
- Cover loosely with a humidity dome or clear plastic bag for the first 3 to 5 days to hold moisture and reduce transplant stress.
- Place in indirect or moderate light for the first few days, then gradually reintroduce to your normal light conditions.
Keep the soil moist but not waterlogged for the first few weeks. Click & Grow's own aftercare guidance for repotted plants is clear on this: moist, not wet. Overwatering right after transplant is one of the most common ways growers accidentally create root rot on an otherwise healthy plant.
Step-by-step: transplanting into hydroponics
- Set up and stabilize your hydroponic system at least 24 hours before transplanting. pH should be 5.5 to 6.5, nutrient solution at half strength, and water temperature around 18 to 22°C (65 to 72°F).
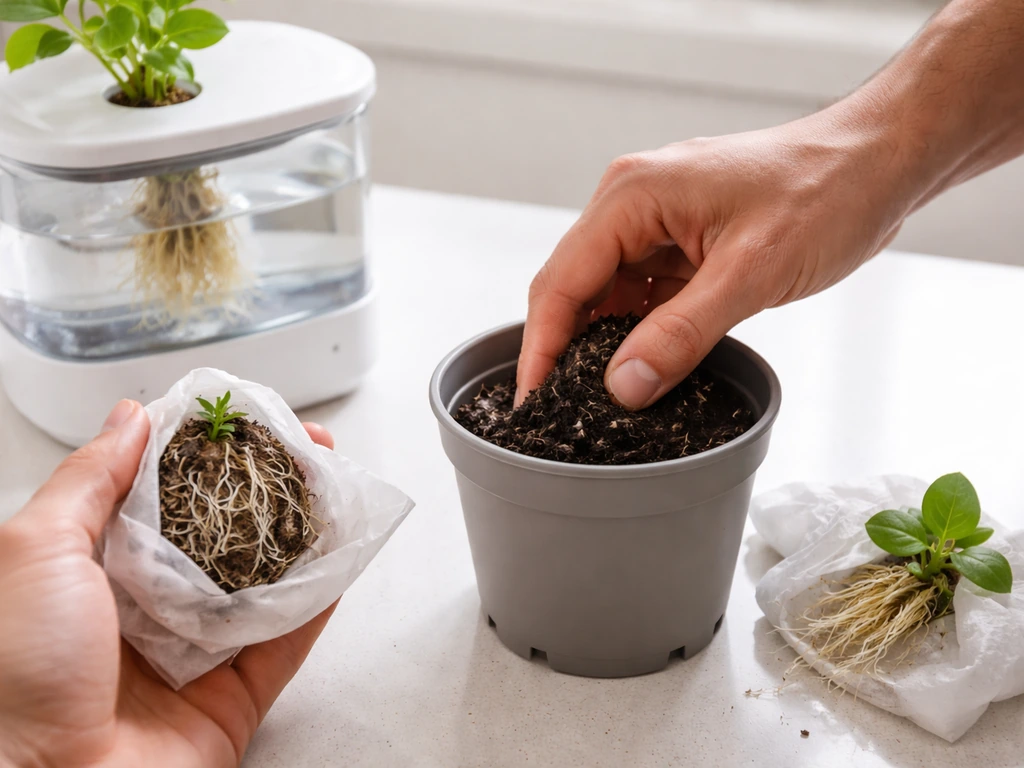
- Remove the plant from the Click & Grow pod cup using the same gentle squeeze-and-tip method as the soil transplant. Handle the root ball minimally.
- Rinse the roots very gently under room-temperature water to remove excess pod growing medium. Don't strip all of it, just wash away the loose material so roots can access the nutrient solution directly. Avoid scrubbing.
- Trim any visibly brown, mushy, or damaged roots with clean scissors. Healthy roots are white to light tan and firm.
- Place the root ball into the net pot and fill around it with pre-rinsed, pre-soaked clay pebbles. The pebbles should support the stem without crushing it.
- Position the net pot in your system so the roots reach or nearly reach the nutrient solution. In deep water culture (DWC), the root tips should touch the waterline; in other systems, adjust based on your setup.
- Run the system at reduced nutrient concentration (25 to 50% of normal) for the first week to let roots acclimate before ramping up feeding.
- Keep light intensity moderate for the first 3 to 5 days, then return to your normal schedule.
- Check roots daily for the first week for signs of rot or sliminess, and monitor pH every 1 to 2 days as the plant adjusts.
The biggest risk moving from a soil-based pod into hydroponics is root rot from residual organic matter. If you’re asking whether the process really counts as hydroponics, focus on keeping residual organic matter under control to prevent root rot in is click and grow hydroponic setups. That's why rinsing matters but doesn't have to be aggressive. Some pod medium left on the roots is fine; a large chunk decomposing in your reservoir is not.
Soil vs hydroponic transplant: which path makes more sense?
| Factor | Soil/Container | Hydroponics |
|---|---|---|
| Difficulty | Beginner-friendly | Intermediate to advanced |
| Shock risk | Moderate (buffered by soil) | Higher (direct root exposure) |
| Growth speed after transplant | Slower initial uptake | Faster once roots acclimate |
| Equipment needed | Pot, soil, water | System, pH meter, nutrients, pump |
| Nutrient management | Mix into soil or top-dress | Requires precise solution control |
| Best for | Herbs, leafy greens, casual growers | Growers already running a hydro setup |
| Risk of overwatering | High if not careful | Lower with proper system design |
If you're a beginner or growing common herbs like basil, mint, or tomatoes from Click & Grow, go the soil route. It's more forgiving and the plants are better adapted to it than you might think, since the pod medium is soil-based to begin with. Hydroponics makes sense if you already have a system running and want to integrate a Click & Grow seedling into it, but the transition takes more attention.
Aftercare and acclimation: light, water, nutrients, and humidity
The first 7 to 10 days after transplanting are when most problems either develop or get avoided. The plant is adjusting to a new root environment, and stress during this window shows up as wilting, yellowing, or stalled growth. Here's how to minimize it.
Light
Click & Grow plants are used to a relatively controlled LED light environment. Whether you're moving them to a windowsill, grow tent, or under a different light source, step down the intensity for the first few days. If moving outdoors, don't put them in direct full sun immediately. Start with bright indirect light for 3 to 5 days, then gradually increase exposure. Jumping from a soft LED to 8 hours of direct summer sun is a shock the roots can't compensate for while they're still establishing.
Water and humidity
For soil transplants, water immediately after transplanting to settle roots, then hold off and let the top inch of soil dry out slightly before the next watering. The target is moist, not saturated. Using a humidity dome for the first few days helps the plant hold moisture through its leaves while the roots get established. This mimics the covered germination conditions Click & Grow uses during early sprouting, which is why it works so well for newly transplanted seedlings.
Nutrients
For soil growers: if you used a pre-amended potting mix, hold off on adding fertilizer for at least 2 weeks. The pod medium itself has some residual nutrition, and adding more too soon causes salt buildup and nutrient burn. For hydroponic growers: start at 25 to 50% nutrient solution strength on day one and work up to full strength over 7 to 10 days as the plant shows new growth. Watch leaf color: pale new growth means it needs more nitrogen; crispy tips or leaf curl means you're pushing too hard too fast.
Temperature
Keep conditions close to what Click & Grow recommends during early growth: 18 to 24°C (68 to 75°F). Dramatic temperature swings during the acclimation week compound transplant stress and slow root development.
Common problems and troubleshooting
Wilting after transplant
Some wilting within the first 24 to 48 hours is normal and usually not a crisis. The plant temporarily loses more water through its leaves than its disturbed roots can supply. If wilting persists past 48 hours, check soil moisture (it may be too dry or too wet), and make sure the plant isn't sitting in direct harsh light. A humidity dome for 3 to 5 days often resolves this on its own.
Slow or stalled growth
Don't panic if the plant looks frozen for 1 to 2 weeks post-transplant. Root development happens underground first. If the plant still looks healthy (no yellowing, no rot, no wilting) but isn't putting out new leaves, it's probably just directing energy toward root establishment. Give it time before adjusting anything. Making changes too quickly during this phase, like increasing nutrients or repotting again, prolongs the stall.
Root rot
Root rot shows up as brown, slimy roots with a bad smell, combined with yellowing leaves and sudden collapse even in moist soil. In soil, this almost always comes from overwatering or a pot without drainage. Fix it by letting the medium dry out significantly and improving drainage. In hydroponics, root rot spreads fast: remove the plant, trim affected roots aggressively back to healthy white tissue, sterilize your reservoir, and restart with fresh solution containing a beneficial bacteria product like Hydroguard to outcompete the pathogen.
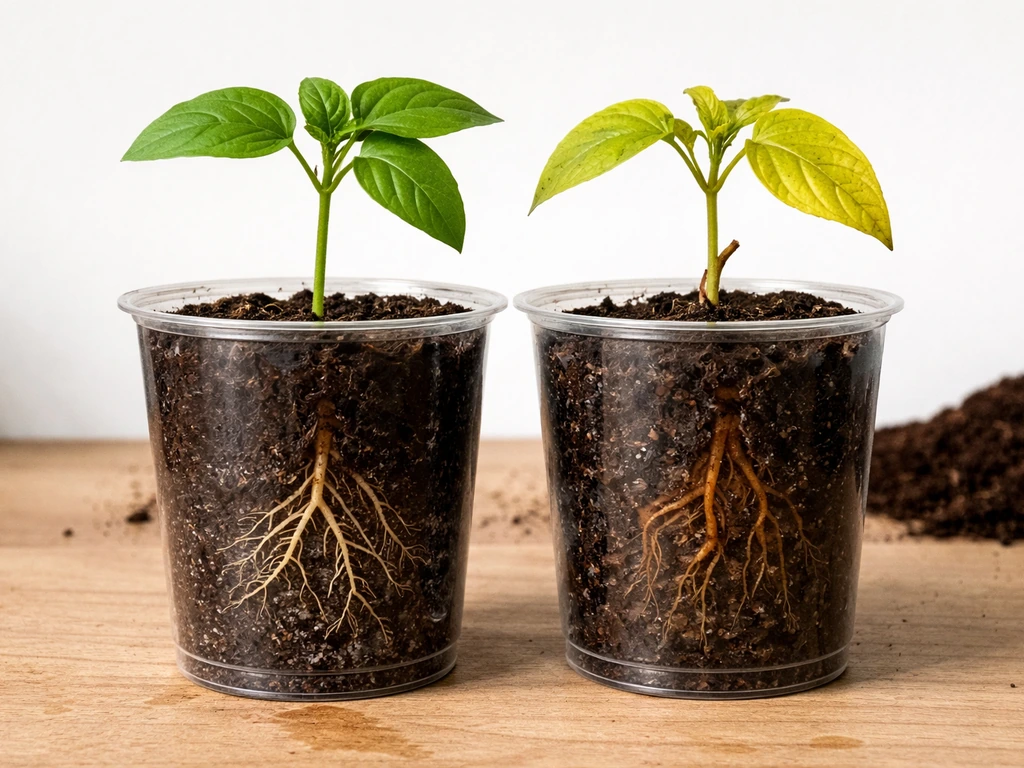
Transplant shock and leaf yellowing
If lower leaves yellow and drop in the first week, that's often normal. The plant sacrifices older leaves to redirect resources to root development. New growth at the top should still look healthy. If yellowing spreads to new growth, check pH (out-of-range pH locks out nutrients even if they're present) and confirm you're not over-fertilizing.
Mold and algae on the soil surface
Surface mold or green algae can appear on the soil, especially if you're using a humidity dome and keeping moisture high. Click & Grow acknowledges this issue in their own growing guides and confirms the plant usually continues growing fine after removal. Scrape or wipe the surface growth off carefully without disturbing the roots, increase air circulation slightly, and let the top layer of soil dry between waterings. Covering the soil surface with a thin layer of dry sand or perlite also suppresses algae by blocking light.
Nutrient lockout or deficiency
If the plant develops interveinal chlorosis (yellow between leaf veins while veins stay green) or shows patchy discoloration, check pH before reaching for more fertilizer. In soil, pH should be 6.0 to 7.0 for most herbs. In hydroponics, keep it 5.5 to 6.5. Feeding a nutrient-deficient-looking plant without fixing pH first wastes product and can make lockout worse.
When transplanting isn't the right move
Not every Click & Grow plant is a good transplant candidate. Annual plants like basil and most herbs that are already nearing the end of their life cycle won't recover from a transplant, they'll just finish dying in a new pot. If your plant is already flowering heavily, producing seed, or showing significant decline, transplanting is unlikely to extend its life. In that case, harvesting what you can and starting a fresh pod is the better call. If you are wondering can you use your own seeds in Click and Grow, the rules are different once you leave the original pods starting a fresh pod. Click & Grow also can't guarantee results after the plant leaves their device, which is a real consideration if you're growing something specific and don't want to gamble on the outcome.
FAQ
Can you transplant a Click and Grow seedling before roots show through the bottom of the pod?
Yes, but do it after the plant has established roots and true leaves. If you cut the pod cup too early, the seedling often breaks at the root ball because the medium hasn’t knitted together yet. When you transplant, keep the pod medium intact (no shaving or pulling away paste-like material) and handle the plant by the base, not the stem.
What happens if I transplant too late, after the seedling looks cramped?
It can work, but expect a higher failure rate. Plants become root-bound inside the pod cup, so extraction tears fine roots that are still trying to grow into the new medium. If you must transplant late, water the target medium first, be extra gentle during removal, and be prepared for a longer adjustment period (often 2 to 3 weeks instead of the typical first-week recovery).
If I transplant into hydroponics, can I keep using the Click and Grow water system?
No. Once the plant leaves the Click & Grow device, you generally should not keep using the device reservoir and wicking setup. You can transplant the pod medium into hydroponics, but the water and nutrient management becomes your responsibility, especially monitoring oxygenation and avoiding organic buildup that can trigger root rot.
How can I tell whether a transplant problem is under-watering or over-watering?
Focus on the first 2 to 3 weeks. If you see wilting and yellowing, the fastest confirmation step is checking moisture depth (not just the surface) and making sure drainage exists. In soil, a pot without drainage holes or staying constantly saturated is the most common root rot trigger.
When should I fertilize after transplanting into soil, especially if my potting mix already has nutrients?
For soil transplants, wait about 2 weeks before adding fertilizer if you used a pre-amended potting mix. If you used an unamended mix, you can start much lighter, but still avoid strong feeding immediately, because salt buildup is more likely right after transplant when roots are damaged. Use a weak dose and reassess based on new leaf color after a week.
What’s the quickest way to avoid nutrient burn in hydroponic Click and Grow transplants?
For hydroponics, adjust nutrients gradually, but also watch your pH as soon as you start feeding. New roots are sensitive, and feeding at full strength too early often shows up as leaf edge burn or curling even before the plant fully stabilizes. Increase strength only when you see active new growth.
If my transplanted seedling wilts the next day, should I intervene right away?
Some wilting in the first 24 to 48 hours is normal, but persistence is a warning sign. If it continues past 48 hours, re-check three things in order: moisture level (too wet or too dry), light intensity (too bright after LED), and temperature swings (roots hate sudden changes). If the stem stays upright and leaves are not collapsing, give it a bit longer, but fix the conditions quickly.
Can I move a transplanted Click and Grow seedling outdoors immediately?
Yes, and it matters because seedlings need stable conditions while their roots re-establish. Don’t put them outdoors directly in full sun, and avoid cold windows at night. A simple decision aid: if your hand would feel uncomfortable in that light or temperature for more than a few minutes, it’s probably too harsh for the transplant.
Is yellowing after transplant always a sign of overwatering?
A few older leaves yellowing can be normal, especially if the plant is redirecting energy to root growth. But if yellowing spreads to new growth, or you see interveinal chlorosis, that points more toward pH or nutrient imbalance than simple transplant shock. In hydroponics, verify pH before you increase nutrients.
What should I do if I see mold or green algae after transplanting?
If mold or algae appears, it’s usually a surface issue from high humidity and light hitting wet soil. Remove the surface growth gently, improve airflow slightly, and allow the top layer to dry between waterings. If you use a humidity dome, keep it only for the first few days, not indefinitely, to prevent recurrence.
Can root rot be saved if I catch it early?
Yes. If you can see root rot starting, don’t wait for it to spread. In soil, improve drainage and let the medium dry more than you would for a healthy seedling. In hydroponics, removing the plant early and trimming to healthy tissue, then restarting with fresh solution and sanitation, usually prevents a complete collapse.
Are there signs that a Click and Grow plant is not worth transplanting?
Yes, and it’s often a reason transplants fail: the plant is effectively past its usable window in the device. Annuals near end-of-cycle, heavily flowering plants, and seedlings already declining from stress are unlikely to recover and can even die faster after transplant. If it’s flowering, consider harvesting and starting a fresh pod rather than relocating.
Do I need to fully remove the pod medium before moving the plant to hydroponics?
No, and that’s a common mistake. Because the pod medium contains organics for soil use, mixing “partial rinsing” with poor hydroponic hygiene can still leave enough residue to decompose in the reservoir. Rinse enough to reduce chunks, then ensure your reservoir stays clean and oxygenated, and monitor for early bacterial smell or rapid root browning.