A micro grow is a small-scale indoor growing setup where you cultivate plants in a compact space with controlled light, airflow, and nutrients. You can run one in a closet, a spare corner, a small tent, or even on a windowsill. The setup is the same whether you're growing microgreens, lettuce, herbs, or anything else compact: a contained space, a light source, some kind of growing medium, water, and a little attention every day. Done right, you can go from seed to harvest in as little as 7 to 21 days for fast crops like microgreens, or a few weeks to a couple of months for leafy greens and herbs.
How to Micro Grow Plants Indoors A Step by Step Guide

Marcus Holloway
14 May 2026
What a micro grow actually is
Micro growing just means growing plants at a small scale, typically indoors, in a controlled environment. It's not a specific product or brand name. The term covers everything from a tray of microgreens on a kitchen counter to a small tent with a dedicated LED and a timer. What makes it "micro" is the footprint: you're not running a commercial operation or a full garden bed. You're working with compact containers, limited square footage, and usually a single light source or a small bank of lights.
The appeal is real. You can grow year-round regardless of climate, dial in your conditions precisely, and get fresh produce in a space the size of a shelving unit. The constraints are also real: limited canopy space means every inch matters, and small mistakes (overwatering, a pH swing, a light that's too far away) show up fast because there's no buffer. That's actually useful once you understand it, because feedback is quick and corrections are easy.
Pick your plant and decide: soil or hydro
Before you buy anything, pick what you're growing. This shapes every other decision. The easiest crops for a first micro grow are microgreens (radish, sunflower, peas, broccoli, basil), lettuce, and compact herbs like cilantro or dill. They grow fast, tolerate beginner mistakes, and don't need a lot of vertical space. Microgreens in particular can go from seed to plate in 10 to 14 days for many varieties, which makes them ideal for learning the basics before moving to longer-cycle crops.
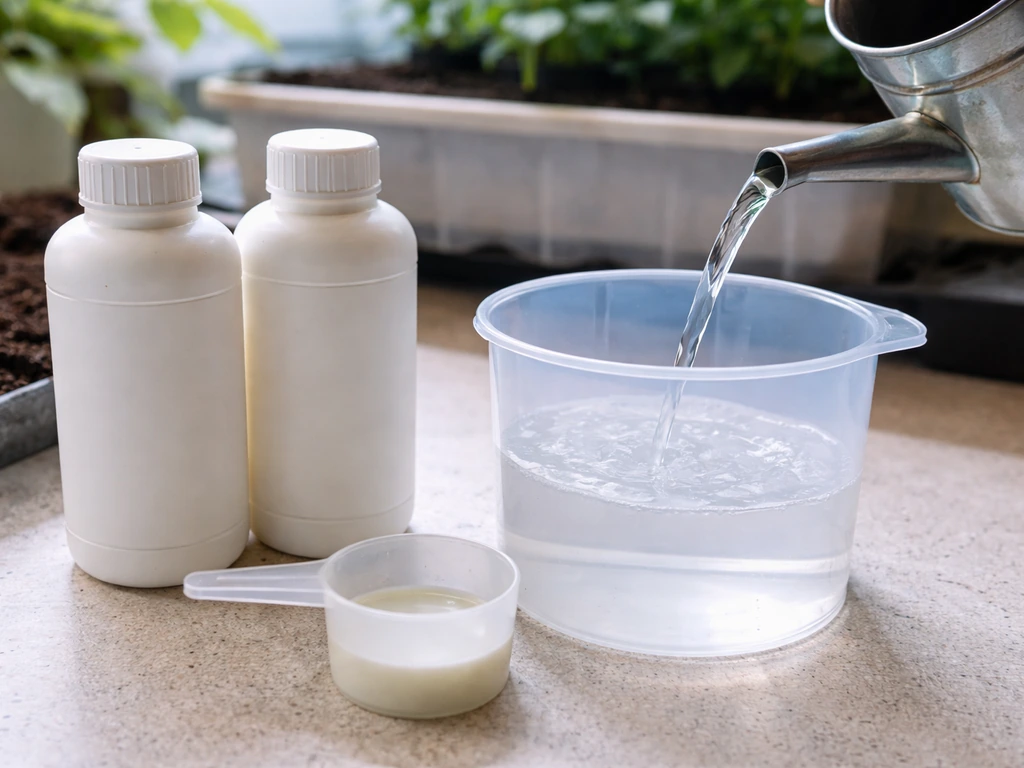
Once you know what you're growing, you need to pick a medium. Soil and hydroponics are the two main paths, and each has genuine trade-offs for a micro setup. Once you choose your path, you can follow the right guidance for how to use Dr. Earth Pump and Grow with your setup soil or hydroponics.
| Factor | Soil / Soilless Mix | Hydroponics |
|---|---|---|
| Setup complexity | Low — fill a tray, water it | Moderate — need reservoir, pH/EC monitoring |
| Cost to start | Low | Moderate to higher (pump, net pots, nutrients) |
| Speed of growth | Good | Faster — roots access nutrients directly |
| Watering forgiveness | Higher buffer if mix drains well | Less forgiving — pH/EC swings hit fast |
| Best for beginners | Yes, especially for microgreens | Yes if you enjoy the technical side |
| Reusability | Media usually single-use for microgreens | Reservoir and system reusable |
| Disease risk | Damping-off if overwatered | Waterborne pathogens can spread system-wide |
For a true first micro grow, soil or a soilless potting mix is the lower-stakes starting point. You get a natural buffer against small mistakes and don't need to track EC or pH from day one. If you are using soil, a product like Roots Organics Buddha Grow can be a helpful option for feeding once your plants move past the seedling stage. If you already have some growing experience and like the idea of faster growth with tighter control, a small hydroponic setup (kratky, DWC, or a simple wick system) is very manageable at micro scale. One thing to avoid regardless of method: never use garden soil from the ground. It's too dense for containers, drains poorly, and brings in pathogens. Use a commercial potting or soilless mix instead.
A quick note on nutrients: if you're already familiar with products like pH Perfect Grow Micro Bloom or multi-part nutrient systems, those translate well into a hydroponic micro grow. If you're using pH Perfect Grow Micro Bloom, make sure your reservoir pH and EC stay within the ranges for microgreens and leafy greens as the plants progress. If you're wondering how to use easy grow fertilizer, follow the label rate and adjust feeding based on your plant stage and whether you're growing in soil or hydroponics. For soil grows, you'll want a soil-specific feed like a gentle organic option rather than a hydro nutrient formula.
Setting up your micro grow space
The four things your micro grow needs are: enough usable space, the right light, airflow, and appropriate containers. Get these right and everything else becomes easier. If you want a simple way to start, plan your light, containers, and airflow first, then follow a week-by-week routine to dial in your micro grow start your micro grow.
Space
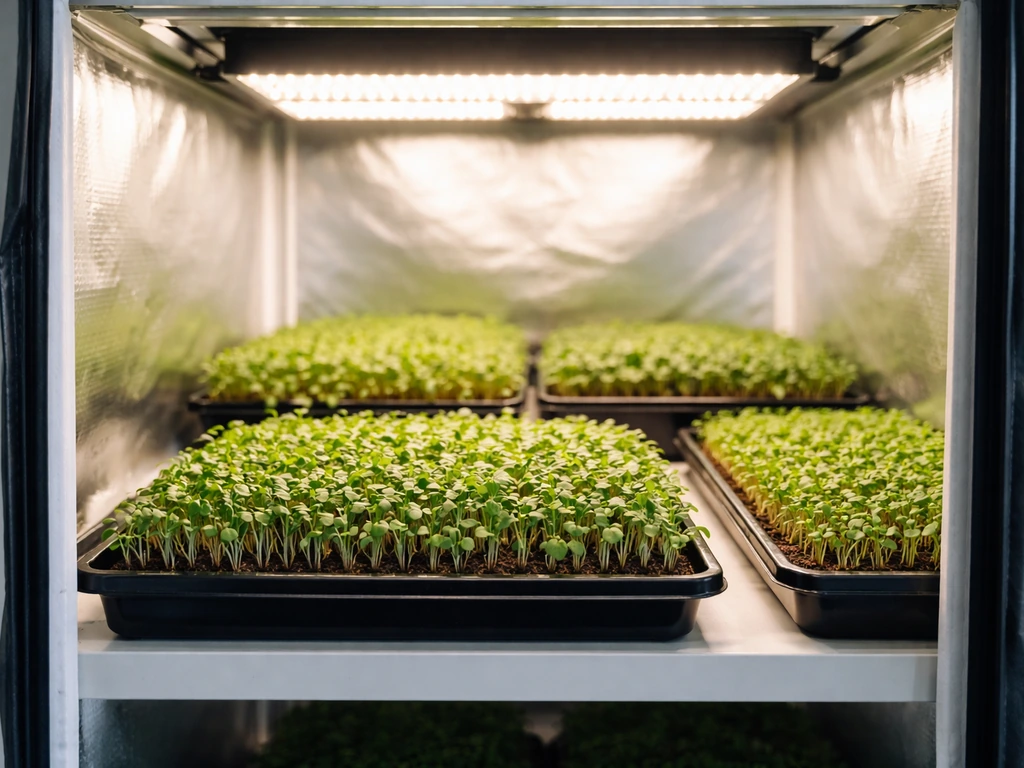
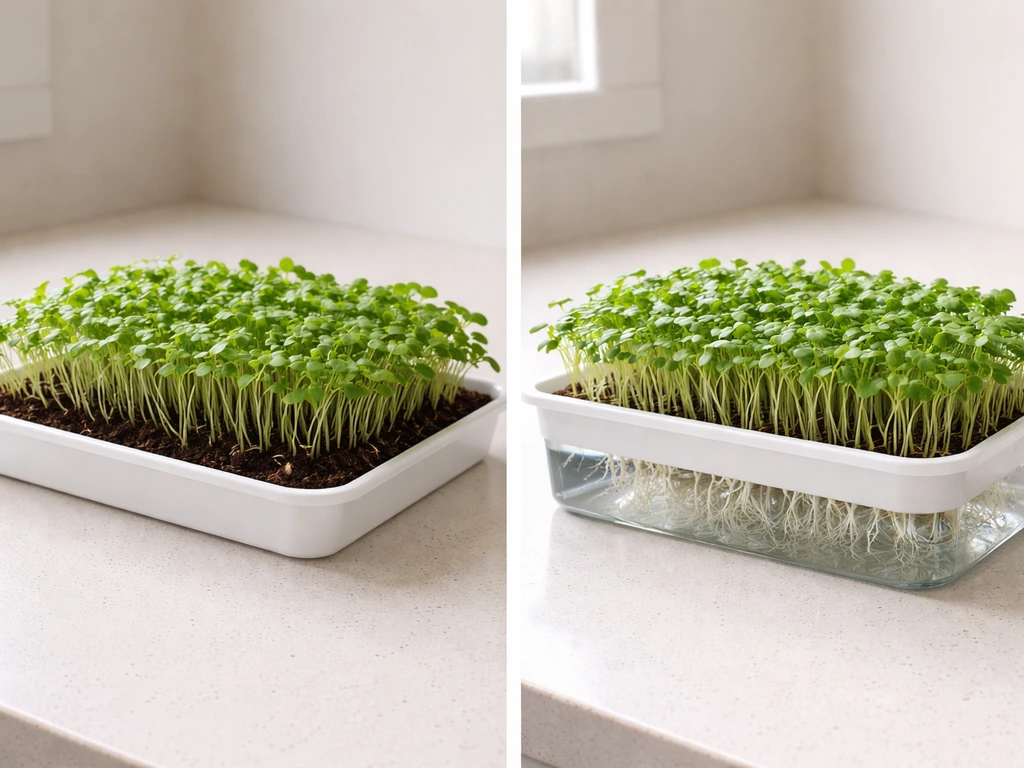
A 2x2 foot grow tent is a genuinely workable micro space and is the most popular starting point. A wire shelving unit with reflective mylar or a dedicated grow cabinet works just as well. The key is that the space is enclosed enough to reflect light efficiently and contain humidity, but ventilated enough that air doesn't stagnate. Standard 1020 greenhouse trays (10 inches by 20 inches) fit neatly on a single shelf and are the industry standard for microgreens. You can stack multiple shelves with their own light strips to multiply production without taking up more floor space.
Lighting
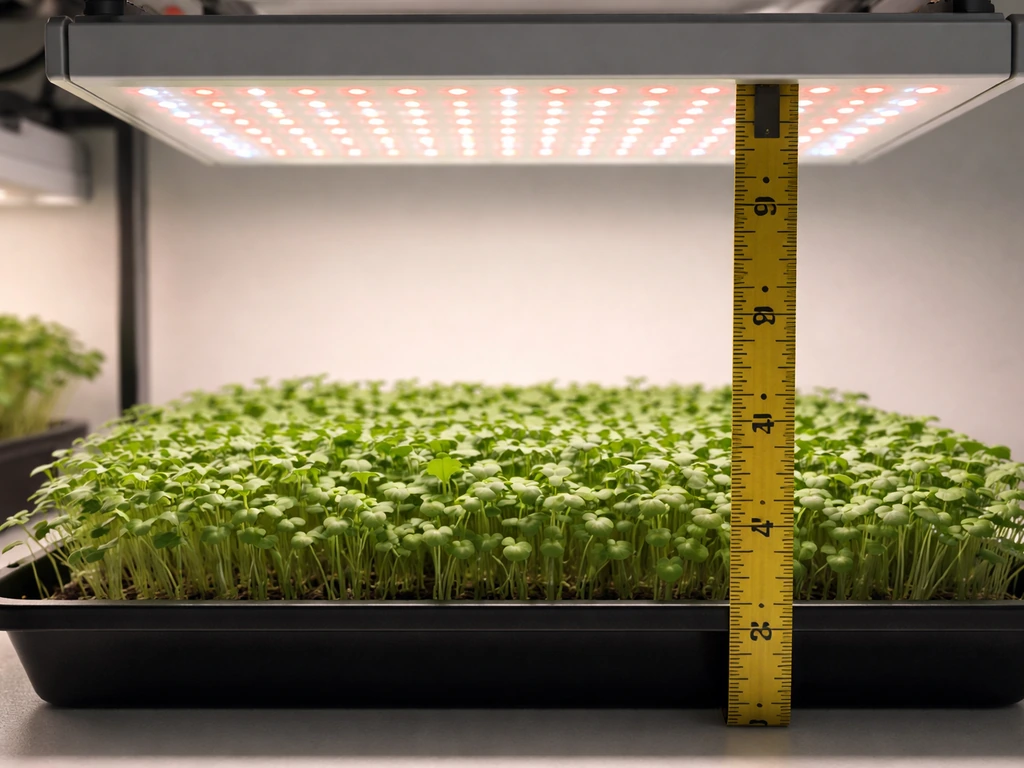
For seedlings and microgreens, you need about 16 hours of light per day. A full-spectrum LED panel or T5 fluorescent strip works well at small scale. Target roughly 100 to 200 µmol/m²/s PPFD when seeds first sprout, then ramp up to 200 to 300 µmol/m²/s once cotyledons open, and 300 to 400 µmol/m²/s at the first true leaf stage. For microgreens, a lamp positioned as close as 3 inches above the top of the plants works fine with fluorescent strips. LEDs may need to be a bit higher depending on their intensity. Use a timer so you're not manually switching lights on and off every day.
Watch for etiolation (stretching). If seedlings are getting leggy and reaching toward the light, the lamp is too far away or the photoperiod is too short. If leaf tips are bleaching or curling, the light is too intense or too close.
Airflow
A small USB fan or clip-on fan providing gentle, continuous air movement is non-negotiable. Stagnant air is one of the fastest routes to mold and damping-off in a micro setup. You want air moving across the canopy, not blasting directly at seedlings. In a tent, a small inline fan with a carbon filter handles both circulation and odor. On a shelf setup, a small oscillating fan pointed at the wall to create indirect movement works well.
Containers
For soil-based micro grows, any sterile container that is 2 to 3.5 inches deep with drainage holes works. Standard 1020 trays, divided trays (one tray with drainage holes sitting inside a solid tray for bottom watering), seedling cells, or food-safe reusable containers all work. The drainage is important because sitting water leads to root rot and disease. For hydroponics, you'll use net pots (typically 1 to 2 inches for small plants) suspended in a reservoir lid, or a simple kratky container like a mason jar or food-safe bucket. Keep all containers clean and sterile between uses.
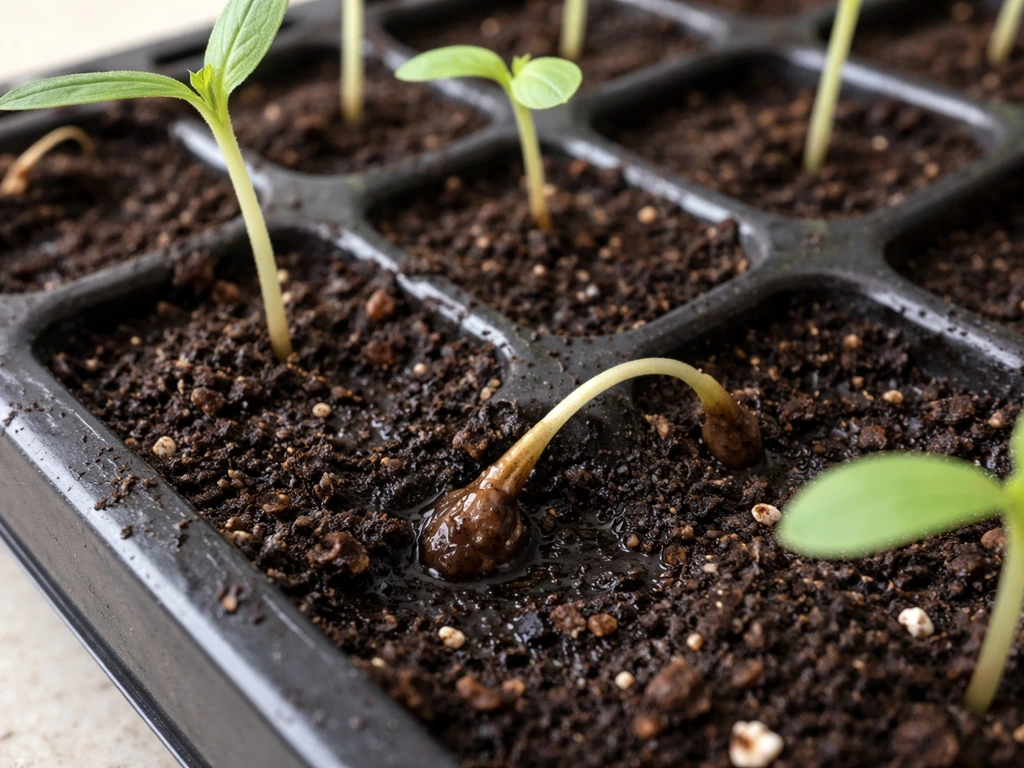
Starting from seed: germination and the seedling stage
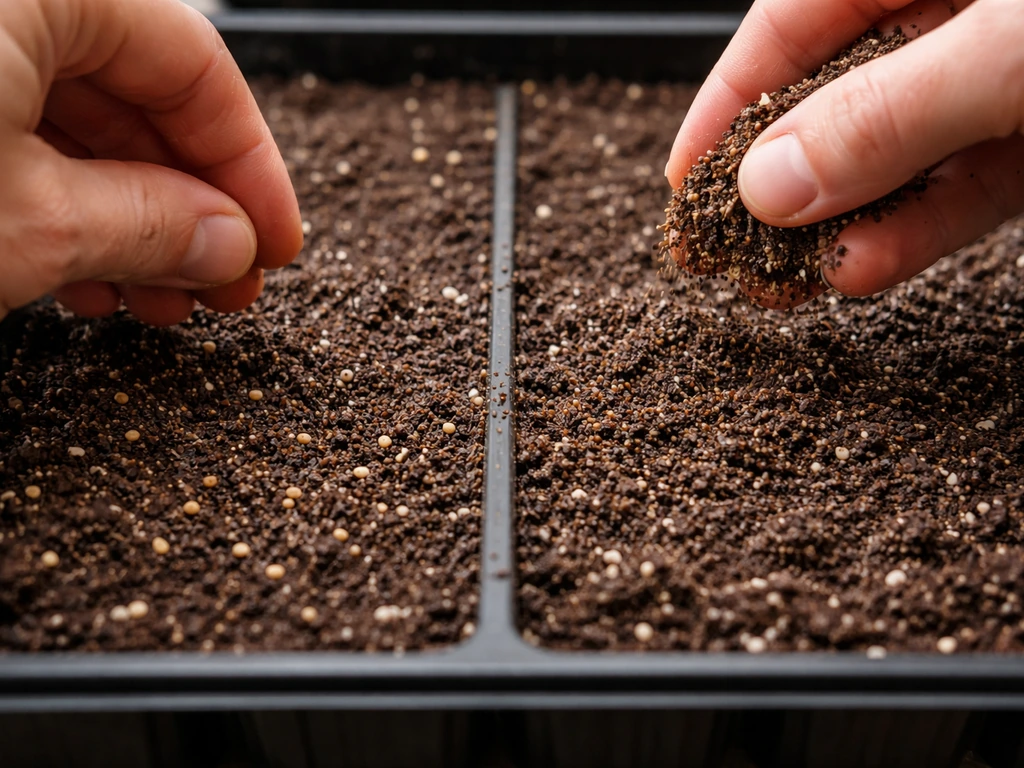
- Fill your tray or container with moist (not soaking wet) soilless potting mix or the medium of your choice. For microgreens, fill to about 1 inch deep. For seedlings going into larger containers, fill to about 2 to 3 inches.
- Sow seeds at the density appropriate to the crop. For microgreens, broadcast seed densely and evenly across the tray surface. For seedlings, one to two seeds per cell is enough. Penn State Extension recommends one type of microgreen per tray because different varieties have different germination and growth rates.
- Mist the surface lightly with a spray bottle. Do not pour water on the seeds or you'll displace them.
- Cover the tray with a plastic dome or another tray placed on top to trap warmth and humidity. This speeds germination significantly.
- Place the covered tray in a warm spot (65 to 75°F is ideal for most crops). Light is not needed yet.
- Check daily and vent the cover briefly to release excess moisture. Closed, wet, warm environments are where mold starts. If you see condensation building heavily on the cover, lift it for a few minutes.
- Once seeds have sprouted (typically 3 to 4 days), remove the cover completely and move the tray under your light immediately. Leaving seedlings in the dark even 1 to 2 days after sprouting causes them to stretch and weaken.
- Begin your 16-hour light cycle from this point.
For a hydroponic micro grow, the germination process is similar: start seeds in a rockwool cube, a small rapid rooter plug, or directly in a net pot with a starter medium like hydroton or perlite. Keep the medium moist and the environment warm until sprout, then move under light and begin introducing a very dilute nutrient solution (around EC 0.4 to 0.6 mS/cm) once the first true leaves appear.
Feeding and watering: soil vs hydro basics
Soil feeding
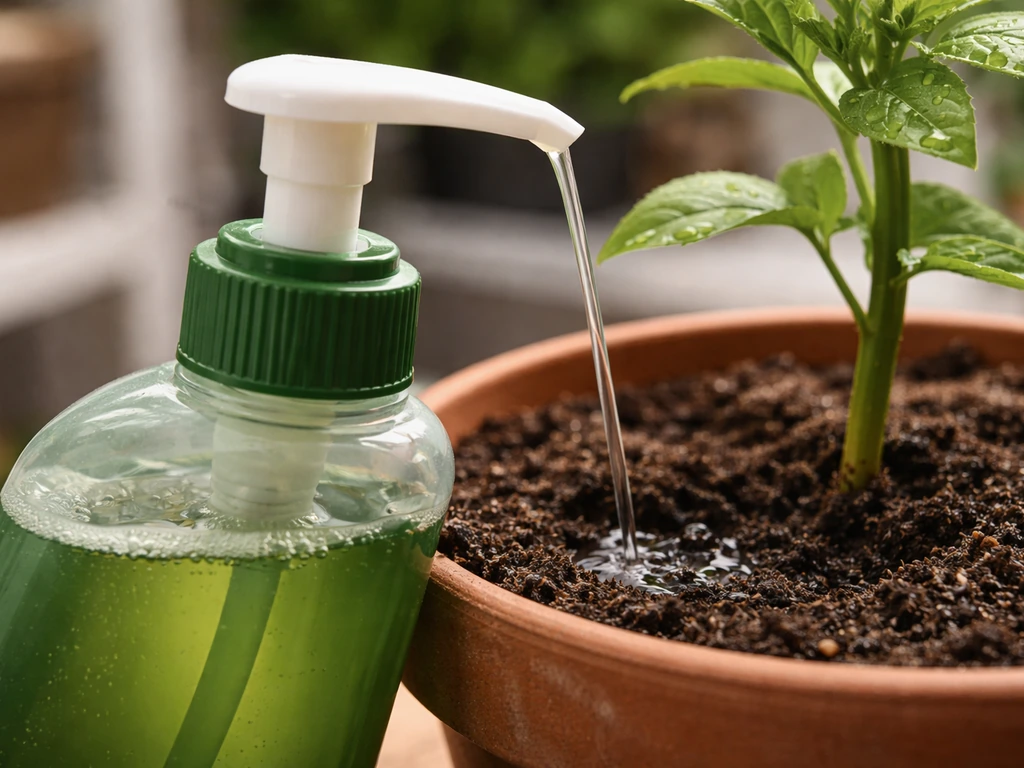
For a soil-based micro grow, a quality soilless potting mix often contains enough nutrients to carry seedlings and microgreens through their entire grow cycle without any added fertilizer. Microgreens in particular rarely need additional feeding because they're harvested before the plant depletes the starter nutrients in the medium. If you are using Power Grow foliar fertilizer, apply it according to the label and spray the leaves lightly rather than soaking the growing medium. If you're growing crops past the seedling stage (lettuce, herbs), introduce a gentle liquid nutrient at half the recommended dose around week two, after the first true leaves have developed. Water when the top half-inch of the medium feels dry, not on a fixed schedule. Consistent moisture without saturation is the goal.
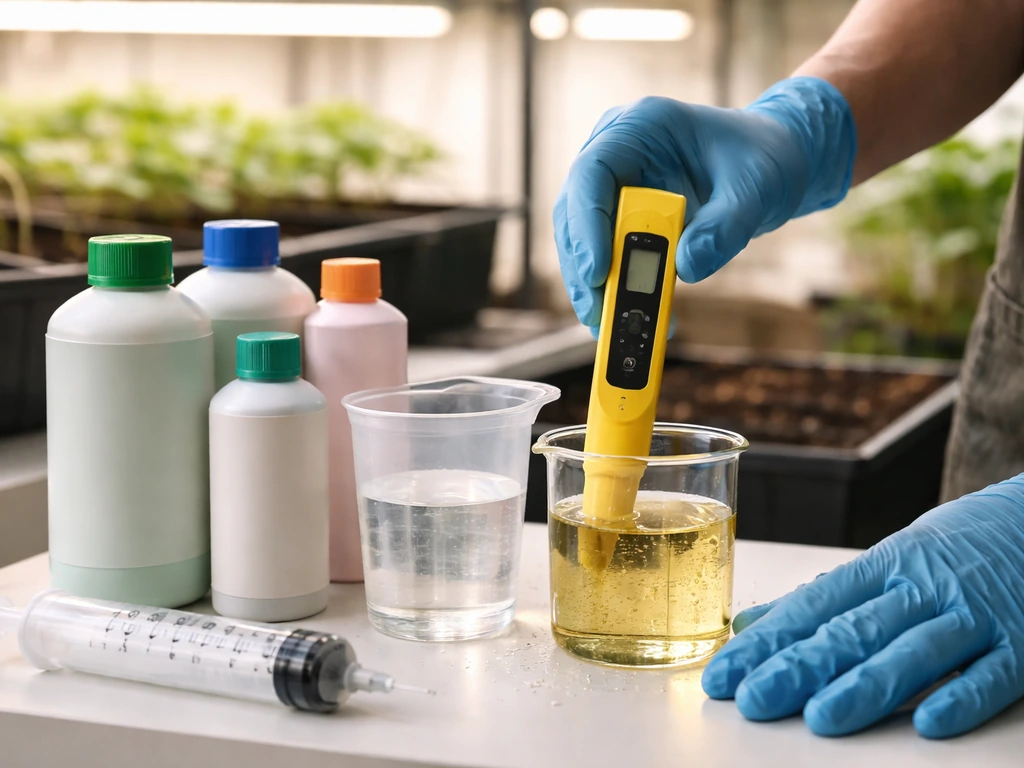
Hydroponic feeding: pH and EC
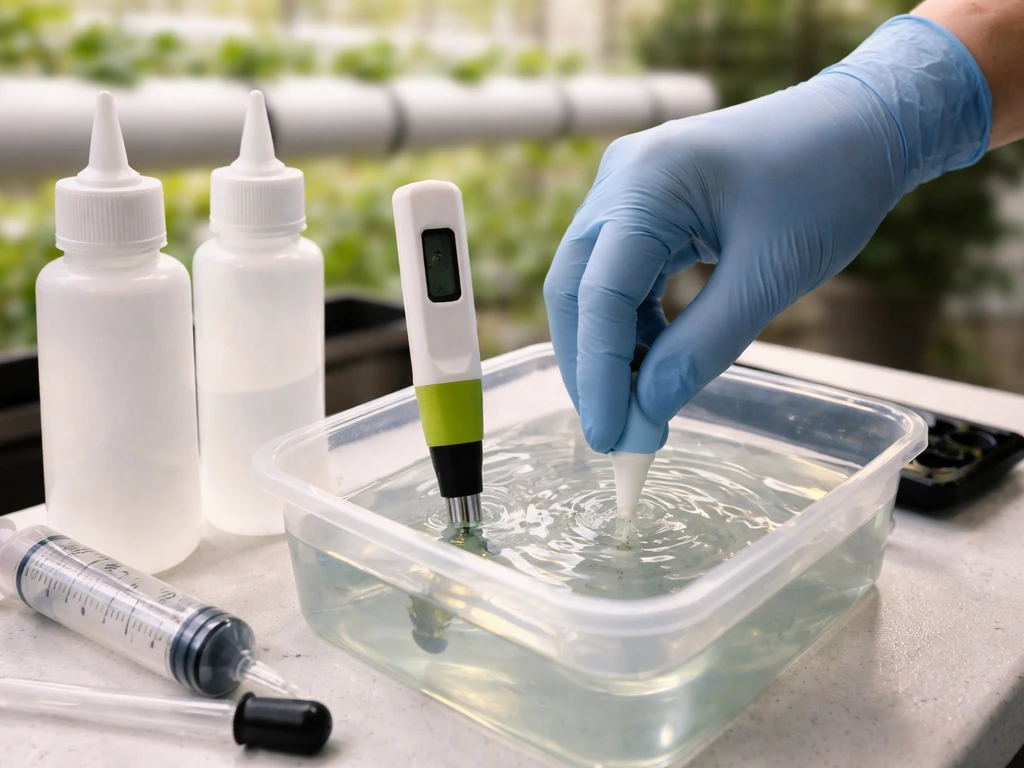
Hydroponics requires you to monitor two numbers consistently: pH and EC (electrical conductivity). OSU provides its hydroponic electrical conductivity and pH guidance as a downloadable PDF publication titled “Electrical Conductivity and pH Guide for Hydroponics (HLA-6722).”. pH tells you whether nutrients are available to the roots. EC tells you how concentrated your nutrient solution is. Get a basic pH pen and an EC/TDS meter. They're inexpensive and essential.
For leafy greens and microgreens in a hydroponic system, target a pH of 5.8 to 6.2 and an EC of 0.8 to 1.0 mS/cm for seedlings. Once plants are established and growing actively, you can raise EC to 1.2 to 1.8 mS/cm. If pH drifts above 7.0 or below 5.5, nutrient lockout happens and the plant looks deficient even if the reservoir is full of nutrients. Check pH and EC every day or two, top off with plain pH-adjusted water between reservoir changes, and do a full reservoir change every 7 to 10 days for a small system.
| Crop Stage | Target pH | Target EC (mS/cm) |
|---|---|---|
| Seedling / just sprouted | 5.8–6.2 | 0.4–0.8 |
| Established seedling / early veg | 5.8–6.5 | 0.8–1.0 |
| Active vegetative growth | 6.0–6.5 | 1.2–1.8 |
| Microgreens (full cycle) | 6.0–7.0 | 0.8–1.5 |
For the nutrient formula itself, any reputable hydroponic grow formula works at micro scale. Multi-part systems (like the kind that include separate grow, micro, and bloom components) give you the flexibility to dial in the formula for each growth stage, which is useful if you plan to cycle through multiple crops.
Managing your grow: training, spacing, and keeping conditions stable
In a micro grow, the biggest space management tool is density control. Overcrowding is the most common mistake: plants compete for light and airflow, humidity spikes between leaves, and disease follows. For microgreens, dense sowing is intentional and correct. For anything you're growing past the cotyledon stage (seedlings, lettuce, herbs), give each plant enough room so leaves aren't overlapping neighboring plants. In practice, that means thinning to the strongest seedling per cell within the first week.
Temperature and humidity are the two environmental variables that cause the most problems when they swing. Aim for 65 to 75°F during the light period and no more than a 10-degree drop during dark hours. Humidity should stay in the 50 to 70 percent range during active growth. Too dry and you'll see leaf edge curl and tip burn. Too humid (above 75 to 80 percent) and you're in mold territory. A cheap combo thermometer/hygrometer placed at canopy level gives you accurate readings without guessing.
For crops going past the seedling stage, low-stress training (gently bending stems outward and securing them with soft ties or clips) opens up the canopy and lets more light reach lower growth. At micro scale, even a small canopy manipulation can meaningfully improve light distribution. You don't need to get elaborate here. Just make sure no large leaves are blocking light from smaller ones below.
Troubleshooting the most common micro grow problems
Overwatering
This is the number one killer of small-scale grows. Symptoms include yellowing lower leaves, wilting that doesn't improve after watering, and a medium that stays wet for days. The fix is to let the medium dry out partially between waterings and make sure your containers have functional drainage. If roots are sitting in water, they're suffocating.
Damping-off
Damping-off is a fungal disease that causes seedlings to pinch off at the soil line and fall over. You'll see a brown, water-soaked area at the base of the stem. Once it's visible, the affected seedling is lost. The pathogens spread through shared water and wet media, so remove affected plants immediately and stop overhead watering. Prevention is the only real strategy: use sterile containers and fresh media, ensure good airflow, vent tray covers daily, and don't overwater. The risk spikes when seedlings are kept very wet in cool conditions.
Nutrient deficiency or lockout
Yellowing between leaf veins (interveinal chlorosis) usually signals a micronutrient deficiency like iron or manganese. Uniform yellowing from the bottom up usually means nitrogen deficiency. Before adding more nutrients, check your pH first. In hydro especially, a pH that's drifted out of range will lock out nutrients even if the EC looks right. Correct the pH, give it 24 to 48 hours, and see if the plant recovers before adding more feed.
Light problems
Stretchy, pale, leggy plants mean not enough light or the light is too far away. Move the light closer or increase the photoperiod. Bleached leaf tips, brown spots on upper leaves, or leaves curling down and away from the light mean too much intensity. Raise the light or reduce the hours. Both problems are easy to fix once you know what to look for.
Temperature and humidity swings
If your temperature drops sharply when lights go off (more than about 10 to 15 degrees), plants can stress and slow down significantly. A small heat mat under trays helps during the seedling stage. Humidity spikes overnight are also common in enclosed micro setups when the fan slows or stops. Keep your fan running on a low setting even during dark hours to prevent stagnant, humid conditions.
Pests and diseases in a small indoor grow
The good news about a micro indoor grow is that pests are far less likely than in an outdoor garden, and you can address them early because you're checking plants daily. The bad news is that in a small enclosed space, a pest population or a disease can run through your entire crop quickly because everything is close together.
Common pests to watch for
- Fungus gnats: tiny flies hovering around the soil surface. Their larvae eat roots and can carry damping-off pathogens. Prevent with sticky yellow traps and by letting the top inch of media dry between waterings. Larvae can't survive in dry topsoil.
- Aphids: soft-bodied insects clustered on new growth and undersides of leaves. Knock them off with a strong water spray, or use insecticidal soap diluted to label rate.
- Spider mites: very fine webbing on leaves, tiny dots on leaf surfaces. They thrive in hot, dry, stagnant air. Maintaining proper humidity and airflow is your first prevention. Neem oil or a miticide spray handles active infestations.
- Shore flies: look similar to fungus gnats but eat algae rather than roots. Still a sign your medium is staying too wet.
Disease prevention in enclosed micro spaces
Mold and fungal diseases (including powdery mildew and grey mold) spread fast in still, humid air. Your main prevention tools are airflow, clean equipment, and not overcrowding plants. Remove any dead or dying plant material immediately. Don't let fallen leaves sit on the soil surface. In a hydroponic system, be especially careful about contamination: because the water recirculates or is shared across multiple plants, a pathogen introduced to the reservoir can affect every plant in the system simultaneously. Change reservoir water on schedule, clean equipment between grows with a mild bleach solution (1 tablespoon per gallon of water), and rinse thoroughly before refilling.
For active disease outbreaks, remove affected plant material, improve airflow and reduce humidity first, then consider a targeted treatment. For powdery mildew, diluted hydrogen peroxide (3 percent at a 1:3 ratio with water) sprayed on leaves works well without leaving residue. For root diseases in hydro, beneficial bacteria products (containing Bacillus subtilis or similar organisms) added to the reservoir can help suppress pathogens.
Your first micro grow: what a good week-by-week run looks like
| Week | What to do | What "good" looks like |
|---|---|---|
| Day 1–3 (Germination) | Sow seeds, cover tray, place in warm spot, vent cover daily | Uniform sprouting, no mold on surface, medium moist but not soggy |
| Day 3–5 (First sprout) | Remove cover, move under light, begin 16-hour photoperiod | Short, upright seedlings with green cotyledons, no stretching |
| Day 5–10 (Early growth) | Water carefully as needed, monitor temp/humidity, check for pests | Cotyledons fully open, first true leaves beginning on longer-cycle crops |
| Day 10–14 (Active growth) | Thin to one plant per cell if growing past microgreen stage; begin dilute feeding in hydro | Strong stems, deep green leaves, roots visible at drainage holes or reservoir |
| Day 14–21 (Harvest or continue) | Harvest microgreens at cotyledon or first true leaf stage; continue leafy greens with regular feeding | For microgreens: 1–3 inch tall shoots ready to cut. For lettuce/herbs: multiple true leaves, compact and healthy |
After your first grow, you'll know more than any article can teach you. If you want a quick schedule for a grow, learn how to use grow more 30 10 10 and adjust it to your plant and setup. You'll have seen how your specific light behaves, how fast your medium dries, and how your plants respond to your conditions. That feedback loop is what makes micro growing genuinely satisfying. Adjust one variable at a time between grows so you can actually tell what changed, and you'll optimize fast.
FAQ
What’s the fastest crop if I’m learning how to micro grow?
Microgreens are usually the quickest learning path, many varieties take about 10 to 14 days from sowing to harvest. If you want an even faster feedback loop, choose seeds known for rapid germination (like radish or sunflower) and harvest at the first true leaf stage rather than waiting for larger plants.
How do I know if my light intensity is too high or too low when I micro grow?
Use plant cues, not guesses. Leggy stretching and pale color point to insufficient intensity or too little photoperiod, bleached leaf tips, leaf curling, or leaf “clawing” suggests the light is too close or too intense. After adjusting, wait 24 to 48 hours before making a second change so you can see the effect clearly.
Can I micro grow on a windowsill, or do I need LEDs?
You can start on a windowsill for very small trials, but it’s hard to keep consistent PPFD and day length. Expect slower growth and more variability day to day, and you’ll still need some form of supplemental light to avoid etiolation. For predictable harvest timing, a dedicated LED with a timer is the safer route.
How close should my lights be for microgreens, and how do I adjust if I see issues?
For many microgreen setups, lights can be positioned very close (around a few inches) when using fluorescent fixtures, LEDs often need a bit more clearance depending on their output. If seedlings stretch, lower the light or extend the photoperiod, if tips bleach or curl, raise the light or reduce hours. Recheck canopy distance after you change tray stack height.
How often should I water if I micro grow in soil?
Rather than a fixed schedule, base watering on feel. Water only when the top portion of the medium dries (for many setups that’s roughly the top half-inch), then water thoroughly enough to get proper drainage. In micro trays, watering too early keeps the root zone constantly wet, which increases damping-off and root problems.
What’s the simplest way to avoid mold in a small micro grow?
Prioritize gentle, continuous airflow across the canopy and avoid overcrowding. Keep humidity below the mid range where it rises toward 75 percent, and do not rely on “more mist” as a solution for dryness. Also vent tray covers daily during seedling stages so trapped moisture can escape.
Do I need to monitor pH and EC for microgreens in hydroponics?
Yes, if you’re doing hydroponics, pH and EC monitoring is critical because nutrient availability and concentration shift as plants grow. Even small drift can cause look-alike problems that seem like “needs more fertilizer” but are actually lockout. For small systems, check every day or two and top off with properly adjusted water between full reservoir changes.
Is soil always lower risk for micro grow beginners, or can hydro be easier?
Soil often is lower-stakes for beginners because it provides buffering and you typically don’t need pH and EC tracking from day one. Hydro can be manageable too, especially with a small kratky or simple wick approach, but you must be comfortable measuring and correcting pH/EC when symptoms appear or before they worsen.
What’s the most common density mistake when I micro grow leafy greens or herbs?
Overcrowding. Leaves overlap, airflow drops, humidity spikes between plants, and disease spreads faster because everything is close. Thin seedlings early so you keep one strong plant per cell or provide spacing so mature leaves do not touch neighboring plants.
Should I fertilize microgreens or skip feeding?
Many microgreens need no added feeding because they are harvested quickly, before they fully deplete starter nutrients. If you do feed, use a light, targeted approach and follow the label rates, and avoid soaking the medium with foliar products. For leafy greens or herbs that run longer, introduce gentle nutrients around the time active growth begins.
Why do my seedlings “fall over” in a micro grow?
That pattern strongly suggests damping-off, usually caused by staying too wet with poor airflow or contaminated media. Once you see the pinched, brown, water-soaked base, remove affected seedlings and stop overhead wetting. Prevention is the priority: sterile containers, fresh media, and consistent, gentle airflow.
My leaves are yellowing, how do I tell if it’s pH or nutrients when I micro grow?
Check pH first in hydro. Yellowing between veins often points to micronutrient issues like iron or manganese, while uniform yellowing starting from lower leaves commonly aligns with nitrogen shortage. In hydroponics, drift outside the target pH range can mimic nutrient deficiency, so correct pH and wait about a day before adding more fertilizer.
What temperature swings are most harmful in a micro grow?
Large drops at lights-off can slow growth and stress plants, especially in small enclosed spaces. Keep dark-period temperature within about 10 degrees Fahrenheit of the light period, and if your room runs cool, consider a modest heat source like a heat mat during germination and early seedling growth.
How do I clean and reuse trays and containers between micro grow cycles?
Because pathogens spread quickly in small spaces, clean between grows. Use a mild bleach solution for hard surfaces, then rinse thoroughly and let everything dry before refilling. If you’re using soilless media, discard used media and avoid “top dressing” dirty substrate, it often reintroduces contamination.
Can I micro grow multiple crops at once in the same tent or cabinet?
Yes, but only if the crops have similar light and humidity needs. If you mix long-cycle leafy greens with short-cycle microgreens, their watering and disease risk can differ. Also keep crop spacing consistent, and avoid stacking too many trays under one light bank if airflow cannot reach all levels.