Mix Micro first, always. That one rule saves most growers from the biggest mistake with pH Perfect Grow Micro Bloom. The correct mixing order is: fill your reservoir or mixing container with most of your water, add Micro, stir, then add Grow, stir, then add Bloom, stir. If you want to micro grow effectively, focus on the correct Micro-then-Grow-then-Bloom mixing order and keep your starting water within the system's buffering range how to micro grow. All three parts run at the same dose rate: start at 1 mL/L in early veg, ramp to 4 mL/L at peak stages, and let the pH Perfect technology do the buffering work for you, provided you're starting with RO or low-ppm water.
How to Use PH Perfect Grow Micro Bloom Step by Step

Marcus Holloway
1 May 2026
What pH Perfect Grow Micro Bloom actually is
Advanced Nutrients markets this as a three-part base nutrient system, but it's really five products bundled together. You're getting the core Grow, Micro, and Bloom base nutrients plus Wet Betty (a non-ionic surfactant that helps nutrients penetrate plant tissue), fulvic acid (their Grandma Enggy's F-1), humic acid (Grandma Enggy's H-2), and an amino acid complex. That's meaningful because the humic and fulvic acids contribute to chelation, which keeps micronutrients soluble and plant-available across a wider pH window.
Each part of the trio serves a distinct nutritional role. Grow carries nitrogen (1-0-4), which fuels leaf and stem development. Micro delivers more nitrogen (2-0-0) along with key micronutrients and acts as the chelation backbone of the system. Bloom supplies the phosphorus and potassium (1-3-4) your plant demands once it shifts reproductive energy into flower development. You never drop one of the three parts entirely, all three run together at every stage, just at different ratios depending on where your plant is in its life cycle.
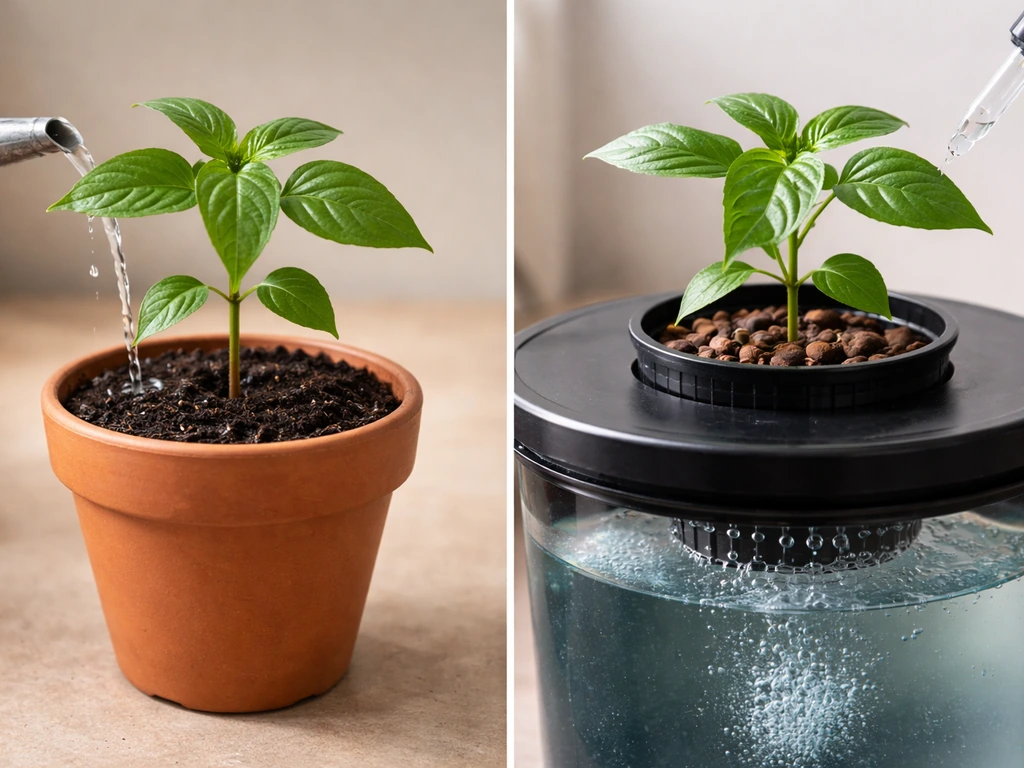
The system is explicitly designed for continuous liquid-feed hydroponic setups: blank" rel="noopener noreferrer">drip/emitter systems, NFT, flood and drain, and deep water culture (DWC). That said, plenty of growers run it in soil and coco coir with good results. The pH Perfect technology is the headline feature, Advanced Nutrients claims it self-corrects pH to stay in the 5.5–6. Advanced Nutrients claims the pH Perfect technology holds nutrient solution pH in a “sweet spot” of about 5.5 to 6.3 pH, often around 5.6 pH blank" rel="noopener noreferrer">sweet spot of 5.5 to 6.3 pH. 3 range, which they call the 'sweet spot' for high-value plants. The catch is that this buffering only works reliably when you start with RO water or water at roughly 100 ppm (EC around 160 µS/cm) or below.
Before you mix anything: check your water and pick your schedule
The pH Perfect system is only as good as your starting water. If you're running tap water at 300–500 ppm with a high calcium or bicarbonate load, the pH buffering will struggle or fail entirely. The fix is either RO water or a combination of RO and small amounts of tap to target that sub-100 ppm baseline. Hard tap water is the single most common reason growers complain that 'pH Perfect doesn't work.'
Grab a TDS/EC meter and measure your source water before you ever mix a single nutrient. If it reads above 150 ppm, either switch to RO or be prepared to manually pH-adjust your final solution. If it's under 100 ppm, you're in great shape for the technology to do its job. Also measure your tap water pH, Advanced Nutrients has demonstrated the system pulling extreme pH values (they use 4.5 and 8.5 as examples) back into range, but extreme tap water pH creates a larger correction load that can reduce buffering reliability.
The Grow Phase and Bloom Phase are the two schedule frameworks. During seedling and vegetative growth, you follow the Grow Phase chart. Once your plant has flipped to flower (12/12 for photoperiod plants, or when an autoflower begins showing pre-flowers), you transition to the Bloom Phase chart. The Grow Phase runs four weeks at escalating doses, then you hold or transition. The Bloom Phase runs seven weeks at a consistent 4 mL/L for all three parts, followed by a flush week.
How to mix Grow, Micro, and Bloom step by step
Shake every bottle before you pour. Advanced Nutrients specifically calls this out because the beneficial components in each bottle settle to the bottom over time. Skipping this means you're getting an inconsistent blend, particularly with the humic and fulvic acid fractions.
- Fill your reservoir or mixing bucket with about 75–80% of your final water volume (RO or low-ppm water, at room temperature).
- Shake the Micro bottle vigorously for 10–15 seconds, then add your measured dose to the water. Stir or circulate for 30 seconds.
- Shake the Grow bottle and add your measured dose. Stir again.
- Shake the Bloom bottle and add your measured dose. Stir again.
- Top up to your final water volume.
- Add any other additives at this point (cal-mag if needed, boosters, etc.).
- Check EC/TDS to confirm you're in the right range for the plant stage.
- If you're not relying on pH Perfect (hard tap water), check and adjust pH now to 5.5–6.3 for hydro or 6.0–6.8 for soil.
- Wait 15–20 minutes and re-check pH before feeding, since the pH Perfect buffering can take a short time to fully stabilize.
Micro always goes first. If you add Bloom or Grow before Micro, you risk precipitation, nutrients clumping together into compounds the plant can't absorb. Once you know the mixing order, you can follow the same Micro-Grow-Bloom steps to use easy grow fertilizer reliably Bloom or Grow before Micro. This is especially problematic with calcium and phosphate or calcium and sulfate combinations. The Micro acts as a chelation buffer that prevents those reactions from happening when Grow and Bloom are added afterward. If you follow the Micro then Grow then Bloom order and keep your water quality in range, you’ll know exactly how to use power grow foliar fertilizer with this dosing system.
Dosing by week and stage
Advanced Nutrients gives a base rate guideline of 4 mL/L for base nutrients at full strength. The ramp-up schedule across the Grow Phase starts lower to avoid stressing young plants. Here's the full picture across both phases:
| Phase | Week | Grow (mL/L) | Micro (mL/L) | Bloom (mL/L) |
|---|---|---|---|---|
| Seedling (pre-Grow Phase) | Weeks 1–2 | 0.5 | 0.5 | 0.5 |
| Grow Phase | Week 1 | 1 | 1 | 1 |
| Grow Phase | Week 2 | 2 | 2 | 2 |
| Grow Phase | Week 3 | 3 | 3 | 3 |
| Grow Phase | Week 4 | 4 | 4 | 4 |
| Bloom Phase | Weeks 1–7 | 4 | 4 | 4 |
| Flush | Final 1–2 weeks | – | – | – |
Seedlings are not on the official chart because they don't need full nutrient loads. Run everything at half the Week 1 rate (0. For a quick “grow more 30 10 10” style routine, use the same half-strength starting approach before ramping up to full dosing 0.5 mL/L each. 5 mL/L each) for the first couple of weeks after germination, or until you see vigorous root development and the first set of true leaves fully open. Pushing full doses on seedlings causes tip burn and can stall root development entirely.
Feeding in soil vs. hydroponics
The mixing process is identical regardless of your medium, but how and when you apply the solution, and how you manage pH, differs in important ways between soil and hydro.
Hydroponic setups
In a recirculating system like DWC, NFT, or flood and drain, you're managing a reservoir rather than individual feedings. Mix your solution directly in the reservoir following the Micro-Grow-Bloom order, then circulate to homogenize before checking EC and pH. In DWC especially, top off daily with plain RO water (not fresh nutrient solution) because water evaporates faster than nutrients are consumed. Check EC every 1–2 days, if it's climbing, your plant is drinking more water than nutrients and a top-off with plain water will bring it back down. If EC is dropping, your plant is eating nutrients aggressively and may need a partial reservoir refresh.
Change your full reservoir every 7–10 days in most recirculating setups to prevent salt buildup, pH drift from microbial activity, and nutrient imbalances from selective uptake. In DWC and NFT, pH can drift upward overnight because roots consume hydrogen ions during active nutrient uptake. Check pH daily. If you see it climbing above 6.3, either your pH Perfect buffering is being overwhelmed (usually a water quality issue) or you need to manually correct with pH Down.
For non-recirculating hydro systems (drain-to-waste drip, for example), feed to about 10–20% runoff at each watering. This runoff flushes accumulated salts from the root zone. Let the medium dry out slightly between waterings but not to the point of drought stress, in coco coir, that means daily watering at peak growth; in rockwool or clay pebbles, similar frequency.
Soil grows
In soil, the pH Perfect technology works differently than in hydro. Soil's natural buffering and microbial activity create their own pH dynamics, so you should always manually check your runoff pH when using this system in soil. Target a pH of 6.0–6.8 in the root zone, slightly higher than the hydroponic sweet spot because soil nutrient availability curves are shifted compared to inert media. Shoot for 6.2–6.5 as your ideal soil target.
Feed soil plants every second or third watering rather than every session. Between feedings, plain pH-adjusted water helps prevent salt accumulation. Water volume should be enough to produce 10–20% runoff so you can measure the runoff EC and pH. If runoff EC climbs more than 500–700 ppm above what you're feeding, it's time for a flush before the next feeding cycle.
When and how to flush
Flushing means running plain, pH-adjusted water through your medium with no nutrients. In hydro, flush for the final 1–2 weeks before harvest by draining the reservoir, refilling with clean RO water, and running that through. In soil, use 3x the pot volume in plain water (e.g., 15 liters through a 5-liter pot) to clear accumulated salts. You should also flush mid-grow if you suspect salt lockout: runoff EC is very high, leaves are showing multi-nutrient deficiency despite regular feeding, and the medium smells off or looks crusty at the surface. After flushing, let the medium dry slightly before reintroducing nutrient solution at a lower dose, then ramp back up.
Troubleshooting: what goes wrong and how to fix it
pH drift and target ranges
The pH Perfect system targets 5.5–6.3 for hydroponic media. If your pH is drifting outside that window despite using the system, the most likely causes are: starting water that's too hard (above 150 ppm), overdosing nutrients (which can overwhelm the buffer), or biological activity in the reservoir altering pH. Fix hard water with RO filtration. Fix overdosing by scaling back and rebuilding at the recommended 4 mL/L. Fix reservoir biology by changing your solution more frequently and keeping reservoir temperature at 65–70°F (18–21°C).
| Medium | Target pH Range | Notes |
|---|---|---|
| DWC / NFT / Flood & Drain | 5.5–6.3 | Check daily; pH often rises overnight due to root activity |
| Coco coir | 5.8–6.2 | Coco tends to buffer toward acidity; aim for middle of range |
| Rockwool / clay pebbles | 5.5–6.1 | Inert media; pH drift is faster without medium buffering |
| Soil | 6.0–6.8 | Soil buffers naturally; monitor runoff pH not just input pH |
Deficiency symptoms and lockout

If you see yellowing between veins on older leaves, that's a classic magnesium deficiency, common when pH drifts above 6.5 in hydro, because Mg uptake tanks at high pH. Iron deficiency looks similar but hits newer growth first (young leaves turn yellow while veins stay green), and it happens when pH climbs above 6.5 in hydro because iron forms insoluble compounds at alkaline pH. Both are pH-management problems first, not necessarily nutrient-dosing problems. Correct your pH before adding more nutrients.
Nutrient lockout shows up as multi-nutrient deficiency despite feeding at proper doses, combined with high runoff EC. The plant can't absorb anything because the root zone is saturated with salt. This is your flush signal. After flushing, wait for EC to normalize (runoff EC should be close to input EC), then restart feeding at 50% of your last dose before ramping back up.
Tip burn on new leaves usually means you're overfeeding, especially on seedlings or early veg plants. Drop back to the previous week's dose and hold there for one more week before advancing. Brown spots on lower leaves mid-veg can indicate calcium deficiency, which sometimes happens in RO-based systems that lack the natural calcium found in tap water. Adding a dedicated cal-mag supplement at 1–2 mL/L alongside your Grow Micro Bloom solution often resolves this quickly.
Common mixing mistakes
- Adding Bloom or Grow before Micro — causes precipitation and nutrient lockout in the solution itself before it ever reaches the plant.
- Mixing concentrates together undiluted — never combine two bottles directly; always dilute each into water separately.
- Skipping Micro because 'it's mostly nitrogen and I already have enough' — Micro is the chelation anchor for the whole system; removing it breaks the pH Perfect buffering.
- Using hard tap water and wondering why pH drifts — the pH Perfect technology requires low-ppm source water to function as advertised.
- Not shaking bottles before measuring — settled particles mean inconsistent nutrient ratios in each pour.
- Running the same dose through seedling stage as veg — seedlings need half or less of the standard dose.
- Ignoring EC and only checking pH — pH alone doesn't tell you if nutrients are accumulating to toxic levels in the root zone.
- Flushing at the wrong time (mid-peak flowering) because of minor leaf issues — unnecessary flushing during peak flower development stalls yield.
Example feeding routines for each stage
Seedling (weeks 1–2 after germination)
Water: RO or low-ppm tap under 100 ppm. Mix Micro at 0.5 mL/L, then Grow at 0.5 mL/L, then Bloom at 0.5 mL/L. Target EC: 0.4–0.6 mS/cm (200–300 ppm on a 500-scale meter). pH target: 5.8–6.2 for hydro, 6.0–6.5 for soil. Water every 2–3 days in soil; feed to small runoff. In hydro, run full reservoir at this dilute rate. No additives yet, keep the environment simple so you can identify problems easily if they arise.
Vegetative stage (weeks 1–4 of Grow Phase)
Ramp from 1 mL/L each in Week 1 up to 4 mL/L each by Week 4. Target EC: 1.2–1.8 mS/cm (600–900 ppm) at peak veg. Feed every watering in hydro/coco; every other watering in soil with plain water between feeds. Monitor runoff EC in soil, if it climbs more than 500 ppm above your input, you're building up salts and need to flush before the next nutrient feed. This is the stage where you'll see the fastest response to proper nutrition: internodal spacing tightens, leaves deepen in color, and lateral branching accelerates.
Flowering stage (Bloom Phase, weeks 1–7 plus flush)
All three parts run at 4 mL/L for the full bloom phase. Target EC: 1.6–2.2 mS/cm (800–1100 ppm). You're holding at maximum dose rather than climbing, because the plant's nutritional demands peak early in flower and then taper toward harvest. In the final 1–2 weeks, drop to plain water only (pH-adjusted) to flush the medium and allow the plant to metabolize stored nutrients. In soil, you'll often notice leaves beginning to yellow naturally during this flush window, which is normal and a positive indicator of clean, salt-free final growth.
Quick-start checklist before your first feed
- Test your source water — get TDS/EC below 150 ppm (ideally under 100 ppm); use RO if needed.
- Gather all three bottles: Grow, Micro, Bloom. Shake each one before use.
- Identify your plant stage and select the correct dose from the table above.
- Fill your reservoir or mixing container with 75–80% of final water volume.
- Add Micro first, stir. Add Grow, stir. Add Bloom, stir. Top up to final volume.
- Check EC — confirm it's in the correct range for plant stage.
- Check pH — if using RO water and correct dosing, it should land in 5.5–6.3 for hydro or 6.0–6.8 for soil; manually adjust if not.
- Wait 15 minutes, re-check pH to confirm stability.
- Feed and observe your plants for 24–48 hours before adjusting anything.
This system genuinely simplifies pH management when used as directed with the right water, but it's not zero-maintenance. Before your first feed, use this quick-start checklist to make sure your water and mixing steps are set up for the Micro-Grow-Bloom schedule Quick-start checklist before your first feed. EC monitoring, reservoir changes, and periodic flushing are still part of the job. Treat the pH Perfect claim as a strong buffering assist rather than a total set-and-forget system, and you'll get consistently good results. If you're also exploring single-part or organic nutrient options alongside a three-part system, products like those in the Roots Organics or Dr. If you go that organic route, you can also look up how to use Roots Organics Buddha Grow to match the nutrition approach to your living soil setup. Earth lineup take a very different approach, more microbially driven, better suited for living soil setups where the biological buffering does the heavy pH lifting instead of synthetic chelation. If you want an easier alternative for soil, you can also follow the Dr. Earth Pump and Grow directions for mixing and application Dr. Earth lineup.
FAQ
Can I mix Grow and Bloom together, then add Micro last to save time?
No. Adding Micro after Grow and Bloom is a common cause of precipitation and clumping, especially with calcium plus phosphate or calcium plus sulfate mixes. Always do Micro first, then Grow, then Bloom, even if you’re doing a quick batch.
What should I do if my source water is below 100 ppm but my final solution still drifts high pH?
Recheck water pH and EC of the mixing water, then confirm you’re shaking every bottle and using the correct ratios. If the water quality is truly low-ppm, the next most common cause is adding nutrients in the wrong order or not stirring long enough between parts, which can delay proper chelation and buffering.
Do I need a TDS or EC meter, or can I dose by mL per liter only?
EC monitoring is highly recommended. Even when you dose correctly, plant uptake and top-offs change solution strength. Use EC to decide whether to top off with RO water (EC rising) or refresh more nutrient solution (EC dropping).
How often should I shake the bottles, and does it matter if I already used them recently?
Shake before every pour. Components like fulvic and humic fractions settle over time, so even a bottle opened yesterday can give a different blend if it sat upright without mixing.
If pH Perfect buffers my pH, when do I still need to manually adjust pH?
You still need to correct if pH consistently moves outside 5.5 to 6.3 in hydro. That usually means the buffering load is being overwhelmed (hard water, too much nutrient dosing, or reservoir biological activity). Adjust pH before adding more nutrients so you fix the root cause.
Should I target the same EC in DWC and NFT?
Use a similar target range, but manage differently. DWC often needs more frequent EC checks and careful RO top-offs because evaporation is faster, while NFT can show changes quickly if the film thickness or flow rate is inconsistent. Treat your EC target as a guideline, not a single fixed number.
What’s the best way to top off in hydro without messing up EC and dosing?
Top off daily with plain RO water when EC climbs, do not top off with fresh nutrients. After topping off, mix order stays the same for any new batch, but for a top-off you’re only diluting with water to keep nutrient concentration stable.
My runoff EC in soil is much higher than my input, should I flush every time?
Flush before you escalate nutrients. If runoff EC is consistently more than about 500 to 700 ppm above your input, that indicates salt buildup and increased risk of lockout. Then restart at a lower dose and watch whether runoff EC normalizes.
How can I tell magnesium deficiency from iron deficiency quickly?
Look at leaf age and vein pattern. Magnesium deficiency typically shows as yellowing between veins on older leaves. Iron deficiency more often hits newer growth first, where young leaves yellow while veins stay greener, and it usually aligns with pH being too high.
Is cal-mag always necessary with this system?
Not always. In RO-based setups you may see calcium-related symptoms like brown spots on lower leaves mid-veg, and adding cal-mag can help. If your pH is stable and EC is in range, diagnose pH first before adding supplements.
What flush schedule should I use for autos versus photoperiod plants?
Use the same last-1 to 2-week flush concept, but trigger it based on the crop’s flowering timeline. For autos, start the flush when they are clearly in late flower and nearing harvest based on trichome and plant maturity, not on a fixed week count.
Can I use this nutrient line in soil without runoff monitoring?
You can, but it’s risky. Soil has extra buffering from microbes and the root zone, so pH Perfect can behave differently. Runoff pH and runoff EC give you the fastest confirmation that the root zone is actually staying in a usable range.
What causes nutrient lockout even when I’m dosing exactly 4 mL/L in bloom?
Most often it’s salt accumulation (high runoff or reservoir buildup) or pH drifting outside the buffering window. If you see multi-nutrient deficiency while EC is high and absorption seems blocked, treat it as a flush signal, not a prompt to add more nutrients.
My seedlings show tip burn, should I stop feeding completely?
Usually no. Tip burn on new leaves generally means you ramped too aggressively. Drop back to the previous week’s dose and hold for about a week, then resume ramping only when root growth and leaf development look strong.