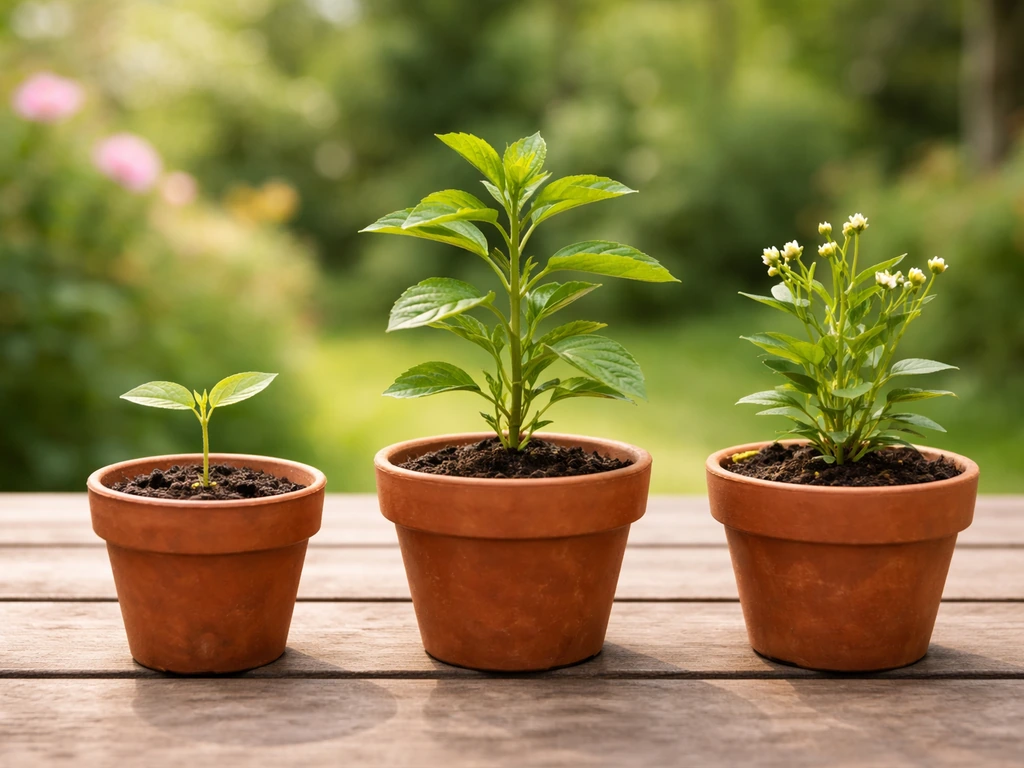
Build your outdoor feeding schedule around three stages: vegetative (high nitrogen, moderate phosphorus, low potassium), transition into pre-flower (cut nitrogen, raise phosphorus and potassium), and full flower or fruit (low nitrogen, high phosphorus and potassium). To dial in the best bloom nutrients for an outdoor grow, focus on shifting toward higher phosphorus and potassium during pre-flower and full flower best bloom nutrients for outdoor grow. In soil, feed every 7–10 days and keep pH between 6. 0–7.
Feeding Schedule: Best Nutrients for Outdoor Grow

Marcus Holloway
11 May 2026
0. In an outdoor hydroponic or soilless setup, feed daily or with every watering and hold pH at 5. 5–6. 5 with EC between 1.
5–3. 0 dS/m. That's the core of it. Everything below shows you exactly how to execute it week by week and fix it when something goes wrong.
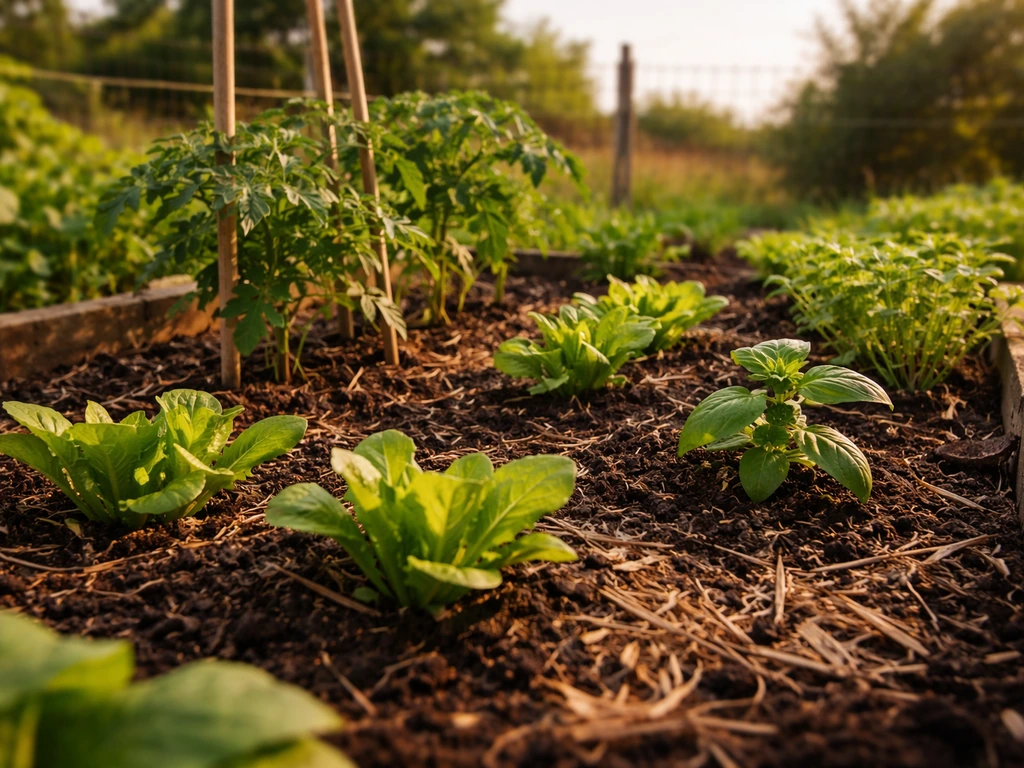
Outdoor Growth Calendar by Plant Stage
Your feeding schedule lives and dies by where your plant is in its life cycle. Feeding a flowering plant like it's still in veg is one of the most common ways growers end up with soft, leafy growth and poor yields. If you want a quick sanity check on nutrient timing and ratios, a search for best nutrients for outdoor grow on Reddit can point you to what other growers are seeing in real conditions Feeding a flowering plant like it's still in veg. Here's how to read the calendar and match your nutrients to each phase.
| Stage | Typical Timing (Northern Hemisphere) | Duration | Primary Nutritional Goal |
|---|---|---|---|
| Seedling / Transplant | Late March – Early May | Weeks 1–3 | Root establishment, minimal feeding |
| Early Vegetative | May – June | Weeks 3–7 | Explosive leaf and stem growth, high N |
| Late Vegetative / Pre-Flower | Late June – Mid July | Weeks 7–9 | Taper N, build P and K reserves |
| Early Flower / Fruit Set | Mid July – August | Weeks 9–13 | High P and K, low N, support bud or fruit development |
| Peak / Late Flower | August – September | Weeks 13–18 | Maximum P and K, flush or reduce EC near harvest |
| Harvest Prep / Flush | September – October | Final 1–2 weeks | Water only or very light feed to clear excess salts |
These windows shift based on your climate zone and the specific cultivar you're growing. Plants in warmer southern climates may push into flower earlier, while short-season varieties do it on their own internal clock regardless of calendar date. Use the stage descriptions as your guide, not the month alone. When you see the first pre-flower sites forming or internodes starting to tighten up, that's your signal to begin the transition feed regardless of what week it is.
Macro vs. Micro Nutrients: What You're Actually Feeding and Why
Plants need a lot of some nutrients and tiny amounts of others, but don't let the word 'micro' fool you into thinking those trace elements are optional. Deficiency in a micronutrient can shut down an entire metabolic process just as fast as running out of nitrogen.
The Big Three: Nitrogen, Phosphorus, and Potassium
- Nitrogen (N): Drives vegetative growth, chlorophyll production, and overall canopy development. This is your primary lever during the veg stage. Too much late in the season and you delay or minimize fruiting, so timing matters as much as amount.
- Phosphorus (P): Critical for root development early on, and absolutely essential during flower and fruit set for energy transfer and bud density. If you're growing in soil with already-high phosphorus levels from previous amendments, skip the P in your base feed and use a nitrogen-only product to avoid lockout.
- Potassium (K): Regulates water movement through the plant, strengthens cell walls, improves stress resistance, and supports fruit quality. Potassium demand spikes during peak flower and stays high until harvest.
Secondary Macros and Micronutrients You Can't Skip
- Calcium (Ca): Holds cell walls together and prevents disorders like blossom-end rot in fruiting plants. Low soil pH combined with inconsistent watering actively suppresses calcium uptake, so this one is tied directly to your irrigation habits.
- Magnesium (Mg): The central atom in every chlorophyll molecule. Magnesium deficiency shows up as interveinal yellowing starting on older leaves and is common in high-potassium feeds that create an antagonistic imbalance.
- Sulfur (S): Supports enzyme function and protein synthesis. Often supplied incidentally through sulfate-form nutrients.
- Iron (Fe): Needed for chlorophyll synthesis. Becomes unavailable when pH drifts too high, which is why outdoor soil growers in alkaline regions struggle with iron deficiency even when it's present in the soil.
- Zinc (Zn), Manganese (Mn), Copper (Cu), Boron (B), Molybdenum (Mo): These trace elements are needed in very small amounts but support everything from pollen viability to nitrogen metabolism. A quality base nutrient line covers most of these. If you're making your own mix, get a complete trace element supplement.
Best NPK Ratios for Veg vs. Flowering (and How to Shift Between Them)
The numbers on a nutrient bottle (like 3-1-2 or 0-5-4) are N-P-K ratios by percentage. You don't need to memorize exact formulas, but you do need to understand the direction your ratios should move as the plant progresses.
| Growth Stage | Target NPK Ratio (approximate) | Notes |
|---|---|---|
| Seedling (weeks 1–3) | 1-1-1 or very dilute | Use at 25–50% of recommended dose, focus on rooting |
| Early Veg (weeks 3–6) | 3-1-2 | High N drives canopy development |
| Late Veg / Pre-Flower (weeks 7–9) | 2-2-3 | Start stepping down N, building K |
| Early Flower (weeks 9–12) | 1-3-4 | N drops sharply, P and K take over |
| Peak Flower (weeks 12–16) | 0-3-4 to 0-5-6 | Minimal or zero N, maximum P and K for bud or fruit density |
| Harvest Prep / Flush | 0-0-0 (water only or light flush) | Clear residual salts in the root zone |
The transition from veg to flower isn't a hard stop. Drop your nitrogen gradually over one to two weeks rather than cutting it cold. Plants still need some N at the start of flower to support the energy demands of rapid bud site development. For the flowering stage, use flowering-focused nutrients and keep your outdoor schedule aligned with the plant's transition into bud development flowering stage best nutrients for outdoor grow. What you're avoiding is providing nitrogen too close to fruit or bud set, which redirects the plant's energy back into leafy vegetative growth instead of productive yield. By peak flower, nitrogen should be minimal to none.
If your soil test shows high existing phosphorus levels, this changes your formula. Skip combined N-P-K products during veg and use a nitrogen-only source like calcium nitrate or fish emulsion. Adding more phosphorus to an already-saturated soil creates antagonism that locks out zinc and iron, which shows up as deficiency symptoms even though the soil technically has enough nutrients.
Feeding Schedules by Medium: Soil vs. Outdoor Hydroponics
How often you feed, how much you give, and what form the nutrients take all depend on your growing medium. Good nutrients for outdoor grow come down to matching NPK and micronutrient needs to your plant’s stage, while keeping pH and EC in the right range. Soil and soilless or hydroponic outdoor setups behave very differently, and using the wrong approach for your medium is a fast track to waste, deficiency, or toxicity.
Soil Feeding Schedule
Soil acts as a nutrient buffer. It holds cations like calcium, magnesium, and potassium on exchange sites and releases them gradually, which gives you more margin for error but also means changes happen slowly. A good base soil amended with compost or slow-release granular fertilizer before planting reduces your in-season liquid feeding needs significantly.
- Weeks 1–3 (Seedling/Transplant): Water only or a very diluted root inoculant with mycorrhizae. Let the plant establish. If your soil is pre-amended, you likely need nothing.
- Weeks 3–6 (Early Veg): Begin liquid feeding every 7–10 days. Use a high-N formula like a 3-1-2 at half dose, working up to full dose by week 5. Water between feedings with plain pH-adjusted water.
- Weeks 6–8 (Late Veg): Maintain the 7–10 day feed cycle. Introduce a cal-mag supplement if your water is soft (under 150 ppm calcium). Begin introducing a bloom-transition formula.
- Weeks 8–12 (Early Flower): Shift to a 1-3-4 or similar formula. Feed every 7–10 days. If plants are large and actively fruiting, you can move to every 7 days.
- Weeks 12–16 (Peak Flower): Use a bloom-focused formula with minimal or zero nitrogen. Continue the 7-day cycle. Watch runoff EC to avoid salt buildup.
- Final 1–2 Weeks: Water only to allow the plant to use stored nutrients. Check runoff EC—if it's significantly higher than your input EC, add an extra plain-water flush.
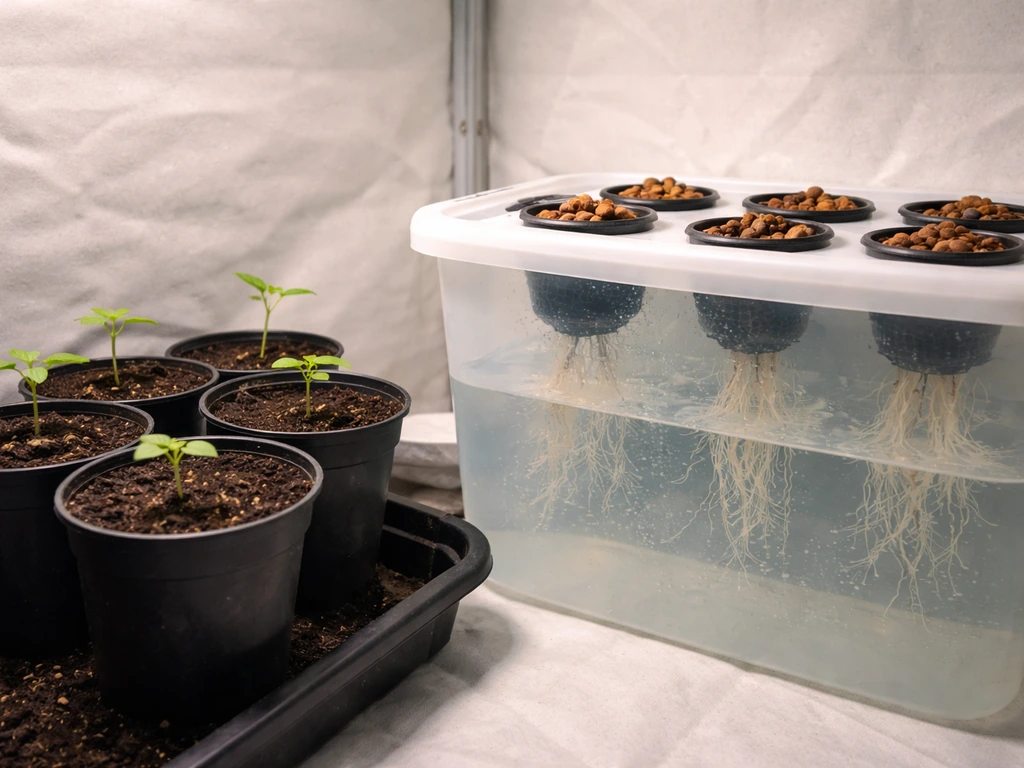
Outdoor Hydroponic or Soilless Feeding Schedule
Outdoor hydroponic setups, think DWC totes, NFT channels on a deck, or container grows in coco coir or perlite, have no nutrient buffer. The plant gets exactly what you put in the reservoir or pot, so feeding must be more frequent and more precise. EC and pH management becomes non-negotiable here.
- Seedling stage: Use EC of 0.8–1.2 dS/m. In coco or perlite, fertigate at least once per day to prevent dry-back beyond 30–40%.
- Early Veg: Raise EC to 1.5–2.0 dS/m with a high-N formula. Coco and perlite growers should fertigate 2–3 times per day in warm weather. DWC or recirculating systems: top off the reservoir daily and do a full reservoir change weekly.
- Late Veg / Pre-Flower: Maintain EC at 1.8–2.2 dS/m, beginning the NPK ratio shift described above. Increase fertigation frequency if plants are large or temperatures are above 85°F.
- Early to Peak Flower: EC 2.0–2.8 dS/m with a bloom formula. Continue daily or multiple-daily fertigation in fast-draining media. DWC: change reservoir every 7 days, pH-check daily.
- Late Flower / Harvest Prep: Drop EC to 1.0–1.5 dS/m for the final week or two, or flush with pH-adjusted plain water to clear salt accumulation before harvest.
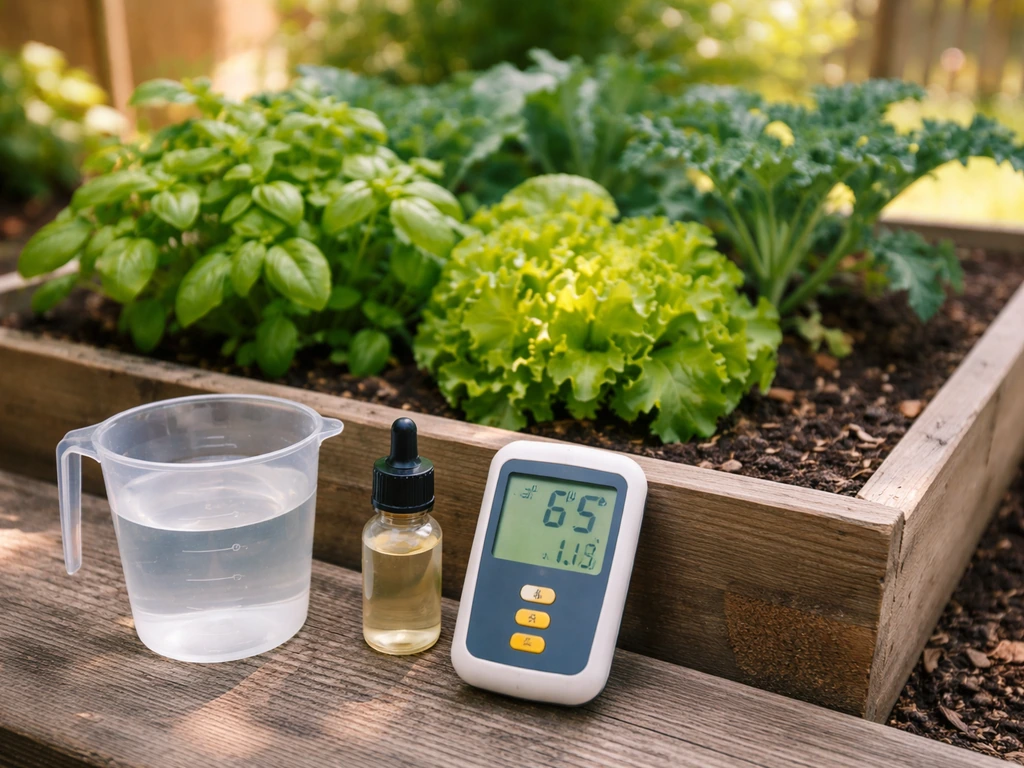
Watering, pH, and EC/PPM Targets That Actually Make Nutrients Work
You can have a perfect nutrient formula and still starve your plant if pH is off. Nutrient availability in both soil and hydroponic systems is pH-dependent, certain elements become chemically unavailable (locked out) outside their optimal range, no matter how much of them you add. UConn Extension notes that vegetable crops generally thrive at soil pH 6.0 to 7, with 6.5 being optimal for most vegetables, and that adequate pH maximizes nutrient availability blank" rel="noopener noreferrer">soil pH 6.0 to 7, with 6.5 optimal. If you are growing indoors, the same pH and nutrient-availability rules still apply, so focus on finding the best fertilizer for indoor grow that matches your plant’s stage.
| Parameter | Soil Target | Hydroponic / Soilless Target | Notes |
|---|---|---|---|
| pH | 6.0–7.0 | 5.5–6.5 | Soil buffers pH naturally; hydro needs daily monitoring |
| EC (nutrient strength) | 1.2–2.5 dS/m in feed water | 1.5–3.0 dS/m | Adjust by stage: lower in seedling, higher at peak flower |
| PPM (500 scale) | 600–1250 ppm | 750–1500 ppm | Convert: 1 dS/m = ~500 ppm (500 scale) or ~700 ppm (700 scale) |
| Watering frequency (soil) | Every 2–4 days depending on size and heat | N/A | Let top inch dry before next watering in containers |
| Watering frequency (hydro/coco) | N/A | 1–4+ times daily depending on media and stage | Never let coco fully dry out; maintain moisture levels |
One thing to be aware of in outdoor hydroponic setups: your EC meter can read 'on target' while your nutrient solution is actually unbalanced. If your tap water contains a high mineral load (hard water with calcium and magnesium carbonates, for example), those ions contribute to EC but they're not the nutrients your plant needs. Always start with a water analysis if you're in a hydroponic setup.
Adjust your base nutrient formula to account for what's already in your source water, and don't assume EC alone tells the full story. The University of Minnesota Extension also notes that knowing your source water pH and EC is important for small-scale hydroponics and that plants do best when growing water is in the pH range of 5.
4 to 7.
For soil growers, watering technique directly affects nutrition. Shallow, frequent watering keeps roots near the surface and reduces calcium uptake, which is a contributing factor in blossom-end rot on tomatoes, peppers, and similar fruiting plants. Water deeply and less frequently so roots chase moisture downward. This also creates the dry/wet cycle that maximizes root oxygen and nutrient uptake efficiency.
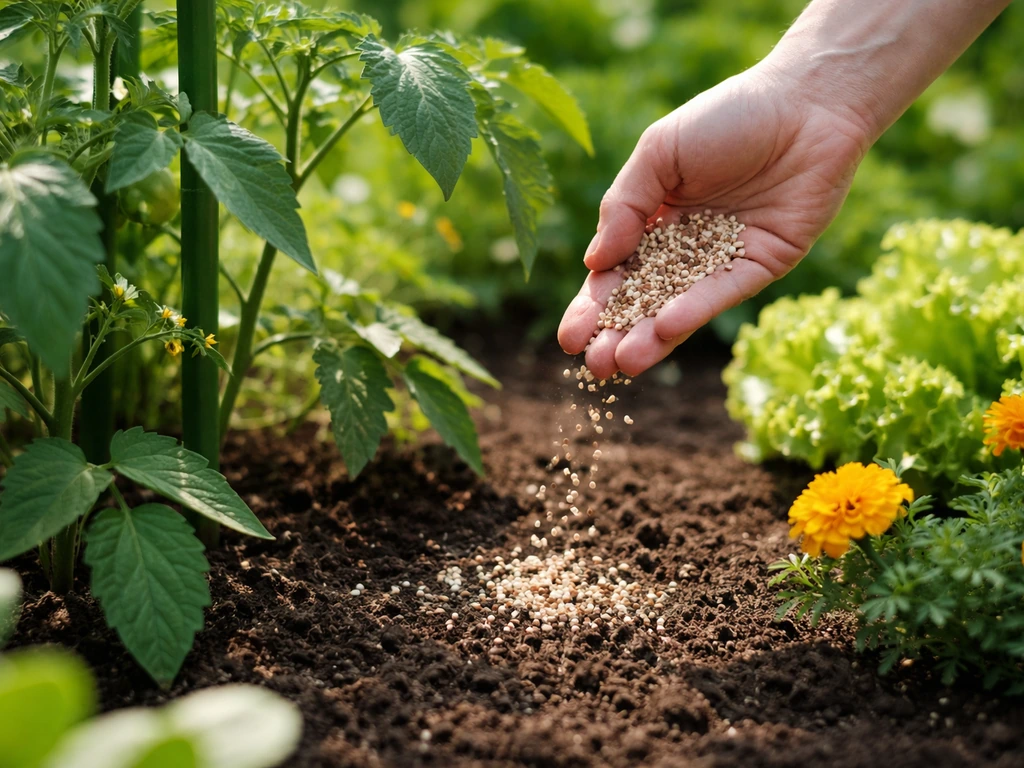
Application Method and Dosage: How to Actually Put Nutrients in the Ground
Soil Drench (Root Feeding)
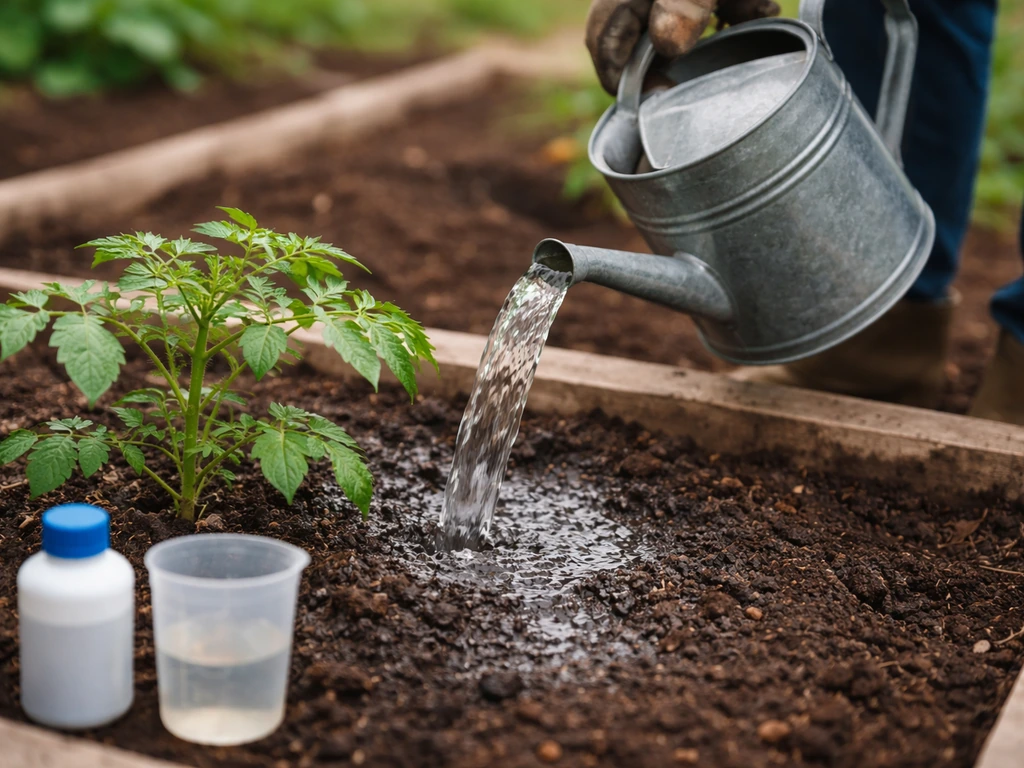
This is your primary method for soil grows. Mix nutrients into your water at the appropriate rate, pH-adjust the solution to 6.0–7.0, and water evenly across the root zone. Avoid concentrating feed directly at the base of the stem, water in a ring that mirrors the drip line of the canopy. For large in-ground plants, use 1–3 gallons of nutrient solution per plant per feeding depending on plant size. For containers, water until you see 10–20% runoff coming out the bottom, which flushes accumulated salts and confirms the root zone is fully saturated.
Foliar Feeding
Foliar feeding is a supplemental tool, not a replacement for root feeding. It's most useful for quickly correcting a specific micronutrient deficiency, iron, magnesium, or zinc being the most common candidates, because absorption through leaves bypasses the pH-driven root uptake process. Mix your foliar solution at 25–50% of the root-feeding dose, pH it to 6.0–6.5, and spray both leaf surfaces in the early morning or evening when stomata are open and temperatures are cooler. Never foliar feed in direct midday sun, the solution concentrates as it dries and can burn leaf tissue. Stop all foliar feeding at the first sign of flowering or bud development. Spraying open flower sites creates mold risk.
Dosage and Runoff Management
Start new products at 50–75% of the manufacturer's recommended dose and work up based on plant response over one to two feedings. More is rarely better with liquid nutrients, and overfeeding is slower to correct than underfeeding. Check runoff EC in containers regularly. If your runoff EC is 0.5 dS/m or more above your input solution EC, salt is accumulating and you need a plain-water flush at the next watering. In outdoor conditions, a heavy rain can do this work for you naturally, but it also means you'll need to feed sooner than your regular schedule.
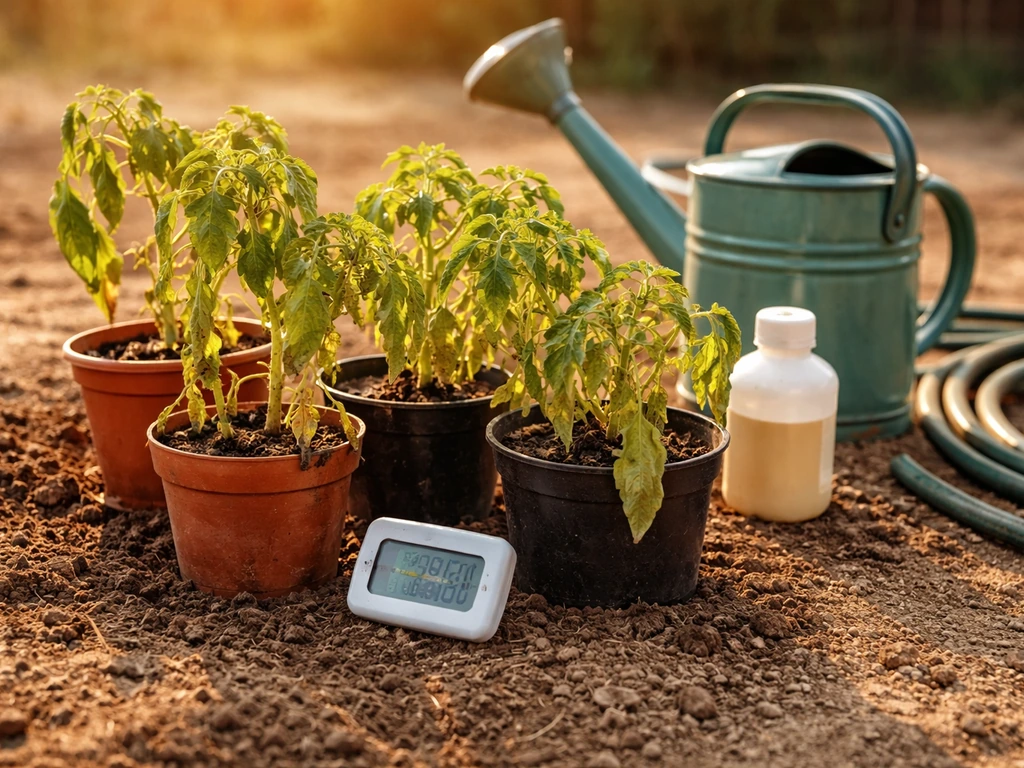
Troubleshooting Nutrient Deficiencies and Excess in Outdoor Grows
The two fastest diagnostic questions are: where on the plant is the problem showing up, and is it yellowing or is it browning/crisping? Mobile nutrients like nitrogen and magnesium deficiency move from old (lower) leaves upward. Immobile nutrients like calcium, iron, and boron deficiency show up first in new growth at the tips and top of the plant.
| Symptom | Likely Cause | Fix for Next Feed |
|---|---|---|
| Uniform yellowing of older leaves, starting at bottom | Nitrogen deficiency | Increase N dose by 25–50%, confirm pH is in range |
| Interveinal yellowing on older leaves (veins stay green) | Magnesium deficiency | Add cal-mag supplement or foliar spray with Epsom salt (1 tsp/gallon) |
| New leaves yellowing or distorted, growing tips look burnt | Calcium deficiency or pH too low | Check and raise pH, increase cal-mag, water more consistently |
| Dark green leaves, clawing or curling downward | Nitrogen toxicity | Skip next feeding, plain water only, reduce N dose by 30–50% |
| Interveinal yellowing on new growth | Iron or manganese deficiency (often pH too high) | Lower pH to 6.0–6.5 in soil or 5.5–6.2 in hydro |
| Brown leaf tips and edges spreading inward | Potassium deficiency or salt burn | Check runoff EC; if high, flush first. If EC is fine, increase K |
| Purple or reddish stems and undersides | Phosphorus deficiency or cold stress | Check temperature and pH; if temps are fine, increase P |
| Blossom-end rot on fruiting vegetables | Calcium uptake failure (pH, watering inconsistency, excess N) | Correct pH, water deeply and consistently, reduce nitrogen immediately |
| Soft green growth during flower, poor bud development | Excess nitrogen at flower stage | Eliminate all N-containing nutrients, switch to bloom-only formula |
Always check pH before assuming a deficiency is about a missing nutrient. The vast majority of deficiency symptoms in outdoor grows, especially in soil, are pH-related lockout issues, not actual shortages in the growing medium. Correct the pH first and give the plant five to seven days to respond before adding more of the 'deficient' nutrient.
Adjusting Your Schedule for Weather: Heat, Cold, Rain, and Wind
A feeding schedule that works in perfect 75°F weather will need real-time adjustments when conditions swing. Outdoor growing means you're managing a living schedule, not running a fixed program.
Heat Waves (Above 85–90°F)
Plants transpire heavily in heat, burning through water fast. This concentrates nutrients in the root zone and raises EC even if you haven't changed your feed formula. In coco or coco-perlite, higher-frequency fertigation is often used to help prevent the medium from drying out and to reduce concerns about EC spikes and watering approach differences versus soil higher-frequency fertigation to prevent the medium from drying out. In heat waves, reduce your nutrient solution EC by 20–30% and increase watering frequency to prevent salt accumulation and tip burn. In containers, this can mean daily or twice-daily plain water between scheduled feeds. Watch for calcium deficiency symptoms, heat stress and rapid transpiration are prime conditions for uptake failures.
Cold Snaps (Below 55°F)
Root metabolism slows dramatically below 55°F and essentially shuts down near 45°F. Nutrient uptake drops regardless of what's in the solution. Feeding cold-stressed plants a full-strength nutrient mix is wasteful at best and damaging at worst, salts accumulate while the plant can't process them. During a cold stretch, reduce feeding frequency and dose significantly. Add a root zone warming strategy if possible (black containers, dark mulch). Purple coloration that appears during a cold snap is often phosphorus lockout caused by temperature, not an actual phosphorus shortage, it resolves when temps normalize.
Heavy Rain Events
A heavy rain does two things: it flushes nutrients from the root zone (especially in fast-draining containers or sandy soil) and it adds a significant volume of untreated, usually low-EC water to the root zone that dilutes whatever is already there. After any rain over an inch, skip one feeding cycle and assess plant response first. For containerized plants, check the runoff EC after a rain to see how much flushing actually occurred. If the post-rain runoff EC is very low, feed sooner than your normal schedule. Also check pH after a rain in outdoor beds, rainwater is naturally acidic (often pH 5.5–6.0) and can gradually lower soil pH over a wet season.
Wind and Dry Conditions
Wind dramatically increases transpiration, sometimes as much as high heat does. Consistent wind can dry out containers and raised beds faster than your watering schedule accounts for, leading to dry-back stress and nutrient concentration spikes. In persistently windy conditions, check soil and container moisture daily and adjust watering frequency up. Windbreaks (shade cloth, fencing, companion planting) help reduce this. For foliar applications, windy days are a no-go, spray won't stick, coverage is uneven, and you're wasting product.
Your Immediate Next Steps to Start This Week
If you're starting fresh or resetting a problem grow, here's exactly how to move forward right now. Once you know your feeding approach, choosing the best seeds for outdoor grow starts you off with the genetics that match your sunlight, season length, and disease pressure.
- Identify your current growth stage using the calendar table above. This tells you which NPK ratio you should be feeding right now.
- Test or confirm your water source pH and rough mineral content (EC or PPM) before mixing anything. A basic pH and EC/TDS meter combo costs under $30 and pays for itself in the first week.
- Choose your base nutrient line based on your medium: a three-part base nutrient system for hydroponic or coco grows, or a high-quality liquid or granular program for soil. If you're in soil, get a soil test done if you haven't already—high phosphorus in native soil changes what you buy.
- Mix your first nutrient solution at 50–75% of label rate, pH-adjust to your medium's target range (6.0–7.0 for soil, 5.5–6.5 for hydro), and measure the final EC before applying.
- Log what you feed, when you feed it, and what the plant looks like 3–5 days later. This is how you build your custom schedule over the next two weeks—you'll see what the plant responds to and adjust dose and frequency accordingly.
- Set a calendar reminder to check the transition point. If you're currently in veg, mark the date you expect first pre-flower signs and plan your NPK ratio shift at least one week before that point.
- For flowering or fruiting plants already in progress: stop any high-N feeds immediately if plants are showing soft growth or delayed bud development. Switch to a bloom formula this week, lower your dose, and give the plant a plain-water watering in between feeds to clear excess nitrogen from the root zone.
The goal for your first two weeks is not perfection, it's observation. Get your baseline pH and EC dialed in, apply nutrients at the right stage ratio, and watch how the plant responds before making big changes. Most outdoor feeding problems come from doing too much too fast, not from a lack of product. Start measured, adjust incrementally, and use the troubleshooting table above any time something looks off.
FAQ
How long should I wait before I assume a deficiency is real and not a pH or watering issue?
For outdoor soil, aim to change one variable at a time. If pH is within 6.0–7.0 and the symptom fits a deficiency pattern, wait 5–7 days before adding more nutrients. If you keep increasing doses every day, runoff salts can rise and mimic “deficiency” symptoms, even when the real issue is lockout or overfeeding.
Can I switch from weekly soil feeding to more frequent feedings if my plants are in containers?
Yes, but only after you verify what the pH is doing. If you feed daily and pH drifts upward, micronutrients can become less available even if EC looks fine. Adjust your pH target to match your medium (6.0–7.0 for soil solutions, 5.5–6.5 for soilless/hydroponics), then confirm with runoff or reservoir readings.
What should I do if my container runoff EC keeps climbing each feeding?
Runoff EC is most useful in containers where salts accumulate. If your runoff EC is 0.5 dS/m or more above what you put in, salts are building, even if the plant looks “almost okay.” The next step is a plain-water flush at the next watering, then resume feeding at a lower starting dose (50–75% of label) to prevent repeat buildup.
What’s the most common mistake when growers follow a veg-to-flower transition schedule?
Don’t push nitrogen all the way through flower transition. If you see internode tightening or pre-flower sites forming, start dropping nitrogen gradually over one to two weeks. If you keep nitrogen high during bud set, you can get lush growth that uses energy meant for fruiting, reducing yield even though the plants look vigorous.
When should I use foliar feeding, and when is it a bad idea?
Start foliar feeding only as a targeted correction, not as a routine boost. If you use foliar sprays for every minor issue, you can encourage reliance on sprays and miss the underlying pH, irrigation, or root-zone problem. Use it for a specific micronutrient symptom, apply at 25–50% of the root dose, and stop once flowering or bud development begins.
How does watering technique change nutrient results in outdoor soil grows?
Yes, salt accumulation can look like “weak growth.” In soil, shallow or overly frequent watering can keep roots near the surface, slowing calcium uptake and increasing the chance of fruit quality issues. A better approach is watering deeply, less often, so roots expand downward and the soil’s buffer has time to cycle nutrients without constant concentration spikes.
Should I follow the week-by-week plan exactly, or adjust when temperatures change?
If it matches the life-cycle cues, yes. The calendar date is less important than the plant signals, but you should also account for climate swings. During cool snaps, reduce feeding frequency and dose because uptake slows below 55°F and can shut down near 45°F. Otherwise you may feed but not metabolize, leading to waste and salt buildup.
My EC meter reads in range, but my plants still struggle. Could my source water be misleading the results?
Hard water can inflate EC readings because calcium and magnesium carbonates raise conductivity without providing the right balance of plant-available nutrients. If you’re running outdoor hydroponic or soilless systems, do a water analysis and offset the base formulation for your source water, otherwise you can end up with “on target” EC but imbalanced nutrition.
How should I adjust my schedule after a heavy rain?
Yes, especially after rain or heavy cloud fronts. Rain can flush nutrients and also add low-EC water, diluting the root zone. After about an inch of rain, skip one feeding cycle and reassess, then check runoff EC in containers to decide whether to feed sooner than your normal schedule.
Why do my plants show nutrient stress during hot, windy weather even if I didn’t change nutrients?
Wind and heat both increase transpiration, which can concentrate salts and trigger tip burn or calcium-related issues. In persistently windy conditions, check soil or container moisture daily, water more often if the root zone is drying, and use windbreaks or shade cloth to stabilize transpiration swings.
My plants look purplish after a cold snap. Do I need to add more phosphorus?
Purple or dark coloration during cold periods is often a temperature-driven phosphorus lockout, not a true phosphorus shortage. During cold stretches, reduce feeding and avoid full-strength nutrient applications, then reassess after temperatures normalize because the color often resolves when lockout clears.
How can I tell whether yellowing is nutrient deficiency versus nutrient lockout?
If you see yellowing on older leaves first, think mobile nutrient issues, but confirm pH before escalating. Correct pH, then wait 5–7 days to see if recovery starts at new growth. Browning or crisping on newer growth is more consistent with immobile nutrient problems or stress, but pH is still a common hidden cause of apparent “nutrient” symptoms.
What’s the safest way to dial in nutrient dose when starting a new fertilizer or after resetting a grow?
Often, yes, but the goal is to find the right balance between dose and frequency for your medium. For example, start around 50–75% of label strength, then adjust based on response over one or two feedings. Overcorrecting with higher doses quickly is harder to undo than underfeeding slightly and gradually increasing once the plant shows stable growth.