If you treat it like a lazy hydroponic setup and add a diluted hydroponic nutrient solution instead of plain water, you can keep certain plants alive and growing for weeks to months. Fast growers, herbs, and cuttings do best. Large fruiting plants or anything with an aggressive root system will eventually outgrow the medium. Expect a fun, visual, low-soil growing experiment rather than a full-season production setup, and you will not be disappointed.
How Orbeez actually work as a growing medium
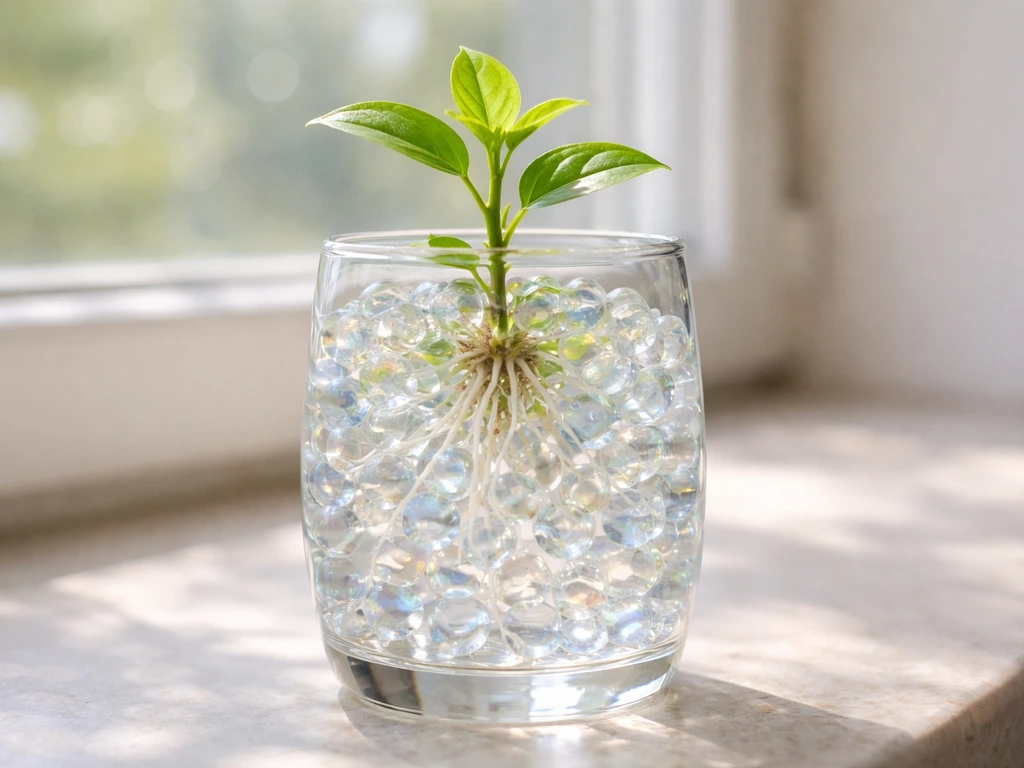
Orbeez start as tiny hard pellets and swell dramatically when submerged in water, expanding to roughly 100 to 300 times their dry volume depending on the specific product and water mineral content. That swelling is the superabsorbent polymer doing its job: the polymer matrix soaks up water and holds it in a gel structure, releasing it slowly as the surrounding environment dries out. This is exactly why they work as a plant medium, roots can wick moisture from the beads without sitting in standing water the way they would in a flooded pot.
The problem is the three-part trade-off between water retention, nutrients, and oxygen. Orbeez nail water retention. Nutrients they provide: zero. Verified safety data sheets for superabsorbent polymers list no fertilizer or plant-nutrient ingredients whatsoever. Oxygen is where things get tricky. The beads pack together when fully hydrated, leaving limited air pockets between them. Roots need oxygen, and if the beads are packed too tightly or overfilled with water, you get low-oxygen conditions that invite root rot fast. Getting this balance right is the core skill of growing in Orbeez.
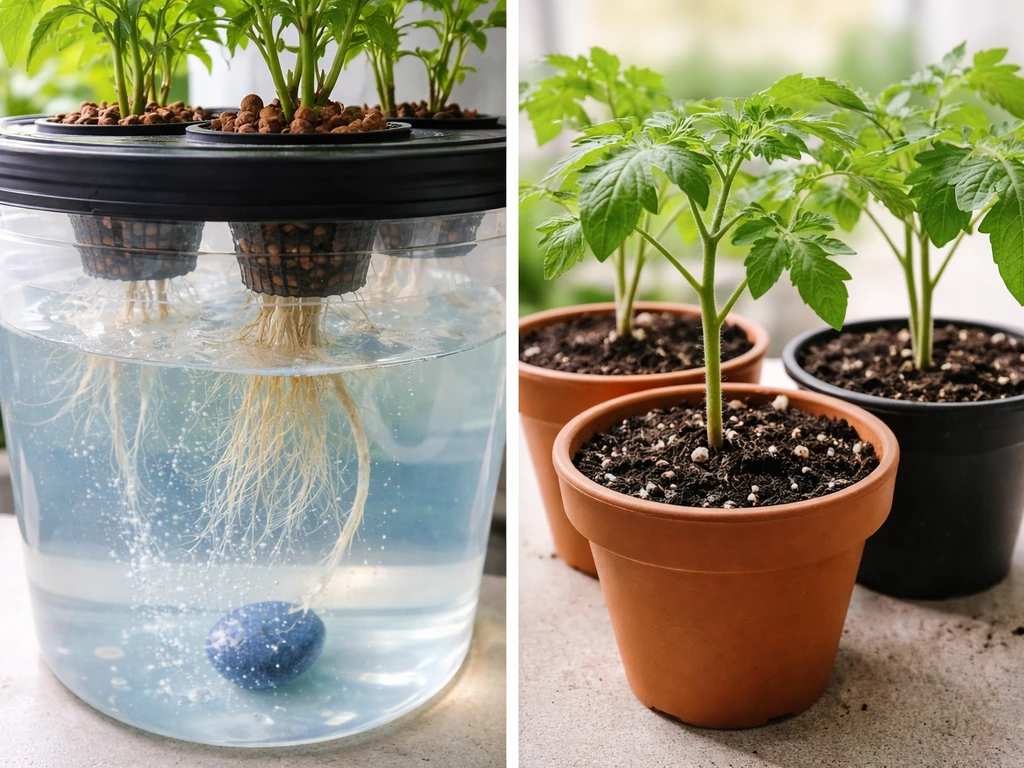
Compare this to a proper hydroponics setup: in a standard DWC (deep water culture) system, blank" rel="noopener noreferrer">roots hang into oxygenated, nutrient-rich water with an air stone providing dissolved oxygen continuously. Orbeez are more like a gel version of a passive hydroponic medium, similar to clay pebbles or rockwool, except with far less natural air space. Understanding that distinction helps you set it up right from day one. If you are weighing Orbeez against more traditional approaches, the hydro vs soil grow comparison is a useful reference for understanding where gel-bead growing sits on that spectrum.
Supplies and setup: containers, prep, and planting
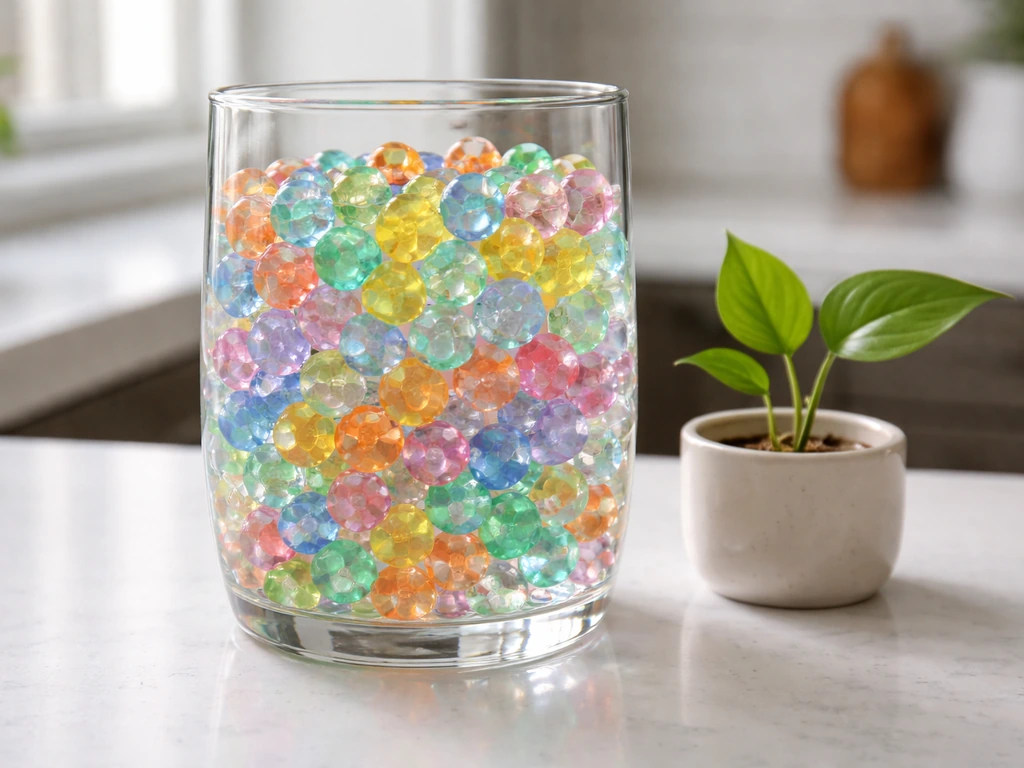
Choosing your container
Clear glass vases or clear plastic containers are the most popular choice, and for good reason: you can watch root development and monitor bead hydration levels without disturbing the plant. A tall, narrow vase (6 to 10 inches) works well for single cuttings or small herbs. For seedlings, a wider container gives roots more room to spread. Whatever you use, drainage holes are optional but recommended. Without them you need to be more disciplined about not overwatering, because excess liquid pooling at the bottom creates the exact anaerobic conditions that rot roots. If you use a container without drainage, a layer of extra-dry beads at the bottom acts as a rough buffer.
Hydrating and rinsing the beads
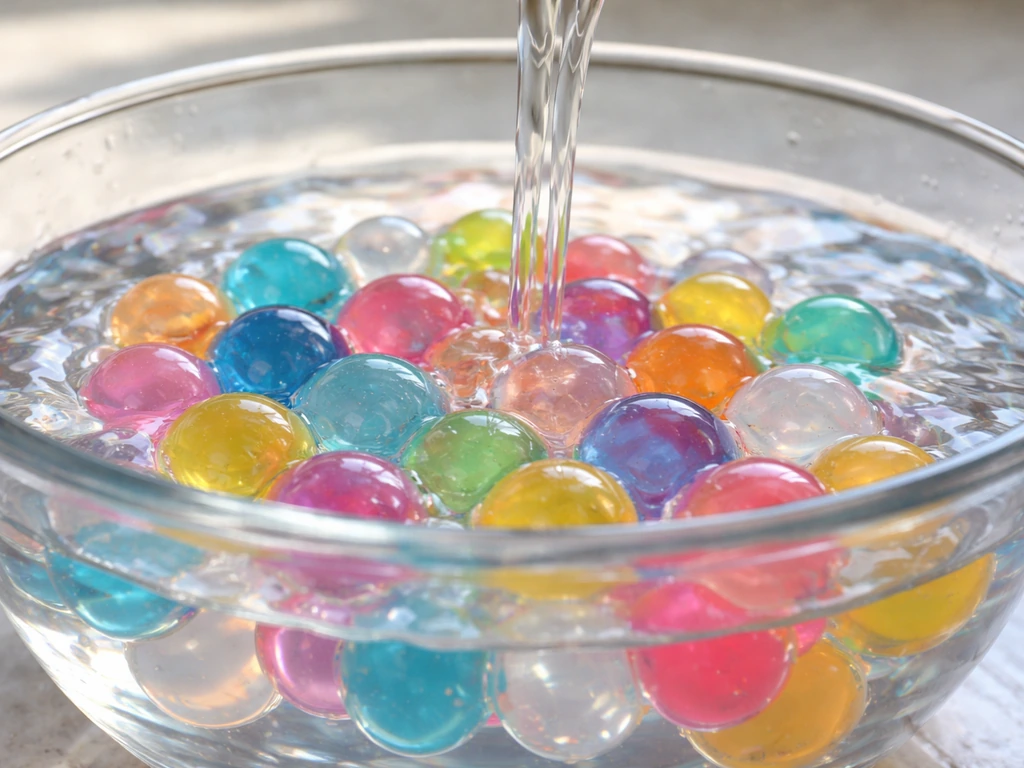
Hydrate your Orbeez in plain water for 4 to 6 hours until they are fully expanded and firm. Rinse them thoroughly under running water afterward. This step matters more than most guides mention: rinsing reduces surface residues from the manufacturing process. Acrylamide/acrylate copolymers can carry trace residual monomer impurities, and while the polymer itself is largely inert once cured, rinsing is simple insurance.
These findings align with a peer-reviewed Pediatrics report from the American Academy of Pediatrics noting that residual acrylamide monomer in water beads has been associated with intestinal obstruction and neurotoxicity Acrylamide/acrylate copolymers can carry trace residual monomer impurities. After rinsing, drain off all standing water and let the beads sit for 20 to 30 minutes before planting.
You want them damp but not pooling liquid.
Planting method and root aeration
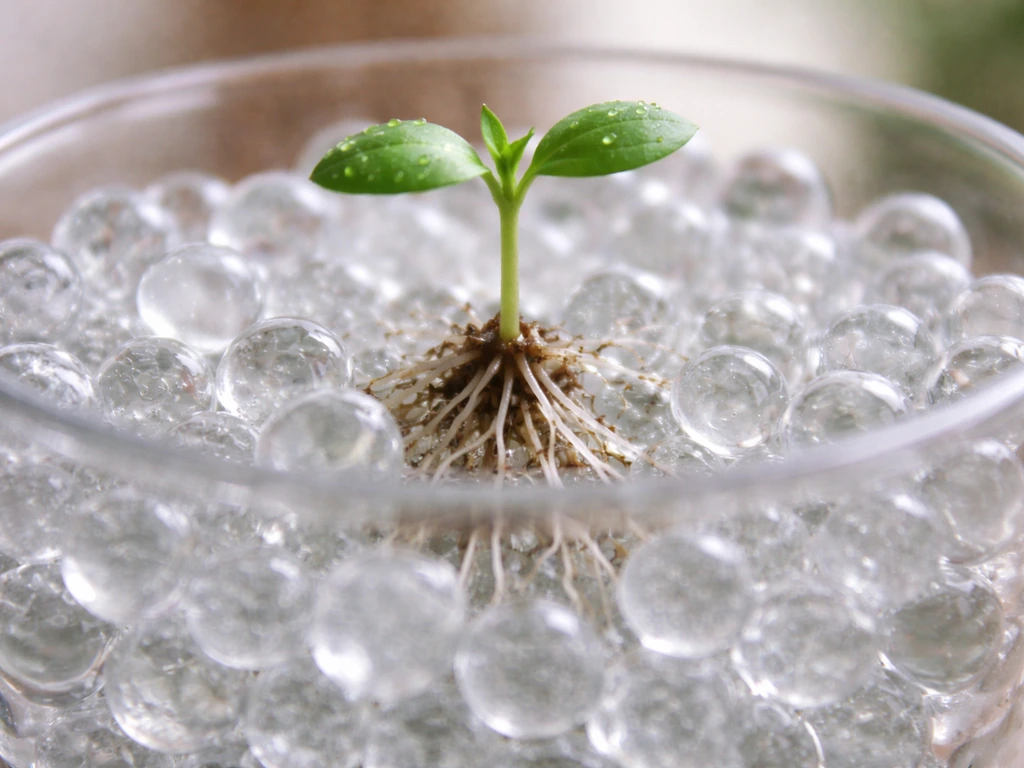
For cuttings, make a small well in the center of the beads, insert the stem so it is surrounded by beads to a depth of 2 to 3 inches, and gently press the beads in around it without compacting them. Do not pack the beads tightly. Loose bead arrangement is your main tool for maintaining some air space around roots. For seedlings or small transplants, remove as much of the original growing medium from the roots as you can (rinse gently with room-temperature water), then nestle the root ball into a well in the beads. Fill in around the roots loosely.
If oxygen is your main worry, and it should be, there are a couple of practical fixes. First, do not fill the container all the way to the top with beads; leave the top 1 to 2 inches empty to allow some evaporation and air exchange at the surface. Second, for larger plants or longer-term setups, a small USB aquarium air pump with a thin air stone pushed down alongside the root zone can add dissolved oxygen to any nutrient solution pooling at the base. It is a minor upgrade that makes a noticeable difference in root health over time.
What nutrients to use and how to feed your plants
This is the non-negotiable part of growing in Orbeez: you must add nutrients, or your plants will run out of food within one to two weeks, depending on the plant and how much it was already established. Plain hydrated Orbeez provide moisture and physical support, nothing else. There is no nitrogen, phosphorus, potassium, or any micronutrient in the polymer beads.
The simplest approach is a diluted liquid hydroponic nutrient solution mixed into the water you use to re-hydrate or top off the beads. A 1-part nutrient to 3-part water dilution (roughly 25% of the manufacturer's recommended concentration) is a safe starting point. Orbeez-grown plants are more sensitive to nutrient burn than soil-grown ones because there is no buffering organic matter to absorb excess salts. Start light and adjust based on what you see.
For nutrient solution pH, aim for 5.5 to 6.5, the same sweet spot used in most hydroponic systems. Use a basic pH meter or drops to test before feeding. Out-of-range pH locks out nutrients even when they are present in the solution, which is one of the most common reasons Orbeez-grown plants look deficient even when they are being fed.
DIY option: if you do not have hydroponic nutrients on hand, a very diluted liquid houseplant fertilizer (like a 10-10-10 balanced formula at roughly 10% of the label rate) can work for short-term experiments. It is not ideal because liquid houseplant fertilizers are formulated for soil pH ranges and often include organic compounds that can encourage microbial growth in your beads. But for a few weeks with easy plants like pothos or mint, it gets the job done.
Best plants to grow in Orbeez (and whether to start from seed, cutting, or seedling)
Not every plant is a good candidate for Orbeez growing. The medium suits plants with smaller, fibrous root systems that thrive with consistent moisture and do not mind limited oxygen. Large root systems, tap-rooted plants, or heavy feeders will struggle within a few weeks.
| Plant Type | Orbeez Suitability | Best Starting Method | Expected Duration |
|---|
| Pothos / Philodendron | Excellent | Cuttings | Months to indefinite with nutrients |
| Mint / Basil | Good | Cuttings or seedlings | 4 to 8 weeks reliably |
| Lucky bamboo | Excellent | Divisions/cuttings | Long term with regular feeding |
| Spider plant | Good | Offsets/babies | 6 to 10 weeks |
| Peace lily | Moderate | Small transplants | 6 to 12 weeks before outgrowing |
| Tomatoes / Peppers | Poor | Not recommended | Roots outgrow medium quickly |
| Cannabis / large herbs | Poor | Not recommended | Root oxygen demand too high |
Seeds are the hardest starting method in Orbeez. Germination requires consistent moisture and some air, and the bead surface is tricky for tiny seeds to anchor into. If you want to start from seed, germinate first in a damp paper towel or a small plug of rockwool, then transfer the seedling once it has a visible root tail of at least 0.5 inches. Cuttings are the easiest and most reliable entry point, especially for houseplants and soft-stemmed herbs.
Care routine: watering, light, temperature, and monitoring
Watering and feeding schedule
Orbeez stay hydrated much longer than soil, so you will water far less often than you are used to. In most indoor conditions, top up the beads with nutrient solution every 5 to 10 days. Before adding more liquid, check the bead firmness: if the beads still feel plump and gel-like, hold off. If they feel smaller, wrinkled, or noticeably less firm, it is time to add about 1 to 2 inches of diluted nutrient solution to the container. Pour slowly along the edge of the container rather than directly onto the plant stem.
Every third or fourth feeding, flush the beads with plain pH-adjusted water to prevent nutrient salt buildup. Salt accumulation on the surface of the beads can inhibit water uptake and gradually damage roots. Flushing is simple: pour enough plain water through the container to run out the drainage hole (or carefully drain excess if your container has no hole), then let it settle before adding the next nutrient feed.
Light and temperature
Light requirements do not change just because you switched growing media. Give your plant the same light it would need in soil or water. Indirect bright light (1000 to 2000 lux) suits most houseplants grown in Orbeez. If you are using Orbeez for herbs like basil or mint, they want more direct light, at least 4 to 6 hours of bright indirect or direct sun, or a grow light set to 14 to 16 hours in an indoor setup.
One important note specific to Orbeez: avoid placing clear containers in direct intense sunlight for extended periods. The clear container plus wet beads creates a warm, humid, light-filled environment that is ideal for algae growth. More on that in the troubleshooting section. Keep temperatures between 65°F and 80°F (18°C to 27°C) for most plants, which is standard indoor growing range. Extreme cold will make the beads contract and potentially crack; extreme heat accelerates microbial growth and evaporation.
Weekly monitoring checklist
- Check bead firmness and top up with nutrient solution if beads are shrinking
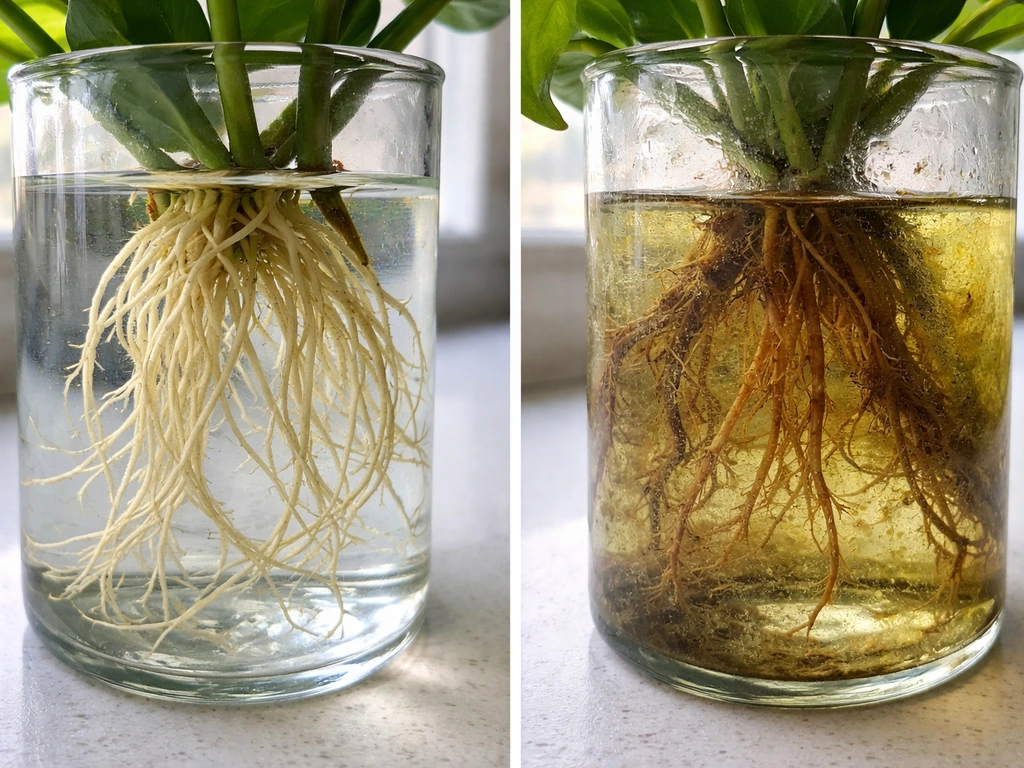
- Inspect roots through clear container walls for color (white/cream = healthy, brown/gray = stress)
- Check for any green tint on beads or container walls (early algae sign)
- Look at leaves: yellowing bottom leaves often mean nitrogen deficiency; brown tips can signal nutrient burn or salt buildup
- Test nutrient solution pH when mixing each new batch
- Sniff the container: a sour or sulfur smell means anaerobic bacteria are building up at the base
Troubleshooting the most common Orbeez growing problems
Mold and algae
Algae (green coating on beads or container walls) is the most common complaint and is caused by light hitting the moist bead surface. The fix is straightforward: wrap the lower half of your container with opaque tape or paper, or switch to an opaque container. Algae will not kill your plant directly, but it competes for nutrients in the solution and indicates conditions that can also foster mold. Surface mold (fuzzy white or gray growth on the top layer of beads) usually means the surface is staying too wet and stagnant. Stir the top layer gently, improve air circulation, and reduce how much liquid you add per feeding.
Root rot and oxygen starvation
Brown, slimy roots that smell bad are root rot caused by low oxygen at the root zone. This happens when beads are packed too tight, the container has no drainage and is overfilled, or there is no air movement at the base. To recover: carefully remove the plant, rinse the roots gently under cool water, trim off any visibly rotted sections with clean scissors, rinse the beads thoroughly, and replant more loosely. Add an air stone if you can, and reduce feeding volume. Do not let liquid sit stagnant at the bottom of a no-drain container for more than a day or two.
Nutrient deficiencies
If leaves are yellowing uniformly (especially older lower leaves first), you are under-feeding nitrogen. If you see purple/reddish tints on leaves or stems, phosphorus may be low or pH is off and locking it out. Interveinal chlorosis (yellow between leaf veins, green veins remaining) usually points to iron or magnesium deficiency driven by pH being too high. Check and correct pH first before adding more nutrients. If pH is fine and deficiency symptoms persist, increase nutrient solution concentration by 10 to 15% and observe over the next week.
When Orbeez stop working: switching to soil or hydroponics
Orbeez are not a forever medium for most plants. There are clear signals that tell you it is time to transition. Root-bound conditions are the most obvious: if roots are visibly pressing against the container walls, circling the base, or pushing up through the top layer of beads, the plant has run out of physical room to grow. At that point, more nutrients or better watering will not fix the problem.
Other signals to watch for include persistent root rot that does not resolve after corrective steps, chronic nutrient deficiencies that do not respond to adjusted feeding, or simply that you want to move toward a more productive long-term growing system. When that moment comes, transitioning to soil is straightforward: gently remove the plant, rinse off all bead residue from the roots under lukewarm water, and pot into a quality growing medium. If you are curious about what that looks like in practice, understanding whether you can use regular dirt to grow plants is a reasonable starting point for choosing your next medium.
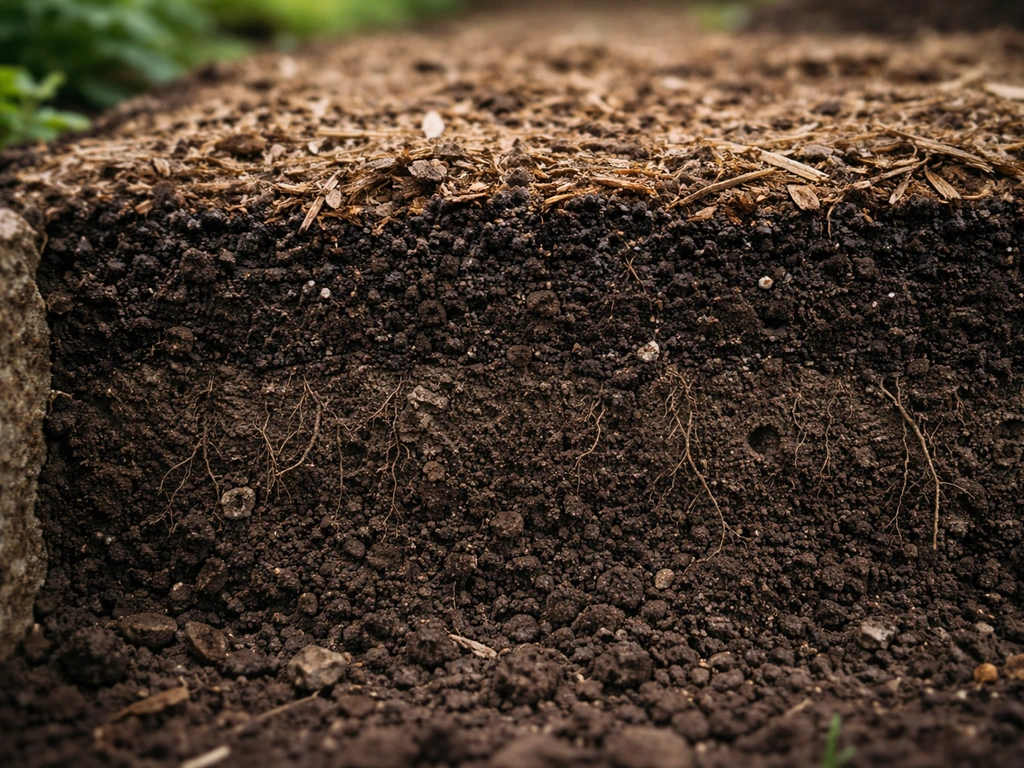
If you want to go the other direction and move toward a true hydroponic setup instead of soil, that is also a valid progression. Plants that thrived in Orbeez have already adapted to a soilless, water-rooted environment, which makes the transition to hydroponics relatively smooth. A basic DWC or Kratky setup with clay pebbles is an easy next step. For growers thinking about long-term soil-based cultivation, a quality bagged topsoil like Grow Max top soil provides the buffering, structure, and organic matter that Orbeez simply cannot.
One thing to keep in mind: Orbeez beads are not biodegradable in the traditional sense. Do not bury spent beads in your garden assuming they will decompose like organic matter. They are synthetic polymers. Dispose of them in household waste. If you are building toward a more permanent outdoor setup, looking into how where soil is grown affects its composition and quality can help you make a smarter transition.
How Orbeez compares to other growing options
It helps to put Orbeez in context alongside the other media you might be weighing. This is a practical comparison for someone deciding whether Orbeez are worth the experiment or whether they should jump straight to something more conventional.
| Medium | Nutrients Provided | Oxygen to Roots | Cost | Best For | Longevity |
|---|
| Orbeez / hydrogel beads | None (must add liquid nutrients) | Low without intervention | Low ($5 to $15) | Short experiments, cuttings, display plants | Weeks to a few months |
| Potting soil | Moderate (pre-charged mixes) | Good | Low to moderate | Most houseplants, herbs, vegetables | Full season or longer |
| Clay pebbles (hydroton) | None (add hydroponic nutrients) | Excellent | Moderate | True hydroponic systems | Reusable indefinitely |
| Rockwool / starter plugs | None (add nutrients) | Good | Low to moderate | Seed starting, cuttings, transplants | Weeks to months |
| Eco earth / coco coir | Minimal (add nutrients) | Good | Low to moderate | Hydroponic and soil hybrid setups | Full season |
Orbeez score well on visual appeal and low setup cost. They lose points on oxygen delivery and the fact that they need supplemental nutrients from day one. Clay pebbles in a proper hydroponic system are more work to set up but significantly more reliable for anything you want to grow beyond a casual experiment. If you are curious about alternatives in the soilless space, growing plants in eco earth is another beginner-friendly option worth comparing, since coco coir offers similar moisture retention with better natural air porosity than hydrogel beads.
For growers who want to understand the full landscape of growing media before committing, it is also worth knowing what separates a premium topdressing product from a base growing medium. For example, knowing what earth grow mulch is and how it differs from a potting medium helps you build a clearer mental model of where Orbeez (and soilless media generally) fit in the broader cultivation picture. And if you are weighing whether to invest in a quality soil baseline for a future grow, understanding earth grow topsoil gives you a reliable reference point for what a nutrient-ready soil should actually look like.
The bottom line on growing plants in Orbeez
Orbeez work as a growing medium if you treat them like what they are: a water-retaining gel support structure that needs liquid nutrients added to it. Set up correctly, with rinsed and loosely packed beads, a diluted hydroponic nutrient solution at the right pH, good light, and minimal overwatering, plants like pothos, lucky bamboo, mint, and spider plants will genuinely thrive in them for weeks to months. Larger, heavier-feeding plants will outgrow the medium quickly and are better off in soil or a real hydroponic system from the start.
The experiment is worth doing if you want to learn about soilless growing in a low-stakes, visually satisfying way. Just go in knowing the limits: no nutrients built in, limited oxygen, not suitable for every plant, and not a replacement for a proper growing setup if you are serious about yield or long-term plant health. Use it as a stepping stone, not a destination.