To grow hydroponics at home, you need six things working together: a hydroponic system (reservoir, pump or wick, and tubing matched to your chosen method), clean water with low dissolved solids, a complete nutrient solution, an inert growing medium to support roots, appropriate lighting and environmental controls, and the measurement tools to keep pH between 5.0 and 6.0 and EC between 1.5 and 3.0 dS/m. Get all six right and vegetables grow faster and cleaner than in soil. If you're still deciding, the answer is often simple: learning why grow hydroponically can help you weigh the tradeoffs before you invest. Miss one and the whole system can stall or crash.
What Do You Need to Grow Hydroponics Successfully

Marcus Holloway
28 Apr 2026
The core requirements: system, water, and nutrients
Every hydroponic setup, no matter how simple or complex, is built on the same three pillars: a delivery system that gets nutrient-rich water to your roots, a water source clean enough to work with, and a nutrient program that replaces everything soil would normally provide.
Pick a system that matches your space and experience
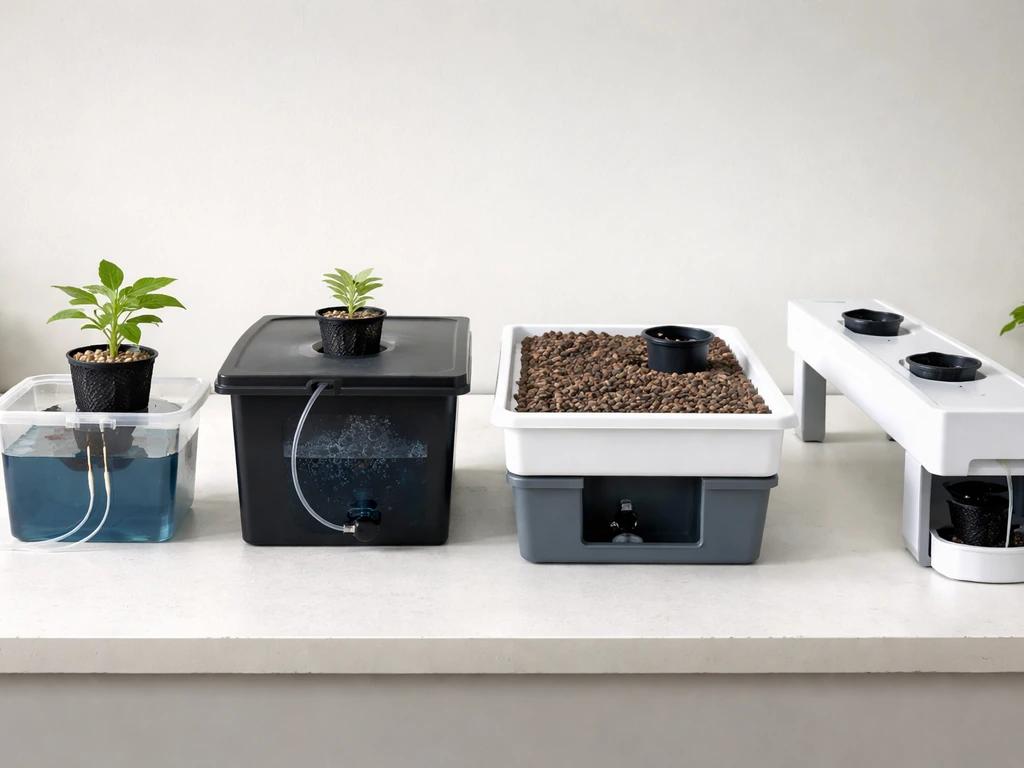
For beginners, the four most practical system types are wick, deep water culture (DWC), ebb and flow (flood and drain), and nutrient film technique (NFT). Each has a different hardware list and skill requirement.
| System | Core Hardware | Pump Needed? | Best For |
|---|---|---|---|
| Wick | Reservoir, growing medium, cotton/nylon wicks | No (passive) | Very small setups, herbs |
| Deep Water Culture (DWC) | Reservoir, net pots, air pump, air stone, tubing | Air pump only | Beginners growing lettuce or herbs |
| Ebb & Flow (Flood & Drain) | Reservoir, flood tray, submersible pump, timer, overflow/drain fittings | Yes | Intermediate growers, multiple plants |
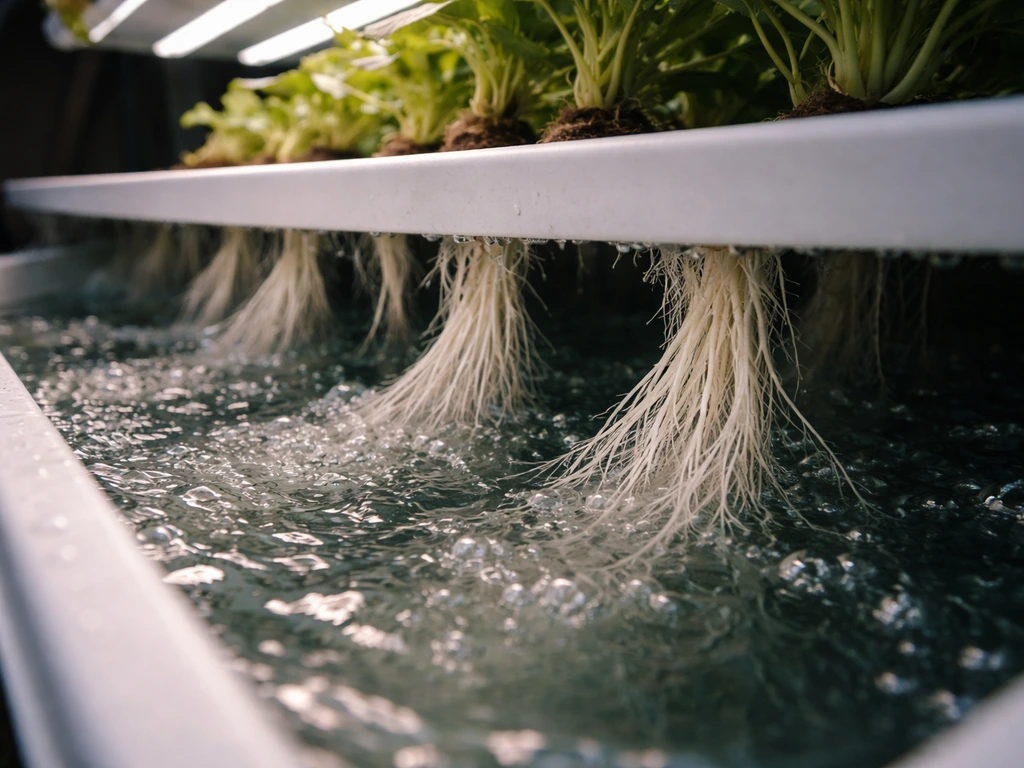
| NFT | Reservoir, sloped channels, manifold/distribution tube, return drain line, pump | Yes | Leafy greens, larger setups |
DWC is the most forgiving starting point. You fill a reservoir, drop net pots into holes in the lid, suspend roots into the nutrient solution, and run an air stone to oxygenate the water. Ebb and flow adds a flood tray above the reservoir and a timer-controlled pump that periodically floods the tray and drains back by gravity. NFT is elegant for leafy greens but requires correctly sloped channels and a return line, so save it for your second or third build. Wick systems need zero electricity but are too slow for most vegetables beyond small herbs.
Water quality is the foundation
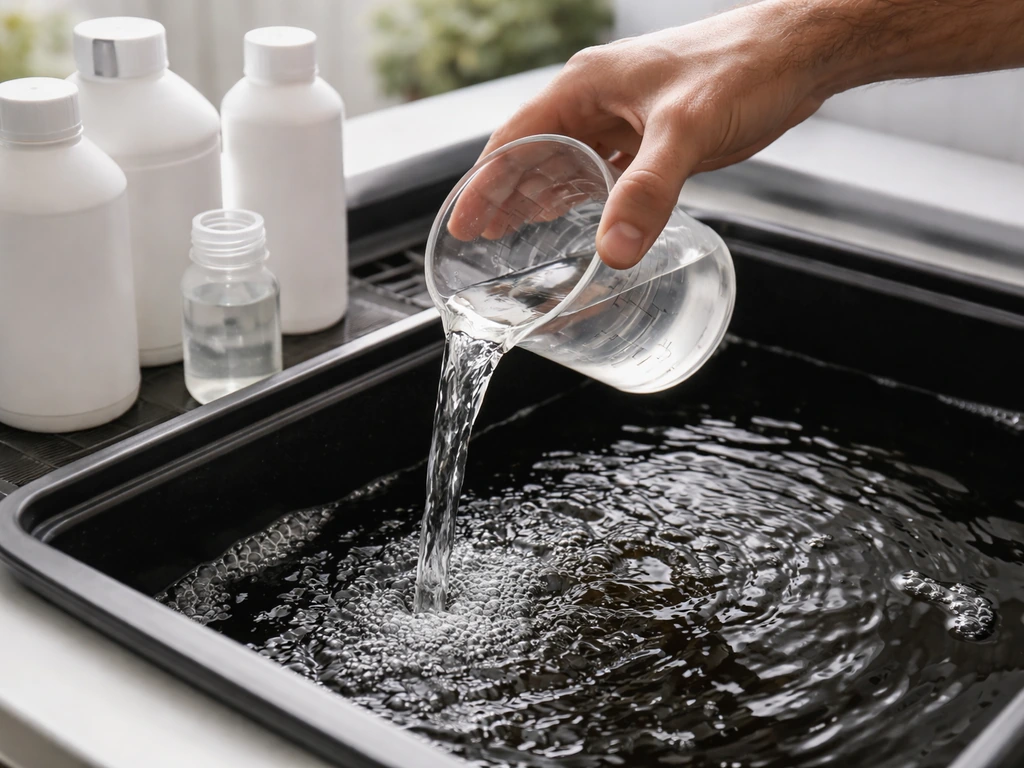
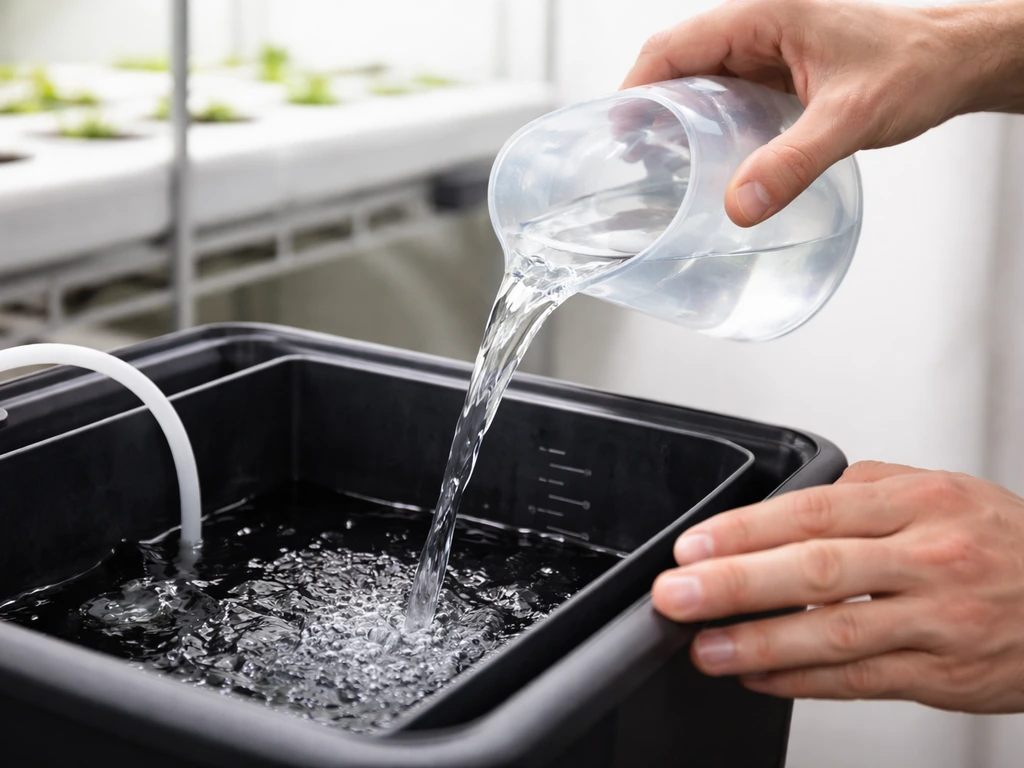
Tap water works for many growers, but you need to know what's in it before you trust it. Hard water above 150 ppm total dissolved solids (TDS) can throw off your nutrient ratios before you even add fertilizer. Chlorine above 70 ppm and suspended solids above 30 ppm are also red flags. If your tap water is heavy, reverse osmosis (RO) filtration is the cleanest fix: it strips out contaminants and brings TDS close to zero, giving you a blank slate for mixing nutrients. Getting your water tested through a local lab or a mail-in kit is worth doing before you spend money on nutrients and equipment.
Nutrients: what goes in the solution
Plants need macronutrients (nitrogen, phosphorus, potassium), secondary nutrients (calcium, magnesium, sulfur), and a range of micronutrients (iron, manganese, zinc, copper, boron, molybdenum). A quality hydroponic nutrient line covers all of these in one two-part or three-part formula. General Hydroponics, Botanicare, and similar brands package their nutrients so you mix part A and part B (or grow/bloom/micro) into water at specific ratios. Follow the manufacturer's feed chart for the crop and growth stage, then verify with your EC meter that the solution strength lands in the right range.
Planning your grow space
Most home growers work indoors, which gives you control over every variable but requires you to supply light, airflow, and temperature artificially. A grow tent sized 2x4 ft or 4x4 ft is the most practical indoor option: reflective interior walls, built-in ports for ducting and cables, and a contained environment that's easy to manage and keep clean. Before you buy a tent, measure your ceiling height and account for the light fixture hanging above your canopy. You typically need at least 24 inches between the light and the plant tops.
Outdoor or greenhouse hydroponic setups are possible and can reduce lighting costs significantly, but they expose you to pest pressure, temperature swings, and seasonal light changes. If you're growing indoors, you're fully in control, which is why most beginners start there. Wherever you set up, plan for easy access to the reservoir for top-offs and solution changes, a drain point nearby (a floor drain or utility sink is ideal), and electrical outlets rated for the load you're running.
Growing media and plant support
Hydroponic plants don't grow in soil, but they still need something to anchor their roots and wick moisture. Your growing medium is physically inert, meaning it doesn't feed the plant, it just holds it upright and keeps roots moist between nutrient deliveries.
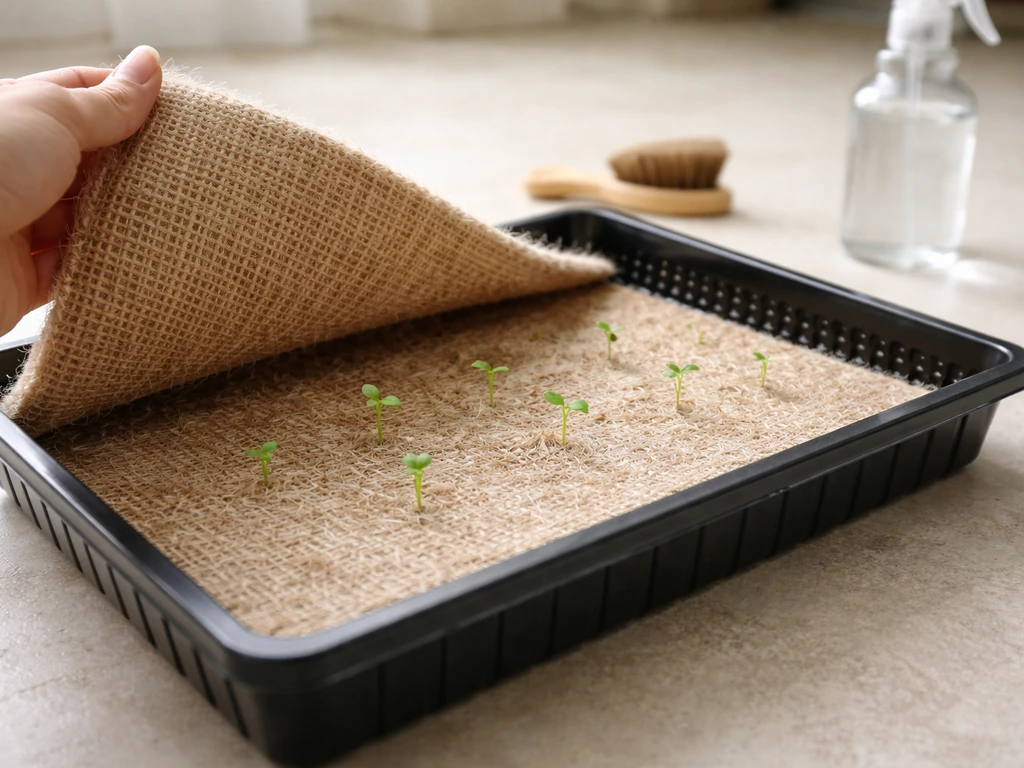
Expanded clay pebbles (hydroton) are the most reusable and versatile option. If you are trying to cut costs, you can also reuse compatible hemp grow mats as your growing medium, but you need to follow proper cleaning and sanitizing steps between runs Expanded clay pebbles (hydroton). Rinse them thoroughly before first use to remove dust, and soak them for several hours to saturate the pores. They drain freely, hold some moisture, and provide good airspace around roots.
Rockwool cubes are excellent for seed starting and early propagation but come with one important caveat: fresh rockwool has a pH around 8. 0, which is way too high for hydroponic crops. Always soak new rockwool in pH-adjusted water (target 5. 5 to 6.
0) for at least an hour before use. Perlite is cheap, lightweight, and works well mixed with other media or in simple drip setups.
Net pots or mesh baskets hold your growing medium and slot into the holes in your reservoir lid or flood tray. Common sizes are 2-inch pots for seedlings and 3 to 4-inch pots for larger plants. The medium inside the pot keeps roots supported while the solution delivers everything the plant needs.
| Medium | Best Use | pH Neutral? | Reusable? | Prep Required |
|---|---|---|---|---|
| Expanded clay pebbles (hydroton) | DWC, ebb & flow, NFT | Yes | Yes | Rinse and soak before use |
| Rockwool cubes | Seed starting, clone rooting | No (starts ~pH 8) | No | Soak in pH 5.5–6.0 water |
| Perlite | Drip systems, mixed media | Yes | Limited | Rinse to remove dust |
| Coco coir | Drip or hand-watered hydro | Near neutral | Limited | Rinse and buffer before use |
Lighting, temperature, and airflow
Light: the non-negotiable for indoor growing
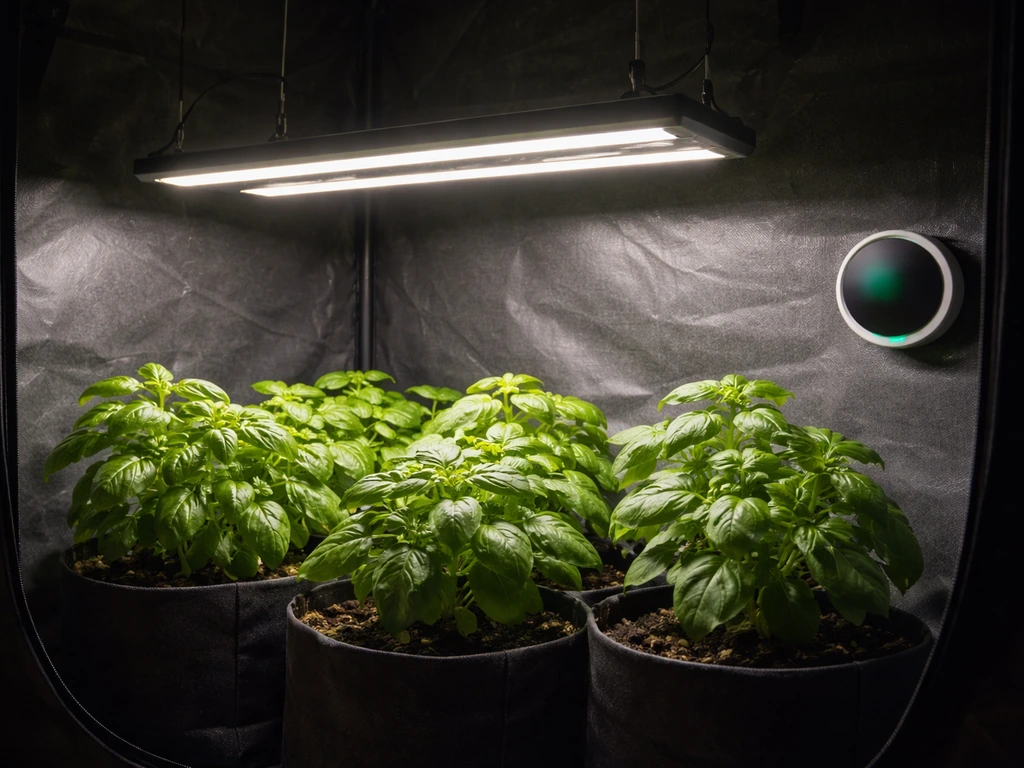
For leafy greens and herbs, target a PPFD (photosynthetic photon flux density) of 200 to 300 µmol/m²/s at canopy level. LED grow lights have become the default choice for home growers because they run cooler and use less electricity than HID fixtures. A quality full-spectrum LED panel in the 200 to 400 watt range covers a 2x4 to 4x4 ft tent adequately for vegetative crops. Fruiting plants like tomatoes and peppers need higher light intensity, closer to 400 to 600 µmol/m²/s, and longer daily light periods. For lettuce and herbs, an 18-hour light/6-hour dark cycle works well. Use a simple timer on your light circuit so you're not managing it manually.
Temperature: air and solution both matter
Aim for daytime air temperatures between 70 and 80°F, dropping to 65 to 75°F at night. Relative humidity around 70 to 80% works for most leafy crops at the vegetative stage, though you want to bring humidity down toward 50 to 60% if you're growing fruiting plants to reduce mold risk. Pay attention to your nutrient solution temperature, not just the air. The sweet spot for solution temperature is around 68°F (20°C). Above 72°F (22°C), dissolved oxygen drops and root disease risk climbs fast. If your reservoir runs warm, especially in summer, a small aquarium chiller or even wrapping the reservoir in insulating foam can make a real difference.
Airflow: more important than most beginners expect
You need two types of airflow in an indoor grow space: circulation and exchange. A small oscillating fan creates gentle air movement across plant stems and leaves, which strengthens stems, prevents hot spots, and lowers humidity at the canopy. An inline exhaust fan connected to a carbon filter pulls warm, humid air out and draws fresh CO2-rich air in through passive intakes or a second duct. For a 4x4 tent, a 4-inch or 6-inch inline fan rated at 200 to 400 CFM is usually enough.
Nutrient solution management and pH/EC control
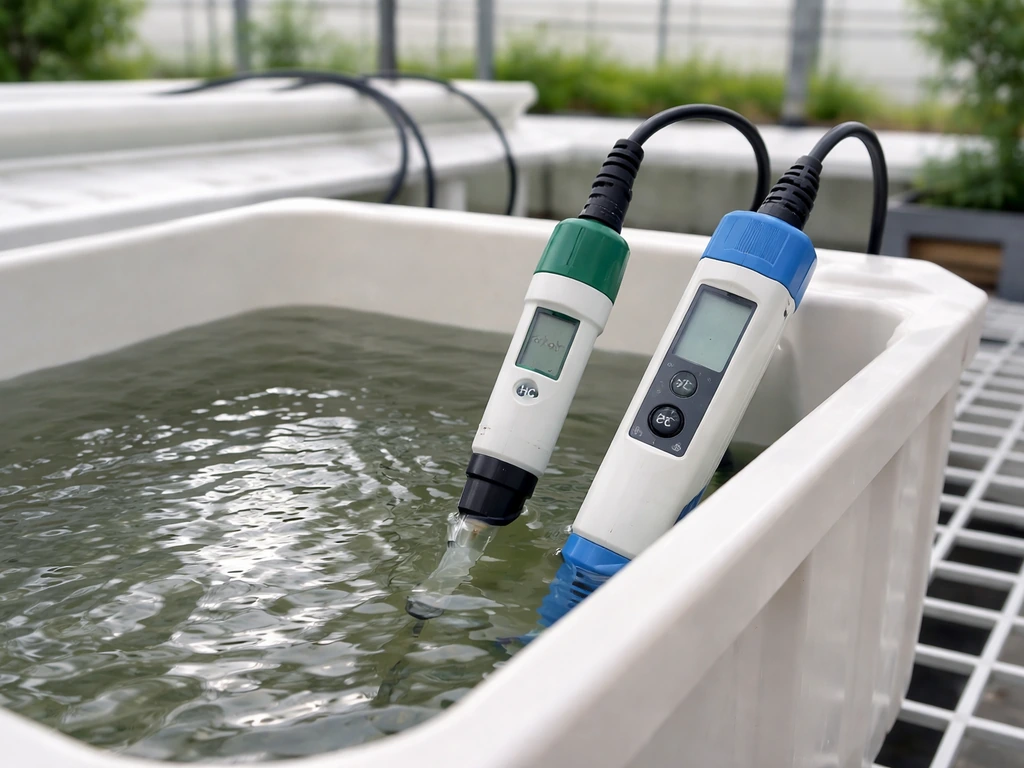
This is where hydroponics either succeeds or falls apart. Without soil as a buffer, your plants depend entirely on the nutrient solution being chemically dialed in. Two numbers matter most: pH and EC. Penn State Extension also notes that in hydroponics, pH strongly affects plant nutrient availability pH affects nutrient availability.
pH controls nutrient availability. Outside the 5. General Hydroponics’ pH Up liquid is designed to be added in small amounts to raise nutrient pH to the proper level. 0 to 6.0 range, elements like iron, calcium, and phosphorus become locked out even when they're physically present in the solution. EC (electrical conductivity) tells you the overall concentration of dissolved salts in the water, which is a proxy for total nutrient strength. The target range for most vegetables is 1.5 to 3.0 dS/m, with seedlings starting at the lower end and mature plants running higher.
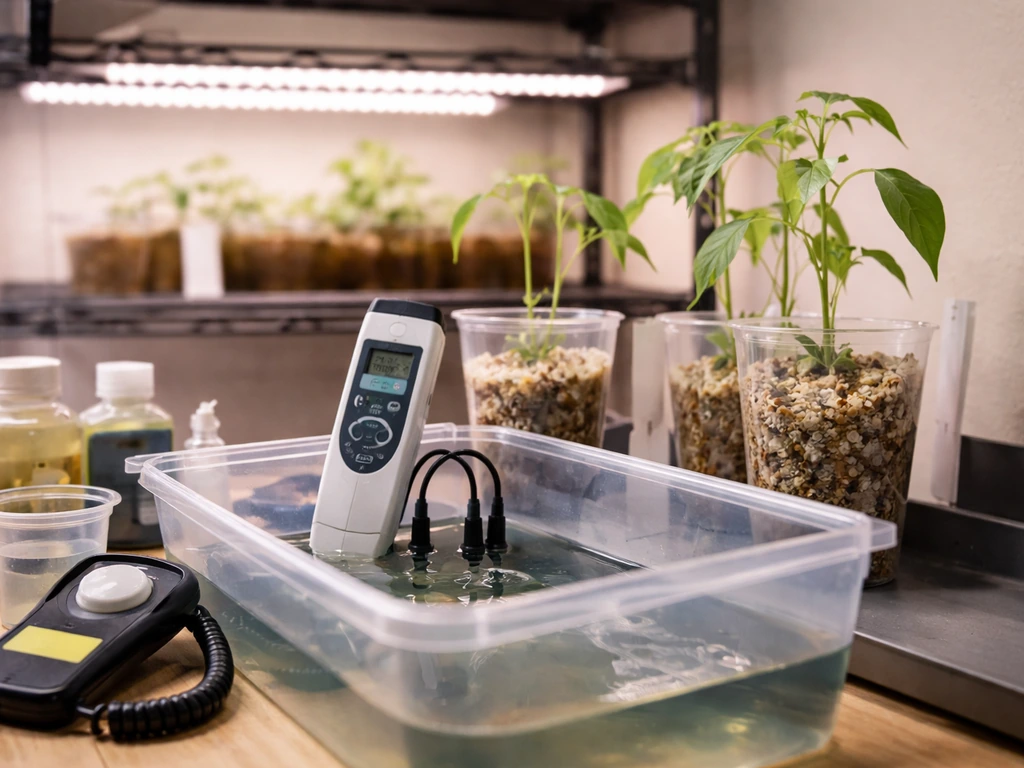
Tools you need to measure and adjust
- Digital pH meter: calibrate with at least two buffer solutions (pH 4.0 and pH 7.0) before first use and regularly after. Use fresh, unexpired buffers and rinse the probe with distilled water between each buffer.
- EC/TDS meter: measures nutrient concentration. EC meters read in dS/m or mS/cm; TDS meters convert to ppm. Either works for home growing.
- pH Up and pH Down solutions: potassium hydroxide-based (Up) and phosphoric acid-based (Down) liquids to adjust pH after mixing nutrients. Add in small amounts and retest.
- Calibration buffer solutions: pH 4.0, 7.0, and optionally 10.01 for three-point calibration. EC calibration solutions at 1413 µS/cm and 12.88 mS/cm cover the range you'll encounter.
- Probe storage solution: KCl-based solution for storing your pH probe between uses. Dry storage shortens probe life.
Mix your nutrients into water first, then check EC to confirm concentration, then adjust pH last. Order matters because nutrients affect pH, and pH adjustment after the fact is easier to control. Check pH and EC daily when you're starting out. Once you get a feel for how stable your system runs, every other day is usually fine.
Reservoir setup, water management, and keeping things clean
Reservoir basics
Your reservoir is the heart of the system. Use a food-safe, opaque container, typically a dark-colored plastic tote or a purpose-built reservoir. Opaque is critical: any light penetrating the reservoir feeds algae growth. Keep the lid fitted tightly and light-tight as a standard habit, not just an occasional measure. Size it generously: a 5-gallon reservoir is fine for a single DWC bucket, but an ebb and flow system for 6 to 8 plants benefits from a 20-gallon or larger reservoir to keep solution volume stable between top-offs.
Top-offs and full solution changes
As plants transpire and drink, reservoir level drops and EC climbs (because water evaporates but salts stay behind). Top off with plain pH-adjusted water when the level drops, not more nutrient solution, or you'll overdose the reservoir over time. Do a full reservoir flush and solution change every 7 to 14 days for most systems. This prevents salt buildup, biofilm formation, and pathogen accumulation. Between full crops, clean and sterilize the entire system with a 10% bleach solution or a hydrogen peroxide wash, then rinse thoroughly with fresh water before refilling.
Preventing algae, biofilm, and clogs
Algae needs two things to thrive: light and nutrients. You're already providing nutrients, so blocking light is your main defense. Keep all tubing, reservoirs, and fittings covered. If you spot green growth on any surface, that's your cue to do an earlier-than-scheduled flush and clean. Biofilm in pump lines and tubing is harder to see but causes clogs and pH swings. Flushing lines with hydrogen peroxide solution and rinsing well handles it. For pump and air stone maintenance, clean them with every reservoir change: mineral deposits build up fast and reduce output.
Optional upgrades for when you're ready to go further
Once your basic system is dialed in, a few additions can make day-to-day management easier and reduce the chance of things going wrong while you're away from the garden.
- Outlet timers: control lights, pumps, and fans on a set schedule without manual switching. Digital timers with multiple on/off cycles are ideal for ebb and flow flood cycles.
- Inline EC/pH monitors: continuous monitors clip to the reservoir or inline on tubing and alert you when readings drift. More expensive than handheld meters but valuable if you're running a larger system.
- Nutrient solution thermometer or aquarium thermometer: cheap and essential for catching solution temperature creep before it causes root problems.
- Yellow sticky traps: hang one or two in your grow space at canopy level as an early warning system for fungus gnats and other flying pests.
- Grow tent controller (temperature/humidity): automatically adjusts fan speed based on conditions. Helpful if your grow space runs warm.
- RO filter system: if your tap water TDS is consistently above 150 ppm, an under-sink RO unit gives you reliable, consistent water quality for every reservoir fill.
Your starter checklist and a realistic budget
Here's what a practical first hydroponic build actually looks like, broken into must-haves and nice-to-haves.
- System hardware: DWC bucket or ebb and flow kit (reservoir, tray, pump, timer) — $30 to $150 depending on size and source.
- Growing medium: expanded clay pebbles or rockwool starter cubes — $15 to $30.
- Net pots: a pack of 2-inch or 3-inch net pots — $5 to $10.
- Nutrient solution: a two-part or three-part hydroponic nutrient line — $30 to $60 for a starter kit.
- pH meter and calibration buffers (pH 4.0 and 7.0) — $20 to $60 for a reliable unit.
- EC/TDS meter — $15 to $40.
- pH Up and pH Down solutions — $10 to $20.
- LED grow light sized for your space — $60 to $200 for a quality panel.
- Grow tent (optional but strongly recommended) — $50 to $150.
- Inline fan and circulation fan — $40 to $100 combined.
- Outlet timers (light and pump) — $10 to $20.
A functional beginner setup with all the essentials lands somewhere between $200 and $400, depending on tent size and light quality. The two areas not to cut corners: your pH meter (cheap units drift badly and give false readings) and your light (underpowered lights are the single most common reason home hydro yields disappoint). Spend the most here, and save on the reservoir and tray, which are basically plastic containers.
One thing worth noting as you plan: while a complete nutrient program is non-negotiable for healthy plants, the question of exactly what happens if you skip or reduce nutrients is worth understanding before you start. Hemp cultivation has some unique requirements, so it helps to review the specific equipment needed for growing hemp before you set up your system.
If you want to grow hydroponics without nutrients, it usually means you need a nutrient-free approach that replaces them with a different food source what happens if you skip or reduce nutrients. Hops work similarly in hydroponics, but there are specific requirements for water quality, nutrients, and growth space that you should plan around what do hops need to grow.
You can also run a hydroponic system without certain equipment, but the plant still needs key growing essentials to succeed hydroponics without nutrients. Similarly, if you're wondering which crops are realistically suited to a hydroponic setup, leafy greens and herbs are the easiest place to start, while crops like grains present entirely different challenges at the system design level.
Grains are possible, but you need to plan a taller, more supportive system and tighter nutrient and water management than with leafy greens can you grow grains hydroponically.
Start with lettuce or basil in a single DWC bucket, get your pH and EC routine solid over the first two weeks, and then scale up from there. The chemistry becomes intuitive quickly, and once it does, the speed and consistency of hydroponic growing is genuinely hard to go back from.
FAQ
How often should I check pH and EC when I first start hydroponics?
In most hydroponic setups, you cannot “set it and forget it.” Plan on checking pH and EC daily for the first 1 to 2 weeks, then every other day once readings stabilize. Also re-check after any adjustment (pH down/up) and after topping off, since adding water changes EC and can drift pH over time.
What order should I mix water, nutrients, and pH adjusters in?
pH adjustment should come after nutrients are fully mixed. If you adjust pH before adding fertilizers, the nutrient chemistry can pull pH back out of range, so your correction is less accurate. When adjusting, make small changes and wait several minutes before retesting to avoid overshooting.
Should I add nutrients every time the reservoir level drops?
Yes, but it must be done in a “complete” way. If your EC drops during operation, that usually means water is evaporating faster than salts are being consumed, so you should top off with plain pH-adjusted water, not additional nutrients. Only add nutrients when your EC has drifted low compared to the target for that growth stage.
How can I tell if my pH meter readings are unreliable?
A pH meter that drifts is often a calibration problem, not “bad luck.” Calibrate with fresh calibration solutions at the same temperature as your sample, and store the probe in proper storage solution (not dry). If you see readings that jump around while your water looks unchanged, re-calibrate before making any major nutrient changes.
What are the common mistakes when interpreting EC readings?
EC is not a direct measurement of specific nutrients, it is a proxy for total dissolved salts, and some meters vary by temperature compensation and conversion factor. Use the same meter, keep temperature roughly consistent, and apply the manufacturer’s EC targets for your crop stage rather than relying on “EC means the same everywhere.”
Why might my plants be growing slowly even though pH and EC are correct?
Most people under-ventilate when they increase light intensity or plant size. Run both air circulation (to prevent stagnant, humid pockets) and air exchange (to control temperature and humidity in the tent). If leaves look wet but RH is high, increase exhaust and check duct sizing, carbon filter load, and whether passive intakes are actually open.
How should EC and nutrient strength change from seedlings to vegetative growth?
Seedlings often handle lower strength than mature plants, so EC targets should be adjusted downward early. A typical mistake is starting a full-strength feed immediately, which can cause nutrient lockout symptoms and stunted roots. Use the feed chart for your nutrient line and ramp EC gradually over the first week.
If leaves yellow, is it always an EC problem?
Nutrient availability drops when pH is outside the effective range, but it also depends on the specific element. Iron problems can show up quickly when pH is off, even if EC looks “fine.” If you see yellowing on new growth, verify pH first, then consider whether your solution includes chelated iron suitable for your pH range.
What oxygen-related issues happen in DWC, and how do I prevent them?
For home reservoirs, oxygenation is critical, especially in DWC. A common mistake is skipping air stones or using weak aeration, then trying to fix symptoms with higher nutrients. Prioritize dissolved oxygen by running strong aeration, keep solution cooler near the target, and avoid long periods where the roots sit poorly oxygenated.
What should I do if my nutrient solution temperature is too high?
If your reservoir warms above the low-70s Fahrenheit, dissolved oxygen declines and disease risk rises quickly, even if pH and EC are “on target.” For summer heat, consider a small aquarium chiller, an insulated reservoir wrap, and shade or relocation away from direct sun or hot walls.
Do I really need to keep the reservoir fully opaque and sealed?
Opaque, light-tight coverage matters because algae can take advantage of any light leaking into the reservoir or along tubing. Even small gaps in lids or clear tubing sections can create algae hotspots. If you already see green growth, clean early and fully flush, then re-check that all reservoir and lines stay covered.
Can I reuse my growing medium, and what’s the safest approach?
Yes, but you need a sanitation and scheduling plan. Reusing media like hydroton or mats can introduce biofilm and pathogens if you only rinse. Between runs, use a consistent clean and soak protocol, then ensure the media is fully rinsed and compatible with your next crop to avoid pH and salt carryover.
Is there a realistic way to grow hydroponically without nutrients?
Some plants tolerate “slower” hydroponic conditions, but overall yields are still constrained by the missing foundation pieces, especially nutrients and correct water chemistry. If you try to grow without a complete nutrient solution, you must replace plant nutrition with another reliable food source, and that approach has crop-specific limits.