For a throw-and-grow setup, the best fertilizer is a balanced granular starter like 10-10-10 or 16-8-8, applied at or just before sowing at no more than 1 pound of nitrogen per 1,000 square feet. If you're working with soilless containers or a hydroponic-style tray, swap that for a diluted liquid starter nutrient solution kept between 300 and 800 ppm EC (roughly 0.6 to 1.6 dS/m) at a pH of 5.8 to 6.2. Those two setups cover almost every beginner throw-and-grow scenario, and the rest of this guide walks you through why they work, how to apply them without burning seedlings, and what to do when something goes wrong.
Best Fertilizer for Throw and Grow: Simple Setup Guide

Marcus Holloway
30 May 2026
What 'throw and grow' actually means (and the fertilizer problem it creates)
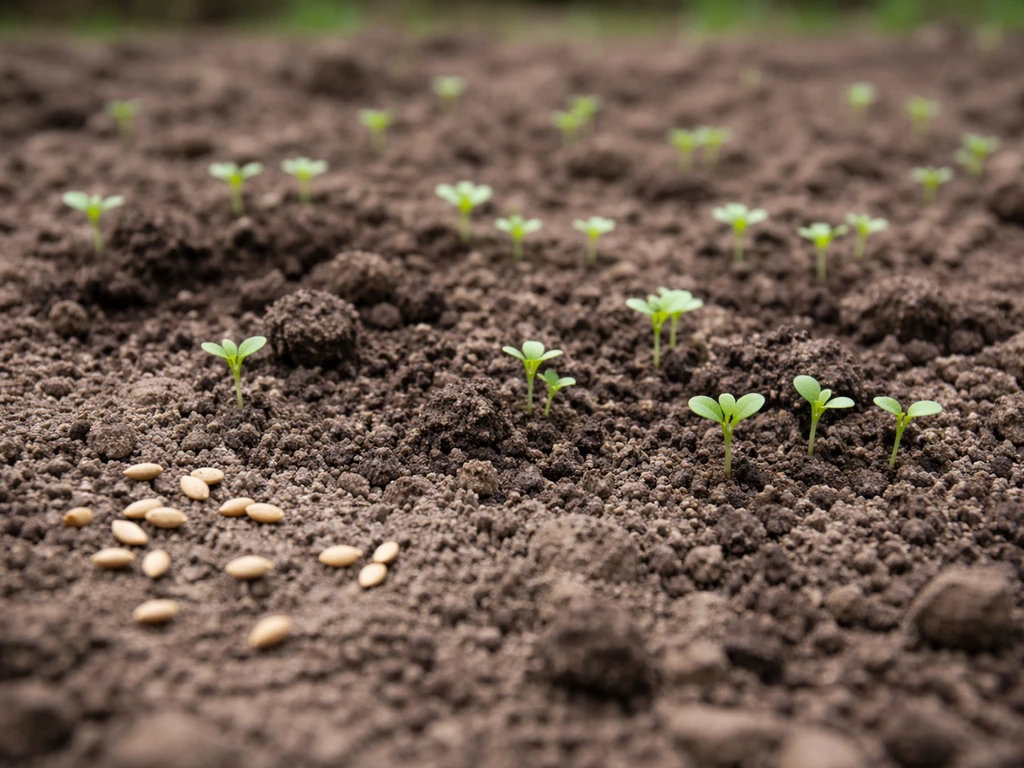
Throw and grow is broadcast sowing: you scatter seed over a prepared surface, maybe rake it in lightly or tamp it down, and let germination happen with minimal fuss. USDA research describes this as one of the simplest, fastest ways to establish plants, and it's exactly how most beginners approach quick greens, clover, herbs, cover crops, and general garden seedlings. The appeal is speed and simplicity. The fertilizer problem is that broadcast sowing puts seeds in direct contact with whatever nutrients are already in or on the soil surface, which means there's almost no buffer between the seed and a salt spike if you overdose.
Seedlings are especially vulnerable. Their root systems are tiny and can't escape a concentrated zone of soluble salts the way a mature plant might. If EC climbs above roughly 3.0 dS/m in the root zone, you start seeing marginal leaf burn, chlorosis, and in bad cases wilting even when the medium is moist. That's the osmotic problem: high salt concentration makes it physically harder for roots to pull water out of the medium, so the plant stresses even though moisture is present. The fertilizer strategy for throw and grow is therefore less about maximum feeding and more about just enough nutrition to push germination and early root development without frying tender seedlings.
Best fertilizer types for quick-sow: soil vs soilless and hydroponic setups
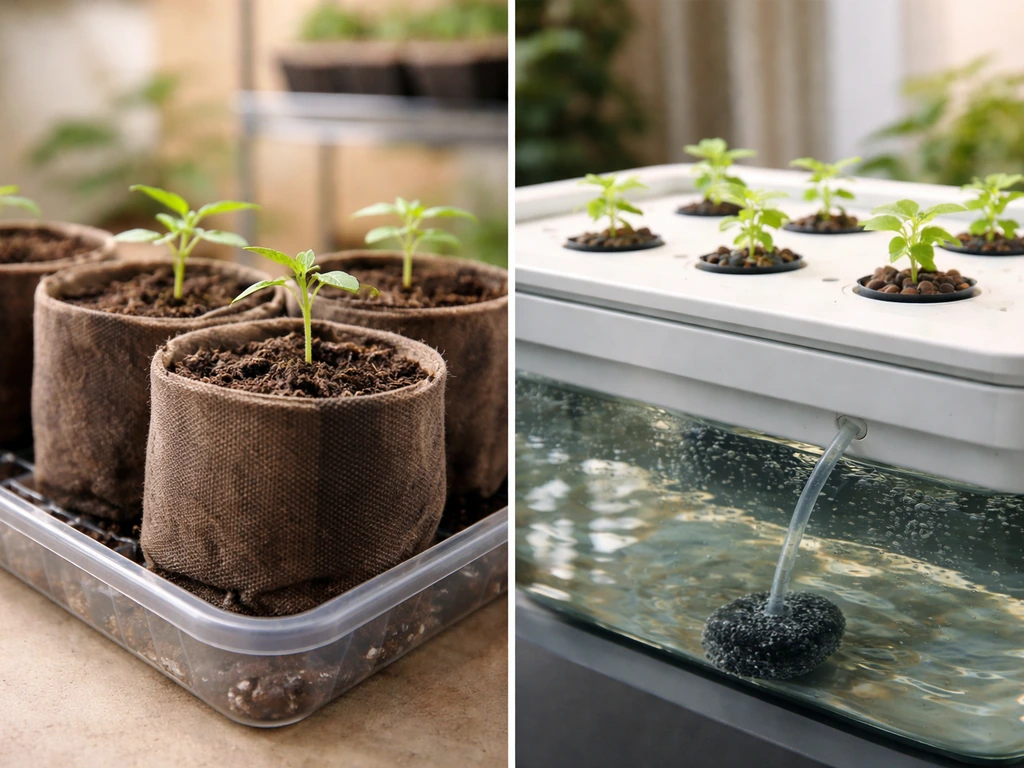
In-ground and container soil
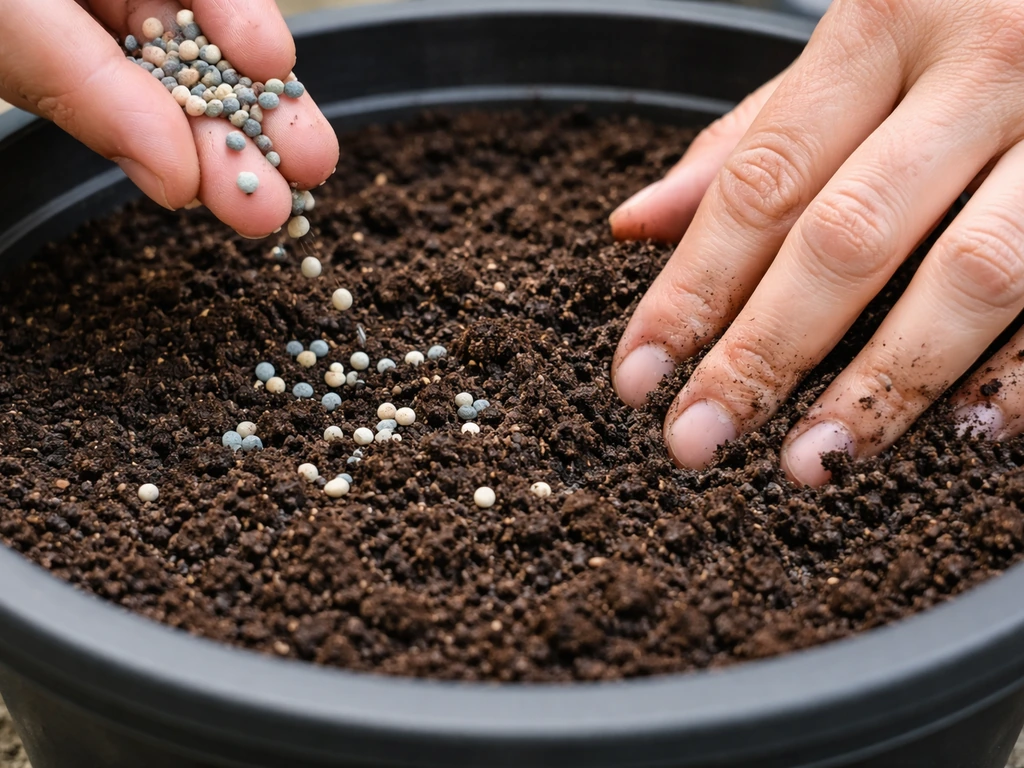
For soil-based throw-and-grow, a granular balanced starter fertilizer is the go-to. Formulations like 10-10-10, 16-8-8, or 20-10-10 are specifically designed for use at seeding time. They give you a known, predictable nutrient ratio and you can calibrate exactly how much nitrogen you're delivering per area. A product labeled 10-10-10 means 10% of each nutrient by weight, so a 10-pound bag contains 1 pound of actual nitrogen, which is your rough ceiling for a 1,000 square foot throw-and-grow area at planting. Pre-amended 'seeding soils' sold in bags usually have a mild starter charge built in, which can simplify things further, though you still want to check the label so you're not double-dosing.
Slow-release granular coated fertilizers (like polymer-coated urea) seem attractive for no-fuss broadcasting because you don't have to re-apply as often, but they have a timing mismatch problem with germination: nutrient release is temperature-dependent and often lags a week or two after application. During the critical first few days of germination, seeds need available phosphorus and a modest amount of nitrogen in the immediate root zone. If release hasn't kicked in yet, seedlings start underfed. Use slow-release as a supplemental top-dress after emergence, not as your primary at-sow fertilizer.
Soilless containers and hydroponic-style setups
If you're throw-and-growing into coco coir, perlite mixes, rockwool cubes, or any hydroponic tray setup, granular fertilizers are largely off the table. Soilless media has almost no cation exchange capacity, meaning it won't hold nutrients between feedings the way soil does. You need a liquid or water-soluble complete nutrient solution, dialed to a low EC appropriate for seedlings. Target 300 to 800 ppm (roughly 0.
6 to 1. 6 dS/m) for germination and the first week or two, then step up toward 1,000 to 1,500 ppm as seedlings develop. Keep pH between 5. 8 and 6.
2 for best nutrient availability. High-alkalinity tap water can push pH upward over time, causing nutrient lockout even when nutrients are present in solution, so checking and adjusting pH each time you mix is non-negotiable in soilless work.
NPK and nutrient strength: picking the right formulation for seedlings
Seedlings want phosphorus first. Phosphorus drives root development and early cell division, and phosphorus deficiency at the seedling stage shows up as slow, stunted growth, poor early development, and sometimes a darkening or purplish cast on lower leaves. This is why starter fertilizers are typically formulated with a higher phosphorus ratio relative to nitrogen, not the nitrogen-heavy ratios you'd use for feeding established leafy plants.
The upper bound for nitrogen at sowing time is 1 pound of actual N per 1,000 square feet in the root zone. Going higher risks fertilizer injury directly on germinating seeds, and the damage is often irreversible: seeds fail to germinate or seedlings emerge stunted and never recover. Phosphorus should be at least equal to nitrogen at this stage (1 pound of P per 1,000 sq ft minimum alongside the nitrogen), which is why balanced or slightly P-heavy starters outperform high-N formulas for throw-and-grow germination.
Potassium (the K in NPK) supports stress tolerance and water regulation, and a balanced amount is fine at sowing. Don't chase ultra-high K products at germination unless you're in a high-stress environment like intense heat or wind. For most home growers doing throw-and-grow, a clean balanced 10-10-10 or a gentle liquid starter at 150 to 200 ppm N is genuinely all that's needed to get strong seedling emergence.
| Fertilizer Type | Best Setup | NPK Range | Timing | Risk Level |
|---|---|---|---|---|
| Balanced granular (10-10-10, 16-8-8) | In-ground soil, containers with soil | Equal or slightly P-heavy | At or before sowing | Low if rate is correct |
| Liquid/water-soluble starter | Soilless, coco, hydroponic trays | Seedling-formulated, low EC | At sowing and every 2-3 days | Low if EC stays under 1.6 dS/m |
| Slow-release granular (coated urea) | Soil top-dress after emergence | Varies | After seedlings emerge | Low as supplement, risky at sowing |
| High-N granular (30-0-10 type) | Established plants only | High N, low P | Not at sowing | High burn risk for seedlings |
| Compost/manure incorporated | Soil amendment pre-sow | Variable, slow release | 2-4 weeks before sowing | Low if aged and well-incorporated |
How to apply it: broadcasting, mixing, dosing, and timing
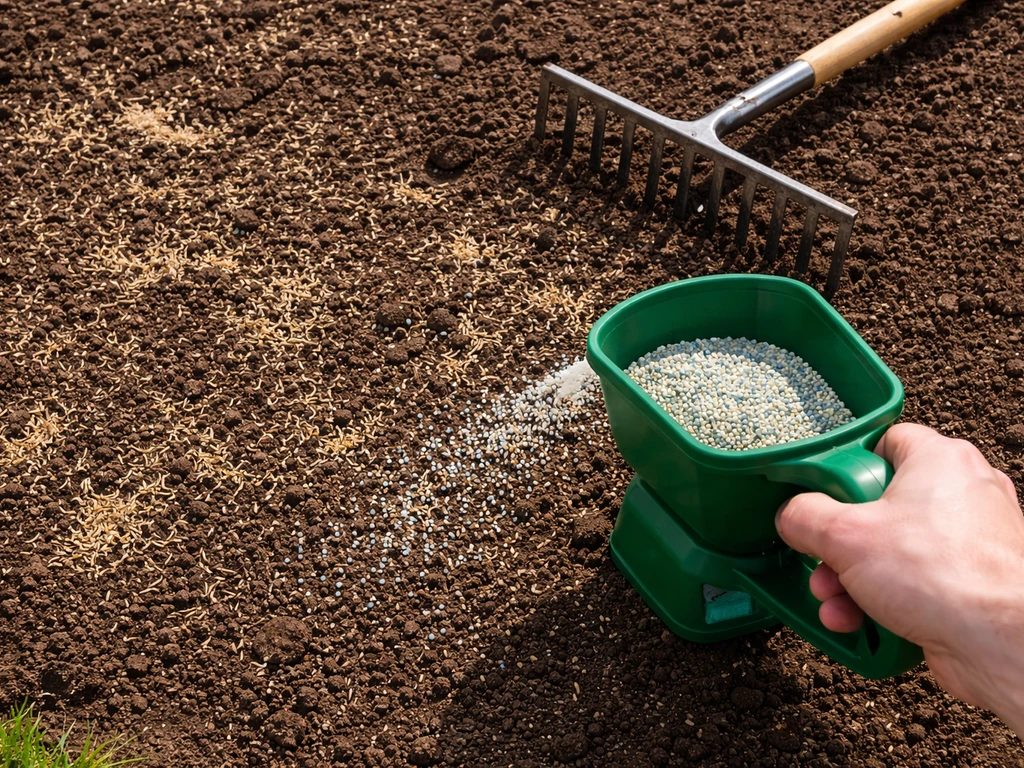
Granular application in soil
The most common application mistake in throw-and-grow is dumping fertilizer in one spot or making a single straight pass. Uneven distribution causes streaking: some areas get scorched, others stay underfed. The fix is simple: split your total fertilizer amount in half and make two passes at roughly perpendicular angles to each other. This crosses coverage lines and smooths out any gaps or hot spots. If you're using a handheld or push spreader, open it only after you're already moving, not while standing still, since a stationary dump of granules creates a concentrated pile that burns whatever seeds are underneath.
After broadcasting your granular starter, rake it lightly into the top 1 to 2 inches of soil rather than leaving it on the surface. This positions it in the germination zone without concentrating it on the seed coat, and it reduces the risk of rain or irrigation washing a salt spike directly onto newly germinated roots. Water in thoroughly after application to help solubilize the granules and begin even distribution.
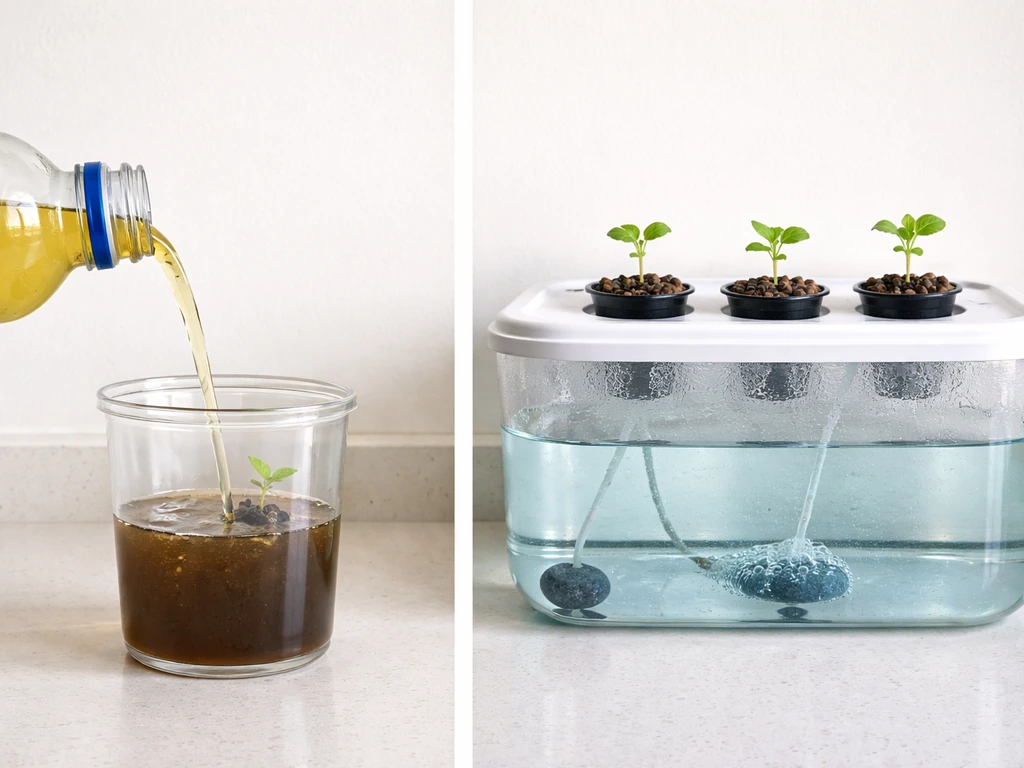
Liquid feeds in soilless and hydroponic setups
Mix your liquid or water-soluble nutrient at the lowest recommended seedling rate on the label, or aim for 300 to 500 ppm EC if you're working from a base nutrient with a meter. You can also ask, “can you grow plants with Gatorade,” but it is not a reliable nutrient mix for seedlings compared with properly dosed liquid fertilizer. Apply at the time of sowing, either by pre-soaking your medium or by bottom-watering trays.
After germination (usually day 3 to 7 depending on the plant), increase frequency to every 2 to 3 days and step EC up gradually toward 800 to 1,000 ppm as seedlings develop their first true leaves. Never jump EC dramatically between feedings. Gradual steps of 100 to 150 ppm at a time let roots adjust without osmotic shock.
Timing at a glance
- Pre-sow (day -7 to -14): Incorporate compost or aged manure if using organic amendments; let them begin breaking down before seeds go in.
- At sowing (day 0): Apply granular starter in two passes (half each direction) and rake into top 1-2 inches; OR pre-wet soilless medium with dilute liquid nutrient at 300-500 ppm EC.
- After germination (day 5-10): Begin light top-dress or increase liquid feed to 600-800 ppm; introduce slow-release granular as a supplement at this stage if desired.
- Weeks 2-4: Step up liquid feeding as needed based on plant size and color; check EC every 3-5 days in soilless setups; top-dress granular again only if growth visually stalls.
Organic vs synthetic: real trade-offs for throw-and-grow
Organic fertilizers are appealing for their soil-building properties and low burn risk, but they have a serious timing problem for quick-sow use. Most organic materials release nutrients slowly, often providing only 5% to 25% of their total nitrogen in the first year, with the bulk tied up in organic matter that requires microbial breakdown to become plant-available. If you throw seeds out expecting organic material to feed germinating seedlings in the first week, you're going to be disappointed. The exception is fast-releasing organics like blood meal, feather meal, or liquid fish hydrolysate, which are broken down quickly enough to be genuinely useful at sowing time.
Synthetic starter fertilizers win on predictability and speed for throw-and-grow. You know exactly what NPK you're delivering, it's available almost immediately, and you can calculate dosing by area with precision. The burn risk is real but manageable if you stick to recommended rates. For a pure germination run where you just need reliable, fast results, a synthetic balanced starter is the practical choice.
The hybrid approach is often the best of both: incorporate aged compost or a light organic amendment into the soil 1 to 2 weeks before sowing (to feed soil biology and improve structure), then apply a small dose of synthetic starter at sowing for immediately available nutrition. This keeps EC low while still providing accessible nutrients at the moment seeds need them most. In soilless hydroponic setups, organic amendments don't translate well at all since there's no microbial ecosystem to process them, so in that context synthetic liquid nutrients are the only reliable option.
| Factor | Organic (slow-release) | Organic (fast-release) | Synthetic starter |
|---|---|---|---|
| Speed to seedling-available nutrients | Slow (weeks to months) | Fast (days) | Immediate |
| Burn risk at sowing | Very low | Moderate if overdosed | Moderate, manageable with correct rate |
| Works in soilless/hydro | No | Partial (liquid fish/kelp) | Yes |
| Nutrient precision | Low (variable concentration) | Moderate | High |
| Soil health benefit | High | Moderate | Low to none |
| Best use timing | Pre-sow soil amendment | At sow or early seedling | At sow or early seedling |
Reading and fixing nutrient problems in early growth
Signs you're underfeeding
Underfed seedlings look weak and thin. Nitrogen deficiency shows up as pale, small leaves and stems that look elongated and spindly, like the plant is reaching rather than filling out. Phosphorus deficiency, which is the more common seedling issue, looks like slow or stalled growth, a darker than normal green, and sometimes purplish coloring on undersides of leaves or stems. If germination rate was good but seedlings just aren't taking off after week one, low phosphorus is the first thing to check.
Signs you're overfeeding (salt burn)
Too much fertilizer at sowing shows up fast. Marginal leaf burn (brown, crispy edges on seedling leaves) is the classic sign of excessive soluble salts. Seedlings may also wilt even in a moist medium, which is the osmotic stress signature: salt concentration is so high that roots can't pull water effectively. In severe cases seeds fail to germinate at all, or emerge and immediately collapse. If EC in the root zone is above 3.0 dS/m, you're already in injury territory for young plants.
How to fix salt problems
If you suspect overfertilization, the immediate fix is to water thoroughly to leach soluble salts through the medium. In containers and soilless setups, flush with plain pH-adjusted water (two to three times the container volume works well) until the EC of the runoff drops to a safe range. Stop all feeding and wait for the medium to recover before reintroducing nutrients at a lower dose. In in-ground beds, heavy watering can help but drainage matters: if the soil is clay-heavy and drains poorly, salts won't move as easily and you may need to physically remove and replace the surface layer.
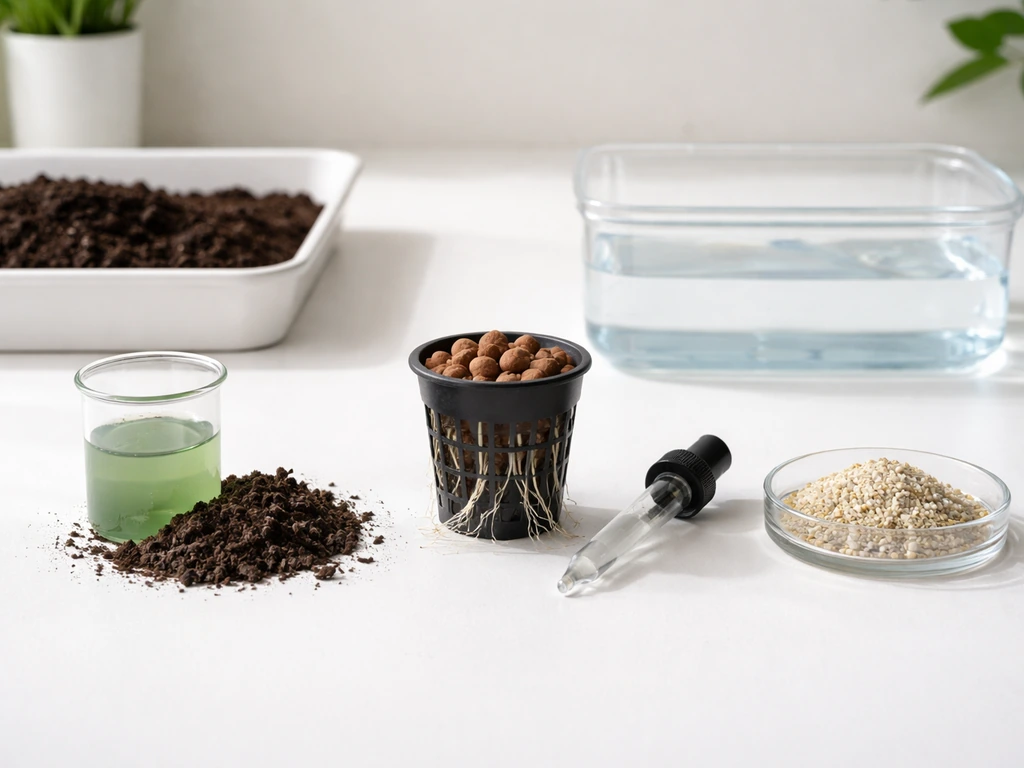
pH and EC: the two numbers you need to check
In soilless and hydroponic setups, EC (electrical conductivity) is how you measure total dissolved salts in your nutrient solution or medium, and it's the fastest way to catch a salt problem before it damages plants. Aim to keep EC under 1.6 dS/m during germination and early seedling stage. For pH, the target window is 5.8 to 6.2. Drift above 6.5 and you'll start losing access to iron, manganese, and other micronutrients even if they're present in your solution. High-alkalinity tap water is a common culprit for upward pH drift, so test your source water and use pH-down solution as needed when mixing feeds.
A simple starter feeding plan you can execute today
Whether you're in soil or soilless, here's the practical framework. The goal is to give seeds just enough to germinate strongly, then ramp up nutrition as root systems develop and can handle more. If you want a simple weekly rhythm for watering and feeding after the first seedlings, use this schedule 1 best way to grow plants approach as your adjacent guide.
Soil-based throw-and-grow plan
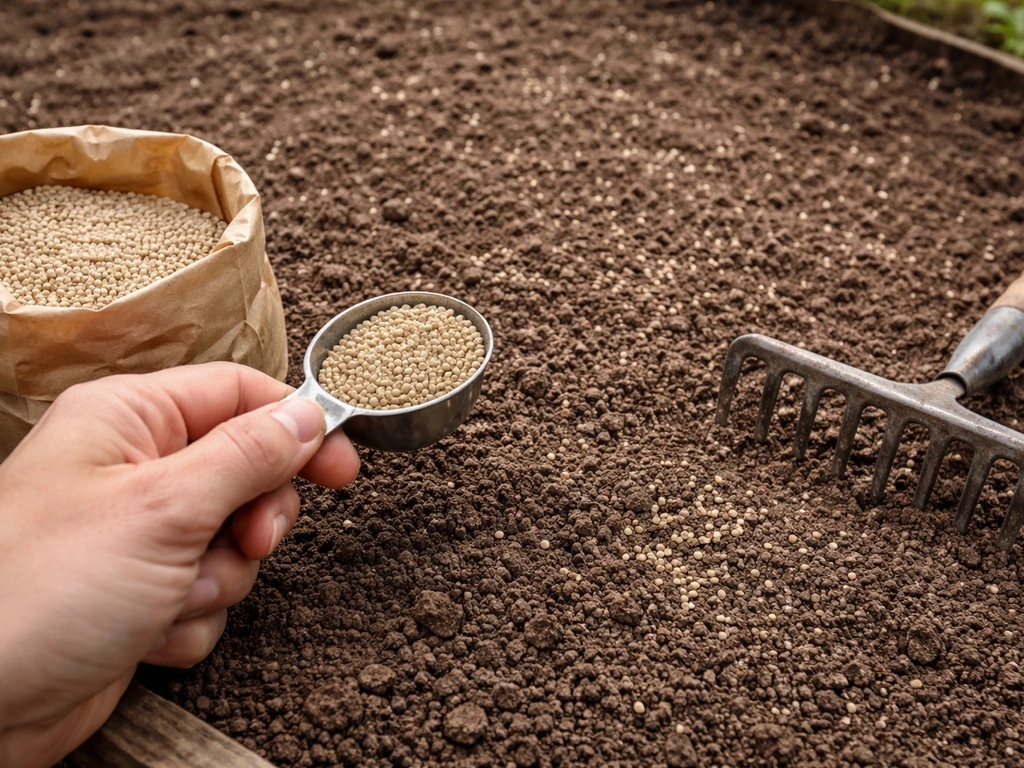
- Buy a granular starter fertilizer labeled 10-10-10, 16-8-8, or similar balanced formulation. A 10 to 20 pound bag covers most home garden areas with room to spare.
- Calculate your area in square feet and apply at a rate that delivers no more than 1 pound of actual nitrogen per 1,000 sq ft. For 10-10-10, that means 10 pounds of product per 1,000 sq ft.
- Split the application: spread half going north-south, then the second half going east-west over the same area.
- Rake the granules into the top 1 to 2 inches of soil, then water in well.
- Broadcast your seed over the prepared surface, press or rake lightly, and keep the surface moist.
- After seedlings have 2 true leaves (usually week 2 to 3), optionally begin a light top-dress of slow-release granular or compost to sustain growth without burn risk.
Soilless or hydroponic throw-and-grow plan
- Get a complete water-soluble or liquid seedling nutrient (look for formulations marketed as seedling starters or clones/germination formulas; 2-part or 3-part base nutrients work too at reduced dose).
- Mix to 300 to 500 ppm EC and pH-adjust to 5.8 to 6.2 before use.
- Pre-wet your medium (coco, rockwool, perlite blend) with this solution before placing seeds.
- After germination, water or top-feed every 2 to 3 days at 500 to 700 ppm EC.
- Check EC with a meter every 3 to 5 days. If runoff EC is climbing above 2.0 dS/m, flush with plain pH-adjusted water before the next feed.
- At week 2 to 3, step up to 800 to 1,200 ppm as the seedlings show vigorous growth and established root development.
What to buy or check today
- Granular balanced starter (10-10-10 or 16-8-8): available at any garden center, sold in 5 to 40 lb bags.
- Water-soluble seedling nutrient or liquid starter (for soilless/hydro): brands like General Hydroponics, Fox Farm, or Jacks Nutrients offer seedling-specific lines.
- A basic EC/TDS meter if you're in soilless or hydro: inexpensive models run under $20 and are worth every cent for catching salt problems early.
- A pH meter or pH drops: critical for soilless and hydroponic setups; test your tap water before you mix your first feed.
- pH-down solution if your tap water is alkaline (above 7.0 pH): a common issue that leads to nutrient lockout in otherwise well-fed seedlings.
If you're choosing between soil and soilless for your throw-and-grow, soil with a granular starter is the most forgiving setup for beginners: the medium buffers mistakes, uptake is more self-regulating, and you don't need a meter to get good results. Soilless and hydroponic-style setups give you faster growth and more control but demand active monitoring.
Either way, stay at low nutrient rates early, watch your plants closely in the first two weeks, and adjust based on what you see rather than a rigid schedule. If you want a simple schedule 1 pgr vs speed grow vs fertilizer comparison, start by using a low, seedling-safe rate first and then adjust based on EC and plant response a rigid schedule.
If you want the best throw and grow clover results, start with a balanced starter and keep early nutrient levels low to avoid salt burn throw-and-grow. If you want the schedule 1 best way to grow plants workflow, start with low, seedling-safe rates and then ramp only as roots establish. Early plant behavior tells you everything you need to know.
FAQ
How do I calculate the right amount of fertilizer for my throw-and-grow area? (Is it based on the product weight or nitrogen content?)
Use only the portion of the fertilizer that is actually nitrogen when you calculate your upper limit. For example, a 10-10-10 bag is 10% nitrogen by weight, so 1,000 sq ft can take about 10 lb of product to reach roughly 1 lb of actual N. If your bag is different (like 20-10-10), the product weight needed changes even if the nitrogen limit stays the same.
If I use a pre-amended seeding mix, should I still add the best throw-and-grow starter fertilizer?
No, not usually. Many “starter soil” products already include a mild charge, so applying a separate granular starter on top can double the salts near the seed. The safer move is to check the label for an NPK or seeding-rate and then either reduce the extra fertilizer or skip it for that first sowing.
Can I fertilize the bed days before throwing seed, or is it safer to apply at sowing?
For broadcast seeding, applying before sowing is only helpful if you can get it mixed into the top layer before seeds touch the most concentrated zone. In practice, the lowest-burn approach is apply at seeding time and then rake lightly into the top 1 to 2 inches, followed by thorough watering.
What’s the fastest way to fix salt burn in a throw-and-grow bed?
If EC is too high, seedlings may burn even when the medium feels wet, so do not rely only on moisture. In soil beds, water the whole area enough to move salts below the germination zone, and consider gently removing and replacing the top couple inches if drainage is poor (especially with clay-heavy ground).
Are organic fertilizers ever a good substitute for the best fertilizer for throw and grow? If so, which types?
Yes, but it changes the “best fertilizer” choice. Compost and slow organics are too late for the first week, while fast-releasing organics like liquid fish or feather meal can work in the short window if you still keep rates low to avoid concentrated salts from specific ingredients.
What if my seedlings look deficient in soilless media, but I’m unsure if it’s fertilizer shortage or pH/EC trouble?
Recheck EC and pH after mixing, then adjust gradually. If pH drifts upward, nutrient lockout can show up before plants look “hungry,” so correcting pH (not adding more fertilizer) is often the first step. In soilless systems, flush and reset EC if you overshot.
Can I use granular fertilizer in coco coir or hydroponic trays instead of a liquid nutrient solution?
A direct application is risky. In soilless, granular fertilizer is largely a bad fit because the media holds little nutrient buffer, which makes salt spikes hard to smooth out. If you only have granules, dissolve them into a known water-soluble nutrient solution and dose based on EC and pH rather than spreading granules in the tray.
How quickly should I increase fertilizer strength after seeds germinate in a soilless setup?
Treat the first week as a low-and-steady window, then let plant response guide the ramp. If you want a concrete safety rule, keep early nutrient strength at the low seedling EC range and increase in small steps after germination, typically when roots have started establishing and true leaves appear.
How can I tell the difference between nitrogen vs phosphorus problems in throw-and-grow seedlings?
Yes. Purple or darkening on lower leaves often points to phosphorus issues, but nitrogen deficiency usually looks more like pale, small growth with spindly elongation. When you see stalled growth after good germination, check phosphorus first before adding heavy nitrogen.
What causes streaking or patchy burn after broadcasting fertilizer, and how do I avoid it?
Split passes reduce streaking, but the biggest coverage mistake is applying while standing still or opening the spreader too early. Start spreading only once you are moving, and keep a consistent broadcast width so you do not create invisible “hot lanes” where seeds contact concentrated salts.
If my seeds sprouted but growth stalled, should I flush and retry feeding, or re-seed?
Often. A common scenario is adding too much nitrogen or applying it unevenly, then seedlings emerge weak and never recover. Re-seeding is sometimes the only practical solution if germination is poor, but if only early burn occurred, a flush-leach followed by reduced feeding usually gives a chance to recover.
Does soil drainage affect how forgiving the best fertilizer for throw and grow will be?
Yes, especially with in-ground beds that don’t drain well. If water ponds or infiltration is slow, salts linger in the top layer and damage seedlings even at moderate dosing. Improve drainage (or consider raking in fertilizer less deeply and keeping rates lower), because leaching depends on actual movement of water.