If you searched 'Schedule 1 best way to grow plants,' the most likely thing you're looking for is a structured week-by-week growing calendar, the kind nutrient brands like General Hydroponics label as a 'feed schedule' or that growers shorthand as 'Schedule 1' when following a phased regimen from seedling through harvest. That's exactly what this guide covers: a full soil and hydroponic grow plan with environment setup, a concrete week-by-week task list, nutrient and pH monitoring, troubleshooting by stage, and yield optimization tips you can act on today.
Schedule 1 Best Way to Grow Plants: Soil vs Hydroponics Plan

Marcus Holloway
29 May 2026
What 'Schedule 1' Actually Means in a Growing Context
The term 'Schedule 1' shows up in a few different places, so it's worth pinning down which one applies here. In US federal law, Schedule I refers to the Controlled Substances Act classification (21 CFR § 1308.11), which includes substances like tetrahydrocannabinols with specific regulatory exceptions. That's a legal category, not a growing method. In the EPA world, 'registration review schedules' are administrative timelines for re-evaluating pesticides every 15 years or so, also not a grow plan.
In the home-growing and hydroponic community, 'Schedule 1' almost always means the first feeding schedule in a brand's nutrient chart, or the baseline week-by-week regimen a grower follows from start to finish. Search results show that “Schedule 1” is sometimes used as a shorthand for a hydroponic feeding/nutrient chart, but it is not a universally standardized industry term 'Schedule 1' almost always means the first feeding schedule. Nutrient manufacturers like General Hydroponics publish separate schedules for drain-to-waste and recirculating systems, broken down by growth stage and week number. When growers say they're 'running Schedule 1,' they typically mean they're following that foundational phase-based plan before layering in advanced supplements. That interpretation is the most useful one for anyone trying to actually grow plants, and it's the one this guide is built around.
Soil vs. Hydroponics vs. Beginner-Friendly Hybrids
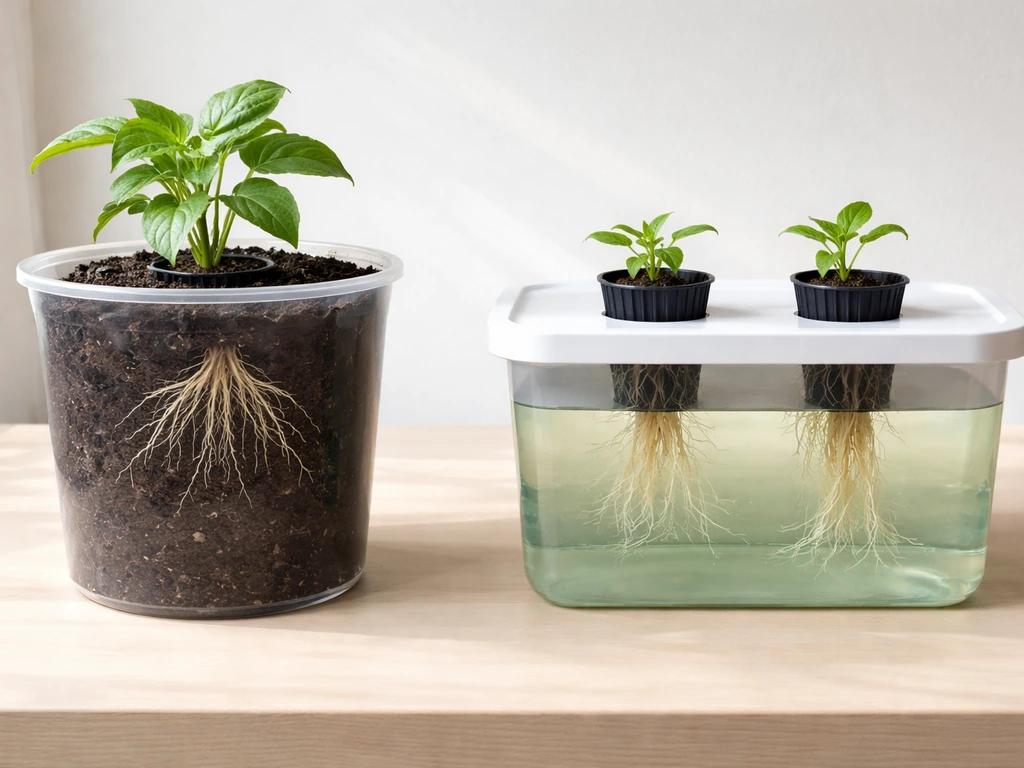
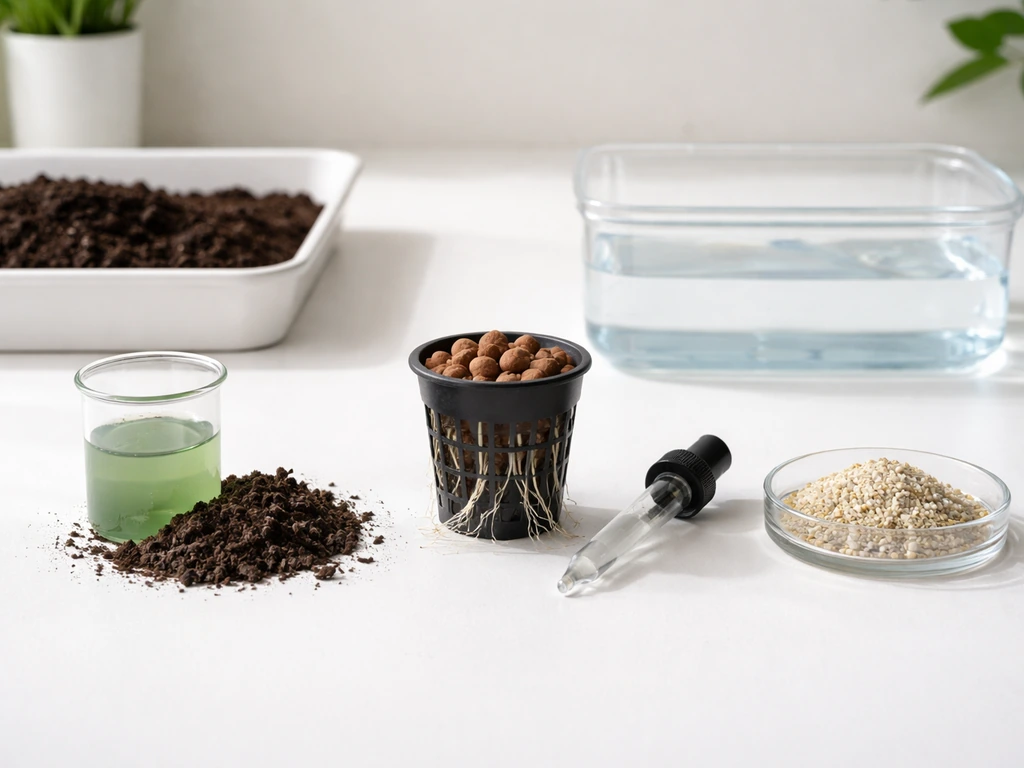
The medium you choose sets the rules for everything else: how you water, how you feed, what problems you'll face, and how fast your plants grow. Here's a straight comparison of the three main paths.
| Factor | Soil | Hydroponics (DWC/NFT) | Hybrid (Coco Coir) |
|---|---|---|---|
| Learning curve | Lowest | Steepest | Moderate |
| Upfront cost | Low ($20-$80 for a basic setup) | Medium-High ($100-$400+) | Low-Medium ($40-$120) |
| Growth speed | Slowest (buffered soil slows uptake) | Fastest (30-50% faster than soil) | Fast (close to hydro) |
| Watering frequency | Every 2-4 days depending on pot size | Continuous or timed cycles | Daily to twice daily |
| pH range to target | 6.0-7.0 (ideal: 6.2-6.8) | 5.5-6.5 (ideal: 5.8-6.2) | 5.5-6.5 (ideal: 5.8-6.2) |
| Nutrient control | Buffered, forgiving of errors | Precise, errors show fast | Precise, slightly forgiving |
| Pest/disease risk | Higher (fungus gnats, root rot) | Lower (no soil), but root rot possible | Lower than soil |
| Best for | Beginners, outdoor growers | Experienced growers chasing yield | Beginners wanting hydro speed |
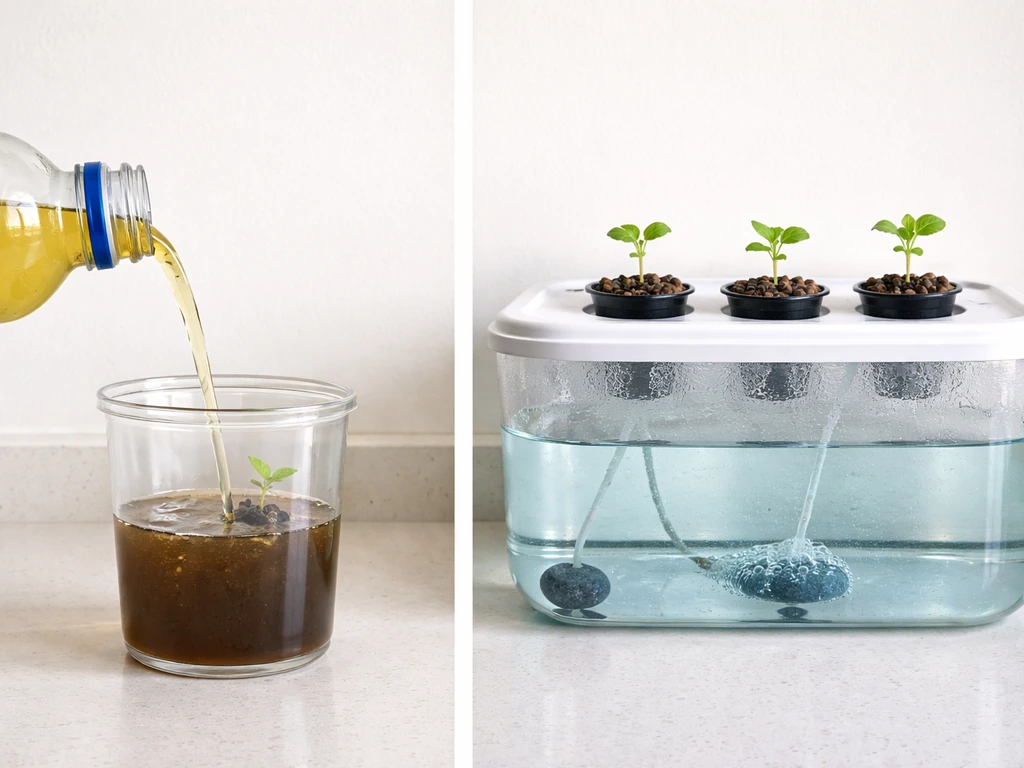
My recommendation: if you're new, start with a quality amended soil like Fox Farm Ocean Forest or a similar pre-buffered mix. You get a natural buffer against pH and nutrient swings, meaning a mistake won't wipe out your plants overnight. If you want faster growth and you're comfortable monitoring numbers daily, coco coir is the best gateway into hydroponic-style feeding without the complexity of a full recirculating system. True deep water culture (DWC) or NFT hydroponics is genuinely faster, but pH and dissolved oxygen issues can crash a crop in 24 hours if you're not watching.
Setting Up Your Growing Environment
Your environment matters more than your nutrient brand. Plants can compensate for an imperfect feed schedule, but they can't compensate for wrong temperatures or no airflow. Get these dialed in before you drop a single seed.
Light
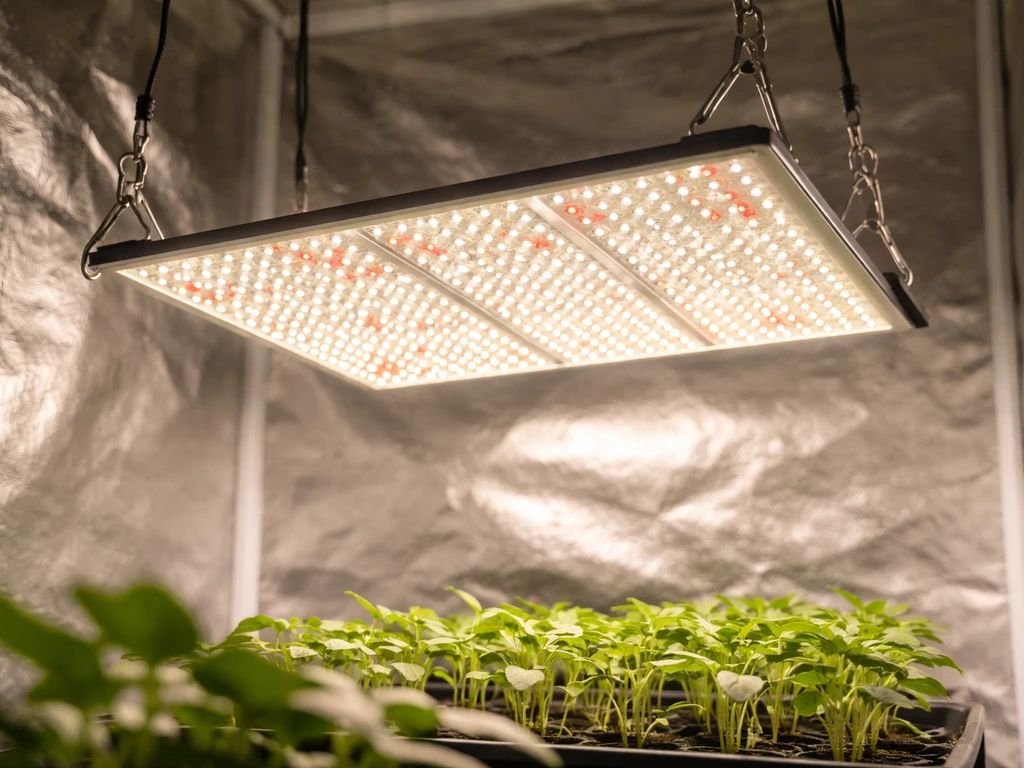
For indoor grows, full-spectrum LED panels are currently the best value: energy-efficient, low heat output, and capable of running the full lifecycle from seedling through flowering. A 200-240W quantum board LED covers a 3x3 ft (0.9x0.9 m) flowering canopy effectively. During vegetative growth, run 18 hours on and 6 hours off. For flowering plants (photoperiod varieties), switch to 12 hours on and 12 hours off to trigger bloom. Autoflowering varieties flower regardless of light schedule, so keep them on 18/6 or even 20/4 for the full cycle. Light intensity matters too: seedlings prefer 200-400 PPFD (micromoles per square meter per second), veg plants thrive at 400-600 PPFD, and flowering plants want 600-900+ PPFD.
Temperature and Humidity
Keep daytime temperatures between 70-85°F (21-29°C) during lights-on, and drop to no lower than 60°F (15°C) during lights-off. Temperatures above 88°F (31°C) slow growth and invite spider mites. For humidity, seedlings and clones prefer 65-75% relative humidity (RH). Veg plants do well at 50-65% RH. Drop humidity to 40-50% during flowering to prevent mold and bud rot, and push it even lower (30-40%) in the final two weeks before harvest.
Airflow and CO2
Move air across your canopy with an oscillating fan set to low or medium. This strengthens stems, prevents hot spots, and reduces fungal pressure. Exhaust fans should exchange the full volume of your grow space air at least once every 1-3 minutes. A carbon filter on the exhaust handles odor. If you're growing in a sealed room with CO2 supplementation (1200-1500 ppm), you can push temperatures a bit higher (up to 88°F) and see meaningful yield increases, but this is an advanced step, not a beginner requirement.
Container Size and Spacing
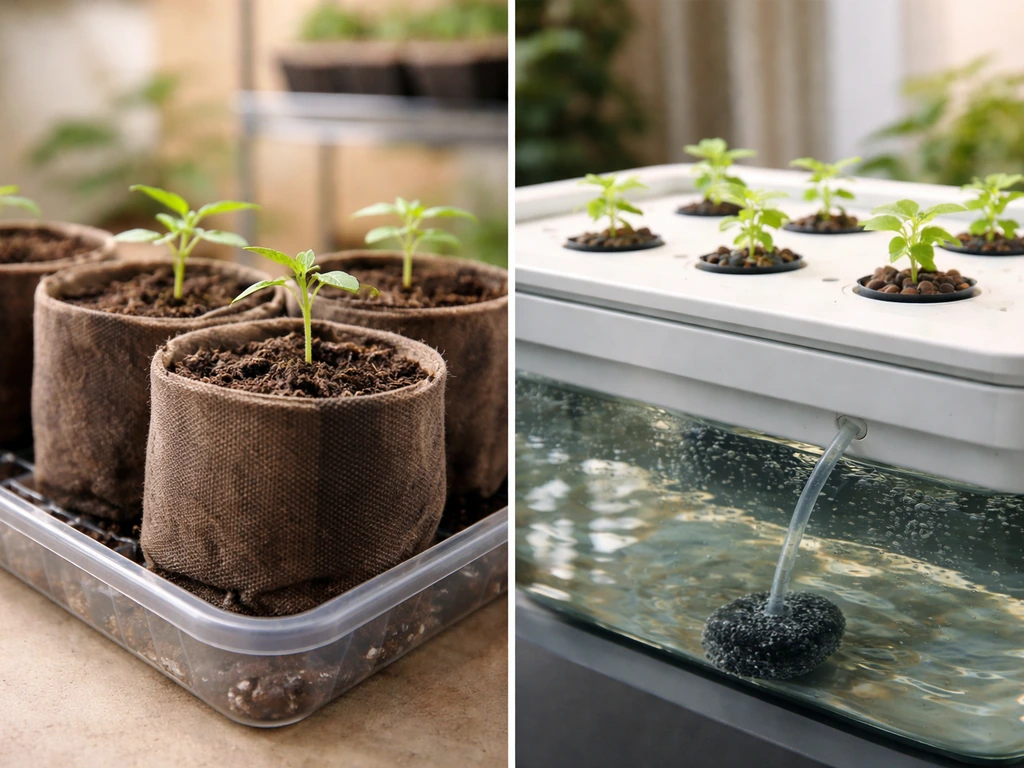
For soil grows, start seedlings in small solo cups or 4-inch pots, then transplant to a 1-gallon container after 2-3 weeks, and finally into a 3-5 gallon final pot for most medium-sized plants. Larger final pots (7-10 gallon) are for big veg periods or large photoperiod plants. In a 3x3 ft tent, 4 plants in 3-gallon pots is a workable number for a Screen of Green (ScrOG) setup. In a 4x4, you can run 4-6 plants comfortably. Overcrowding kills airflow and invites mold. For coco or hydro, fabric pots or net pots in 3-5 gallon sizes work well because they provide excellent oxygen to the root zone.
Week-by-Week Growth Schedule: Seed to Harvest
This calendar works for most flowering plants, including cannabis, in an indoor environment. Adjust timing slightly for faster-finishing autoflowers (typically 8-10 weeks total) or longer-running photoperiod strains (12-16 weeks including veg). Outdoor timelines follow the natural season, but the task sequence stays the same.
| Week | Stage | Key Tasks |
|---|---|---|
| Week 1 | Germination / Seedling | Germinate seeds in moist paper towel or directly in small pots. Keep at 75-80°F, high humidity (70%). Minimal light (100-200 PPFD). No nutrients yet. |
| Week 2 | Seedling | First true leaves appear. Move to slightly stronger light. Begin very light feeding (25% of recommended dose) if using plain media like coco. Soil plants often need nothing yet. |
| Week 3-4 | Early Veg | Transplant from solo cup to 1-gallon pot if roots are circling. Increase light intensity. Begin full seedling/veg nutrient dose. Water when top 1 inch of soil is dry. |
| Week 5-6 | Mid-Veg | Plants growing vigorously. Begin LST (low stress training) by bending and tying down main stem. Increase nutrients to full veg dose. Check pH every watering. Transplant to final pot. |
| Week 7-8 | Late Veg / Pre-Flower | Flip to 12/12 for photoperiod plants, or continue 18/6 for autos. Plants may stretch 50-100%. Maintain training. Begin transition nutrients (lower N, higher P and K). |
| Week 9-11 | Early-Mid Flower | Buds/flowers forming. Switch to full bloom nutrient schedule. Maintain airflow, lower humidity to 45-50%. Watch for deficiencies. Continue defoliation if canopy is dense. |
| Week 12-14 | Late Flower | Trichomes developing. Add final bloom boosters if using. Reduce or eliminate nitrogen. Push phosphorus and potassium. Watch trichome color with jeweler's loupe. |
| Week 15-16 | Flush / Final Ripening | Flush with plain pH-adjusted water for 7-14 days (soil) or 3-7 days (coco/hydro) before harvest. Lower humidity to 35-40%. Watch for amber trichomes as harvest signal. |
| Harvest | Harvest & Post-Harvest | Cut, trim, and hang dry at 60-65°F and 55-60% RH for 10-14 days. Cure in glass jars, burping daily for 2-4 weeks minimum. |
Nutrient and Medium Plan: What to Feed, When, and How to Measure
Nutrients follow a simple arc: high nitrogen during vegetative growth to build leaves and stems, then a shift to higher phosphorus and potassium during flowering to support bud development. Most quality nutrient lines (General Hydroponics Flora series, Fox Farm trio, Advanced Nutrients Sensi series) publish a feeding chart that matches this arc. For a throw and grow setup, the best fertilizer is the one that matches your plant stage and stays within that feeding chart. Treat that chart as a starting point, not a rigid rule, and always start at 50-75% of the recommended dose to avoid nutrient burn.
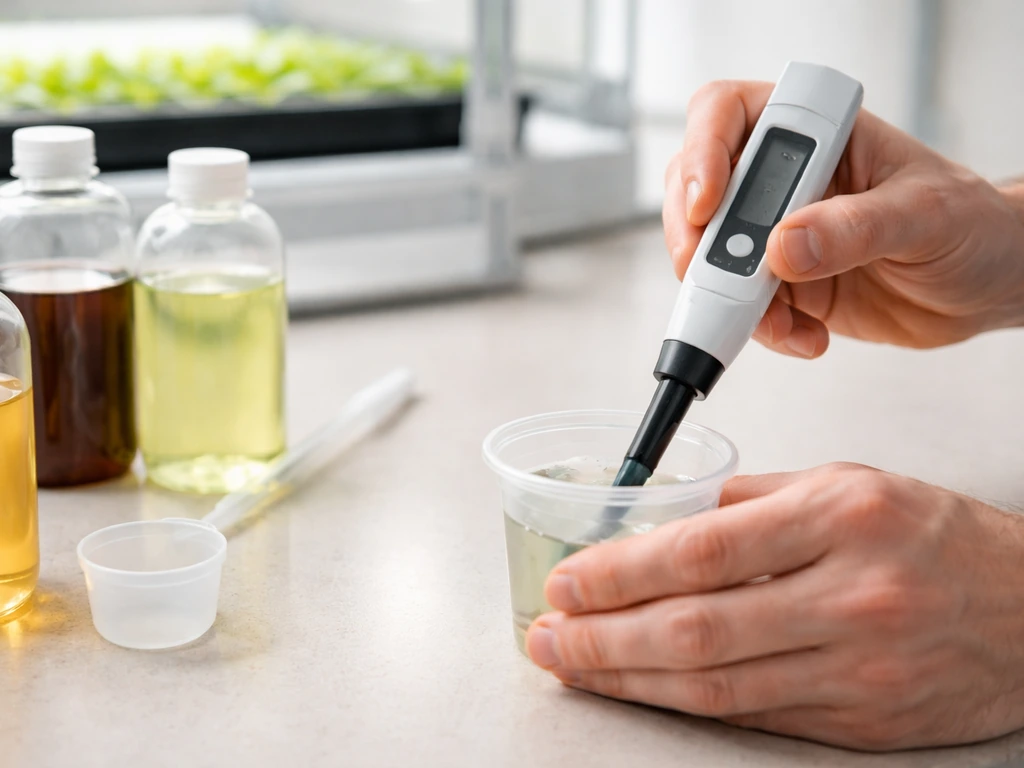
pH: The Most Important Number You'll Measure
pH controls whether your plant can absorb the nutrients you're giving it. You can have a perfect nutrient solution and still starve your plants if pH is wrong. For soil, target 6.2-6.8. For coco and hydroponics, target 5.8-6.2. Measure pH with a digital pen meter (calibrate it with buffer solution weekly). Adjust using pH Up (potassium hydroxide) and pH Down (phosphoric or citric acid) solutions. Check the runoff pH from your containers too: if your runoff is significantly lower or higher than your input water, your root zone is drifting and needs correction.
EC (Electrical Conductivity): Measuring Nutrient Strength
EC tells you how concentrated your nutrient solution is. Higher EC means more nutrients dissolved in the water. For seedlings, stay at 0.4-0.8 EC (or TDS of roughly 200-400 ppm). Ramp up through veg to 1.2-1.8 EC (600-900 ppm). Peak flower feeding runs 1.8-2.4 EC (900-1200 ppm). During the final flush, drop EC to near zero (plain water). In soil, you can measure runoff EC to detect salt buildup: if runoff EC is significantly higher than input EC, flush with 2-3x the pot volume in pH-adjusted plain water to clear accumulated salts.
Watering Technique
In soil, water thoroughly until 10-20% runoff comes out the bottom, then let the medium dry slightly before the next watering (the 'lift test' works: if the pot feels light, water; if it still feels heavy, wait). In coco, water to runoff daily or more frequently once plants are larger. In recirculating hydro, the reservoir handles timing, but check water levels and top off with pH-balanced water daily to prevent concentration swings.
Troubleshooting Common Issues by Growth Stage
Seedling Stage Problems
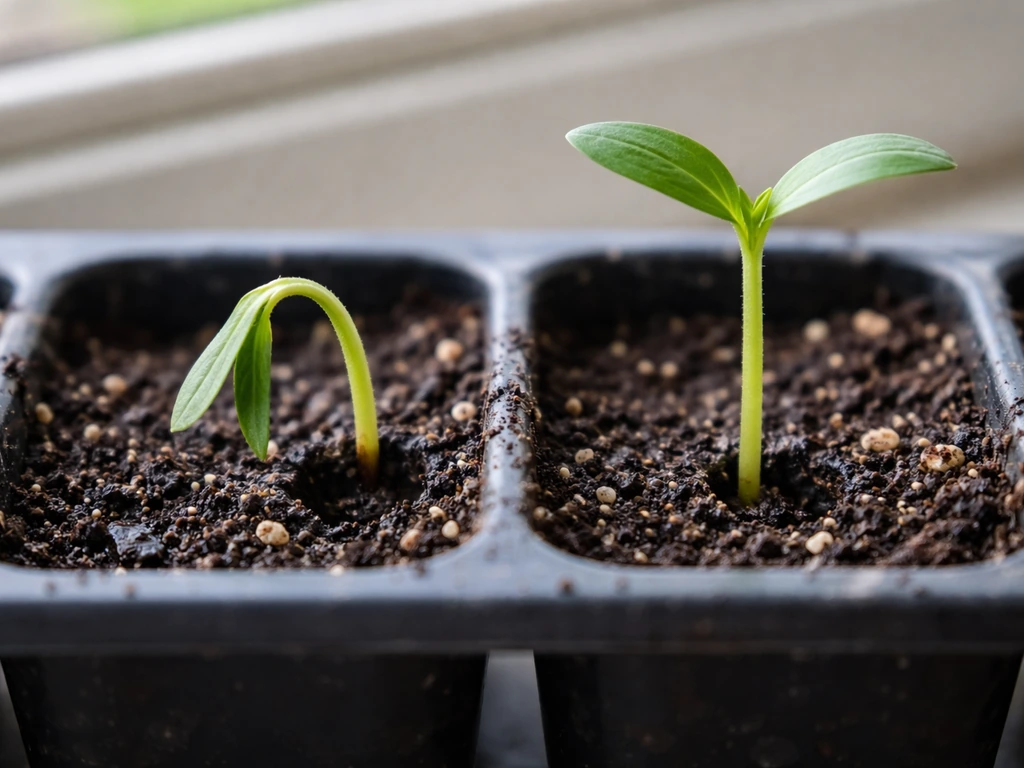
- Damping off (stem collapses at base): caused by overwatering and poor airflow. Fix by reducing watering frequency and adding a small fan. Use a well-draining seedling mix.
- Slow germination or no sprout after 7+ days: check that temperature is 75-80°F and medium stays moist but not soaked. Try a fresh seed if still no sprout after 10 days.
- Seedling stretching tall with a thin stem (etiolation): light is too far away. Move the light closer or increase intensity slightly.
Vegetative Stage Problems
- Yellowing lower leaves (nitrogen deficiency): increase nitrogen dose or check that pH is in range so N can be absorbed. In amended soil this usually means the initial nutrient charge is depleted and it's time to start feeding.
- Dark green, clawing leaves (nitrogen toxicity): reduce nutrient concentration and flush with plain water if symptoms are severe.
- Brown tips or edges (nutrient burn): you're feeding too strong. Drop to 50% dose and water with plain pH water once.
- Growth stall with no obvious deficiency: check root zone. If the plant is root-bound (roots circling or escaping the pot), transplant up a size. Also check that temperature and humidity are in range.
- Fungus gnats (small flies around soil): let the topsoil dry out more between waterings. Use yellow sticky traps and treat with Bacillus thuringiensis israelensis (BTi) soil drench or neem oil drench.
Flowering Stage Problems
- Interveinal yellowing on new leaves (iron or magnesium deficiency): usually a pH lockout issue. Recheck and adjust pH first before adding supplements. If pH is correct, a CalMag supplement at 1-2 ml/L often resolves magnesium yellowing.
- Bud rot (gray fuzzy mold inside dense colas): caused by high humidity above 50% during flowering. Remove affected material immediately with clean scissors, lower humidity, and increase airflow. Prevention is the only real cure.
- Spider mites (tiny dots on leaves, webbing underneath): spray with diluted neem oil or insecticidal soap early in the flowering stage. Do not spray within 3-4 weeks of harvest. Hot Shot No-Pest Strips work in enclosed spaces.
- Salt buildup in coco or hydro (rising runoff EC, stunted growth, brown leaf tips): flush thoroughly with plain pH water. In recirculating systems, dump and replace the reservoir.
- Light bleaching on top colas (white or pale yellow at the very tip of buds closest to the light): light is too close or too intense. Raise the light and reduce intensity.
Maximizing Yield and Quality: Training, Harvest Timing, and Curing
Seeds vs. Clones
Seeds give you genetic diversity and a fresh root system, which matters for vigorous plants. Clones give you an exact genetic copy of a known performer and cut 2-3 weeks off your timeline since you skip germination and early seedling phase. For beginners, feminized seeds are the easiest path: no need to identify and remove male plants. Autoflowering feminized seeds are even more forgiving since they flower on a timer rather than responding to light schedule changes.
Training Methods That Actually Move the Needle
Low Stress Training (LST) is the highest-return technique for any skill level. During veg, gently bend the main stem and tie it down to keep the canopy flat and expose lower bud sites to light. This turns a single tall cola into a wider, multi-cola plant with significantly more harvest weight. Topping (cutting the main stem above the 5th or 6th node) creates two main colas instead of one, and you can do it 2-3 times during veg for even more branching. Screen of Green (ScrOG) using a horizontal net above the canopy works brilliantly in small tents: weave branches through the screen, fill the net during veg, then flip to flower once the screen is 70-80% full.
Knowing When to Harvest
The most reliable harvest signal for flowering plants is trichome color. Use a 30-60x jeweler's loupe or a pocket microscope to inspect trichomes on the bud surface. Clear trichomes mean it's too early. Milky white (cloudy) trichomes mean peak THC/active compound content. Amber trichomes indicate degradation of THC into CBN, which produces a more sedative effect. Most growers harvest at 70-90% cloudy with 10-20% amber. Pistil color is a secondary indicator: when 70-80% of the white hairs have turned orange or red, you're close.
Drying and Curing
A slow dry preserves terpenes and improves the final quality dramatically. Hang trimmed branches in a dark room at 60-65°F and 55-60% RH. Drying too fast (high temperature, low humidity) locks in chlorophyll and creates a harsh product. After 10-14 days, when small stems snap rather than bend, transfer to glass mason jars. For the first two weeks of curing, open the jars (burp them) for 15-30 minutes once or twice daily to release moisture and gases. After two weeks, burp every few days. A minimum four-week cure meaningfully improves smoothness and flavor. Two to three months produces noticeably better results than rushing to consume at harvest.
Your Next Steps Based on Where You Are Right Now
If you're starting from scratch today: grab feminized autoflowering seeds, a bag of quality pre-amended soil, and a basic 200W LED panel for a 2x4 tent. Follow the week-by-week calendar above with a simple 3-part nutrient system (Grow, Micro, Bloom, or equivalent). Measure pH every watering. You can have a harvest in 10-12 weeks from seed with this setup. You generally cannot rely on Gatorade as a growing nutrient, but you can learn what proper feeding and pH targets look like for healthy plants can you grow plants with gatorade.
If you're moving from soil to hydroponics: coco coir is your bridge. The feed schedule and pH targets are hydroponic (5.8-6.2), but the physical setup is identical to soil. Master it for one cycle and you'll understand nutrient management well enough to step into a recirculating DWC or NFT system confidently.
If you're comparing nutrient products for your schedule, the choice between plant growth regulators, speed-focused additives, and traditional fertilizers is worth understanding in detail before you buy. Linking your “Schedule 1” choices between speed growth additives and fertilizer helps you dial in timing, EC, and pH for each stage plant growth regulators, speed-focused additives, and traditional fertilizers. The differences in timing and application are meaningful enough to change your week-by-week plan. Similarly, if you're exploring low-effort outdoor options, a structured approach to seed selection and soil prep applies the same core principles covered here, just adapted to your local season and climate.
FAQ
What if my plants are behind the week-by-week timing in Schedule 1, should I follow the calendar or the plants?
In a phased “Schedule 1” style regimen, the fastest way to avoid problems is to keep pH and EC inside the targets for each stage, then only adjust nutrient amounts gradually. If your plants look hungry or droopy, do not jump to the next week’s full dose, instead increase EC by small increments (about 0.1 to 0.2) over 2 to 3 days and recheck runoff/input pH trends.
How do I adjust Schedule 1 if I change light schedules or have inconsistent light hours?
Use the same nutrient stage, but modify the schedule around your light cycle. For photoperiod plants, keep the bloom trigger light change consistent (no “catch-up” by relighting random nights). If plants stall after a light change, check temperature swing and humidity, then verify pH runoff first, because feeding errors usually show up as root uptake issues before visible leaf damage.
My runoff pH and EC don’t match my input, what does that mean and what should I do?
If runoff is far from your input values, treat it as a root-zone drift indicator rather than “normal variation.” A practical rule is: if runoff pH differs by more than about 0.3 from input, or runoff EC is much higher than input, flush with pH-adjusted water (for soil) or correct feeding solution concentration (for coco/hydro) before raising dose again.
How can I tell if I’m overfeeding versus having a pH lockout, and how do I correct it?
Salt buildup and overfeeding are the two most common causes of brown tips and locked-out growth. If you notice symptoms, pause dose increases and return to the prior EC level while you verify pH, then perform a targeted flush only if runoff EC is clearly elevated. After flushing, resume at 50 to 75% of the chart and increase slowly.
Can I skip or shorten the final flush, and what tradeoffs should I expect?
Yes, but make it deliberate. During the final flush, drop EC toward near-zero for the stated window, then keep your pH correct so the plant stops accumulating salts without starving. For some growers, shortening or extending the flush by a few days is fine, but avoid extreme changes if you are seeing yellowing that is progressing too slowly.
What if my tap water won’t reach the pH targets, can I still use Schedule 1?
Do not use “tap water only” if your alkalinity is high and you cannot reliably hit the pH targets. Instead, measure your starting water pH and either adjust it or use a water source that you can control consistently. Also, if your water is very hard, consider pre-flushing or selecting a medium and nutrient approach that tolerates salts, because high mineral content can push runoff EC even with a correct feed chart.
How often should I measure pH and EC, and when is the measurement most meaningful?
Measure pH and EC at consistent times, ideally when the solution is mixed and again after the plants have been watering for a while. In hydro reservoirs, concentration can drift as water is removed or added, so top off with pH-balanced water and recheck EC daily. In soil, runoff reading is useful but should be taken during typical watering conditions, not right after a major flush.
Is coco really easier than true hydro, or will I still need daily monitoring?
If you want faster results and higher consistency, coco is a common bridge, but you still need daily attention once plants are larger because coco can swing quickly. A beginner-friendly approach is to run a steady feeding cadence matched to plant size, then fine-tune EC and pH based on runoff trends rather than copying another grower’s exact numbers.
My plants react to light changes, how should I dial PPFD without messing up Schedule 1 feeding?
For LEDs, PPFD targets depend on plant height and canopy density. If plants stretch, raise the intensity slowly and confirm temperature stays in range, because too-rapid intensity jumps can cause clawing or leaf curl. If plants look short with dark leaves, ease intensity slightly and verify your humidity and airflow, since those can mimic nutrient issues.
In Schedule 1, should I water on a fixed day schedule or based on plant/mat moisture?
Avoid overwatering “just because” the chart says to feed. The medium should determine watering frequency, not the week number alone. A reliable method is to water to a modest runoff (soil) or feed to runoff (coco), then wait until the medium shows it needs more, using weight or the lift test to prevent constant saturation.
When I top or do LST, do I change nutrients or just the training plan?
LST and topping can temporarily slow vertical growth, but they do not automatically require a full feeding schedule reset. After a major cut, keep EC at the prior level or slightly lower for several days, then ramp back up once new growth resumes. The key is to monitor leaf color and pH uptake, not the calendar week.
How does Schedule 1 differ for autos, especially if I’m new and might stress the plant?
Autoflowers generally do not respond well to major stress during early weeks, so keep interventions light. For autos, prioritize stable temperature, consistent photoperiod (often 18/6 or 20/4), and avoid repeated transplanting. If you must correct something, do it gradually, because nutrient swings and pH drift can be more punishing during the short growth window.
What should I do with EC and nutrients late in flowering if trichomes are still not at my target color?
A safe baseline is: stop adjusting the feed aggressively and focus on stable pH and modest EC. If trichomes are still clear, you typically need more time and stable conditions rather than chasing higher nutrients. If trichomes are already milky with early amber, lowering EC and maintaining correct pH can prevent late-stage issues without pushing new growth.
My buds feel dense, humidity is high, what should I change first to prevent mold?
When humidity gets too high near flower, mold risk rises quickly even if your feeding is perfect. If RH is creeping above your target, fix airflow and dehumidification first, then adjust watering so the medium is not staying wet. Do not increase nitrogen late in flowering, because it can keep foliage dense and harder to dry.
If I have multiple plants with different ripening times, should I harvest the whole tent at once?
For indoor harvest timing, trichomes are best, but you still need to consider plant-specific maturity. If two plants in the same tent differ, harvest individually rather than together, and keep the later plant’s environment stable so you are not changing temperature and airflow mid-season. After harvest, drying conditions should be uniform across batches, ideally within your 60 to 65°F and 55 to 60% RH targets.