If you want botanical research that actually teaches you something, start with plants that grow fast, respond visibly to changes, and fit the space you have. The best home botanical research crops are basil, lettuce, radishes, mint, and cherry tomatoes for beginners, with herbs like chamomile, calendula, or fast-cycling dwarf peppers as a step up. UNH Extension notes that calendula (Calendula officinalis) can self-sow and provides practical cultivation guidance for growing it at home [calendula can self-sow](https://extension. unh.
MHW Botanical Research What to Grow: Start Here Guide

Marcus Holloway
19 Apr 2026
edu/resource/how-grow-calendula-calendula-officinalis). Those choices work whether you're running a simple soil pot setup on a windowsill or a full hydroponic system under grow lights. The rest of this guide walks you through picking your plant, building a repeatable experiment around it, and making sure your results mean something.
What "botanical research" actually means for a home grower
Botanical research at home isn't about a lab coat or a university budget. It means growing plants with intention: defining a question, controlling your variables, and recording what happens so you can compare results and actually learn something repeatable. The difference between "just growing" and "research" is documentation and structure. You might be comparing two nutrient lines, testing whether a soil amendment speeds up germination, or simply observing how a particular cultivar responds to different light schedules. Any of those is legitimate botanical research if you set it up properly.
Choosing a project starts with asking one question at a time. Multi-variable experiments are hard to interpret even in professional settings, so keep it simple: pick one thing you want to test (light hours, nutrient concentration, soil vs. hydro medium, for example) and hold everything else constant. Fast-cycling plants give you more data points in a season, which matters if you want to repeat the trial or correct mistakes quickly. Slow growers like large tomato cultivars or tree-form herbs can work, but plan for longer timelines and more patience between data points.
The best plants to grow for home botanical research
The right research plant is one that grows fast enough to give you results within weeks, responds noticeably to the variable you're testing, and can be grown in multiples without taking over your space. Here's a shortlist that covers different use cases, from beginner-friendly to more advanced.
Starter-friendly picks (fastest results, easiest to replicate)
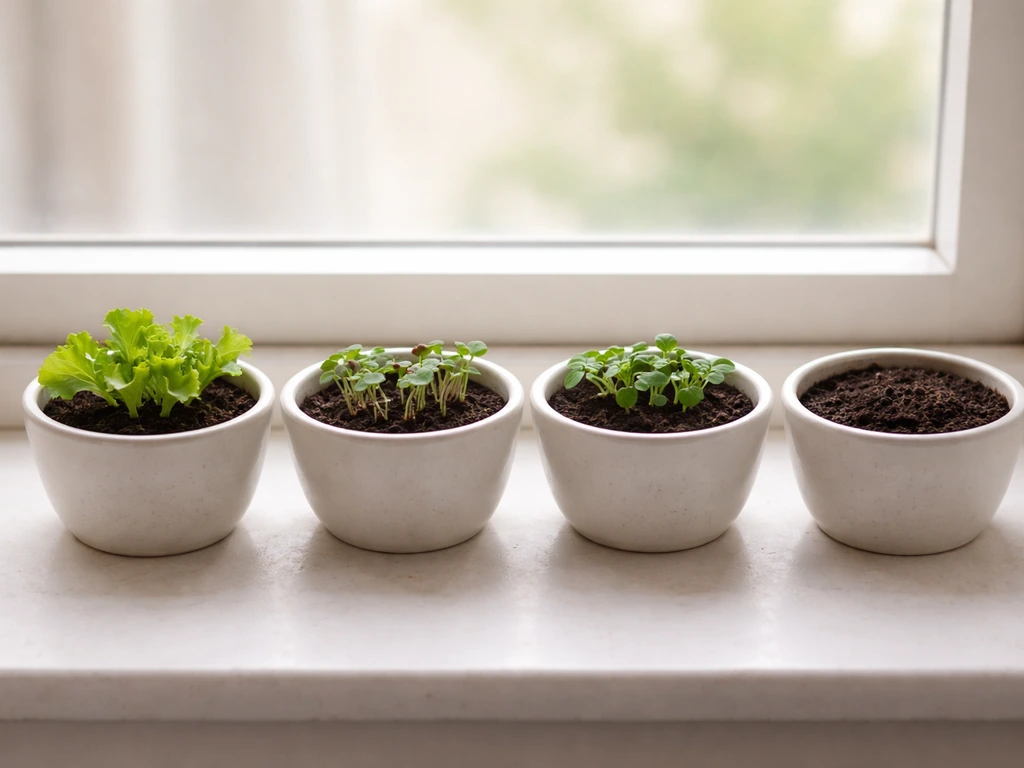
- Lettuce (any leaf variety): germinates in 2 to 5 days, harvest-ready in 30 to 45 days, compact, and extremely responsive to nutrient and light changes. Perfect for hydro or soil side-by-side tests.
- Radishes: seed to harvest in as little as 22 to 28 days. Excellent for germination rate studies, soil amendment tests, and density experiments. Very small footprint.
- Basil: germinates in 5 to 7 days, shows visible stress responses (leaf curl, color change) quickly, and works well in both soil and DWC hydroponics. Great for nutrient concentration trials.
- Spinach: 6 to 8 week cycle, cold-tolerant, and useful for comparing indoor vs. outdoor light environments.
- Cherry tomatoes (compact/patio varieties): longer at 60 to 80 days to fruit but highly observable across the full growth cycle, including flowering, fruiting, and leaf health.
A step up: herbs and medicinal-style plants
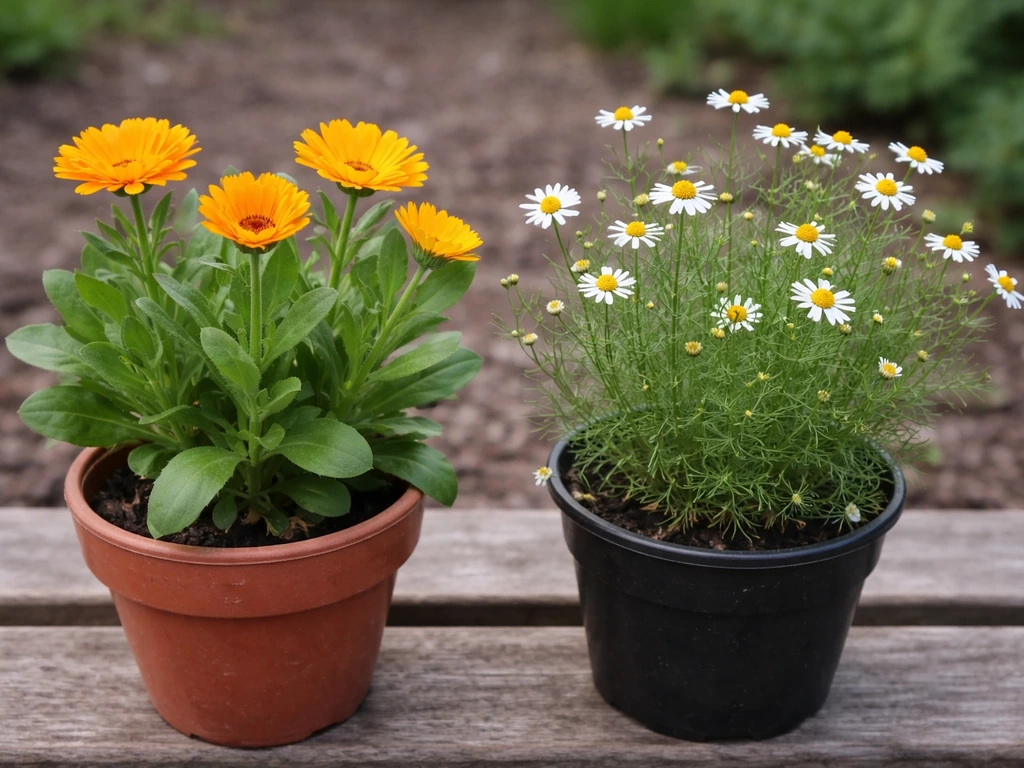
- Calendula: flowers in 45 to 60 days from seed, drought-resilient, and useful for observing how water stress affects flower yield and timing.
- Chamomile (German variety): fast-growing annual, ready to observe in 6 to 8 weeks, and useful for comparing soil pH effects on growth rate.
- Dwarf/compact peppers: 70 to 90 day cycle but highly observable, especially for studying the effect of calcium and magnesium on fruit development.
- Mint (rooted cuttings): nearly indestructible, propagates from cuttings in 7 to 10 days, and ideal for clone-based experiments where you want genetically identical starting material.
Mint and other vegetatively propagated plants deserve special mention for research purposes: because all cuttings from the same mother plant are genetically identical, you eliminate genetic variation as a confounding factor. That's a meaningful advantage when you're trying to isolate the effect of a specific variable. If you want a fast, herb-forward option for your next indoor botanical research, try valerian grow best to match how quickly it responds valerian grow best harry potter.
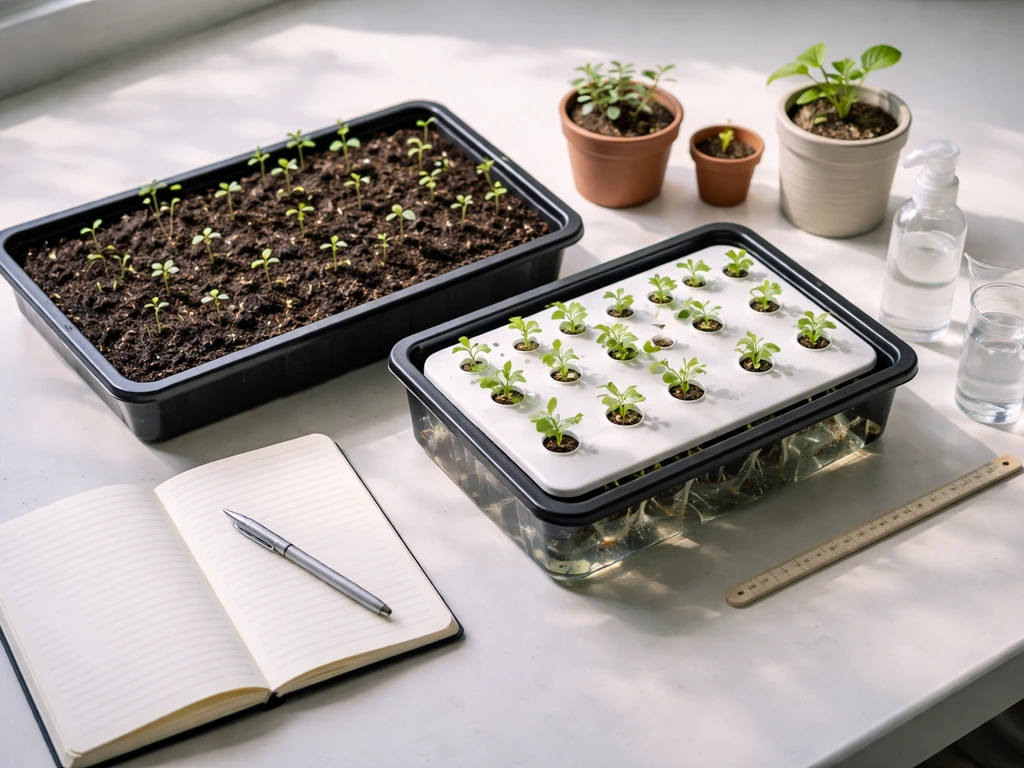
Soil vs. hydro: what actually changes for your research setup
This is one of the most common forks in the road for home growers starting a research project. Both methods can produce valid data, but they have genuinely different tradeoffs in setup complexity, cost, and the kinds of questions you can answer.
| Factor | Soil | Hydroponics |
|---|---|---|
| Setup cost | Low ($10 to $30 to start) | Moderate to high ($50 to $200+ for DWC or NFT) |
| Variable control | Harder (soil chemistry changes over time) | Easier (nutrient solution is fully adjustable) |
| Watering frequency | Every 1 to 3 days depending on pot size | Continuous or scheduled (system-dependent) |
| pH management | Soil buffers naturally, check weekly | Must monitor daily; target 5.5 to 6.2 |
| Growth speed | Moderate | 15 to 25% faster in optimized systems |
| Best for | Soil amendment, medium comparison, and organic nutrient trials | Nutrient concentration, EC, and solution composition trials |
| Replication ease | High (individual pots are independent units) | Moderate (shared reservoir complicates true replication) |
| Beginner friendliness | High | Moderate (requires pH/EC meter and more daily attention) |
My recommendation: if you're new to research-style growing, start with individual soil pots. Each pot becomes one independent experimental unit, which makes replication straightforward. If you move to hydroponics, use separate small DWC buckets per plant rather than a shared reservoir, so each unit stays truly independent. Shared reservoirs make it hard to assign different nutrient treatments to individual plants without cross-contamination, which limits the kinds of experiments you can run. For nutrient line comparisons (like testing floranova grow dosage against another base nutrient), individual buckets in hydro or individual soil pots are both workable.
How to set up a real experiment (replicates, records, and variables)
This is the part most home growers skip, and it's the reason most "experiments" don't actually produce usable information. A properly designed trial doesn't have to be complicated, but it does need three things: a control, true replication, and randomization.
Define your variables first
Before you plant a single seed, write down your independent variable (the one thing you're changing), your dependent variable (what you're measuring), and all your controlled variables (everything you'll hold constant). For example: independent variable = nutrient solution concentration (1 mL/gallon vs. If you're using FloraNova Grow, the common next step is figuring out how much to add per gallon for the specific dose you want to test how much floranova grow per gallon.
If you are exploring flora grow carbo co2 alternative options, keep the dosing schedule consistent and record how each alternative affects your growth targets how much to add per gallon for the specific dose you want to test. 2 mL/gallon); dependent variable = plant height at 21 days; controlled variables = same light schedule, same growing medium, same seed batch, same watering volume, same temperature. If you don't define this upfront, you'll end up with results you can't interpret.
Always include a control
A control is your baseline: the plants receiving no treatment, or the standard/recommended treatment you're comparing against. Without a control, you have no reference point. If all your plants grow slowly, you won't know if it's your treatment causing it or just a bad environmental week. The control lets you separate the effect of your variable from everything else happening in the grow space.
Use true replication, not repeated measurements
This is where most home trials go wrong. Measuring the same plant three times is not replication. True replication means multiple independent experimental units per treatment: three separate pots of lettuce receiving treatment A, and three separate pots receiving treatment B (your control). If you only have one plant per treatment and it dies or performs unusually, you have no way to know whether that's a real effect or a random event. Aim for at least three replicates per treatment. Five is better if you have the space.
Randomize your placement
If all your treatment plants sit at one end of the grow tent (closer to the light or the fan) and all your control plants sit at the other end, any difference you measure might be from position, not treatment. Randomize placement using a coin flip or a random number generator. Assign each pot a number, randomize the order, and place them in that randomized arrangement. It takes two minutes and it makes your results trustworthy.
What and how to record
- Germination date and percentage (how many seeds sprouted out of how many planted)
- Height measurements at consistent intervals (weekly is standard for most herbs and greens)
- Leaf count and any visible color changes or stress symptoms
- Daily or every-other-day pH and EC readings for hydro; weekly soil pH
- Temperature and humidity at canopy level (not just ambient room readings)
- Water/nutrient solution volume applied per watering event
- Any pest sightings, damage, or intervention applied
- Photos at the same time each week from the same angle and distance
A simple spreadsheet works perfectly. You don't need specialized software. The key is consistency: measure at the same time of day, under the same conditions, using the same tools every time.
Starting seeds and clones: timelines for indoor and outdoor
Getting your starts right is the first place experiments fail. If your germination rate is uneven, you'll begin the trial with plants at different development stages, and your data becomes hard to compare from day one.
Indoor seed starting timeline
- Week 0: Sow seeds in pre-moistened starter mix or rockwool cubes (for hydro). Maintain 70 to 78°F and keep covered with a humidity dome until sprouts emerge.
- Days 2 to 7: First sprouts appear depending on species. Remove dome once 80%+ of seeds have germinated to prevent damping off.
- Week 1 to 2: Seedlings under 18 hours of light (fluorescent or LED at 200 to 400 PPFD, 8 to 12 inches away). Begin very dilute nutrient solution at 25% of recommended dose once first true leaves appear.
- Week 2 to 3: Transplant into final containers (soil) or net cups (hydro) once roots are visible and plants have 2 to 4 true leaves. This is when your formal data collection (baseline measurements) should begin.
- Week 3 onward: Apply your experimental treatments and begin consistent weekly measurements.
Outdoor timeline considerations (spring 2026 context)
With today's date being mid-April, most regions in the northern hemisphere are now in prime outdoor starting territory for warm-season crops like basil, peppers, and tomatoes. Cold-tolerant greens (lettuce, spinach, radishes) can go directly outdoors now in USDA zones 5 and above. Start warm-season crops indoors now and plan outdoor transplant around May 15 to June 1 for most mid-latitude regions, after last frost risk passes. For outdoor botanical research, keep in mind that environmental variables (wind, temperature swings, rainfall) are harder to control, so indoor setups produce cleaner data for most experiment types.
Using clones for research advantages
If you want to eliminate genetic variability entirely, take cuttings from a single healthy mother plant. Mint, basil, and tomatoes all root readily in water or a moist medium within 7 to 14 days. Dip cut ends in rooting hormone, place in rockwool or a cup of clean water under low-intensity light, and wait for root emergence before transplanting. All clones from one mother are genetically identical, which gives your experiment a much cleaner baseline than seed-started plants, which show natural genetic variation even within the same packet.
Nutrients, growing medium, and the environmental targets that matter
Choosing your medium
For soil-based research, a high-quality peat or coco-perlite blend (60/40 or 70/30 coco-to-perlite) gives you good drainage, consistent texture across all pots, and predictable water-holding capacity. Avoid heavily amended "super soils" for research purposes because their pre-loaded nutrients make it hard to control what the plant is actually receiving. A neutral, low-nutrient starter medium lets you add exactly what you want and nothing more. For hydro, expanded clay pellets (hydroton) or rockwool cubes are the standard for DWC and kratky setups, both of which are easy to source and replicable across units.
Nutrients: what to use and how to measure
A simple two or three-part liquid nutrient system gives you the most control for research purposes. One-part formulas like FloraNovaGrow are useful if you're studying a single variable other than nutrient composition (dosage, for example), since the formulation is fixed. When you use FloraNova Grow, plan around dosage and timing by following a clear schedule, including how often to use FloraNova Grow for your crop stage.
For experiments comparing nutrient systems, use separate complete formulas at the same EC target in each treatment group. Target EC ranges: seedlings at 0. 6 to 1. 0 mS/cm, vegetative growth at 1.
2 to 2. 0 mS/cm, and flowering/fruiting stages at 1. 8 to 2. 4 mS/cm.
Always pH-adjust after mixing nutrients, not before. For hydroponic crops, the University of Kentucky greenhouse horticulture materials note a good pH range of 5. 5 to 6. 5 [pH-adjust after mixing nutrients, not before.
](https://greenhousehort. ca. uky. edu/sites/greenhousehort.
ca. uky. edu/files/H180. pdf).
Environmental targets
| Parameter | Seedling stage | Vegetative stage | Flowering/fruiting |
|---|---|---|---|
| Temperature (day) | 72 to 78°F | 70 to 78°F | 68 to 75°F |
| Temperature (night) | 68 to 72°F | 65 to 72°F | 62 to 68°F |
| Relative humidity | 65 to 75% | 50 to 65% | 40 to 55% |
| Light hours | 18 hours | 16 to 18 hours (indoor) | 12 to 16 hours (species-dependent) |
| Light intensity (PPFD) | 200 to 400 | 400 to 700 | 600 to 1,000 |
| Soil pH | 6.0 to 6.5 | 6.0 to 6.5 | 6.0 to 6.5 |
| Hydro pH | 5.5 to 6.0 | 5.5 to 6.2 | 5.8 to 6.2 |
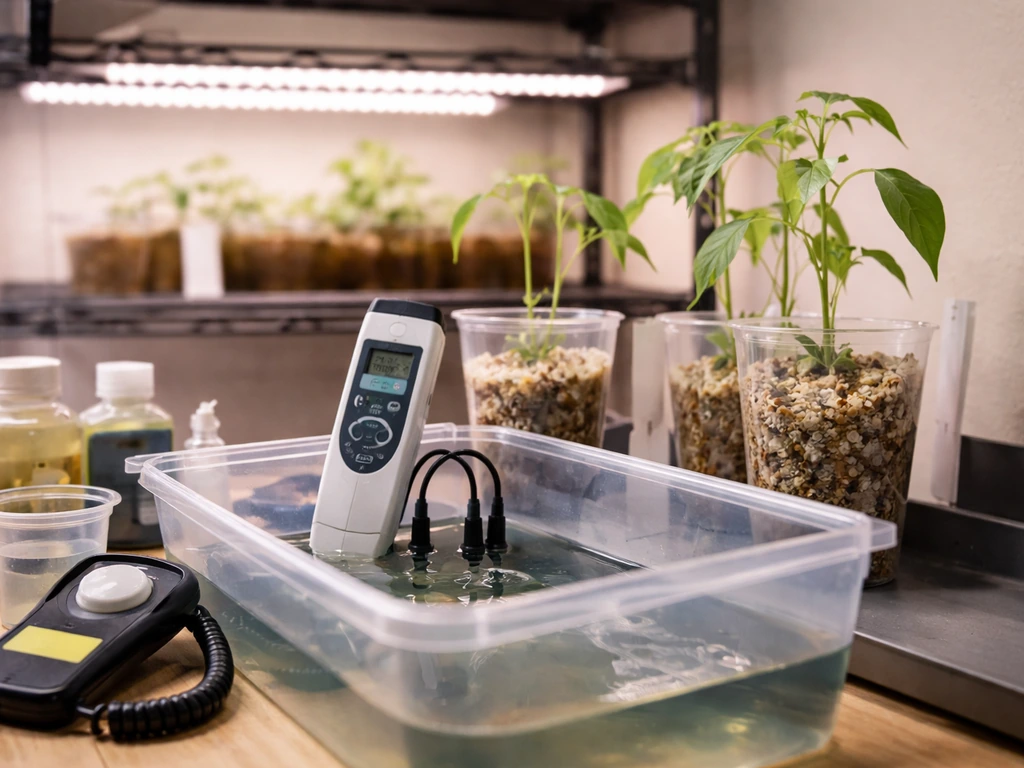
Keep a basic digital thermometer/hygrometer at canopy level and log it at least once per day. Environmental swings are one of the most common reasons home research results don't replicate between trials, and you'll never catch them without consistent logging. A $12 sensor with data logging capability is worth every cent for research purposes.
Fast troubleshooting when plants go sideways
Even well-designed experiments hit problems. Here's how to diagnose and fix the most common issues quickly without losing your trial.
Nutrient problems
- Yellowing from the bottom up (older leaves first): classic nitrogen deficiency. In soil, top-dress with a nitrogen source or water with a dilute fish emulsion. In hydro, increase EC by 0.2 to 0.3 mS/cm and recheck pH first.
- Yellowing between leaf veins on newer growth: iron or manganese deficiency, almost always caused by pH being too high. Drop hydro pH to 5.8 to 6.0, flush soil with pH-adjusted water and recheck after 48 hours.
- Brown leaf edges or tip burn: too-high EC (nutrient burn) or calcium deficiency. In hydro, do a 50% reservoir change with fresh solution at lower EC. In soil, flush the medium with 2 to 3 times the pot volume of pH-adjusted water.
- Pale, washed-out new growth on otherwise healthy plants: likely calcium or magnesium deficiency. Add cal-mag supplement at 1 to 2 mL per gallon and hold that rate for two weeks before reassessing.
Watering problems
- Wilting despite wet soil: root rot or overwatering. Let the medium dry to about 30% moisture before watering again. In hydro, check water temperature (keep below 70°F) and oxygenation. Add an air stone if you haven't already.
- Wilting despite dry soil: underwatering. Water thoroughly until runoff appears, then establish a consistent schedule based on pot weight rather than calendar days.
- Slow growth with no visible symptoms: check root zone temperature. Cold roots (below 60°F) dramatically slow nutrient uptake even when everything above the medium looks fine.
Pest problems
- Fungus gnats (tiny flies around soil surface): let the top inch of soil dry completely between waterings, and apply yellow sticky traps at soil level. Bacillus thuringiensis israelensis (BTi) in the irrigation water kills larvae within 48 to 72 hours.
- Spider mites (fine webbing, speckled leaves): increase humidity above 60%, introduce neem oil spray (2 mL per liter) at lights-off, and repeat every 3 days for two weeks. Isolate affected plants immediately to protect your control group.
- Aphids (clusters on new growth and stem undersides): knock them off with a strong water spray first, then apply insecticidal soap at 5 mL per liter every 4 to 5 days until clear. Record any intervention in your research log with dates so you can account for it when analyzing results.
One critical note for research integrity: if you have to intervene with a treatment (pesticide, flush, pH correction) on some plants but not others, document it precisely and note it as a potential confounding event in your records. It doesn't necessarily ruin your trial, but it does need to be accounted for when you interpret results. Transparency in your log is what separates useful home research from guesswork.
Where to go from here
Start with one fast-cycling plant (lettuce or radishes are my first recommendation for most people), one simple question, and three replicates per treatment. Run that first trial for four to six weeks and focus on keeping your logs consistent rather than trying to optimize everything at once. Once you have one completed trial with clean data, the second one will be dramatically easier to set up because you'll already know your system's quirks.
Once you have one completed trial with clean data, the second one will be dramatically easier to set up because you'll already know your system's quirks, including how the floranova grow dosage range behaves in your setup. If you're comparing nutrient products, looking into dosage guidelines for the specific line you're running before you design your EC targets will save you a lot of trial and error.
The same principle applies whether you're working with a basic grow formula in soil or dialing in a hydroponic solution.
FAQ
What’s the best thing to measure in an MHW botanical research trial when I only have a few weeks?
Aim to measure something that changes within your time window. For fast crops, plant height, leaf count, and days-to-first-harvest work well. For basil or lettuce, also track “time to visible response” (for example, new leaf emergence after a nutrient or light change) because it gives you earlier signals than final yield.
My seedlings start at different sizes. How do I keep my results comparable?
If germination varies, normalize your starting points. Either thin to uniform seedlings (same number of true leaves) before you start treatments, or start counting data from a defined developmental milestone (example: when each pot reaches two true leaves) rather than from the day seeds were planted.
What should I do if one plant dies or gets damaged during the trial?
Use a simple “treatment map” and document any plant that gets removed. Record the date, reason (disease, accidental damage), and replacement method. Then decide upfront whether you will exclude that unit from analysis (predefined rule) or include it with a note, because changing rules mid-trial is a common source of misleading conclusions.
How do I control for grow light hotspot or tent airflow differences?
Randomization helps, but you also need positional controls. Keep airflow, distance to light, and watering access consistent, then randomize placements of both control and treatment pots within the same layout. If you rotate plants for “fairness,” rotate the entire layout on the same schedule for all groups.
If my control plants look unhealthy, does that invalidate the experiment?
Treat the control as its own diagnostic. If control plants also show stress, your environment likely shifted, not your treatment. In that case, log the event (heat spike, water missed, sensor drift) and consider pausing interpretation until conditions stabilize, even if the trial continues.
Do I need to adjust dosage targets based on my starting water?
EC targets are stage-based, but you still must account for your water baseline. Measure incoming water EC and pH, then calculate how much product you add to hit the target. If your water source changes between days, your “same dose” may not actually mean the same final solution.
What’s the most common mistake when people follow a nutrient schedule but get inconsistent results?
Yes, especially for nutrients and anything that can leach. Don’t rely on “same schedule” alone. Check reservoir or runoff EC (or for soil, use consistent runoff-to-measure timing) and confirm pH after mixing. For soil trials, avoid switching soil moisture practices mid-trial, because wet-dry cycles change nutrient availability.
If I correct pH or flush some plants, how do I keep the experiment valid?
Keep interventions minimal and consistent. If you must correct pH, apply the same correction rule across all plants (for example, “when pH drops below X, adjust to Y”) and record how many times it happened per treatment. Otherwise, the correction itself becomes a second variable.
Can I use repeated measurements on one plant instead of multiple pots?
For replication, think “separate experimental units,” not “multiple measurements.” Three replicates means three independent pots or buckets per treatment. If you have limited space, use fewer treatments but keep the replicate count per treatment at least three.
How often should I record data during the trial without overwhelming myself?
Plan a “stop-and-read” schedule. For fast crops, measure at consistent intervals (example: weekly) and do a quick daily check for obvious confounders (wilting, pest sightings). If you discover a contamination or pest outbreak, record it immediately because it can explain sudden jumps in dependent variables.
When using mint or other cuttings, how do I avoid rooting variability from ruining the comparison?
If you use clones, make sure all cuttings start from the same developmental state, similar stem thickness, and comparable rooting progress. Then randomize clones among treatments after they reach a defined root length or transplant readiness, because rooting differences can mask the treatment effect.
Can I include sensory or quality observations, or does botanical research need only growth metrics?
Yes, and the direction matters. If a treatment changes taste, fragrance, or harvest timing, that is still data, not “extra.” Add a simple scoring rubric (example: 1 to 5 for scent intensity) and keep the scoring criteria consistent across days.