Yes, you can buy Click & Grow pods at Best Buy, and the selection is more useful than you might expect. Best Buy carries pod refills, starter bundles, and the Smart Garden hardware itself, which means you can walk out (or check out online) with everything you need to get growing today. This guide breaks down exactly what's available, which pods are worth buying for your goals, how to get the system running from the moment you unbox it, and how to fix the most common problems that trip people up.
Best Buy Click and Grow Pods: What to Buy and Setup Guide

Marcus Holloway
18 Apr 2026
What Click & Grow pods are and how the system works
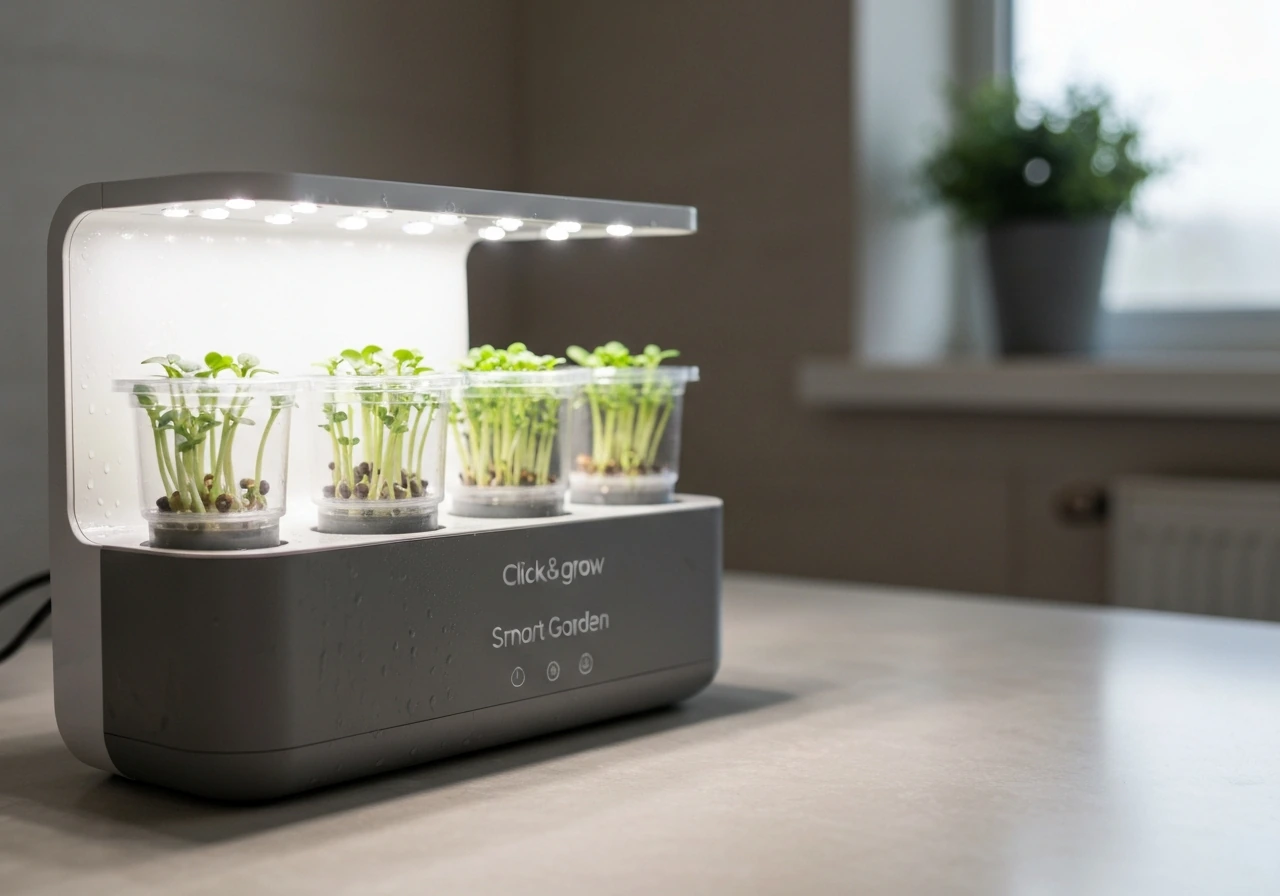
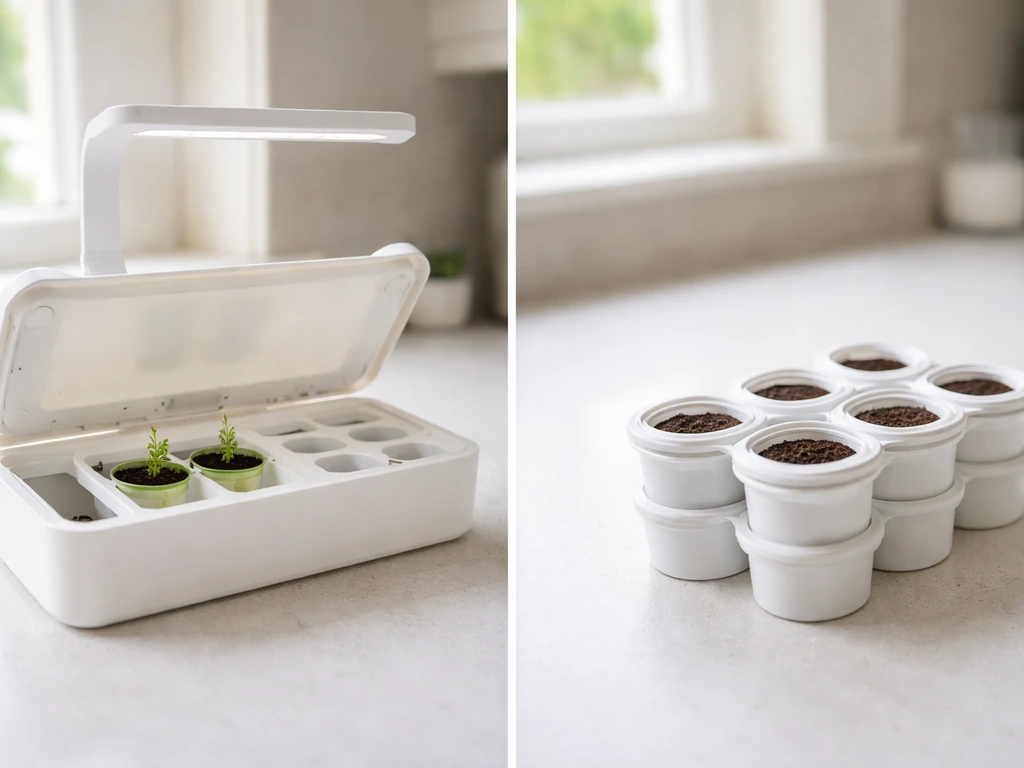
Click & Grow pods are self-contained growing capsules that combine seeds, Smart Soil, and a built-in nutrient supply in a single biodegradable unit. You don't mix nutrients, you don't pH-test your water, and you don't fiddle with grow media. You just drop a pod into the device, add water, and plug it in. The brochure Best Buy uses to sell these gardens describes the experience as being 'like the Nespresso pod coffee machines for fresh food,' which is a fair analogy. The system is designed to remove guesswork entirely.
The magic is in the Smart Soil itself. Click & Grow describes it as a 100% safe nanotech material that supplies oxygen, water, and nutrients continuously, calibrated to what each specific plant needs. The soil manages wicking, aeration, and nutrient release without you doing anything. Underneath each pod sits a wick, which is a white stick that transfers water up from the reservoir into the pod. The wick is passive and long-lasting, doing its job silently as long as the water level in the tank stays topped up. Understanding the wick is important for troubleshooting later, but during normal operation you'll never think about it.
There are two main pod types. Seeded pods come with seeds already embedded in the Smart Soil and are ready to grow specific plants out of the box. The Grow Anything pods are seedless capsules that let you add your own seeds, giving you full control over what you're growing. The nutrient and pH environment in Grow Anything pods is optimized broadly, and the pack is rated to last 4 to 6 months before nutrients run out. If you're experimenting with less common varieties or want to use your own seed stock, this is the path to take.
What's actually available at Best Buy right now
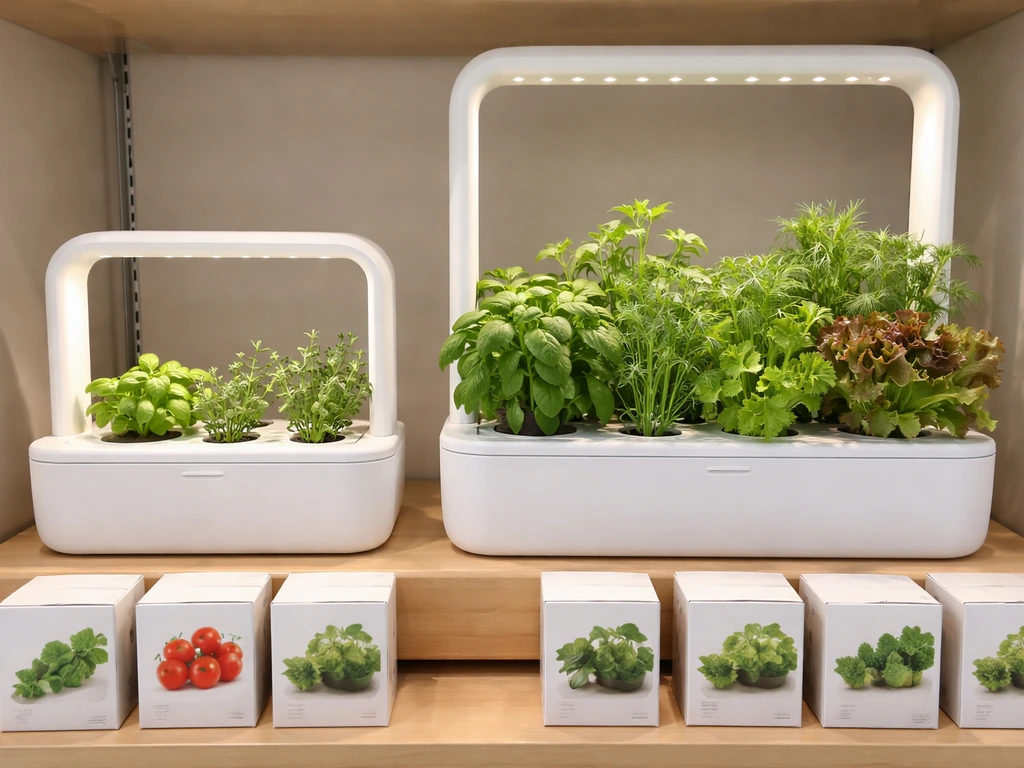
Best Buy carries both the Smart Garden 3 and Smart Garden 9 hardware, plus a rotating selection of pod refills. The Smart Garden 3 holds three pods, comes with three free Basil Plant Pods included, and is the most common starting point for new growers. It's compact, affordable, and the free pods let you start growing the day you set it up without buying anything extra.
The Smart Garden 9 scales things up to nine pods and includes a larger reservoir rated to hold roughly a month's worth of water, which is a meaningful quality-of-life upgrade if you're serious about keeping a continuous harvest going. Click & Grow’s Smart Garden 9 specifications list the water tank size as 4 liters (135 oz).
On the pod refill side, Best Buy lists options like Wild Strawberry 3-count pods. The Best Buy product page for those pods is specific: blank" rel="noopener noreferrer">first sprouts emerge in 1 to 2 weeks, and the pod lasts about 17 weeks, which is a solid lifespan for a fruiting plant. The listing also confirms compatibility with Click & Grow Smart Garden hydroponic systems, so there's no guessing about whether refills will fit your hardware. If you want to know more broadly about where to buy Click & Grow pods beyond Best Buy, there are more options worth knowing about, but Best Buy is one of the most accessible retailers for same-day pickup.
Bundle availability at Best Buy tends to shift with inventory, so the best move is to check their site for any starter kit listings that include both a garden and a pod variety pack. These bundles typically represent better value than buying hardware and pods separately. When you're comparing options in-store or online, the key number to look for is pod capacity: 3-pod and 9-pod are the two main configurations, and your choice should be driven by how much counter space you have and how often you want to harvest.
Picking the right pods for what you actually want to grow
Click & Grow makes a wide range of seeded pods, but for most people buying at Best Buy, the decision comes down to a few practical categories. Here's how to think about it based on your goals.
Herbs: the fastest, easiest wins
Basil is the flagship pod for a reason. It's fast, it's forgiving, and the harvest window is wide at 5 to 12 weeks depending on conditions. Basil also comes free in the Smart Garden 3 box, so if you're starting with that unit you already have three pods ready to go. Other common herb pods include mint, chives, and parsley. These are all low-maintenance and high-reward choices for anyone who cooks regularly. If you're looking for guidance on which seeded pod varieties perform best over time, the best Click & Grow pods by category is worth a look before you finalize your cart.
Greens and salad crops
Lettuce, mini tomatoes, and spinach pods are good choices if you want something closer to a continuous salad supply. These tend to grow slightly slower than herbs but produce more usable volume per pod. If you have a Smart Garden 9, consider running a mix of herbs in three pods, greens in three pods, and leaving three open for fruiting plants or experimental Grow Anything pods. That variety keeps your system productive across multiple harvest windows simultaneously.
Starter kits vs. individual pod refills
If you're brand new to the system, buy a starter kit that includes the garden hardware. Individual pod refills only make sense once you already own the garden. The Smart Garden 3 starter is the lowest-risk entry point at Best Buy because it includes everything in one box at a lower price point than the 9-pod unit. Once you've run one or two growing cycles and know what you actually want to grow more of, then start buying targeted pod refills.
| Pod Type | Best For | Estimated Harvest Time | Notes |
|---|---|---|---|
| Basil Plant Pods | Beginners, frequent cooks | 5–12 weeks | Included free with Smart Garden 3 |
| Wild Strawberry Pods | Fruiting plant experience | 17 weeks (pod lifespan) | First sprouts in 1–2 weeks |
| Lettuce / Salad Greens | Continuous salad harvest | 4–8 weeks | High yield, good for 9-pod units |
| Grow Anything (Seedless) | Custom seeds, experimentation | Varies by seed | Nutrients last 4–6 months |
| Herb Variety Packs | Mixed herb supply | 5–12 weeks depending on variety | Good starter bundle add-on |
How to get your Click & Grow system running today
Setup is genuinely simple, but there's a specific sequence that matters. Follow these steps in order and you'll avoid the most common first-time mistakes.
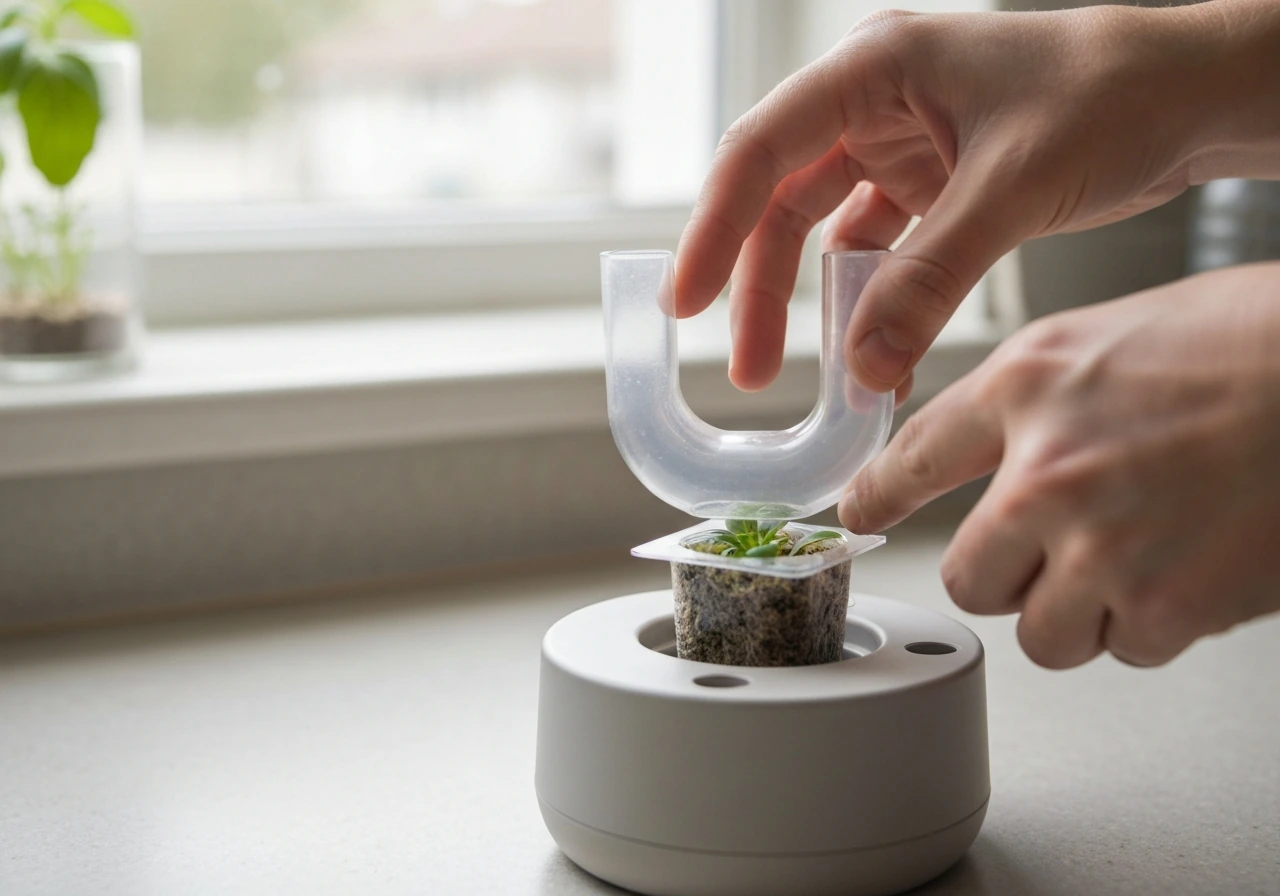
- Insert your plant pods into the pod cavities in the garden base.
- Place the U-shaped lids back on each cavity after inserting the pods.
- Click the cavities into the Smart Garden unit until they seat firmly.
- Place the transparent germination domes on top of each capsule. These create a humid microclimate that kickstarts germination.
- Fill the water tank: the Smart Garden 3 takes about 1.3 L (44 oz) of water. The Smart Garden 9 takes 4 L or until the float levels with the garden surface. Watch the water level indicator and stop before it rises above the lid surface — over-watering at this stage is the most common setup mistake.
- Plug the garden in. The system is immediately active. The grow lamp will run on a built-in automatic timer of 16 hours on, 8 hours off.
- Leave the germination domes on until you see sprouts pushing up. Once sprouts are visible, remove the domes and store them for your next growing cycle.
That's genuinely it. There are no nutrients to add, no timers to program, and no calibration steps. After plugging in, your first-week routine is just checking the water level every few days and waiting for sprouts.
Lighting, water, and placement: getting these right matters
The built-in light is doing more than you think
The LED lamp bar in Click & Grow gardens is tuned for plant growth, not room illumination. The automatic 16-on / 8-off timer is set at the factory and is not adjustable, which is actually a feature for beginners because you can't accidentally run a bad photoperiod. Don't position the garden in direct sunlight or near a south-facing window where strong sun will override the light cycle and heat the water tank. A countertop away from direct sun is ideal. The lamp needs to be the primary light source, not a supplement to outdoor sun.
Water type and reservoir maintenance
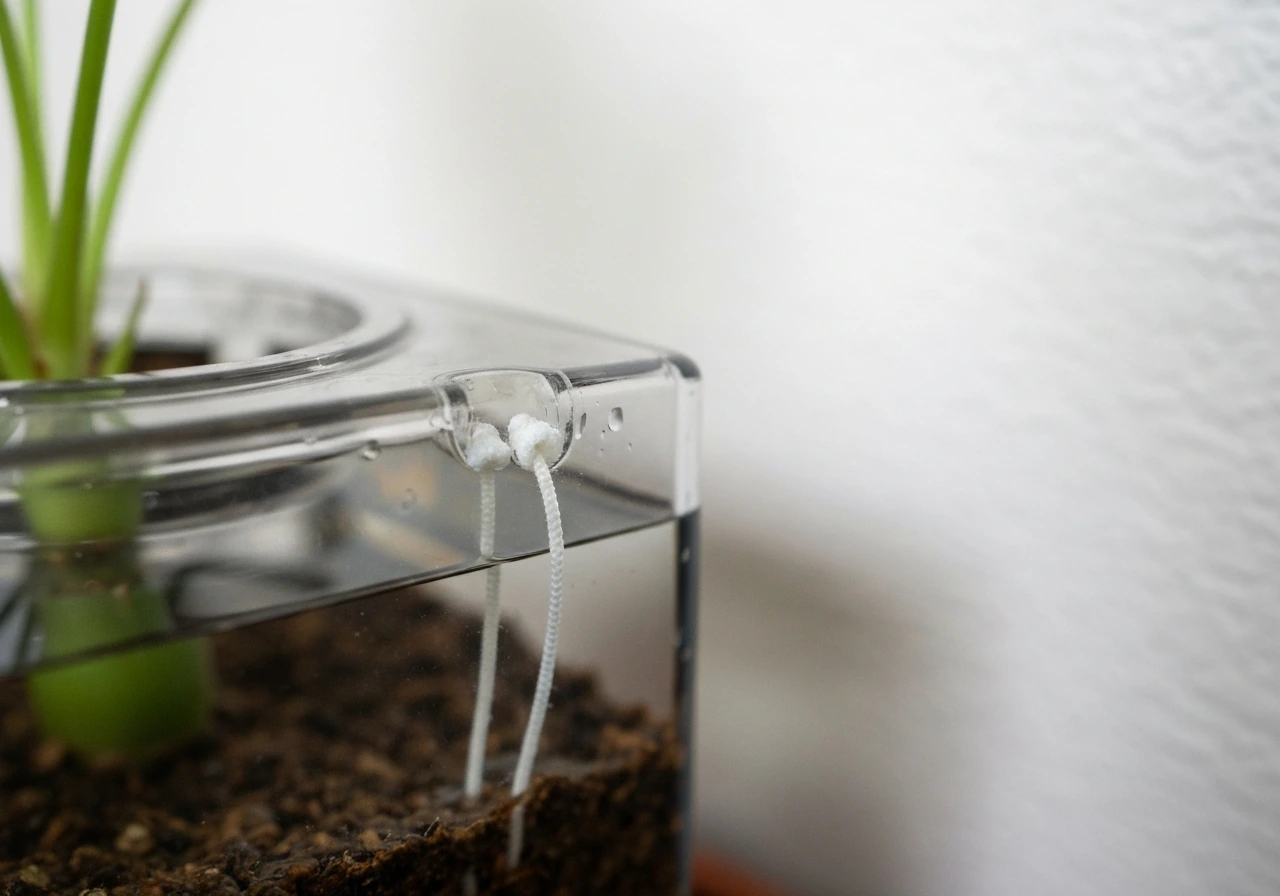
Click & Grow's own guidance confirms that tap water works fine, which removes one common concern. The thing to watch for over time is calcium and limescale buildup around the wicks, especially if your tap water is hard. The practical fix is to keep the tank filled so that roughly two-thirds of each wick stays submerged at all times. Wicks that repeatedly dry out accumulate limescale faster and eventually lose their ability to transfer water to the soil. Consistent topping up is the single best maintenance habit you can build.
Placement and airflow
Keep the garden in a room with moderate temperature, ideally between 65°F and 75°F (18°C to 24°C). Avoid placing it near a heating vent, air conditioner, or drafty window. Excessive heat accelerates water evaporation and can stress young seedlings. Poor airflow, on the other hand, can encourage mold on the soil surface, especially in the early germination stage when the domes are still on. Once domes come off, light air circulation around the plants helps prevent fungal issues and strengthens stems.
Fixing the problems that actually happen
Slow growth or nothing sprouting
If nothing has sprouted after two weeks, check two things first: water level and dome placement. The water indicator should show water present, and the domes should be fully seated and creating a seal. Germination domes that sit loosely let humidity escape and slow germination significantly. If the water level looks fine and the domes are on correctly, the pod itself may be the issue. Occasionally a seeded pod has a germination failure, which is a manufacturing variance rather than something you did wrong. Contact Click & Grow support with your order details since they typically replace failed pods.
Slow growth after successful germination usually comes down to light position or water transmission. Make sure the lamp arm is set to the lowest position when seedlings are small, raising it as plants grow. If the plants look pale or stretched (reaching upward with thin stems), they're not getting enough light intensity, and moving the lamp closer helps immediately. This behavior is similar to what you'd see in any hydroponic setup where light distance is miscalibrated. If you've dealt with similar germination issues in pod-based systems before, the troubleshooting approach used for AeroGarden pods that didn't grow shares some useful diagnostic logic worth reviewing.
Wick problems and water not reaching the soil
If your plants look dry despite a full tank, the wick is the first place to investigate. A wick that's positioned too high won't draw water up from the reservoir; one positioned too low won't reach the soil. The wick needs to fit snugly in its tube and sit at the correct height. Hard water buildup and root matter growing through the wick can also block water transmission entirely.
The fix for limescale is to soak the wick in a warm, mild food vinegar solution to dissolve the mineral deposits. If soaking doesn't restore function, replace the wick. These are cheap and replaceable parts. Never leave an empty pod cavity in the garden with a wick sitting dry, because that accelerates clogging.
Mold on the soil surface
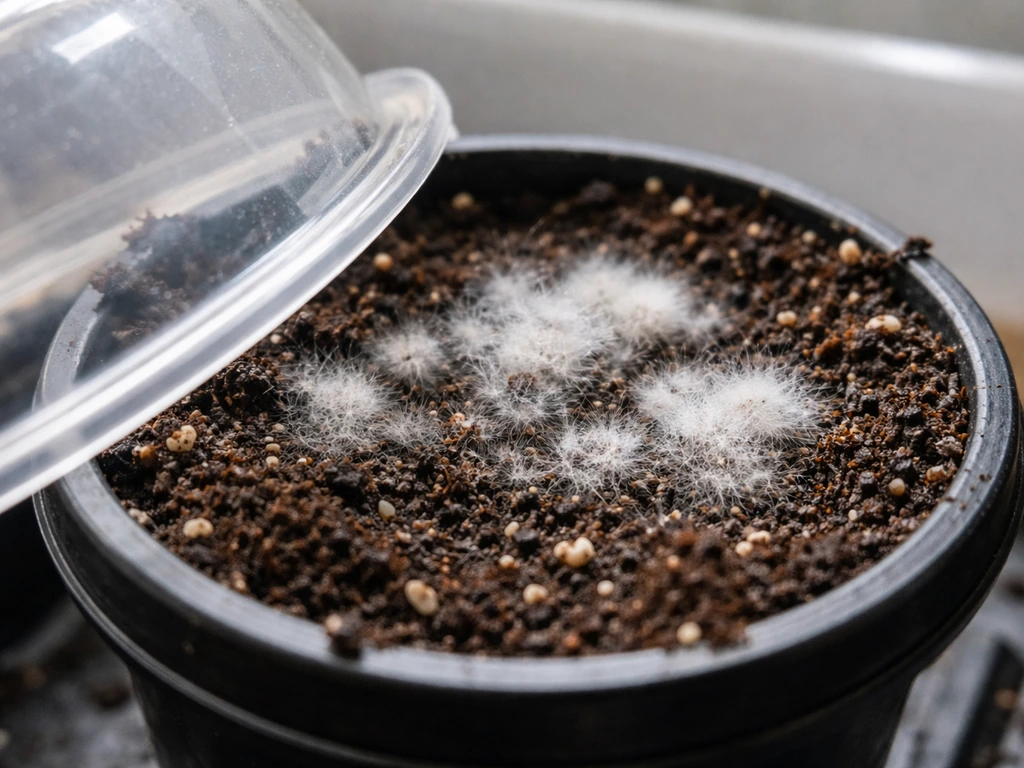
White fuzzy growth on the soil surface usually means the domes have been left on too long or airflow is too low. Remove the domes as soon as you see sprouts, not after. If mold appears on established plants, gently scrape off the affected surface layer and improve airflow around the garden. Avoid over-filling the water tank past the recommended level since waterlogged conditions promote mold faster than almost anything else.
Pests and indoor hygiene
Fungus gnats are the most common pest in pod-based indoor gardens. They're attracted to moist soil surfaces and are a sign that the surface is staying too wet between waterings. Since Click & Grow is self-watering, your best prevention tool is keeping the growing area clean: remove dead leaves immediately, don't leave standing water around the base of the unit, and keep the garden away from outdoor soil sources like potted houseplants brought in from outside. If you get an active infestation, yellow sticky traps placed near the garden catch adults and break the reproductive cycle without any chemical treatment.
Odors and water quality
A musty smell usually means the reservoir water has gone stagnant, which happens when the tank sits at low levels for extended periods or isn't topped up frequently enough. Drain the tank, rinse it with warm water, and refill. This is also why consistent topping up matters beyond just plant health. If you're letting the tank run near empty before refilling, you're creating conditions for bacterial growth.
Harvesting, caring between cycles, and what to do when a pod is done
How and when to harvest
For herbs like basil, start harvesting once the plant has at least three sets of leaves. Cut from the top down, removing no more than a third of the plant at a time. This encourages bushier regrowth and extends the productive life of the pod significantly. Don't wait until the plant is flowering to start harvesting because once basil bolts and sets seeds, leaf flavor degrades and the plant prioritizes reproduction over foliage. Regular cutting delays bolting. For fruiting plants like strawberries, harvest individual fruits as they ripen and leave the plant in place to keep producing.
Pod lifespan varies by plant type. The Grow Anything seedless pods are rated for 4 to 6 months before nutrients deplete. Fruiting plants like Wild Strawberry are rated at around 17 weeks. Understanding [how long Click & Grow pods last](/hydroponic-growth-rates/how-long-do-click-and-grow-pods-last) by variety helps you plan your purchasing cycle and avoid running out of replacement pods mid-harvest.
Cleaning between cycles
When a pod is finished, don't just yank it out and drop in a new one. Click & Grow recommends a proper cleaning before the next cycle: drain all the water from the reservoir and rinse it carefully with warm water. This removes mineral deposits, root debris, and any organic matter that could contaminate the new pod's growing environment. It takes five minutes and makes a measurable difference in how well the next pod establishes.
Keeping the system productive long-term
The Click & Grow system stays productive as long as you keep fresh pods rotating through it. Stagger your pod replacement dates so you're not replacing all pods at once and facing a dead zone where nothing is harvestable. In a Smart Garden 9, you can realistically maintain a rolling harvest by starting one or two new pods every three to four weeks while others are in peak production. This is the same succession planting logic used in outdoor kitchen gardens, just compressed into a countertop footprint.
If you're considering expanding beyond the pod system or want to compare how Click & Grow's Smart Soil pods stack up against alternatives, it's worth knowing how the grow media compares to third-party options. There are aerogarden grow sponge alternatives that shed light on how different pod-adjacent media perform, which is useful context if you're also running an AeroGarden alongside your Click & Grow unit. And if you're wondering about cross-compatibility between systems, the question of whether Click & Grow pods are compatible with AeroGarden has a specific answer that's worth knowing before you buy pods for one device and discover they don't fit the other.
The short version: Click & Grow pods are purpose-built for Click & Grow hardware, the system is one of the most beginner-friendly ways to grow food indoors, and Best Buy is a legitimate place to buy both the hardware and pod refills today. Start with the Smart Garden 3 if you're new, grab the Wild Strawberry or a basil variety pack as your first pod refill, follow the setup sequence above, and you'll have something growing within a week.
FAQ
Can I buy best buy click and grow pods without a Smart Garden unit, and will they work in another device?
You can buy refills from Best Buy, but Click & Grow pods are designed to fit their Smart Garden hardware. If you do not already own a compatible Smart Garden model, your pods will not be usable until you get the correct garden (Smart Garden 3 or Smart Garden 9).
What should I do if my first week looks “fine” but no sprouts show by the two-week mark?
Re-check that the domes are fully seated and sealed, then confirm the water level is actually high enough to keep the wick consistently wet. If both look correct, treat it as a possible pod germination variance and contact support with your order details for a replacement.
Do I need to use distilled water for best buy click and grow pods to avoid wick clogging?
Distilled water is not required, but hard water can cause mineral buildup around wicks over time. The practical best practice is consistent topping up so the wick does not repeatedly dry out, and plan on periodic vinegar soaking if you notice reduced water draw.
How do I know whether my issue is light distance versus a wick problem?
If seedlings look pale or stretched, adjust lamp position closer or keep the lamp low early on. If plants look dry even with a full tank, focus on wick placement and mineral blockage, since the wick controls water transfer more directly than the light does.
Can I leave a pod cavity empty in the garden, or should I always insert a pod?
Avoid leaving an empty pod cavity with the wick sitting dry. If you are not running a pod, keep the system filled appropriately or rotate pods so you do not accelerate clogs and reduced wick performance.
Do I need to remove the domes immediately when sprouts appear, or can I wait a bit?
Remove them as soon as you see sprouts. Keeping domes on too long can lead to fuzzy growth and higher humidity problems, and removing them earlier improves airflow during the seedling stage.
How often should I harvest basil for the best flavor and regrowth?
Start harvesting when there are at least three leaf sets, and cut from the top down, removing no more than about a third of the plant at a time. Regular cutting delays bolting and keeps leaf flavor better than waiting until flowering begins.
How do I stagger pod replacements in a Smart Garden 9 to avoid a harvest gap?
Use succession timing, such as adding one or two new pods every three to four weeks while keeping others in peak production. This spreads out replacement so the whole unit is not simultaneously past its productive window.
What is the fastest way to recover a clogged wick when I spot mineral buildup?
Soak the wick in a warm, mild food-vinegar solution to dissolve limescale, then test water draw after reassembly. If performance does not return, replace the wick since it is cheaper than replacing pods.
Will fungus gnats show up in every household, and what’s the non-chemical first step?
They are common, especially when the soil surface stays too wet. Your first move is cleanliness (remove dead leaves, avoid standing water around the base, keep away from outdoor soil sources), and if needed use yellow sticky traps to catch adults.
Are the Grow Anything pods expected to last the same time as seeded fruit pods like strawberries?
No. Grow Anything pods are typically rated for about four to six months, while fruiting pods like Wild Strawberry are closer to around 17 weeks. Match refill purchases to the plant’s lifespan so you do not run out mid-cycle.
What cleaning should I do between pod cycles so the next pod has the best chance to establish?
After a pod finishes, drain and rinse the reservoir with warm water, and remove mineral deposits and residue that can contaminate the next pod’s environment. Doing this before installing a new pod usually improves early uptake and reduces recurring issues.