The best Click and Grow pods are the ones that match your goals, your device, and how much attention you actually want to give your garden. For most beginners, that means basil, mini tomatoes, or lettuce, all of which germinate fast, grow reliably under the built-in LED, and produce harvests you'll actually use. For experienced growers chasing variety, it means picking from Click & Grow's expanded catalog of herbs, peppers, flowers, and leafy greens, while understanding what the pod format can and cannot do. This guide walks through every layer of that decision so you leave with a specific list, a setup plan, and a realistic harvest timeline.
Best Click and Grow Pods: How to Choose and Set Up

Marcus Holloway
22 Apr 2026
What Click and Grow pods actually are (and what 'best' means here)
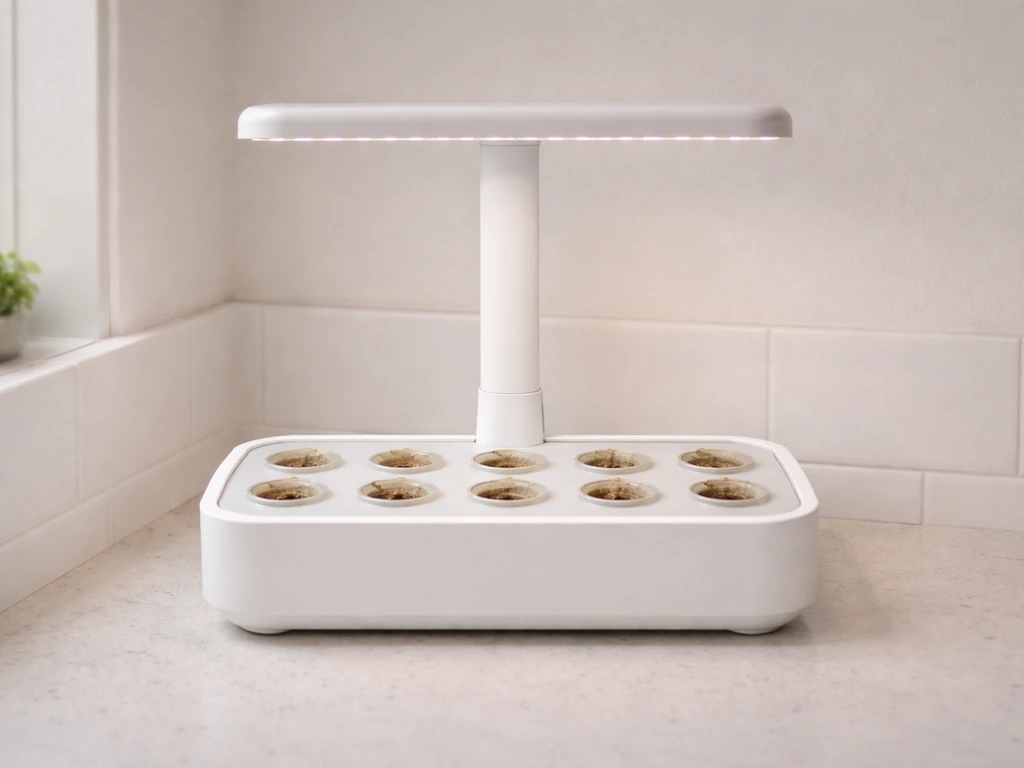
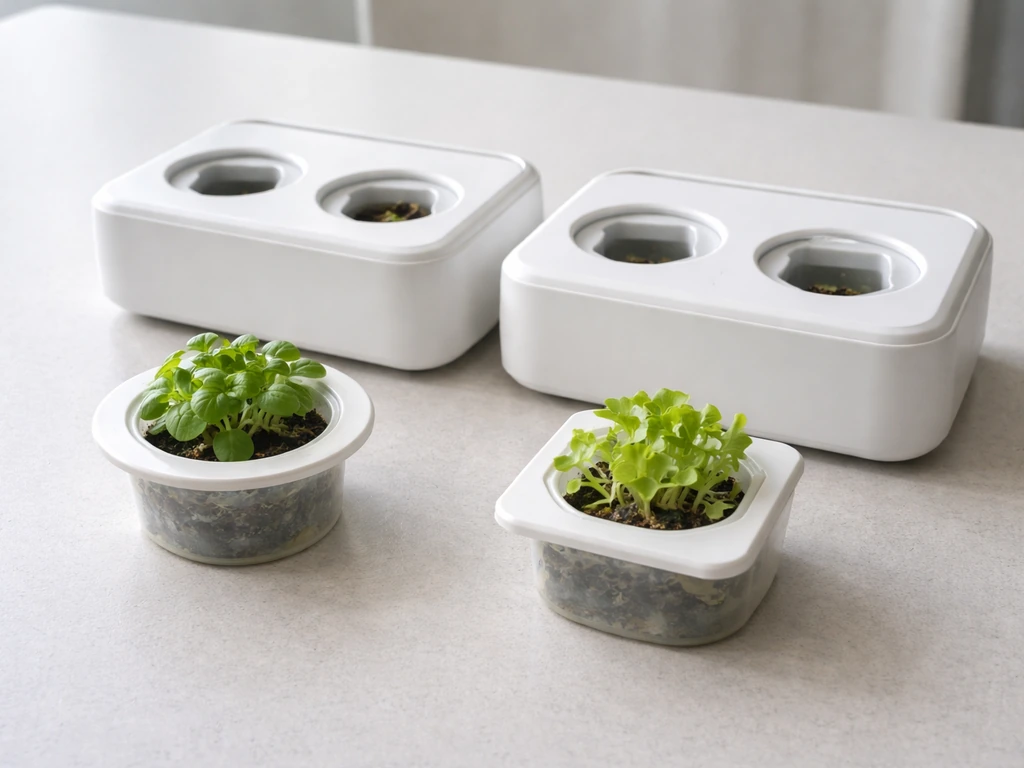
Click & Grow pods are pre-seeded, self-contained growing units built around the brand's patented Smart Soil substrate. Each pod is essentially a small puck: seeds are embedded in a nutrient-loaded, pH-balanced growing medium that behaves somewhere between soil and a hydroponic substrate. It's not traditional potting mix and it's not a pure hydro system.
Think of it as a middle ground: the medium holds moisture, releases nutrients gradually, and provides physical support for roots, while a wick system draws water up from the device's built-in reservoir. The LED lamp overhead handles the light side of the equation. You fill the tank, drop in pods, and the system manages most of the variables. For the Smart Garden 9 specifically, the manual lists an [LED automatic cycle of 16 hours on and 8 hours off](https://www.
manua. ls/click-grow/smart-garden-9/manual), and it also instructs you to pour water into the tank until the water level indicator reaches the top of the garden.
So what makes a pod 'best'? It comes down to five things: germination reliability (does it actually sprout?), growth speed (how many weeks until first harvest?), flavor or yield quality (does the end product taste or perform the way you want?), ease of care (how much intervention does it need?), and compatibility with your specific device. A pod that scores high on all five for your use case is the best pod for you. There is no universal answer, which is exactly why this guide is organized around use cases rather than a single ranked list.
Choosing the right pod type for your goals
Before you buy a multipack of any pod, spend two minutes deciding what you actually want to grow and eat. You can buy Click & Grow pods through the brand's official store and other authorized retailers, depending on your country. Click and Grow's best buy click and grow pods are usually the ones that match your device and the kind of harvest timeline you want, so decide what you want to grow and eat before you buy a multipack of any pod. Click & Grow's catalog covers four broad categories: culinary herbs, leafy greens, fruiting plants (tomatoes, peppers, chili), and ornamentals/flowers. Each category has very different timelines, space demands, and care requirements inside a smart garden.
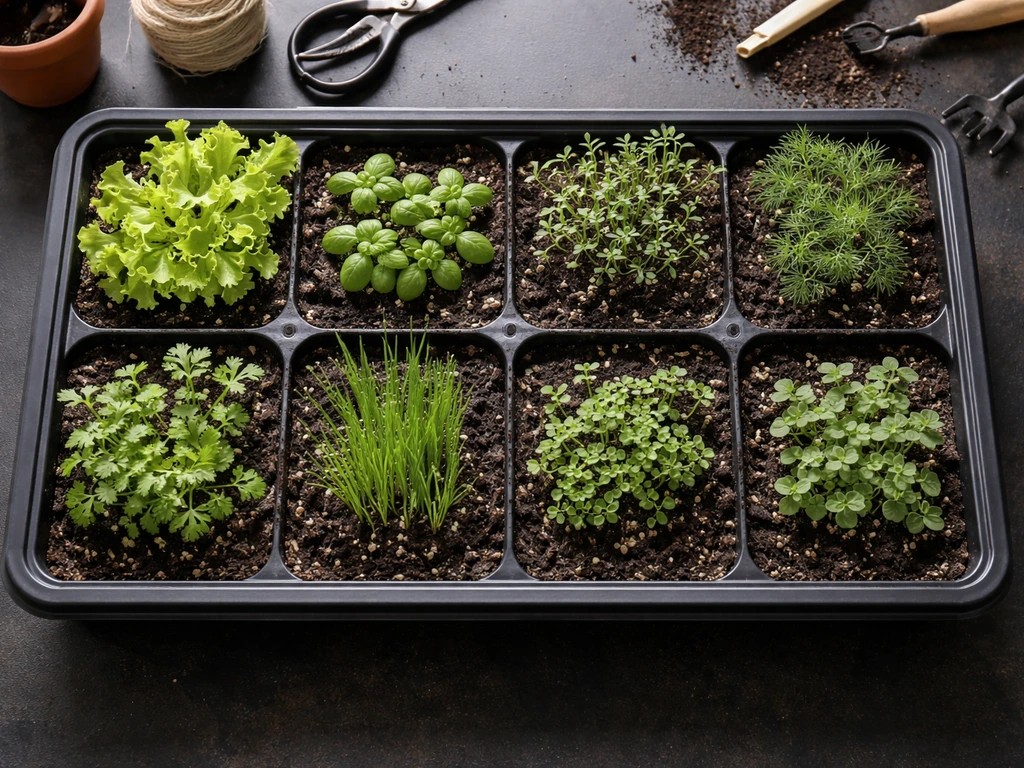
Culinary herbs
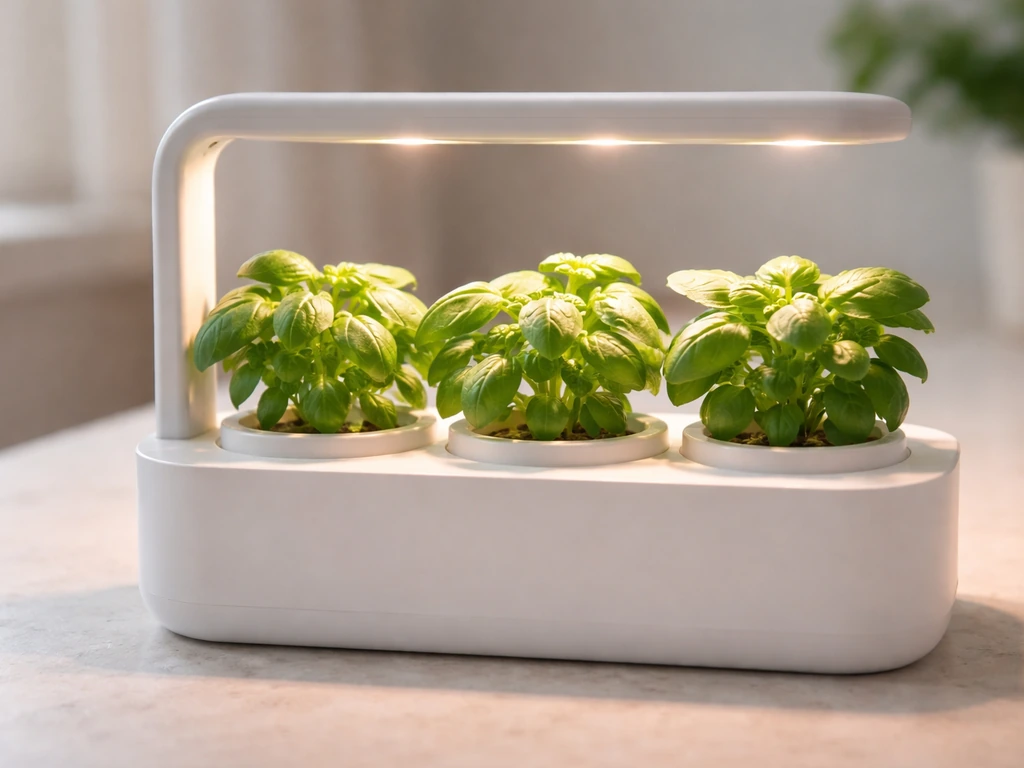
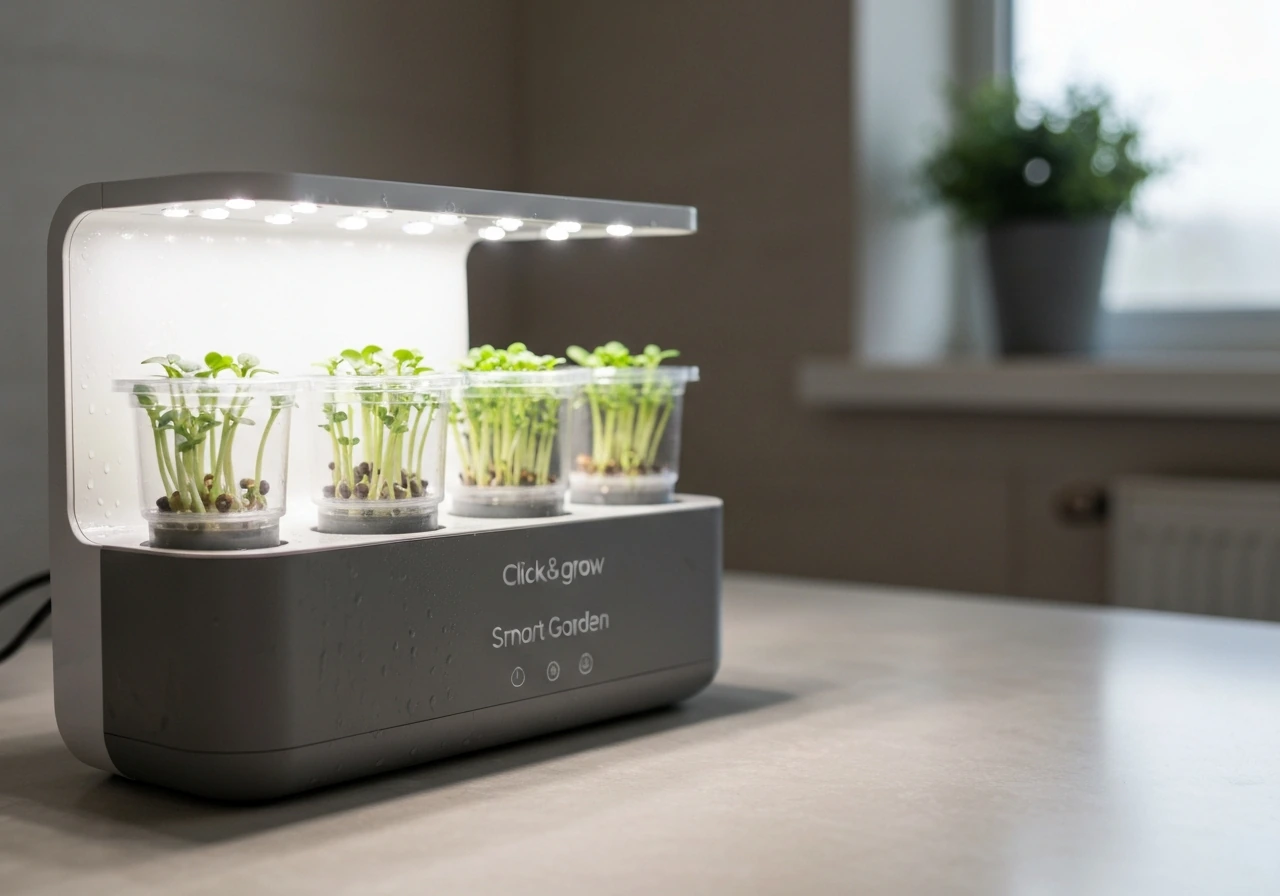
Herbs are the most practical choice for most people because the pods are compact, the plants mature quickly (basil is harvestable in roughly 3 to 4 weeks), and a small counter garden can genuinely replace your store-bought fresh herbs habit. Basil, parsley, thyme, chives, mint, cilantro, and dill all perform well. Basil is the top performer for beginners: fast, forgiving, and flavorful. Mint is vigorous to the point of being aggressive in a shared pod tray, so give it edge positions if you can.
Leafy greens
Lettuce, arugula, baby spinach, chard, and kale pods all work in a Smart Garden. These are cut-and-come-again crops, meaning you harvest outer leaves and the plant keeps producing. Expect a first harvest around weeks 3 to 4, with continuous cutting possible for several more weeks before the plant bolts or the pod nutrients run out. If you want a salad garden on your counter, a mix of green lettuce, arugula, and red romaine across a 9-pod device is a genuinely useful setup.
Fruiting plants
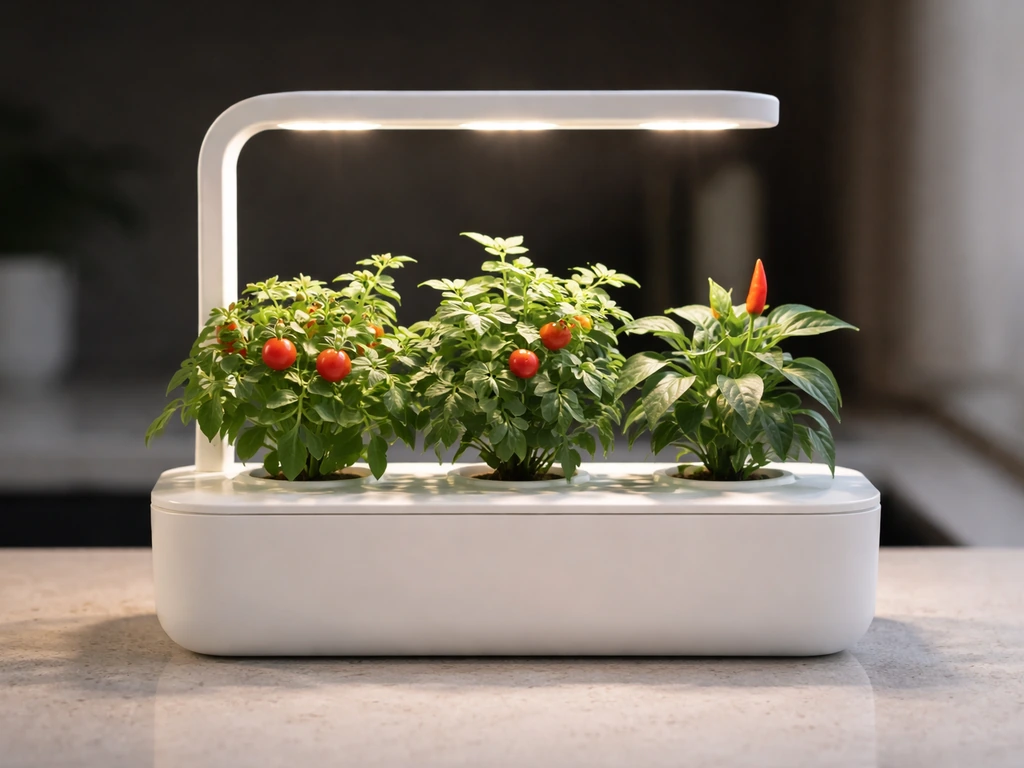
Mini tomatoes, cherry peppers, and hot chilies are available as pods, and they can fruit indoors under the Click & Grow LED. The tradeoff is time and space: fruiting plants take 8 to 12+ weeks before harvest, need more vertical clearance (the adjustable lamp arm matters here), and ideally should be hand-pollinated indoors since there are no insects to do it. If you enjoy the process as much as the harvest, these are rewarding. If you want fast results, stick to herbs and greens first.
Ornamentals
Petunia, nasturtium, and other flower pods exist mainly for aesthetics or edible flower use. They're a fine choice if you want the garden as a decorative object, but for anyone focused on food production, they're low priority unless you specifically cook with edible flowers.
Pod compatibility: matching pod format to your device
Click & Grow makes several device models, and while the pod format is largely standardized across the main consumer lineup, there are important differences to know before you order.
| Device | Pod Capacity | Pod Format | Notes |
|---|---|---|---|
| Smart Garden 3 | 3 pods | Standard C&G pod | Compact, windowsill-friendly; same pod format as SG9 |
| Smart Garden 9 | 9 pods | Standard C&G pod | Most popular model; widest catalog compatibility |
| Smart Garden 9 PRO | 9 pods | Standard C&G pod | App-connected; same physical pod as standard SG9 |
| Smart Garden 27 | 27 pods | Standard C&G pod | Large unit; pod format identical to SG3/SG9 |
| Wall Farm (Mini/Full) | Multiple pods | Standard C&G pod | Vertical mounting; same pod system, different light array |
The good news is that Click & Grow has kept its pod format consistent across models, so the same basil pod that fits a Smart Garden 3 fits a Smart Garden 27. Where compatibility gets more nuanced is with third-party or blank pods. Click & Grow sells 'Experimental' or empty pod kits that let you plant your own seeds in their Smart Soil. These use the same physical format.
If you're coming from an AeroGarden ecosystem and wondering whether Click & Grow pods cross-fit, the answer is no. If you're comparing Click and Grow pods to AeroGarden pods, note that they are not compatible because of differences in pod geometry and growing materials. AeroGarden uses a different pod geometry, grow sponge material, and basket design. The two systems are not interchangeable, even though they're functionally similar in concept.
If your AeroGarden pods did not grow, the mismatch in pod geometry and growing materials is often the main cause.
One practical note on pod generations: Click & Grow has quietly updated seed varieties within the same pod SKU over the years. If you bought tomato pods two years ago and found them underwhelming, the current version may use an improved cultivar. It's worth checking the current catalog date on any multipack you buy, especially for fruiting varieties.
What's inside the pod: medium, nutrition, and realistic expectations
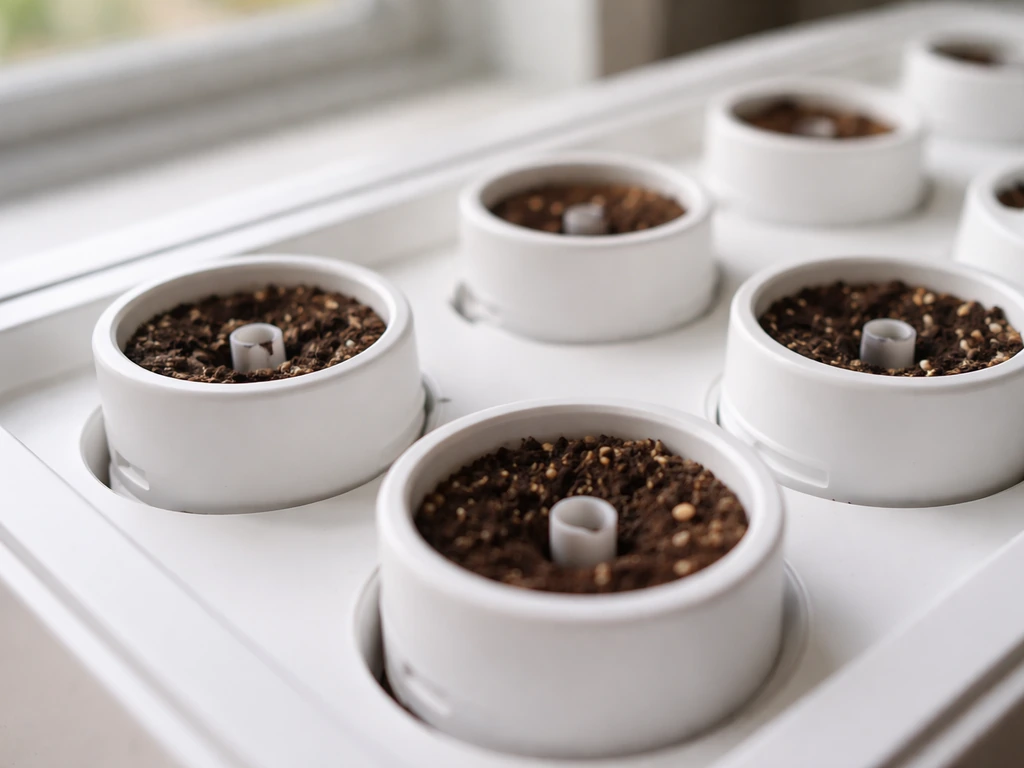
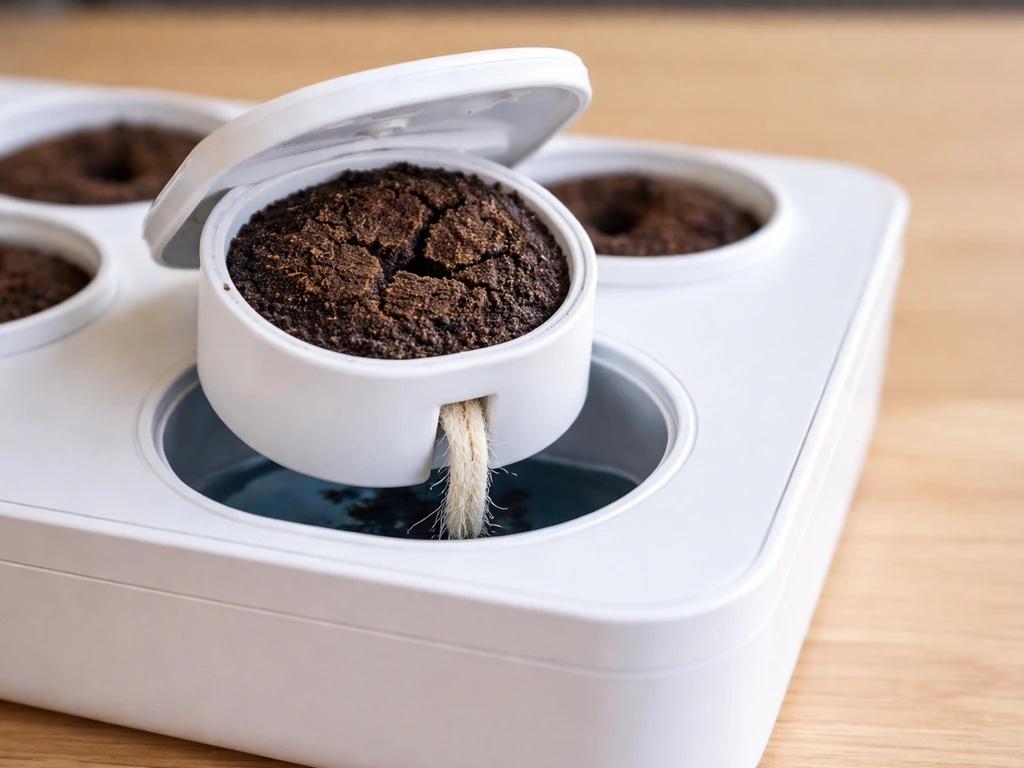
Click & Grow's Smart Soil is not garden soil. It's a peat-based, nutrient-preloaded substrate engineered to be pH-stable and to release nutrients at a rate matched to the plant's growth phase. It behaves closer to a coco-peat blend than to a true hydroponic grow medium, but it also isn't a recirculating hydro system. There is no nutrient solution in the water tank. The tank holds plain water, and the wick draws that water up into the pod. The nutrients are physically embedded in the Smart Soil, not dissolved in the water.
This design has a direct consequence: the nutrient supply is finite. Once the embedded nutrients are depleted, the plant can't be adequately fed by plain water alone, and growth stalls or quality drops. This is why Click & Grow positions its pods as single-use: when the plant's productive life ends (typically 4 to 12 weeks depending on species), you remove the pod and replace it. You're not expected to top-dress with fertilizer or add liquid nutrients to the tank. Some advanced growers do add a mild liquid nutrient to the tank water in later weeks to extend a plant's productive life, but this is outside the intended design and can cause algae or pH issues if you're not careful.
If you want more control over nutrition, Click & Grow's blank/experimental pods let you fill them with your own substrate and seeds. You can use Smart Soil refill bags or substitute with a high-quality peat-perlite blend. This is a good option for growers who want to experiment with varieties not in the Click & Grow catalog or who are comfortable dialing in their own nutrient schedule.
Setup checklist for getting the best results from day one
A lot of Click & Grow failures happen in the first two weeks and they're almost always setup errors, not pod defects. Run through this checklist before you plant. Click & Grow also instructs filling the Smart Garden 9 tank with 4L of water (until the float is leveled with the garden) and running the light 16 hours per day with 8 hours off Smart Garden 9 Set Up.
- Place the device on a stable, level surface away from direct sunlight. Sunlight from a window competes with and can confuse the LED light cycle, causing inconsistent growth or early bolting.
- Fill the water tank to the MAX line with room-temperature, low-chlorine water. Let tap water sit for an hour or use filtered water if your tap is heavily chlorinated.
- Set the lamp height to its lowest position at germination, then raise it as plants grow. The Click & Grow LED is optimized for the distance specified in the manual (typically 10 to 25 cm above plants). Keeping it too high from the start causes leggy seedlings.
- Set the light timer to 16 hours on, 8 hours off. This is the default for most Click & Grow devices and matches the light requirements for nearly all herbs and greens in the catalog.
- Do not cover pods with plastic wrap or humidity domes unless germination fails after 10 days. The Smart Soil retains enough moisture via the wick system. Extra humidity traps can encourage mold.
- Keep ambient temperature between 65 and 77°F (18 to 25°C). Below 60°F, germination slows significantly. Above 80°F, herbs like cilantro and lettuce bolt fast.
- Provide light airflow in the room. A small fan on low nearby is ideal. Still air encourages fungal issues, especially in dense herb pods.
- Check the water level every 2 to 3 days for the first two weeks. The wick system is passive but the tank depletes faster during germination in warm or dry indoor environments.
- Place pods in non-adjacent positions if mixing fast-growing and slow-growing varieties. Fast growers (basil, mint) can shade slower neighbors if placed in center positions.
- Thin seedlings to one per pod once the first true leaves appear (usually days 7 to 14). The biggest seedling wins. Leaving two plants per pod splits nutrients and reduces final yield.
The best pod varieties for specific goals
Here are concrete recommendations organized by the most common use cases. These are based on germination rate, time to first harvest, flavor or yield quality, and how forgiving the plant is when conditions aren't perfect.
Best for beginners: fastest, most forgiving
- Green Basil: germinates in 3 to 7 days, first harvest at 3 to 4 weeks, very vigorous, forgiving of minor temperature swings
- Green Lettuce: ready to start cutting at 3 to 4 weeks, no intervention needed, stays productive for 6 to 8 weeks
- Chives: slow to germinate (7 to 14 days) but incredibly low-maintenance once established; snip and regrow for weeks
Best flavor for cooking
- Sweet Basil or Genovese Basil: aromatic, large-leafed, noticeably better than supermarket basil within 4 weeks
- Thai Basil: spicier, more complex flavor than Italian varieties; excellent in stir-fries and soups
- Thyme: slow to establish but the flavor concentration in a pod-grown plant is surprisingly intense; first real harvest at 5 to 6 weeks
- Mini Tomato (Red): taste quality when vine-ripened indoors is noticeably superior to grocery store cherry tomatoes; timeline is 10 to 12 weeks
Best for small spaces (Smart Garden 3 or single-device setups)
- Chives, thyme, and parsley: compact growers that don't crowd adjacent pods
- Baby Salad Mix or Arugula: cut-and-come-again, stays low, no staking or height management needed
- Dwarf Basil (Minette type if available): bushy and compact, less likely to overshadow a 3-pod tray
Best for windowsill growing (supplemental natural light)
- Lettuce and spinach: tolerate lower light levels and slightly cooler temperatures near windows
- Parsley: performs well with mixed LED and indirect natural light
- Avoid tomatoes and peppers near windows: they need consistent, high-intensity light and the temperature swings near glass cause blossom drop
Best for continuous harvest (succession planting)
If you want to always have something ready to harvest, replace one-third of your pods every 3 to 4 weeks rather than replanting all pods at once. A 9-pod garden running basil, lettuce, and arugula on a staggered schedule means you're harvesting something every week after the first month.
Troubleshooting: why pods fail and how to fix it
No germination after 10 to 14 days
First, check that the wick is properly seated in the pod hole and reaching the water. A dry pod won't germinate regardless of how good the seed is. Second, check ambient temperature. Seeds need at least 65°F to germinate reliably. Third, confirm the lamp is on and cycling correctly. If everything checks out and you're at day 14 with no sprout, the seed may be nonviable. Contact Click & Grow support for a replacement pod. Germination failure is the one failure mode they'll almost always replace under warranty.
Yellowing leaves
Yellowing in weeks 1 to 3 is usually one of two things: overwatering (tank too full with poor wick drainage causing waterlogging) or a lamp that's too far away causing light deficiency. In weeks 4 to 8, yellowing often signals nutrient depletion. The Smart Soil's preloaded nutrients are running low. If the plant is still actively producing, you can add a very diluted general-purpose hydroponic nutrient (EC around 1.0 to 1.2) to the tank water as a one-time boost, but at that stage it's often better to just replace the pod. If the yellowing is on lower leaves only and new growth is green, it's likely natural senescence, not a problem.
Weak, leggy plants
Leggy growth (tall, spindly stems with small leaves) is almost always a light problem. Either the lamp is too high, the 16/8 light cycle isn't running, or a window behind the device is pulling the plant toward natural light instead of the LED above it. Lower the lamp to within 10 to 15 cm of the canopy and block any competing directional light source. If the plant is already leggy, pinch the growing tip to force lateral branching and move the lamp down immediately.
Mold or white fuzzy growth on the pod surface
Surface mold on the Smart Soil is usually harmless Trichoderma or saprophytic fungi responding to high humidity and low airflow. It's not killing your plant. Add a small fan nearby, reduce the water level slightly (don't fill above the recommended line), and remove the white growth with a clean cloth or dry toothbrush. If the mold is black or the plant stem is rotting at the base (damping off), the plant is lost. Remove the pod, dry the tray, and start fresh.
Poor yield or small leaves despite healthy-looking plants
Two plants left in one pod will both underperform. Thin to one plant per pod without exception. Also, if you're harvesting too aggressively (cutting more than one-third of the plant at a time), you're slowing regrowth. Harvest outer leaves only, leave the growing crown intact, and give the plant 5 to 7 days between cuts.
Pests
Fungus gnats are the most common pest in Click & Grow gardens. They're attracted to moist growing medium and can be introduced via nearby houseplants. Yellow sticky traps placed near the device catch adults. Letting the top of the pod surface dry slightly between watering cycles (which is tricky with a wick system but possible by reducing tank fill level briefly) discourages larvae. For aphids, which sometimes appear on herbs like mint and basil, a mild neem oil spray applied to the underside of leaves every 5 to 7 days for two weeks handles most infestations without harming the pod's Smart Soil.
Maintenance and re-podding schedule for ongoing harvests
Click & Grow is designed to be low-maintenance, but 'low maintenance' still means doing a few things on schedule. Here's a realistic ongoing routine that keeps your garden producing without letting it fall apart.
| Frequency | Task |
|---|---|
| Every 2 to 3 days | Check water level and refill tank as needed. Wick-fed systems deplete faster in warm, dry indoor air. |
| Weekly | Inspect plants for yellowing, mold, pests, or leggy growth. Adjust lamp height as plants grow taller. |
| Every 3 to 4 weeks | Harvest actively growing herbs and greens. Pinch basil flower buds before they open to extend leaf production by 2 to 3 weeks. |
| When a plant bolts or stops producing | Remove the spent pod. Rinse the pod hole and wick channel with clean water before inserting a new pod. |
| Every 4 to 6 weeks (staggered) | Replace one-third of pods with new ones if running a succession planting strategy. This avoids a full reset of your garden. |
| Every 3 months | Full tray cleaning: remove all pods, rinse the tray and tank with a 1:10 white vinegar/water solution, rinse thoroughly with clean water, then restock with fresh pods. |
One question that comes up constantly is how long pods actually last before they need replacing. The short answer is it depends heavily on the plant type: fast herbs like basil and lettuce typically give you 6 to 10 weeks of productive growth, while slower plants like thyme or mini tomatoes can run 12 to 16 weeks. After that, the nutrient reserves in the Smart Soil are genuinely exhausted and the plant quality drops regardless of how well you maintain everything else. Planning your re-podding schedule around these timelines, rather than waiting until plants look bad, keeps your garden in a perpetually good state.
If you're running a full 9-pod garden and want to keep it productive year-round, treat the re-podding schedule as a rotation rather than a reset. Keep notes on which pods went in on which date. A simple sticky note on the device base with pod names and start dates takes 30 seconds and saves you from guessing whether that basil is 4 weeks in or 8 weeks in. Small habit, big difference in harvest consistency.
FAQ
Can I reuse a Click and Grow pod after the harvest window is over?
In most cases, no. The Smart Soil is nutrient-preloaded, once those reserves are depleted the plant growth stalls because plain water in the tank has no dissolved nutrients. If you want a second run, the practical option is to use blank or experimental pods with fresh seeds (or a new Smart Soil refill), rather than trying to nurse the old pod for more yield.
What’s the right tank water level, and can I overfill it to help germination?
Overfilling is a common cause of early yellowing because it can leave the pod surface too wet and interfere with proper wicking. Follow the fill line for your model. If germination is slow, focus on wick seating and temperature first, rather than adding extra water.
How important is temperature for germination in Click and Grow pods?
It matters a lot. If the room is below about 65°F, many pods will either not sprout or sprout unevenly. Also avoid placing the unit next to cold drafts, exterior doors, or near-window areas that swing temperature day to night.
Do I need to fertilize, or does the pod cover everything?
The intended design is self-sufficient. For most of the productive window, you should not add fertilizer because nutrients are embedded in the Smart Soil. If you choose to do a one-time nutrient boost late in the cycle, keep it very diluted, because too much can worsen algae growth and can stress plants once the Smart Soil is nearing depletion.
Why did my pod germinate but then stop growing or look worse after a week or two?
This often points to setup or light issues, not seed quality. Check that the wick is drawing water (pods can stay too dry even after sprouting), confirm the lamp cycle is running, and make sure competing light from a window is not pulling the plant away from the LED.
How close should I keep the lamp to avoid leggy growth?
Use the canopy as your reference. A helpful rule is to keep the lamp within roughly 10 to 15 cm of the top growth. If you see stretching early, lower the lamp sooner rather than waiting, and ensure the 16/8 light cycle is active.
Can I put multiple herbs in one pod to get more variety or faster harvests?
No, each pod is designed for one plant. Leaving two plants in the same pod causes both to underperform because they compete for space and nutrients in the same Smart Soil puck. Thin to one plant per pod as soon as you see multiple sprouts.
What should I do about surface mold on the Smart Soil?
If it is white and the stem is not rotting, it is usually not a death sentence. Increase airflow (for example, run a small nearby fan), keep the tank at the correct level, and remove the mold gently with a clean cloth or soft brush. If you see dark rot at the base or the plant collapses, remove the pod and restart.
How can I prevent fungus gnats without constantly messing with the system?
Use yellow sticky traps near the unit and discourage overly wet conditions by not overfilling the tank. Let the pod surface dry slightly between wicking cycles when possible. Since gnats can be introduced via other houseplants, keep new plants separated until you confirm there are no larvae in their soil.
Is hand-pollination always required for mini tomatoes or peppers?
Often, yes indoors. Click and Grow setups typically do not have insect pollinators, so fruit set can be poor. If you want more reliable yields, lightly hand-pollinate (for example, by gently shaking flowers or transferring pollen) once flowering starts, and keep expectations aligned with the longer time-to-harvest.
What are the signs that it’s time to replace a pod even if the plant still looks partly alive?
Late-cycle nutrient exhaustion often shows as progressive yellowing, reduced growth rate, and lower-quality leaves even with correct lighting and watering. If new growth slows and older leaves continue to decline, plan to replace the pod rather than trying to extend it indefinitely, because the Smart Soil nutrient reserves are finite.
How should I schedule pods in a 9-pod garden to avoid gaps in harvest?
Instead of starting all pods at once, stagger re-podding by about every 3 to 4 weeks so at least one plant group is in the right harvest stage. Keep notes of pod names and start dates on the device so you can quickly identify what is in its peak window without guessing.
Where can I expect the biggest differences between Click and Grow pods and AeroGarden pods?
Even though both are countertop smart gardens, the pods are not interchangeable. Differences in pod geometry and the internal growing materials (including the sponge or basket design) can prevent proper seating and watering, which can lead to failure. If you migrate from AeroGarden, plan on buying the correct pod system for the device you own.
What if my seeds were recent but germination still failed around day 14?
First re-check the basics, wick position and temperature, and confirm the lamp is running on its cycle. If those are correct and there is no sprout by about two weeks, treat it as likely nonviability and contact support for a replacement pod, since germination failure is one of the most commonly covered issues.