The best organic nutrients for an indoor soil grow are worm castings, quality compost, dry amendments like kelp meal and fish bone meal, and targeted liquid supplements such as fish emulsion, liquid kelp, and calcium-magnesium products. If you build your soil right from the start, you can get through most of veg on the fertility already in the mix. Then you layer in liquid organics during flower when demand spikes. That's the core workflow, and everything below breaks it down stage by stage.
Best Organic Nutrients for Indoor Soil Grow: A Guide

Marcus Holloway
30 Apr 2026
Choosing the right indoor soil for nutrient performance
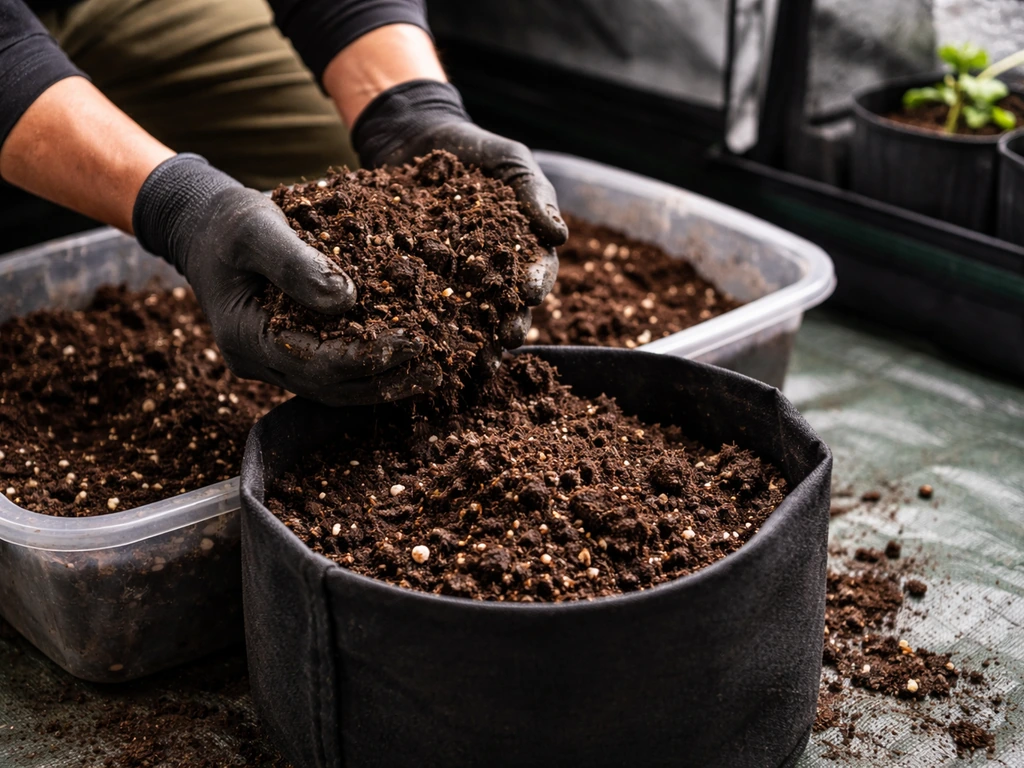
This is where a lot of growers go wrong before they even buy a nutrient bottle. If you want the best nutrients for soil grow UK, start by building a living mix that can release plant-available inputs over time nutrient bottle. Organic nutrients do not work the same way in soil as synthetic salts do. They rely on microbial activity to break down organic matter into plant-available forms. That process is called mineralization, and it only happens well when your soil has good structure, adequate moisture, and a healthy population of bacteria and fungi. If your soil is compacted, waterlogged, or biologically dead, organic amendments sit there doing almost nothing.
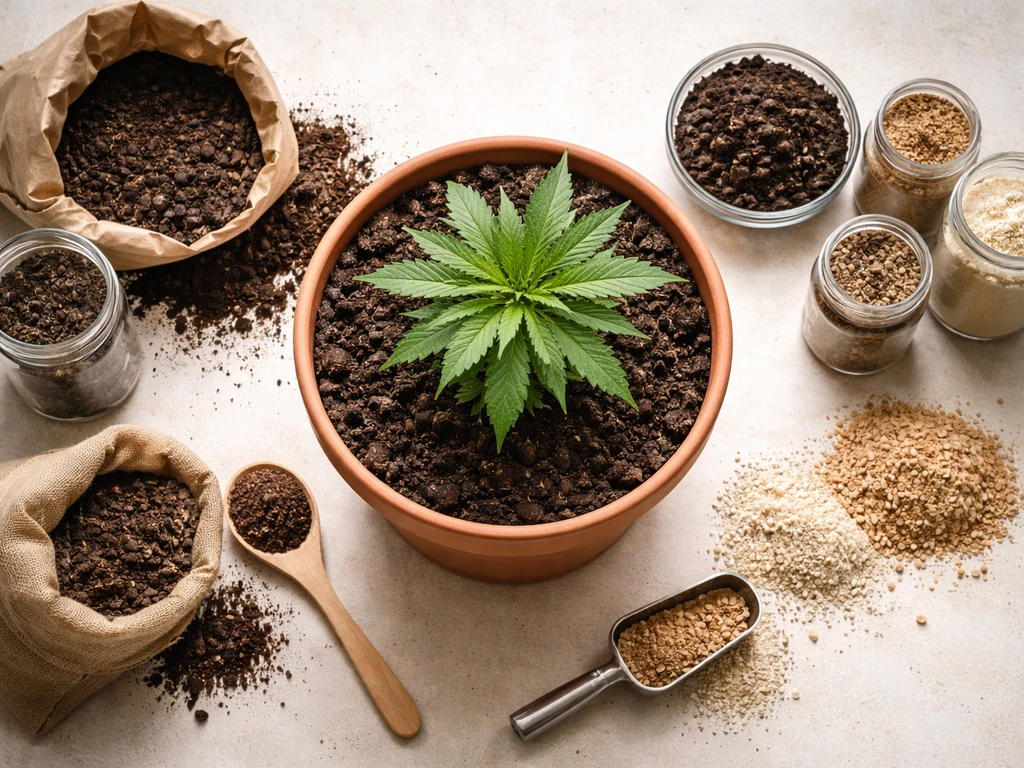
For indoor grows, you want a living soil mix that has three key properties: decent water retention, good drainage and aeration, and a high cation exchange capacity (CEC) so nutrients stay available rather than washing through. A mix built around quality compost, worm castings, and perlite checks all those boxes. If you want to increase water retention without hurting drainage, vermiculite is a better choice than extra perlite because it actually holds water and improves CEC. Perlite improves aeration and drainage but does not retain water or nutrients.
Pre-amended super soil mixes like Coast of Maine's Stonington Blend are worth knowing about. They are designed as living, biologically active growing media and typically include composted bark, worm castings, manure, perlite, and a mix of meals (kelp, fish bone, and similar). If you start in a mix like this, your seedlings and young plants often need nothing extra for weeks. That matters for beginners who want to simplify their nutrient program. The trade-off is cost per bag and less control over the exact NPK ratios.
If you are mixing your own, a solid starting recipe for a 20-liter batch is roughly 40% quality compost, 30% coco or peat for base structure, 20% perlite, and 10% worm castings. Then you amend with dry nutrients before planting. This gives you a living medium where organic inputs can actually do their job.
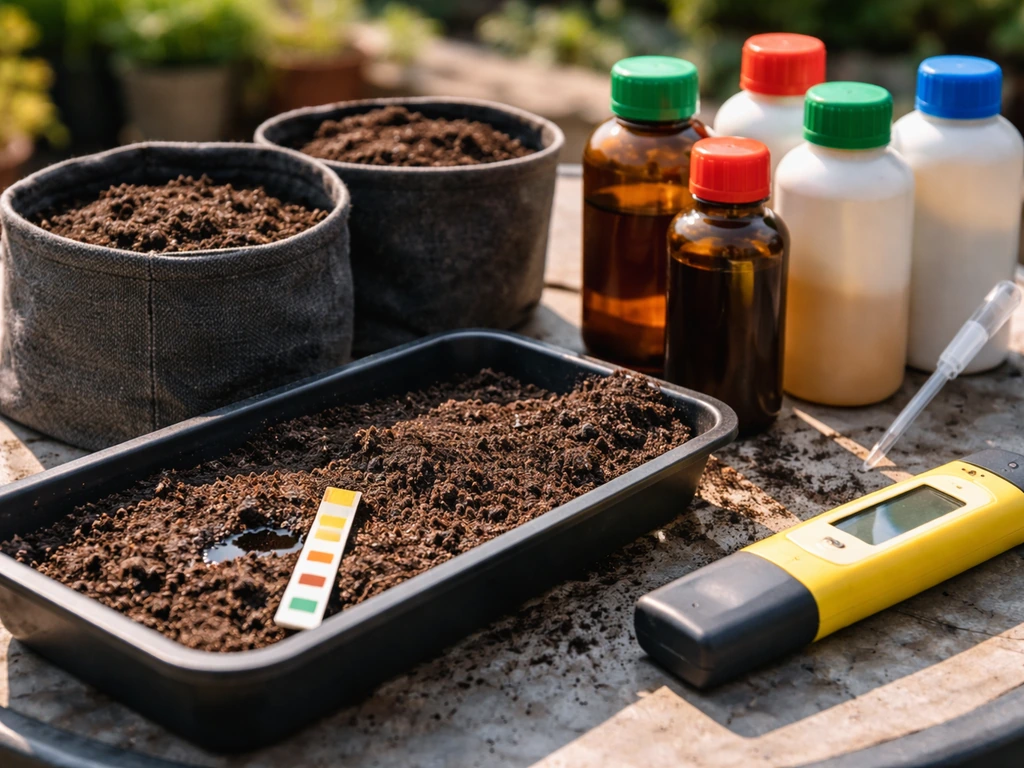
Foundational soil amendments
Dry amendments are what build baseline fertility into your soil before a single seed goes in. Think of them as slow-release nutrients that microbes unlock over weeks. Getting these right means you are not chasing deficiencies from week one.
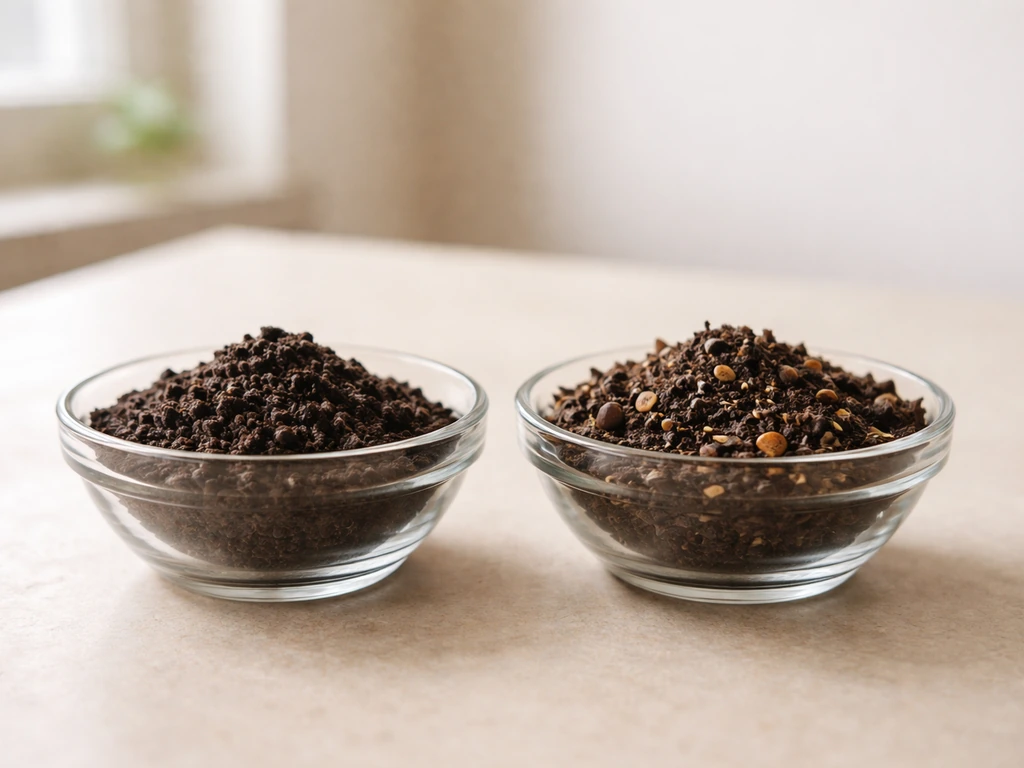
The core amendments and what they do
| Amendment | Primary Nutrients | Release Speed | Best Used For |
|---|---|---|---|
| Worm castings | Balanced N-P-K, microbial life | Fast (for organics) | Base mix, top dressing, seedlings |
| Quality compost | Broad spectrum, humus | Medium | Base mix, soil structure, CEC |
| Kelp meal | Trace minerals, cytokinins, K | Medium-slow | Veg and transition, top dress |
| Fish bone meal | High P, some Ca | Medium | Pre-flower amendment |
| Fish meal | High N, some P | Medium | Veg phase, base mix |
| Crustacean/shellfish meal | Ca, chitin, some P | Slow | Pest suppression, soil structure |
| Dolomite lime | Ca and Mg, pH buffer | Very slow | pH stabilization, base mix |
| Mycorrhizal inoculant | Not a nutrient, root enhancer | Immediate on roots | Transplant time, any stage |
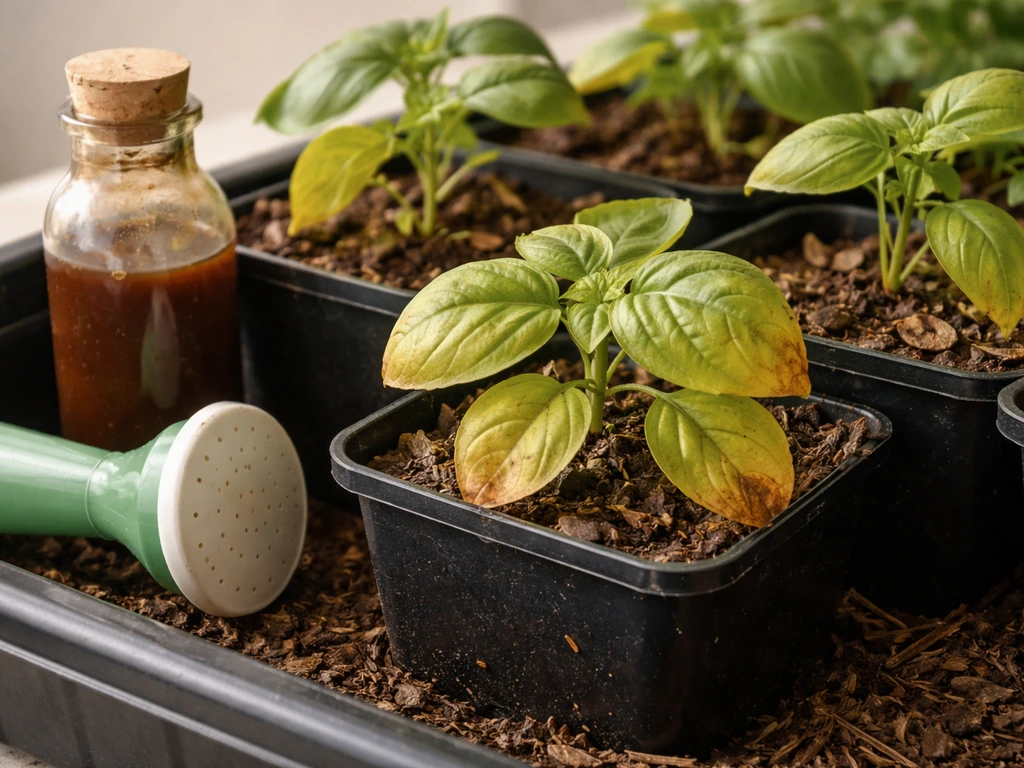
Worm castings are probably the single most versatile organic amendment you can use. They contain a broad, plant-ready nutrient profile, introduce beneficial microorganisms, and are gentle enough to use directly around seedling roots without burning. Aim for at least 10 to 20 percent of your soil mix by volume. More is not always better since castings are dense and can reduce drainage if overdone.
Compost is the backbone of any living soil. It provides humus, which increases CEC and feeds the microbial community long-term. Quality matters a lot here. Poorly made compost introduces pathogens and inconsistent nutrient levels. Use compost that has fully finished (no ammonia smell, earthy and dark), and source from a trusted supplier or make your own.
Kelp meal and fish bone meal are a complementary pair. Kelp brings trace minerals and natural growth hormones (especially cytokinins, which support cell division during veg). Fish bone meal delivers phosphorus for root development and early flower. Together they cover the gaps compost and castings leave. A common dose is around 1 to 2 tablespoons of each per gallon of soil in your base mix.
Dolomite lime is essential if you are mixing your own organic soil. It slowly buffers pH toward the 6.0 to 7.0 range that most organic soil grows need, and it provides both calcium and magnesium. Use it at roughly half a cup per cubic foot of mix, and let the soil rest for a week or two before planting if possible.
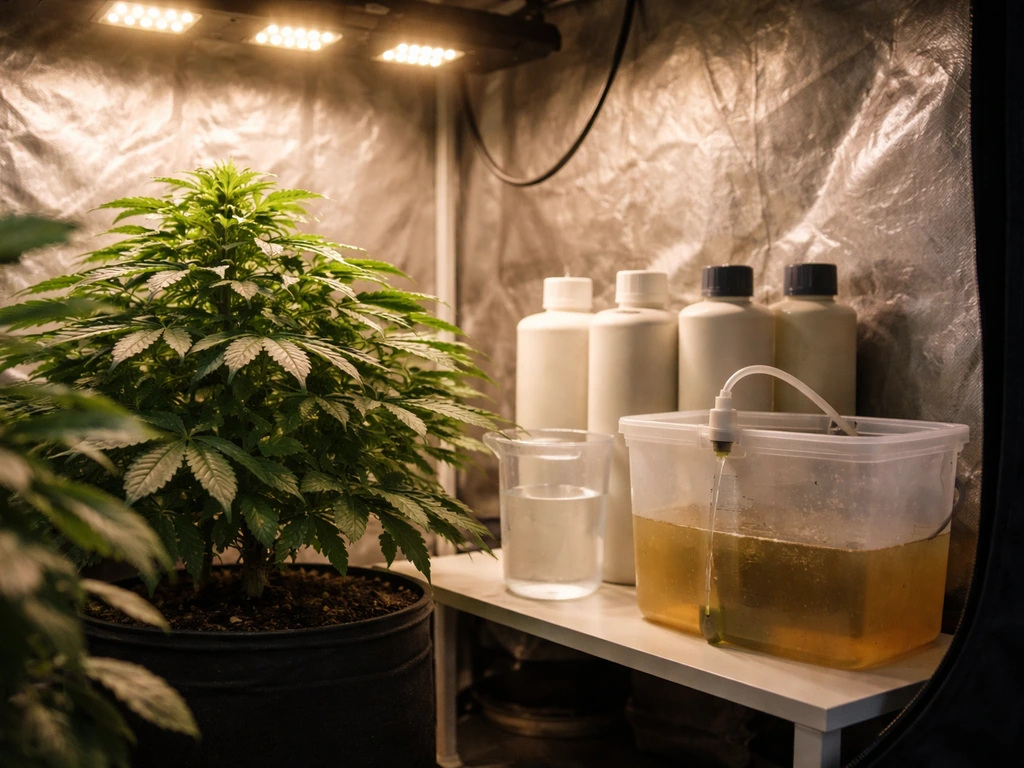
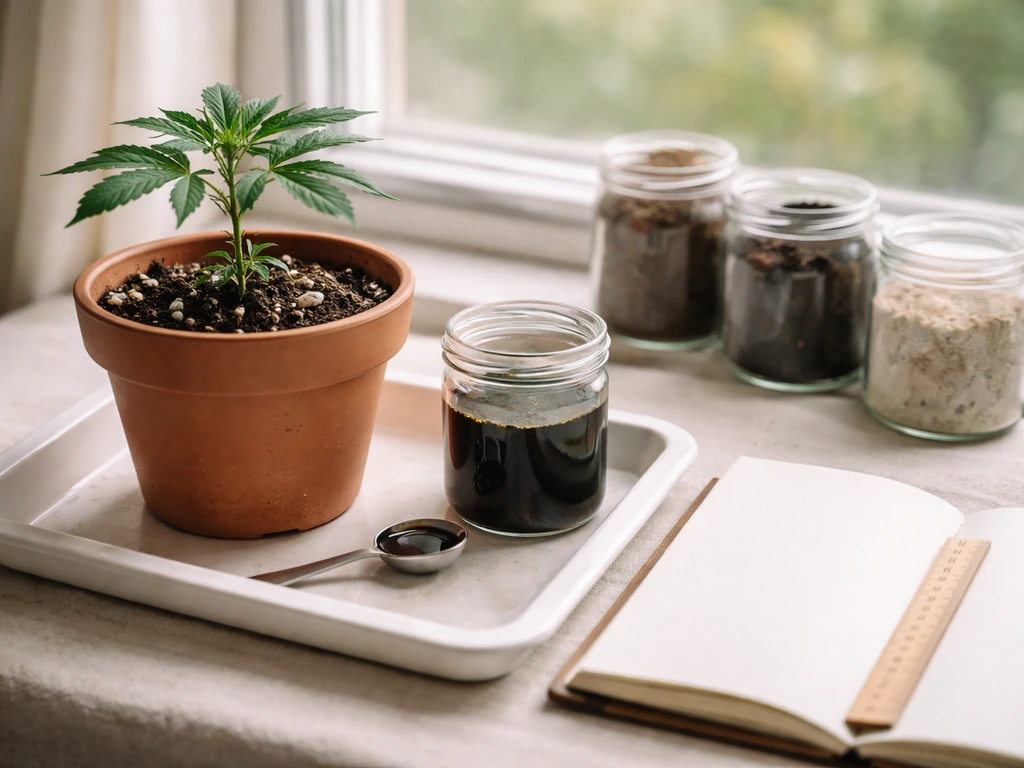
Organic liquid nutrients and concentrates
Even a well-built soil eventually runs short on certain nutrients as your plants grow. That is where organic liquid concentrates come in. They are faster-acting than dry amendments (though still slower than synthetic salts), and they let you target specific deficiencies or phase-specific demands without disrupting the soil biology. If you want the best grow nutrients results, focus on choosing liquids that match your plants' stage and deficiency signals rather than following one fixed bottle schedule.
When to use liquids versus relying on soil alone
If you started in a heavily amended super soil or a pre-loaded commercial mix, you may not need liquid nutrients until mid-veg or even transition. The microbes are already breaking down the amendments and feeding your plants. Watch the plants rather than following a fixed liquid-feeding schedule from week one. If they are dark green and pushing new growth steadily, the soil is handling it. Start supplementing when growth slows, leaves pale slightly, or you hit the transition into flower when phosphorus and potassium demand climbs.
The most useful organic liquid options
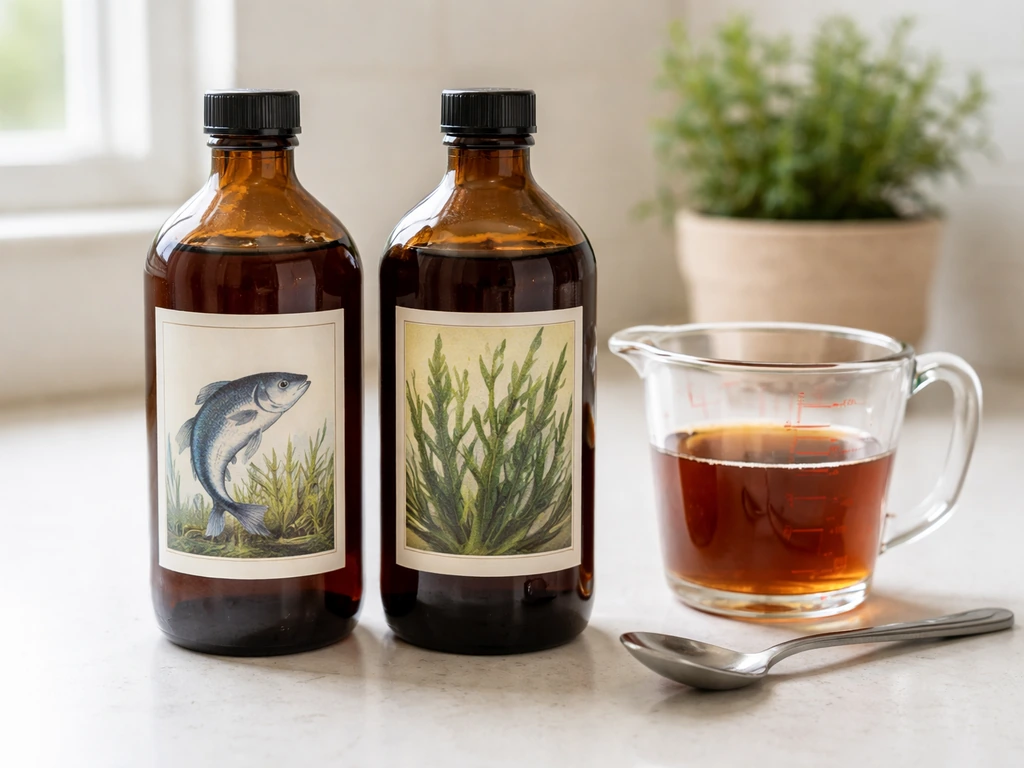
- Fish emulsion (typically 5-1-1 or similar): fast nitrogen source, good for veg. Smells bad indoors, so use it early in lights-on and ventilate well.
- Liquid kelp (low NPK but rich in trace minerals and growth hormones): use throughout the grow, especially during veg and the first two weeks of flower.
- Liquid worm casting extract or actively aerated compost tea: delivers microbial life to the root zone, improves nutrient uptake. Great as a regular drench.
- Organic calcium-magnesium supplements: most organic grows need these by mid-veg; look for sources derived from crab shell, dolomite, or similar.
- Molasses (unsulfured, 0-0-5 roughly): feeds soil microbes, provides potassium and micronutrients. Use at 5 ml per liter as a soil drench, not foliar.
- Bloom-focused organic liquid blends (e.g., products with NPK around 2-8-4 or similar): use from week 1 of flower through week 6 or so.
When picking a brand, look at the ingredient list, not just the NPK numbers. Good organic liquid nutrients list real inputs: fish hydrolysate, kelp extract, crab meal extract, humic acid, and similar. Be skeptical of products with very high NPK numbers that do not specify their source. True organic concentrates tend to have modest NPK ratios because they are not synthetically concentrated.
If you are comparing this approach to growing in coco coir (which requires a full liquid nutrient program from day one since coco has no inherent fertility), soil with organic amendments is significantly more forgiving. Coco coir typically performs best when you use a complete nutrient lineup formulated for coco from day one. Soil acts as a buffer. That is a major reason many home growers prefer it, especially for their first few cycles.
Macro and micro nutrients: what you actually need to know
You do not need a chemistry degree to feed plants well, but knowing what the major nutrients do helps you read deficiency signs correctly instead of guessing. A good starting point is making sure you provide the right balance of nitrogen, phosphorus, potassium, calcium, magnesium, and key micronutrients at each growth stage. Here is a practical breakdown.
N-P-K: the big three
Nitrogen (N) drives leafy, green vegetative growth. High nitrogen in veg is normal and correct. The mistake is carrying high nitrogen into flower, where it suppresses bud development. Back off nitrogen when you flip to 12/12 or when you see the first flower sites forming.
Phosphorus (P) supports root development and is critical during the flowering phase. In organic systems, phosphorus availability depends heavily on mycorrhizal fungi in the root zone, which is one reason inoculating at transplant is worth doing. Low phosphorus in flower shows as slow bud development and sometimes purple-tinged stems.
Potassium (K) regulates water movement, enzyme activation, and overall plant vigor. It works alongside phosphorus in flower to support dense bud development. In organic soil grows, potassium can deplete faster than nitrogen because it does not bind to soil particles as strongly. Kelp meal and molasses both help top this up.
Calcium, magnesium, and the key micros
Calcium is a structural nutrient that holds cell walls together. Deficiency shows as curled new growth and brown leaf tips or edges. Indoor grows are particularly vulnerable because purified or soft water is often calcium-deficient. Dolomite lime in your base mix helps, but many growers still supplement with a cal-mag product through mid-flower.
Magnesium is central to chlorophyll production, which is why deficiency looks like interveinal chlorosis (yellowing between the veins while veins stay green) on older leaves first. It is mobile in the plant, so the plant pulls it from older tissue when stressed. A tablespoon of Epsom salts per gallon of water, applied as a soil drench, is a fast organic-compatible fix.
Iron, zinc, manganese, boron, and copper are the micros you are most likely to run into trouble with in organic soil. The most common cause of micro deficiencies is not that the nutrients are absent from the soil but that pH is wrong and the nutrients lock out. Keep your soil pH in the 6.0 to 7.0 range and most of these take care of themselves. Liquid kelp and compost teas cover the baseline micronutrient needs in most living soil setups.
Feeding schedule for indoor soil grows
This schedule assumes you started in an amended organic soil mix with worm castings, compost, dry amendments, and dolomite lime built in. Adjust based on how your plants look and how rich your starting mix is.
| Stage | Weeks | Soil Feeding Approach | Liquid Supplements (if needed) |
|---|---|---|---|
| Seedling | Weeks 1-2 | Rely on castings and compost in mix only. No additional feeding. | None. Overfeeding seedlings is the #1 beginner mistake. |
| Early veg | Weeks 3-4 | Soil amendments should cover demand. Water with plain pH-adjusted water. | Optional: light compost tea drench, dilute liquid kelp at 1/4 strength. |
| Mid-late veg | Weeks 5-8 | Top dress with worm castings and a small amount of kelp meal if growth slows. | Fish emulsion or fish hydrolysate at half-label dose every 1-2 weeks. Cal-mag if needed. |
| Transition (pre-flower) | Weeks 1-2 of 12/12 | Top dress with fish bone meal and kelp meal to load up phosphorus. | Begin organic bloom liquid at half dose. Continue cal-mag. |
| Early flower | Flower weeks 1-4 | Let amendments work. Reduce nitrogen inputs. | Organic bloom liquid at full dose. Liquid kelp once per week. Cal-mag through week 4. |
| Mid-late flower | Flower weeks 5-8 | Unsulfured molasses drench weekly to feed microbes and add K. | Continue bloom liquid. Taper cal-mag. Consider potassium supplement week 6-7. |
| Final ripening | Last 1-2 weeks | Plain pH-adjusted water only in most organic systems. | No supplements. Let soil biology finish the job. |
One thing worth emphasizing: in a true living soil or super soil setup, your feeding schedule is much simpler than in synthetic or coco grows. The soil does most of the work. You are mainly topping up with liquids when demand exceeds what the soil can deliver, not driving the whole nutrition program through a bottle.
Reading your plants: deficiency and toxicity signs
Before you add anything, always check pH first. Most nutrient problems in organic soil are lockout issues caused by pH being too high or too low, not actual nutrient absence. Garden Fertilizer Basics from the University of Maryland Extension explains that fertilizer label N-P-K numbers represent the percentages by weight of nitrogen, phosphorus expressed as P2O5, and potassium expressed as K2O fertilizer label N-P-K numbers represent the percentages by weight of nitrogen, phosphorus (P2O5), and potassium (K2O).. Fix pH before you add more product.
Common deficiency symptoms and fast fixes
| Symptom | Likely Deficiency | Quick Organic Fix |
|---|---|---|
| Overall yellowing, starting on older/lower leaves | Nitrogen (N) | Fish emulsion drench at half dose. Check pH is 6.0-7.0. |
| Interveinal yellowing on older leaves, veins stay green | Magnesium (Mg) | 1 tsp Epsom salts per gallon as soil drench, or foliar spray. |
| Purple stems, slow bud development, dark green leaves | Phosphorus (P) | Top dress fish bone meal. Check pH is not above 7.0. |
| Brown leaf edges, curling new growth | Calcium (Ca) | Cal-mag supplement. Check if using very soft/filtered water. |
| Yellowing on young leaves, new growth pale | Iron (Fe) or pH lockout | Lower pH to 6.0-6.5. Compost tea drench. |
| Slow growth, dark leaves, burnt leaf tips | Nitrogen toxicity | Flush with plain water, reduce or stop N inputs. |
| General decline, brown roots, wilting | Overwatering or root issues | Let soil dry out completely before next watering. Check drainage. |
Toxicity in organic systems is less common than in synthetic grows because organic nutrients release slowly and the soil buffers against excess. But nitrogen toxicity is still possible if you overfeed fish emulsion or start in an overly hot (too heavily amended) mix. The signs are clawing leaves that curl down, very dark green color, and slow new growth. The fix is simple: plain water for a week and no nitrogen inputs.
Best practices to avoid problems before they start
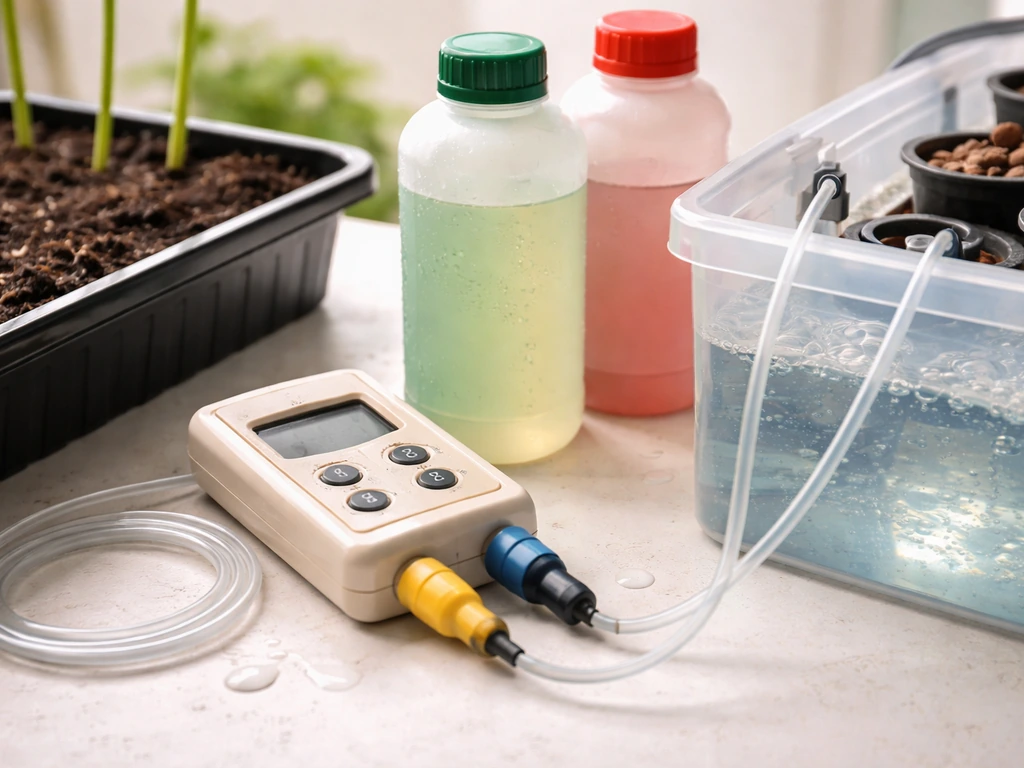
Managing pH in organic soil
The target pH range for organic indoor soil grows is 6.0 to 7.0, with 6.3 to 6.8 being the sweet spot. Outside this range, nutrients become chemically unavailable even if they are physically present in the soil. Test your water and runoff with a decent pH meter (not cheap paper strips) every week or two. If pH creeps up, a mild organic acid like dilute apple cider vinegar or a pH-Down product can bring it back. If it drops too low, dolomite lime in the base mix usually stabilizes things, but you can also top-dress with a little agricultural lime.
If you are also familiar with synthetic or hydroponic growing, you know that pH management there requires constant attention. In living organic soil, a well-built mix with dolomite lime buffers pH more naturally, so you are not adjusting every watering. That said, do not ignore it. Check runoff pH at least once a week, especially during heavy-feeding flower weeks.
EC, ppm, and whether to bother tracking them
EC (electrical conductivity) and ppm meters measure dissolved salts in water. In synthetic grows, these are essential tools you use every feed. In organic soil grows, they are less critical but still useful. Check EC of your runoff periodically. If runoff EC is very high (above 3.0 mS/cm), salts are accumulating in the soil even from organic sources. If it is very low late in veg or flower, your soil fertility is depleted and you need to supplement. Think of it as a soil health check rather than a per-watering requirement.
Water quality
Chlorine and chloramine in municipal tap water kill beneficial soil microbes, which are doing the work of feeding your plants. Let tap water sit out for 24 hours to off-gas chlorine, or use a carbon filter. Chloramine does not off-gas and needs a filter to remove. If your water is very soft (very low mineral content), you may need to supplement calcium and magnesium more aggressively than growers using hard well water. If your water is very hard (high calcium/magnesium/bicarbonate), your pH will tend to climb over time, and you may need to correct it more often.
Flushing in organic systems: do you even need to?
In synthetic grows, flushing with plain water before harvest is standard practice to clear accumulated salts. In organic living soil grows, the question is more nuanced. True organic nutrients do not accumulate in the same ionic salt form as synthetic ones do. If you have been feeding with fish emulsion and compost teas, there are no significant salt deposits to clear out. USDA ARS also notes that supplemental nutrients in compost tea can help both beneficial microbes and pathogens grow, so final tea testing for pathogen absence may be needed compost teas. Most experienced organic soil growers simply taper off all supplemental feeding in the final one to two weeks and water only with plain pH-adjusted water. That is enough to let the plant use up remaining reserves and finish cleanly. You do not need a seven-day flush.
The exception is if you have been using higher-dose liquid organic concentrates late into flower and see elevated runoff EC. In that case, a light plain-water rinse over a couple of waterings before harvest makes sense. But it is not the mandatory protocol it is in synthetic or coco grows.
Watering rhythm matters as much as nutrition
Overwatering is the single most common cause of nutrient problems in indoor soil grows, because waterlogged soil suffocates the microbial life that makes organic nutrients available. The general rule is to water when the top inch or two of soil feels dry, and water until you see roughly 10 to 20 percent runoff. Then let the pot dry down before watering again. Lift your pots to feel their weight. You get a feel for it fast, and it is more reliable than any scheduled interval.
Get these fundamentals right (a living soil, the right dry amendments at the start, targeted liquid supplements by stage, and consistent pH and watering practice) and organic indoor growing becomes dramatically less stressful than chasing problems with bottles of synthetic nutrients. The soil does most of the work. Your job is to keep the biology happy and pay attention to what the plants are telling you. If you want the best cannabis grow nutrients, focus on building a living soil base first, then use targeted liquid supplements only when plants need them.
FAQ
What’s the quickest way to tell if my indoor soil has enough fertility before I start adding organic nutrients?
Run a simple “feed test” by starting a small section of your next batch with your base soil only (compost, castings, and dry meals), then watch the first 2 to 3 weeks. If leaves stay consistently green and new growth is steady, your baseline is probably adequate, and you can delay liquids until early flower rather than starting a weekly routine.
Can I reuse the same soil for multiple indoor grows if I’m using worm castings and compost?
Yes, but you should recondition it. Remove roots, let it dry, then top-dress with fresh compost and worm castings, and recheck pH. If the soil is compacted or smells sour and anaerobic, discard it, because compacted or biologically damaged soil makes organic nutrients stall.
How often should I check pH and what exact water should I measure?
Check both input water and runoff pH, especially once you add any liquids. Measuring only your reservoir can hide lockout, since runoff shows what the soil biology and buffering are actually doing under your feeding and watering pattern.
Do I still need to inoculate with mycorrhizae if I use compost and worm castings?
Not always, but it’s a useful insurance step. Castings and compost often include microbes, yet mycorrhizal coverage can be uneven. If you are seeing weak root structure, slow uptake in early veg, or delayed flowering, transplant inoculation can improve phosphorus acquisition.
How do I avoid overdoing worm castings, since more sounds better?
Limit castings to your mix targets, around 10 to 20% by volume, because castings are dense and can reduce drainage and aeration. If your pot stays wet too long or you smell ammonia or rot, you likely added too much or mixed it too wet, and the fix is to improve structure, not to add more nutrients.
What’s the difference between a nutrient deficiency and a pH lockout, and how can I tell quickly?
Deficiency usually progresses from consistent weak growth with matching patterns, while lockout often causes broad color changes without improving after mild feeding. A practical approach is to check pH first (soil and runoff), then correct pH before adding more product, because in organic systems the nutrient source is often present but inaccessible.
Is dolomite lime enough for calcium and magnesium, or should I buy cal-mag?
Dolomite lime helps, but it is not instant and it depends on your soil start and water chemistry. If you’re using purified or very soft water, or you see recurring calcium shortage signs in mid to late flower, a targeted cal-mag supplement is often more effective than trying to rely only on lime buffering.
Can I use agricultural lime instead of dolomite lime if I already have magnesium in my soil mix?
Sometimes, but be careful. Agricultural lime can raise pH effectively while dolomite lime supplies magnesium. If your mix or water is already low in magnesium, using non-dolomite lime can worsen an Mg issue, so it’s better to choose based on your magnesium situation and then confirm with pH and plant response.
Should I use compost tea in place of fish emulsion or kelp meal?
They can complement, but they are not always a direct swap. Compost teas vary widely in strength and may not reliably supply the same nutrients at the same stage as a consistent dry amendment. If you use teas, treat them as supplemental liquids, not the sole foundation, and watch for inconsistency in growth.
What if my runoff EC is high, even though I’m using organic fertilizers?
High runoff EC usually means salts are accumulating from the liquid inputs or the soil is not drying down enough for microbes to cycle nutrients. Pause heavy liquid feeding, water with plain pH-adjusted water, and make sure your soil is draining and aerating correctly. If runoff stays high for multiple waterings, consider refreshing the mix next cycle.
How should I water to prevent nutrient problems in a living soil, without sticking to a rigid schedule?
Use a physical check: water when the top 1 to 2 inches are dry and water until you see about 10 to 20% runoff, then let the pot dry down. Pot weight is more reliable than calendar timing indoors, because temperature, light intensity, and plant size change daily water demand.
Do I need to “flush” before harvest if I’m growing in organic soil?
Usually no. In living organic soil, most experienced growers taper off supplemental feeding and water with plain pH-adjusted water for the last 1 to 2 weeks. Do a light rinse only if you see elevated runoff EC late in flower from higher-dose liquids.
What are the most common mistakes when buying “organic” nutrients for indoor soil?
Avoid products that only show NPK numbers without specifying organic ingredients, and be cautious with very concentrated liquids that can cause nitrogen excess in a rich base. Also confirm your product fits soil biology, because some “organic” labeled items behave more like fast salts and can overwhelm the system you built.