Hops need six core things to thrive: full sun (at least 6 to 8 hours daily), a tall vertical structure to climb (15 to 20 feet), well-draining slightly acidic soil or a nutrient-rich soilless medium, consistent moisture without waterlogging, balanced nitrogen-forward feeding during vegetative growth, and a climate with a genuine cold dormancy period each winter. Get those six right and hops are actually one of the most vigorous plants you can grow, capable of putting on a foot of new growth per day at peak season.
What Do Hops Need to Grow Setup Guide for Soil and Hydro

Marcus Holloway
7 May 2026
What hops are and what success actually looks like
Hops (Humulus lupulus) are herbaceous perennial bines, not vines. That distinction matters because bines climb by wrapping their entire stem around a support structure using stiff, downward-pointing hairs, rather than using tendrils or suction like true vines. Each spring the above-ground growth dies back, but the crown and rhizome system underground survives and sends up new bines the following year. A healthy, established plant can live and produce for 25 or more years.
Success in year one looks different from year three. First-year plants are building root mass and crown energy, so you'll see vigorous bine growth but modest cone production, and that's completely normal. By year two and especially year three, a well-sited hop plant should be producing harvestable cone yields. For a home grower, a mature hill of hops in good conditions will typically yield between 1 and 2 pounds of dried cones per plant, with productive varieties like Cascade routinely hitting the higher end.
Site and light: where to put your hops
Outdoors, hops want a south-facing exposure (in the Northern Hemisphere) with as much direct sun as possible. The minimum is 6 hours, but 8 or more is where you see the best cone development. They're photoperiod-sensitive plants, meaning day length triggers their transition from vegetative growth into cone production, typically when day length begins shortening after the summer solstice. This is why hops generally perform better between roughly 35 and 55 degrees latitude. Growers in hotter southern climates can still grow them, but intense afternoon heat stresses the plant, so some afternoon shade becomes acceptable as a trade-off there.
Indoors, hops are rarely grown to full production scale because the trellis requirements are impractical, but container-grown hops for ornamental use or small harvests are absolutely doable. To grow hemp successfully, you will need the right cultivation inputs, including suitable varieties, a legal setup, and appropriate growing equipment like lighting, irrigation, and climate control depending on whether you grow indoors or outdoors what equipment is needed to grow hemp. For indoor vegetative growth, you need high-output lighting. Target at least 400 to 600 watts of HID or equivalent LED coverage per plant. For photoperiod triggering indoors, you'd manipulate the light cycle down to 12 hours to initiate coning, similar to how you'd manage other photoperiod-sensitive crops.
Climate, spacing, and the trellis system that makes or breaks your harvest
Climate requirements
Hops are cold-hardy perennials that need winter dormancy to reset their annual growth cycle. Most commercial varieties are hardy to USDA zones 4 through 8. They tolerate frost well in dormancy but young spring shoots can be damaged by a hard late freeze, so timing matters in colder climates. During the growing season, they prefer daytime temperatures between 50°F and 80°F (10°C to 27°C). Sustained heat above 85 to 90°F slows growth, stresses the cones, and increases disease pressure, particularly downy mildew.
Spacing your plants
Give each hill at least 3 to 5 feet of spacing within a row and 8 feet between rows if you're growing multiple varieties. Rhizomes from the same variety can share a hill but should be spaced 2 feet apart within it. Crowding creates humidity pockets around the foliage, which is the fastest way to invite downy or powdery mildew. Airflow is almost as important as sunlight for long-term plant health.
Building your trellis
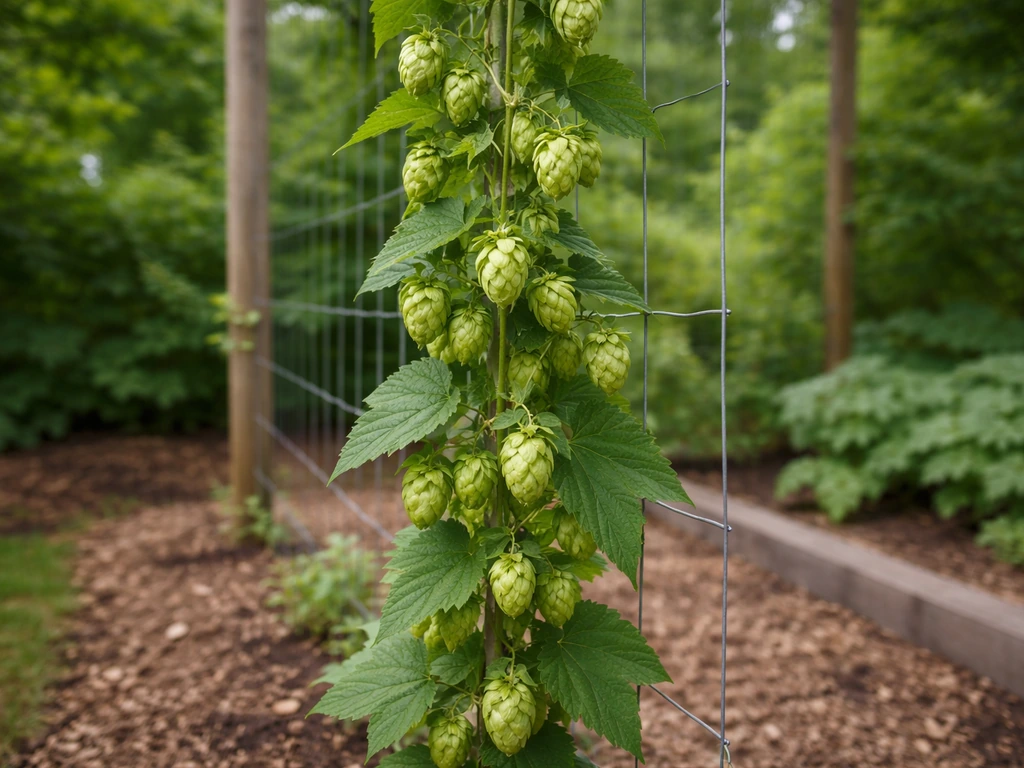
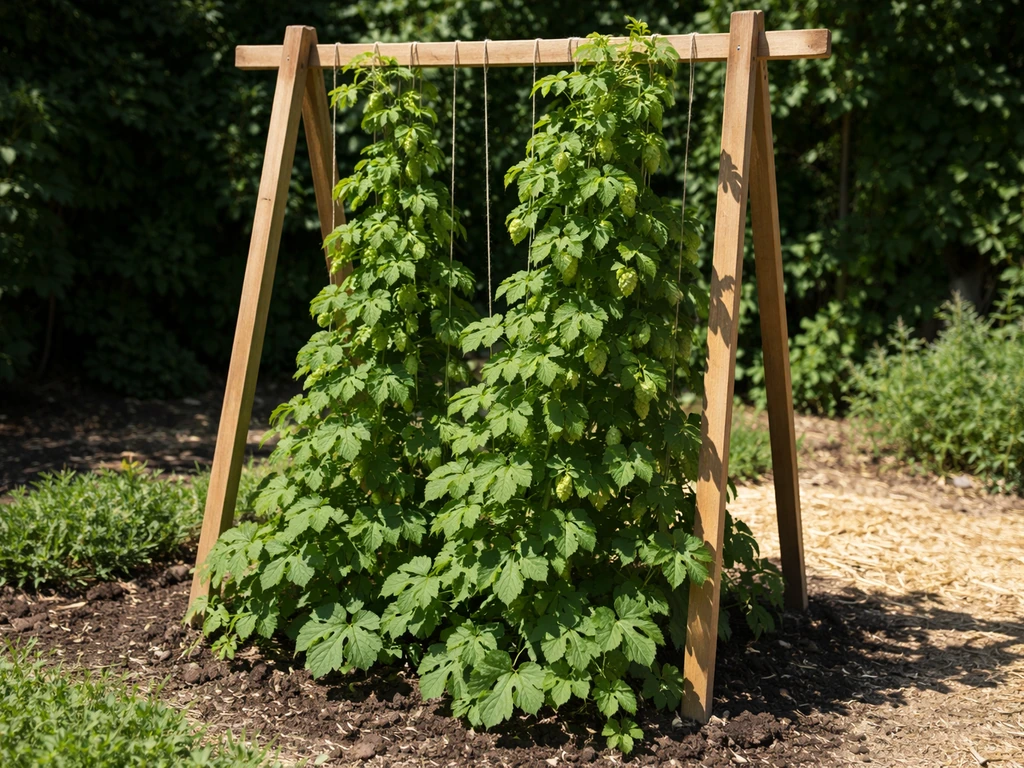
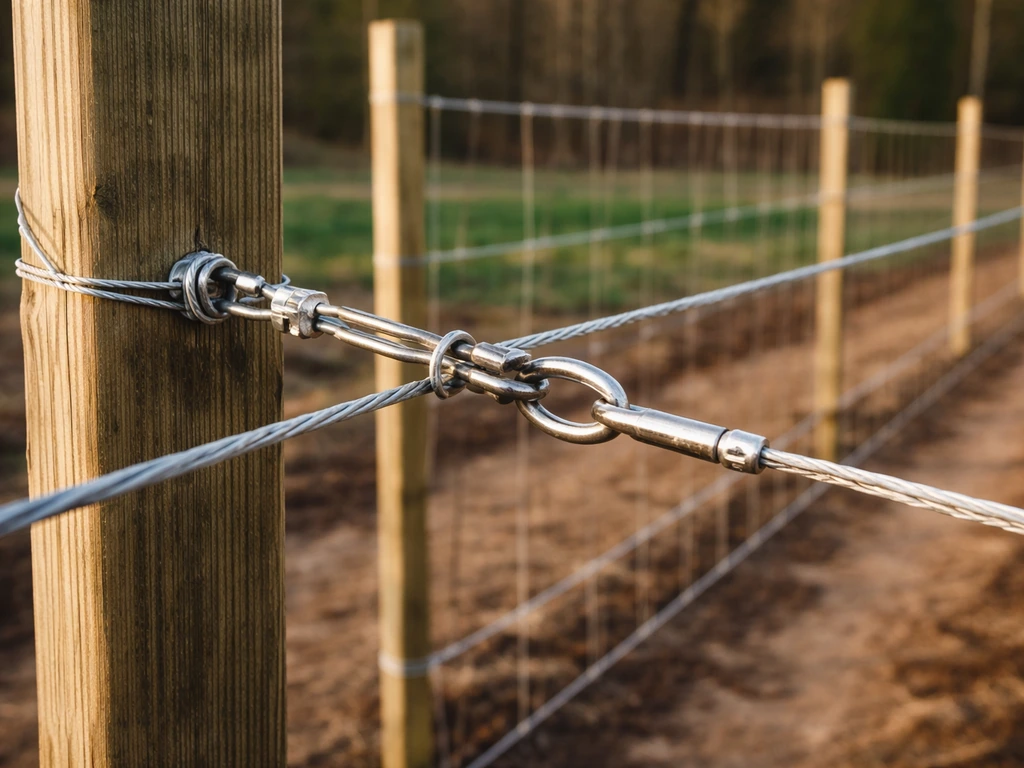
The trellis is non-negotiable. Commercial hopyard trellises run 18 to 20 feet tall, but a home grower can achieve solid yields on a 12 to 15-foot structure. Use heavy-gauge galvanized wire or rope strung from a sturdy overhead anchor point down to a stake near the base of each plant. Coir twine, jute rope, or UV-resistant polypropylene twine all work for the individual bine strings, and you'll want roughly 2 to 3 strings per hill since you'll only train 2 to 3 bines per string.
Training timing matters more than most beginners expect. Research from Michigan State University Extension found that training date, in one study ranging from early May through early June, measurably affected plant structure and final cone yield. The practical takeaway: train your bines onto the trellis early, as soon as they're 12 to 18 inches long and the risk of a hard freeze has passed. Wrap them clockwise (in the Northern Hemisphere) around the string, following the natural direction they'll try to grow on their own. Early, correct training means the plant spends energy climbing and branching productively rather than tangling at ground level.
Soil vs. hydroponics: choosing your growing medium
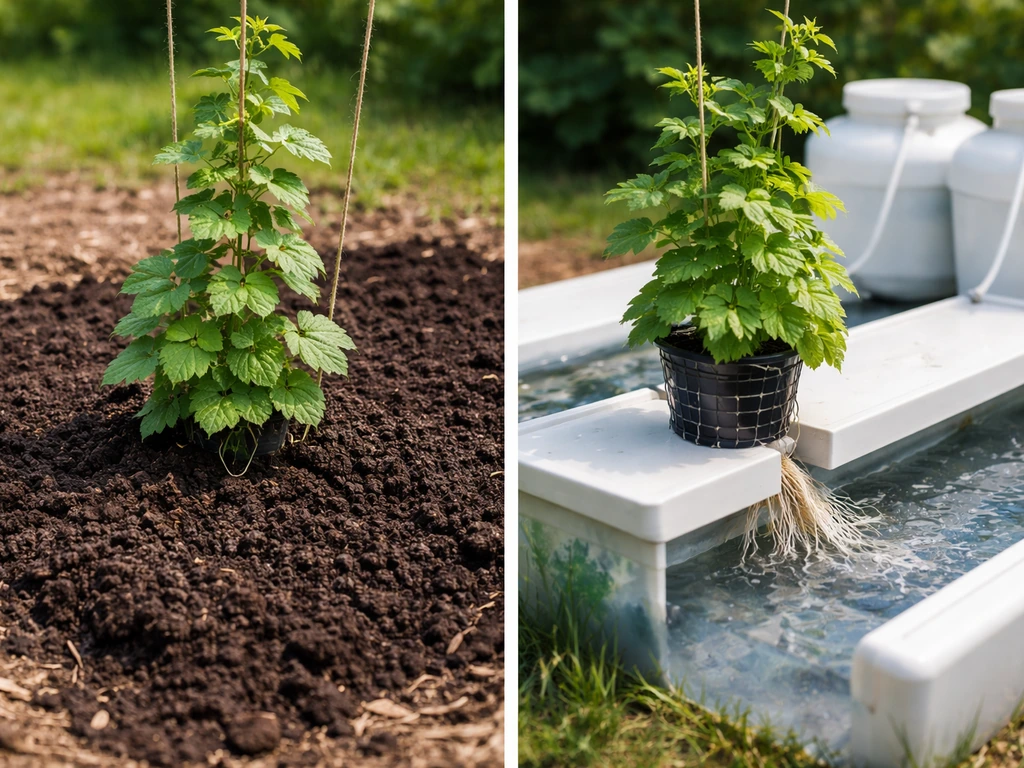
Most hop growers use in-ground soil, and for good reason: the deep root run that develops over years in native soil is part of what makes hops so productive and long-lived. But container soil and hydroponic setups have genuine use cases, especially for renters, indoor growers, or anyone who wants tighter control over nutrient delivery.
If you are wondering why grow hydroponically, it usually comes down to giving you tighter control over nutrients, water, and root-zone conditions container soil and hydroponic setups. If you want to move away from traditional soil, you can reuse hemp grow mats as a reusable soilless growing medium, but make sure they’re clean and still draining well before planting again.
In a hydroponic setup, you generally do not need in-ground soil or compost since the nutrient solution does the job.
| Setup | Best For | Key Advantage | Key Challenge |
|---|---|---|---|
| In-ground soil | Outdoor long-term production | Deep root development, low maintenance once established | Hard to adjust pH/nutrients after planting; drainage depends on native soil |
| Container with potting mix | Patios, renters, small-space growers | Full control over medium and drainage; portable | Dries out fast in summer heat; needs frequent watering and feeding |
| Soilless mix (coco/perlite) | Indoor setups or serious home growers | Excellent drainage, easy pH/EC monitoring | Requires complete liquid nutrient program from day one |
| Deep water culture / NFT hydro | Experimental or controlled environments | Fast vegetative growth, precise nutrient delivery | Impractical trellis scaling indoors; requires system management knowledge |
For in-ground soil, amend heavily before planting if your native soil is compacted or drains poorly. Hops want a loamy, well-draining medium with a pH between 6.0 and 8.0, with 6.5 to 7.5 being the sweet spot. Work in compost to a depth of at least 18 inches since those roots will go deep. For containers, a minimum 15-gallon pot is workable for one hill, but 25 to 30 gallons is significantly better for a second-year or established plant. Use a quality potting mix blended with 20 to 30% perlite to keep drainage strong.
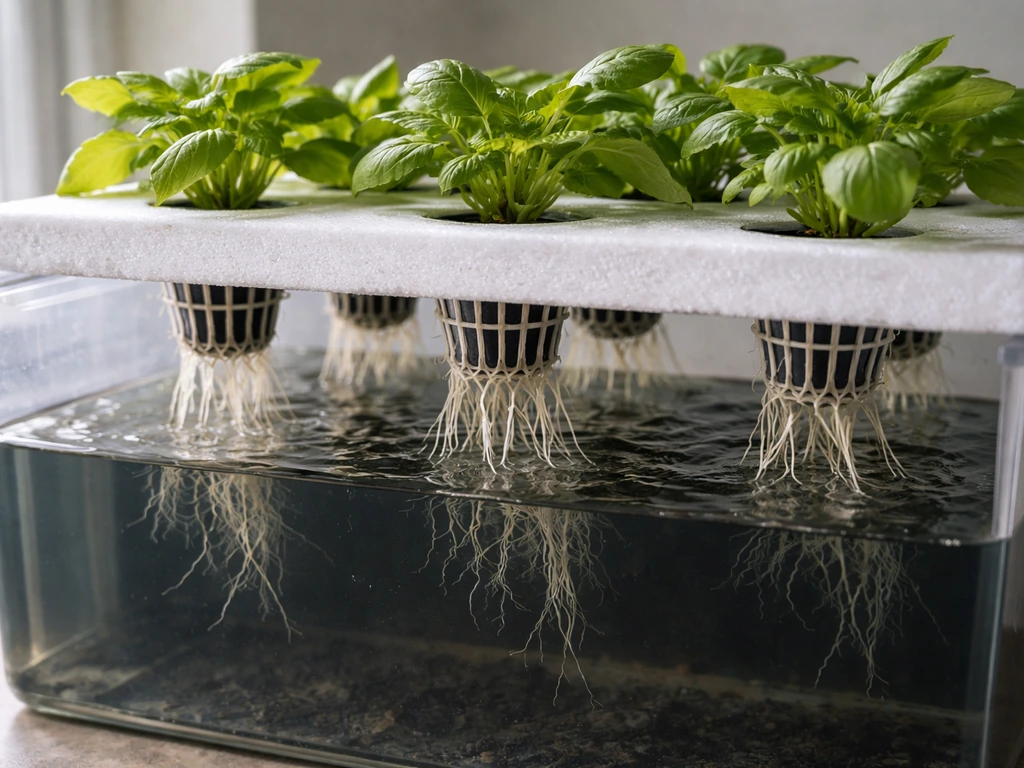
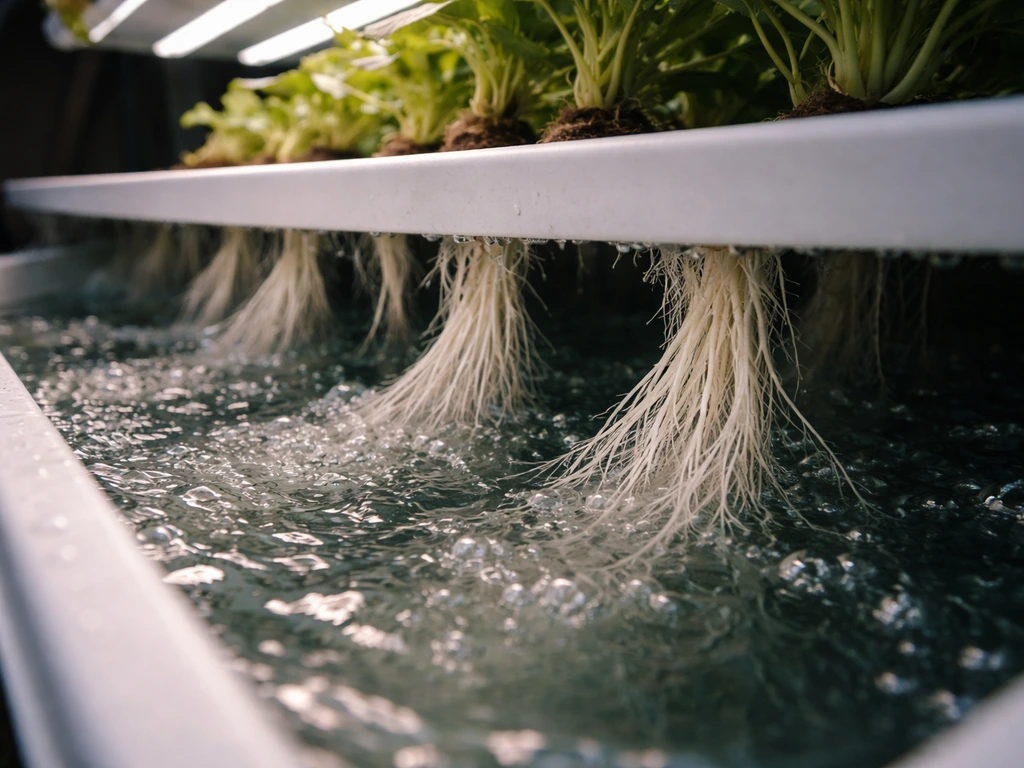
If you're going soilless or hydroponic, a coco coir and perlite blend (70/30 ratio) is a practical starting point that behaves predictably with standard liquid nutrients. Deep water culture and NFT systems can grow hops in vegetative phase with impressive speed, which is useful for comparing plant performance to soil grows or for producing ornamental container hops indoors.
If you want to can you grow grains hydroponically, use a similar soilless approach and pay close attention to nutrient strength, light, and oxygenation in the root zone hydroponic hops. If you want to grow hydroponics without nutrients, you still need a “food source” for the plants, such as fish waste water or a properly managed aquaponics system.
Keep in mind that hydroponic hops are a very different management challenge from more common hydroponic crops, and the trellis logistics alone make full indoor production a serious commitment.
Water and nutrient requirements
Watering
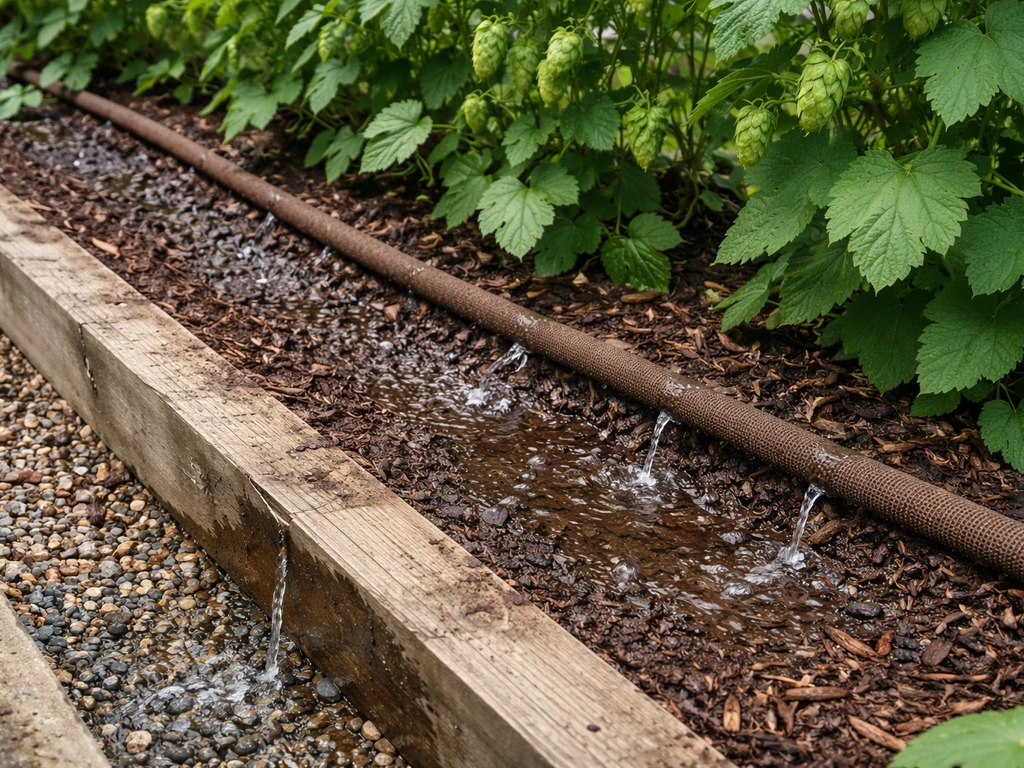
Hops want consistent moisture but hate sitting in saturated soil. In-ground plants in most temperate climates need supplemental watering during dry spells, targeting about 1 to 1.5 inches of water per week during peak growth. Container plants need checking daily in summer heat, and a 15-gallon pot can dry out in 24 hours when a bine is running full speed up a trellis. Drip irrigation at the base of the plant is ideal for both efficiency and disease prevention since wet foliage is an open invitation to mildew.
Feeding schedule and fertility targets
New shootss emerging from rhizomes don't need immediate nitrogen because the rhizome itself contains stored energy reserves to fuel early growth. Pushing nitrogen too hard at emergence can actually cause excessive vegetative tissue at the expense of root establishment. Hold off on heavy fertilization for the first 2 to 3 weeks after emergence.
Once plants are actively climbing, typically 4 to 6 weeks after emergence, begin a nitrogen-forward feeding program. Commercial hop fields apply nitrogen in split doses totaling 75 to 150 lbs per acre across the season, but for a home grower, a simpler guide is to use a balanced fertilizer (like a 10-10-10 or similar NPK) at planting, then transition to a higher-nitrogen liquid feed once vegetative growth kicks into high gear. A weekly or biweekly application of a water-soluble fertilizer at roughly half the labeled rate is a safer starting point than full rate, especially in containers.
- Weeks 1 to 3 after emergence: no supplemental feeding; rely on soil or rhizome reserves
- Weeks 4 to 8 (active bine growth): begin nitrogen-forward feeding; target 100 to 150 ppm N in solution for hydro/soilless setups
- Weeks 8 to 12 (pre-cone initiation): reduce nitrogen slightly, increase potassium and phosphorus to support cone development
- Cone ripening phase: minimal feeding; focus on consistent moisture and let the plant finish naturally
- Post-harvest: a light compost topdress or balanced fertilizer application helps the crown store energy for winter
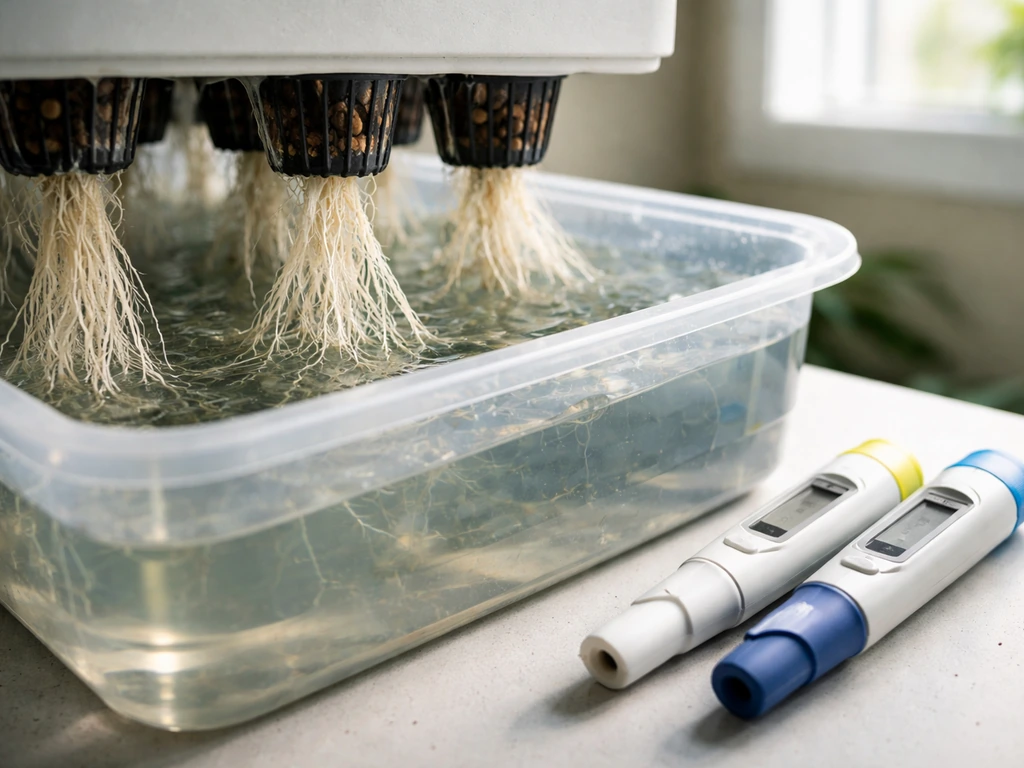
For soilless or hydroponic setups, maintain a solution pH between 5.8 and 6.2 and target an EC of 1.5 to 2.5 mS/cm during peak vegetative growth, dropping to 1.2 to 1.8 as cones develop. These are the same general principles that apply to managing nutrients for other hydroponic crops, so if you already have a system dialed in for leafy plants or grains, the adjustment for hops is mostly about timing and N:K ratios.
Temperature, timing, and the seasonal workflow
Hops follow a predictable annual cycle, and knowing each phase helps you stay one step ahead rather than reacting to problems after the fact.
| Season / Period | What's Happening | Your Key Tasks |
|---|---|---|
| Late winter (Feb-Mar) | Dormancy; rhizome cutting season | Source or divide rhizomes; prepare planting bed or containers |
| Early spring (Mar-Apr) | First shoots emerge from crown | Select 2-3 strongest shoots per hill; remove the rest; hold off on heavy fertilizing |
| Mid-spring (Apr-May) | Bines reach 12-18 inches | Begin trellis training; wrap clockwise; start feeding program |
| Late spring to early summer (May-Jun) | Rapid bine elongation (up to 1 ft/day) | Monitor for pests; ensure trellis strings are secure; water consistently |
| Mid-summer (Jun-Jul) | Photoperiod triggers cone initiation | Shift nutrient ratio toward K and P; reduce nitrogen |
| Late summer (Aug-Sep) | Cones develop and ripen | Check cone maturity by rubbing between fingers for dryness and lupulin aroma; harvest when dry but before browning |
| Fall (Oct-Nov) | Above-ground dieback | Cut bines to 12-18 inches, then down to crown before hard frost; mulch heavily |
| Winter | Full dormancy | Leave roots undisturbed; mulch in cold climates; plan next season |
Rhizomes cut from dormant crowns in late winter to early spring establish fastest when planted with the buds facing up, about 1 to 2 inches deep. In colder climates, starting rhizomes indoors in 1-gallon containers 4 to 6 weeks before your last frost date gives them a head start and lets you harden them off before transplanting. For harvest, the field test recommended by extension programs is the finger-rub method: pinch a cone and rub it between your fingers. A ripe cone should feel dry and slightly papery, smell intensely aromatic, and release yellow lupulin powder easily. Soft or moist cones need more time.
Troubleshooting the most common hop problems
Slow or weak growth
If bines are emerging slowly or looking spindly, the most likely culprits are insufficient light, cold soil temperatures (below 50°F slows root activity significantly), or a rhizome that was planted too deep or upside down. Check your site exposure first. If you're in a container, check whether the root zone temperature is above 55°F before pushing nutrients. Weak growth in an established plant that was productive before often points to crown overcrowding, in which case dividing the root mass in early spring every 3 to 5 years is the fix.
Yellowing leaves
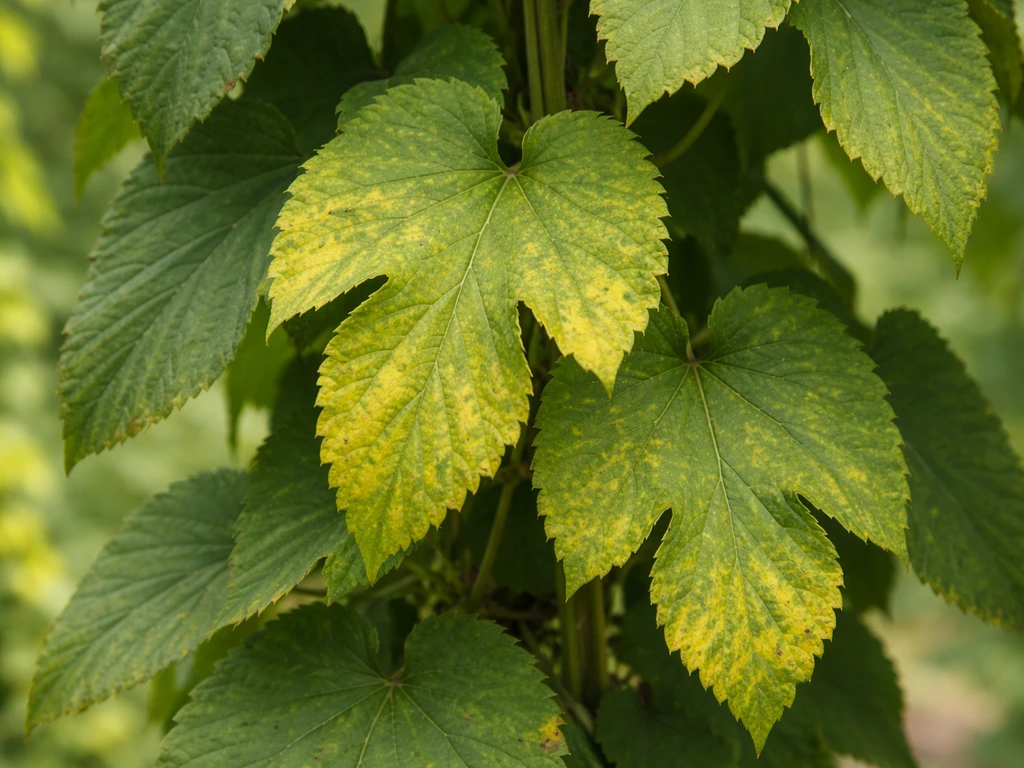
Yellow leaves in early season on lower, older foliage usually indicate nitrogen deficiency. If the yellowing is interveinal (green veins, yellow tissue between them), you're likely looking at iron or magnesium deficiency, often caused by pH drift above 7.5 that locks out micronutrients. In hydroponic or soilless setups, check and correct pH before adding more nutrients. In soil, a dose of chelated iron or Epsom salt (magnesium sulfate) at 1 tablespoon per gallon of water can provide quick relief while you address the underlying pH issue.
Mildew problems
Downy mildew (Pseudoperonospora humuli) is the single biggest disease threat to hops and shows up as gray-green or yellow patches on upper leaf surfaces with a gray or purple fuzz on the underside. It thrives in cool, wet conditions, especially when airflow is poor. Powdery mildew is a separate issue that appears as white powdery coating on leaves and cones in warm, dry-ish conditions. Both are easier to prevent than cure: space your plants well, avoid overhead irrigation, train bines so foliage gets airflow, and consider a preventive copper-based or potassium bicarbonate spray during high-risk humid periods. Once either mildew is entrenched in a canopy, removing infected tissue and improving airflow are the first physical steps before considering a fungicide.
Two-spotted spider mites
Two-spotted spider mites (Tetranychus urticae) are the most damaging pest you'll encounter on hops, and they're easy to miss until the infestation is serious. Early signs include light stippling or bronzing on leaf surfaces. Flip a leaf and look for tiny moving dots and fine webbing on the underside. Mite populations explode in hot, dry conditions and can devastate cone yield and quality quickly. Miticides labeled for spider mites can help in severe cases, but biological controls like predatory mites (Phytoseiulus persimilis) are very effective and a better long-term strategy than repeated chemical applications. Keeping plants well-watered and not stressed also reduces mite vulnerability since stressed plants are always more attractive targets.
Overwatering and root rot
In containers especially, overwatering is more common than underwatering. Symptoms look like nutrient deficiency because the root damage from oxygen-deprived, soggy soil prevents uptake. The fix is to let the medium dry out partially between waterings and ensure drainage holes aren't blocked. In soilless and hydroponic setups, root rot (Pythium spp.) can move fast in warm reservoir temperatures. Keep reservoir temps below 72°F, add beneficial bacteria products (like those containing Bacillus subtilis or Trichoderma), and increase dissolved oxygen through air stones to create an environment where Pythium struggles to establish.
The pattern across most hop problems is the same: get the fundamentals right (light, drainage, airflow, correct pH) and the plant's natural vigor handles the rest. Hops aren't fragile once established. The first season is the steepest learning curve, and most issues that show up in year one are setup and placement mistakes that are easy to correct before year two.
FAQ
What if I don’t have 6 to 8 hours of full sun for my hops?
Yes, but expect slower or uneven growth. Hops are most productive with sustained full sun, if you only have 3 to 5 hours you may still get bines, but cone development often lags and yields drop, especially in containers where root stress compounds.
Can hops grow on a shorter trellis if my yard is limited?
Usually, no. You can support bines with 8 to 12 feet outdoors, but if you do not have enough vertical height you risk shorter bines, fewer side branches higher up, and lower cone density. If your climate is mild, prioritize trellis height and spacing over squeezing plants into less sun.
When should I start fertilizing, and do I keep feeding after cones appear?
Don’t wait until you see cones to adjust water and nutrients. Start with correct drainage and consistent moisture, then begin nitrogen-forward feeding only once the plant is actively climbing (about 4 to 6 weeks after emergence). Late or continuous heavy nitrogen can increase vegetative growth and reduce cone quality.
What do I do if my hop leaves show nutrient symptoms but my schedule and fertilizer seem right?
If pH is staying above your target, nutrient lockout is common. In soil, fix the pH drift first (often due to runoff, alkalinity, or over-liming). In soilless systems, correct pH before increasing nutrient strength, then re-check after 12 to 24 hours to confirm the correction holds.
Can warm air still fail to produce hop growth if the soil or roots are cold?
It depends on how warm your roots are. In cool weather, you can stunt growth even if air temperatures look fine. For containers, check root-zone temperature, if it is below about 55°F, wait to push nutrients and growth until the root zone warms consistently.
How often should I retrain bines, and what’s the most common training mistake?
Train early and then keep training as bines lengthen. Aim to wrap clockwise around the string in the Northern Hemisphere and guide the bine every few inches, if you wait until the bine tangles or lays on the ground, you lose productive climbing energy and airflow.
If my bines look spindly, does that mean I need more nitrogen immediately?
Not always, and “more fertilizer” is a common mistake. In many cases, spindly growth is from insufficient light, cold roots, or planting depth errors, not lack of nitrogen. Confirm those first before increasing nitrogen, and avoid heavy feeding for the first 2 to 3 weeks after emergence.
Do I need to change the light schedule indoors to get cones, or will they cone under normal lighting?
In most cases, yes. Hops are strongly tied to photoperiod for coning, so indoors you need a deliberate light cycle to trigger the transition, typically shortening to around a 12-hour day length. Long continuous light usually keeps them in vegetative mode.
What’s the difference between drought stress and overwatering in container hops?
Overwatering is a bigger issue than underwatering in many containers, saturated roots reduce oxygen and mimic nutrient deficiency. Let the medium partially dry between waterings, confirm the pot drains freely, and use drip irrigation at the base outdoors to keep foliage dry.
How do I know when hop cones are truly ready to harvest?
Not a lot, and maturity matters. A cone is usually ready when it feels dry and slightly papery, releases lupulin powder readily, and smells strongly aromatic. If cones are soft or moist, give them more time on the bine rather than harvesting early.
Should I divide my hop plant, and when is the best time?
Yes, dividing can help if you see declining vigor. Crowding of the crown and root mass can create poor airflow and weaker growth. Divide in early spring every 3 to 5 years when the plant is dormant or just restarting, then replant promptly at the correct depth.
If I get downy mildew, should I spray right away or focus on pruning and airflow first?
It can be, especially during cool, wet periods with dense canopy. If you already see downy mildew, remove infected leaves and improve airflow, then consider preventive sprays during high-risk humid stretches. Avoid overhead watering, spacing and trellis airflow are your biggest first line defenses.
How can I prevent spider mites without constantly using miticides?
Commonly, stress reduction and humidity control help. Spider mites surge when conditions are hot and dry, and they can be hard to spot until damage is visible. In containers especially, keep watering consistent, inspect undersides of leaves, and consider predatory mite releases rather than repeated miticide cycles for long-term control.