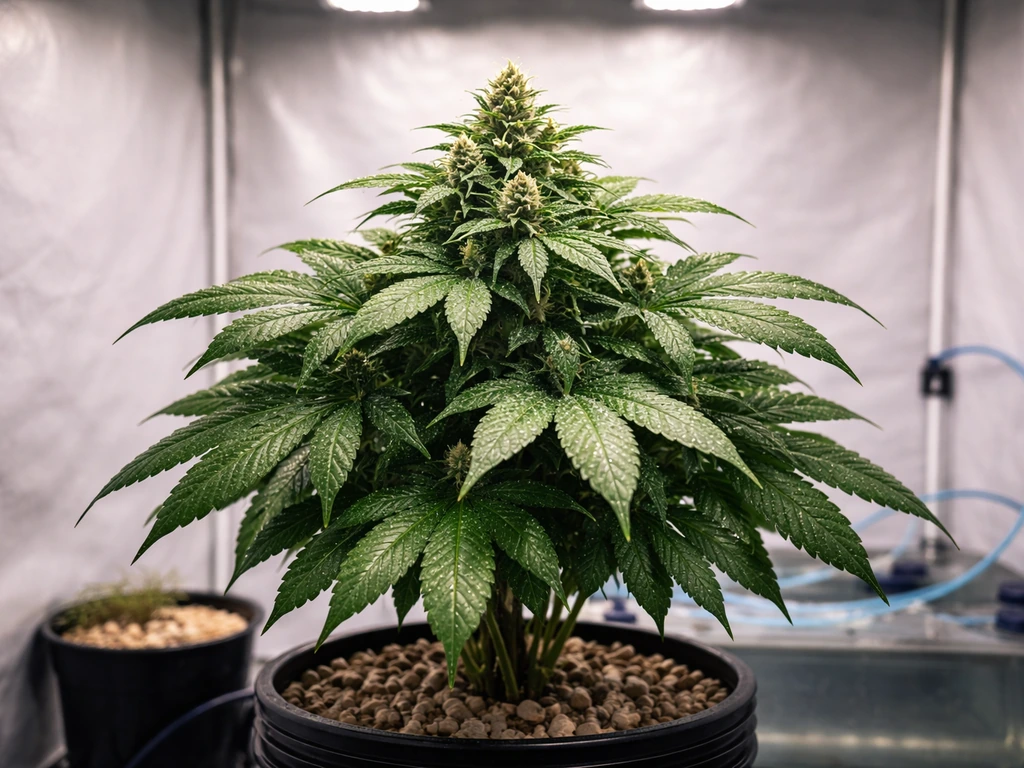
Growing autoflowers in DWC (deep water culture) is one of the fastest ways to go from seed to harvest indoors. You can realistically pull a finished plant in 70 to 90 days, with root-to-tip growth that soil simply can't match. The trade-off is that DWC is less forgiving than soil: pH swings hit faster, root problems escalate quickly, and you're managing a liquid environment instead of a buffered medium. If you stay on top of your reservoir, though, the results are consistently bigger, faster, and cleaner than most organic soil runs.
How to Grow Autoflowers in DWC: Setup to Harvest Guide

Marcus Holloway
13 May 2026
What DWC actually does for (and to) autoflowers
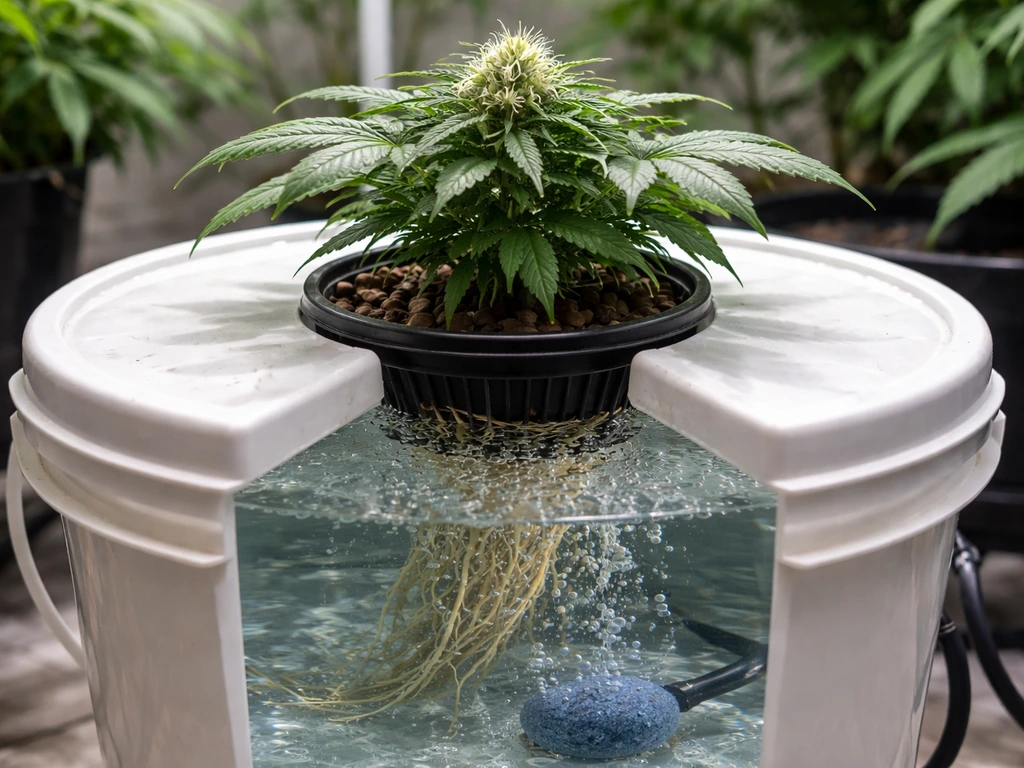
In DWC, your plant's roots hang directly in an oxygenated nutrient solution. Because the roots have constant access to both water and dissolved oxygen, they don't need to search for food the way they do in soil. That direct-feed environment is why DWC autoflowers tend to grow faster and pack on more weight during their short vegetative window. If you specifically want how to grow bigger autoflowers, the same DWC principles apply: stabilize pH, keep nutrients on target for each stage, and prevent oxygen or temperature problems early. Most growers see noticeably shorter internodes, more lateral branching, and heavier buds compared to the same strain in a pot.
The flip side is that autos are already time-compressed plants. They don't have a long veg phase to recover from a problem. A two-day pH swing or a root rot outbreak can wipe out a week of growth you'll never get back. So while DWC rewards you with speed, it punishes neglect faster than soil does. The good news: once you understand the system and build a maintenance routine, those problems are very preventable.
Equipment and setup checklist before you fill the reservoir
Getting the hardware right before your seed cracks is the single biggest thing you can do to avoid preventable failures. Here's exactly what you need and why each item matters.
Reservoir and bucket
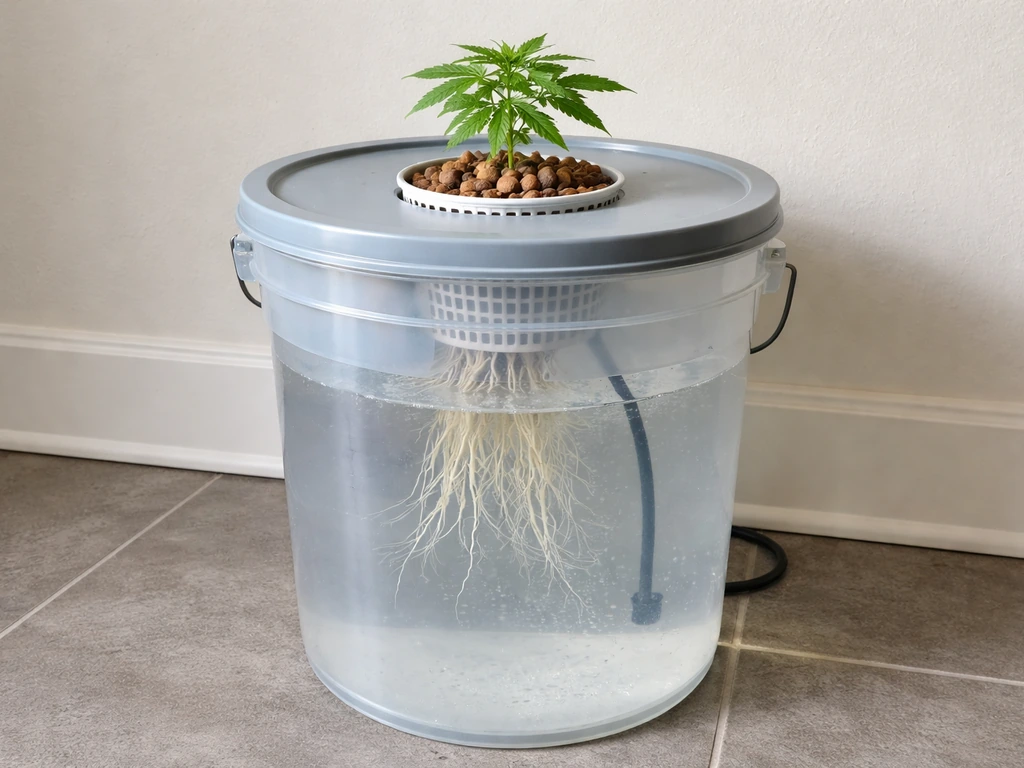
For a single autoflower, a 5-gallon bucket is the standard minimum. If you're running multiple plants or want more buffer against pH swings, go to 10-gallon buckets or a larger centralized reservoir. Bigger water volume means slower pH and EC drift, which is exactly what you want with autos. Make sure your reservoir has a bulkhead fitting or drain valve at the bottom so you can do full reservoir changes without scooping water out by hand. Opaque buckets only: any light reaching the root zone promotes algae and degrades the nutrient solution.
Air pump and air stone
Oxygenation is the entire point of DWC. Roots sitting in still water without oxygen will rot within days. You need an air pump sized to your reservoir, connected to one or more air stones sitting at the bottom of the bucket. A good target is roughly 1 to 2 liters per minute of air output per gallon of solution, sizing up as your root mass grows and displaces water volume. For DWC, HydroBuilder also recommends sizing air for vigorous fine bubbling and scaling up air output as root mass and displacement increase (for example, around 2 LPM per gallon in some cases) 1 to 2 liters per minute of air output per gallon of solution. You want vigorous, fine bubbling throughout the entire reservoir, not just in one corner. One critical detail: route your airline tubing in a loop or use a check valve so that if the pump loses power, water can't siphon back into the pump motor and destroy it. This is a cheap fix that most beginners skip until their pump dies.
Net pots and growing medium
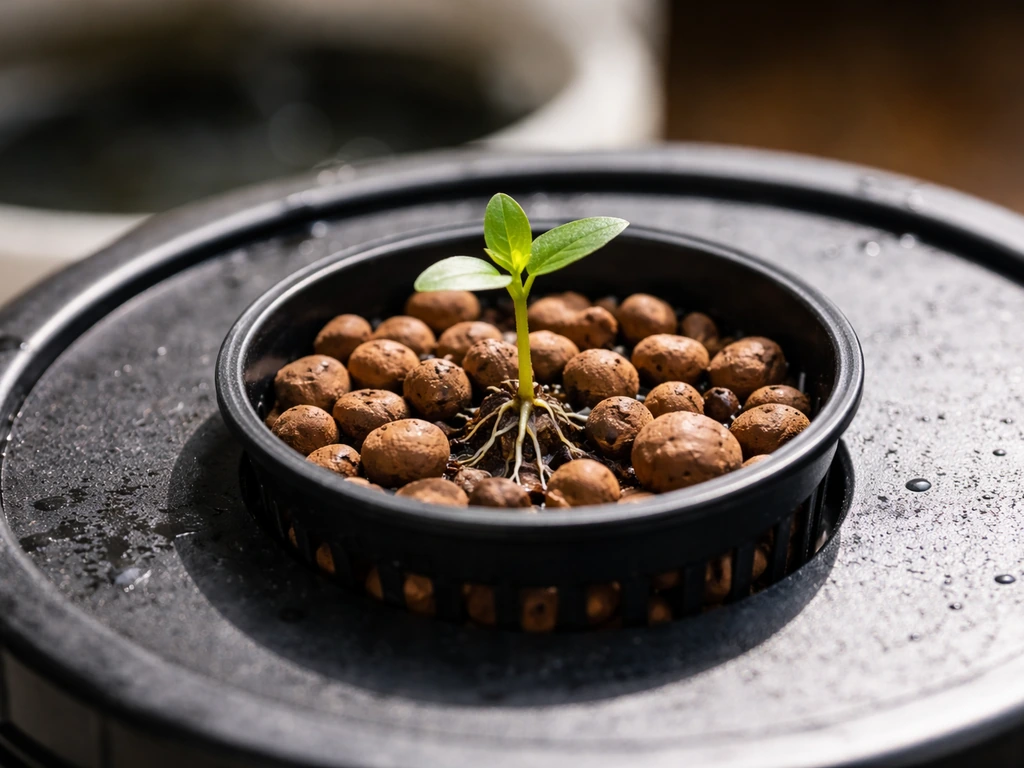
A 3-inch or 4-inch net pot sits in the lid of your bucket and holds your seedling in place. Fill it with expanded clay pebbles (hydroton), rockwool, or a combination of both. These materials anchor the plant without compacting, let roots grow downward freely, and don't harbor pathogens the way organic media can.
Lights for autoflowers
Because autoflowers flower based on age rather than light schedule, you have real flexibility here. Most DWC auto growers run an 18/6 or 20/4 light schedule from seed to harvest. To get the timing right for your specific strain, combine this with a clear grow plan that shows how to use Grow Dots for autoflowers Most DWC auto growers run an 18/6 or 20/4 light schedule. A quality LED with a full spectrum and adequate PPFD for your canopy area is the go-to in 2026. Aim for 200 to 400 PPFD during seedling, 400 to 600 during early veg, and 600 to 900 during flower. Keep lights far enough away that leaf temperature stays under 82°F.
Temperature and environment
Water temperature is the variable most DWC growers underestimate. Your nutrient solution needs to stay between 65°F and 72°F (18°C to 22°C). Above 72°F, dissolved oxygen drops sharply and pythium (root rot) thrives. If your grow space runs warm, a small aquarium chiller or ice bottles cycled through the reservoir are both legitimate fixes. Ambient air temperature should stay in the 70°F to 82°F range with good airflow and oscillating fans to prevent hot spots.
| Component | Minimum Spec | Recommended Spec |
|---|---|---|
| Bucket/Reservoir | 5 gallon per plant | 10 gallon per plant |
| Air Pump Output | 1 LPM per gallon | 2 LPM per gallon, size up as roots grow |
| Air Stone | Single disk stone | Multi-stone or ring diffuser for full coverage |
| Net Pot | 3-inch | 4-inch for larger rootball support |
| Water Temperature | Under 75°F | 65–72°F with chiller if needed |
| Grow Medium in Net Pot | Clay pebbles | Clay pebbles + rockwool cube base |
| Light Schedule (Autos) | 18/6 | 20/4 for maximum growth |
| Drain Valve | Bucket drain tap | Bulkhead fitting with ball valve |
pH, EC, and nutrient targets by stage
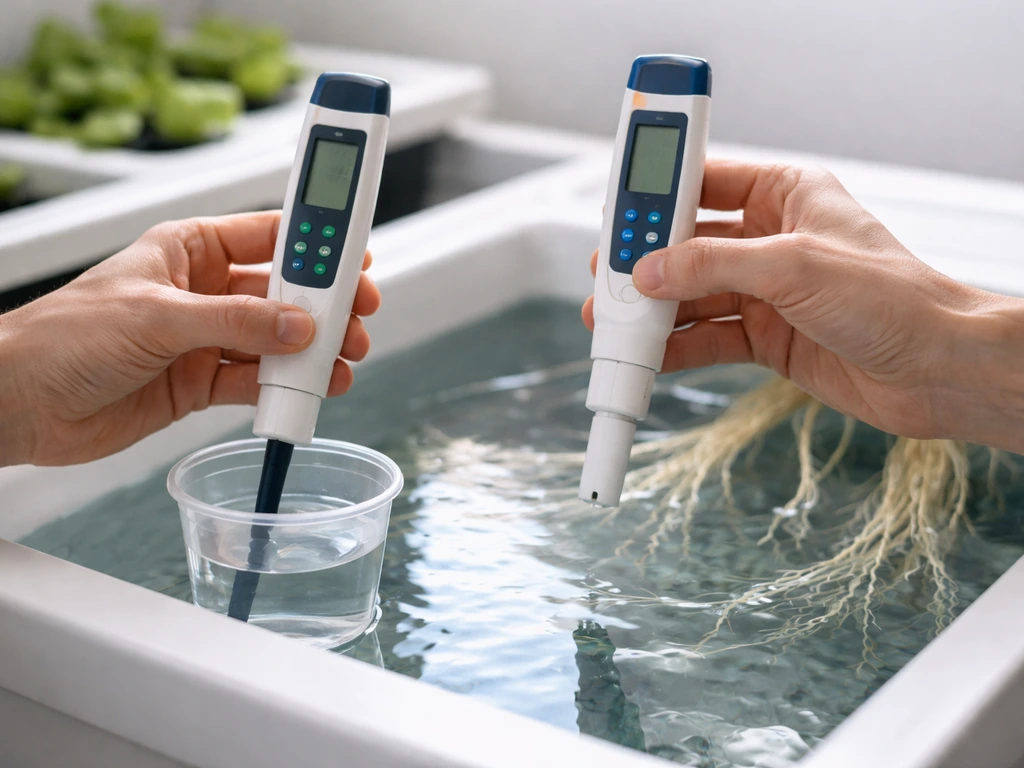
pH is the most common reason DWC grows go sideways. Even a good nutrient solution becomes useless if the pH is off, because roots can't absorb most minerals outside the optimal range. For DWC autoflowers, keep your reservoir pH between 5.8 and 6.2 at all times. Some growers let it float naturally between 5.5 and 6.1 to ensure different nutrients become available at different points, but 5.8 is your target and the number to return to after any drift.
EC (electrical conductivity) tells you how concentrated your nutrient solution is. Autoflowers are lighter feeders than photoperiod plants, so start low and build gradually. Many growers also like Dr. Earth’s approach for autoflowers, so you can pair it with the DWC nutrient schedule above and adjust strength by your EC readings Autoflowers are lighter feeders. Don't push EC the way you might with a heavy-feeding photoperiod strain in full veg.
| Growth Stage | pH Target | EC Target (mS/cm) | Notes |
|---|---|---|---|
| Seedling (Week 1–2) | 5.8–6.1 | 0.2–0.5 | Keep it very light; roots are fragile |
| Early Veg (Week 2–3) | 5.8–6.1 | 0.6–1.0 | Introduce base nutrients at half strength |
| Mid Veg (Week 3–4) | 5.8–6.2 | 1.2–1.4 | Start building EC steadily |
| Early Flower (Week 4–6) | 5.8–6.2 | 1.4–1.8 | Increase P and K, reduce N slightly |
| Peak Flower (Week 6–8) | 5.8–6.2 | 1.6–2.0 | Full bloom feed; monitor closely |
| Pre-Harvest Flush (Week 8–10) | 5.8–6.0 | 0.0–0.4 | Plain water or light flush solution |
For nutrients, any quality three-part hydroponic base (like General Hydroponics Flora Series, Athena, or similar) works well. Mix into your reservoir water in the order: micro first, then grow, then bloom. Always add nutrients to water, not water to concentrated nutrients. pH your solution after mixing, not before, because the nutrients themselves affect the final pH. Check EC and pH every day during the first grow until you understand how quickly your reservoir drifts.
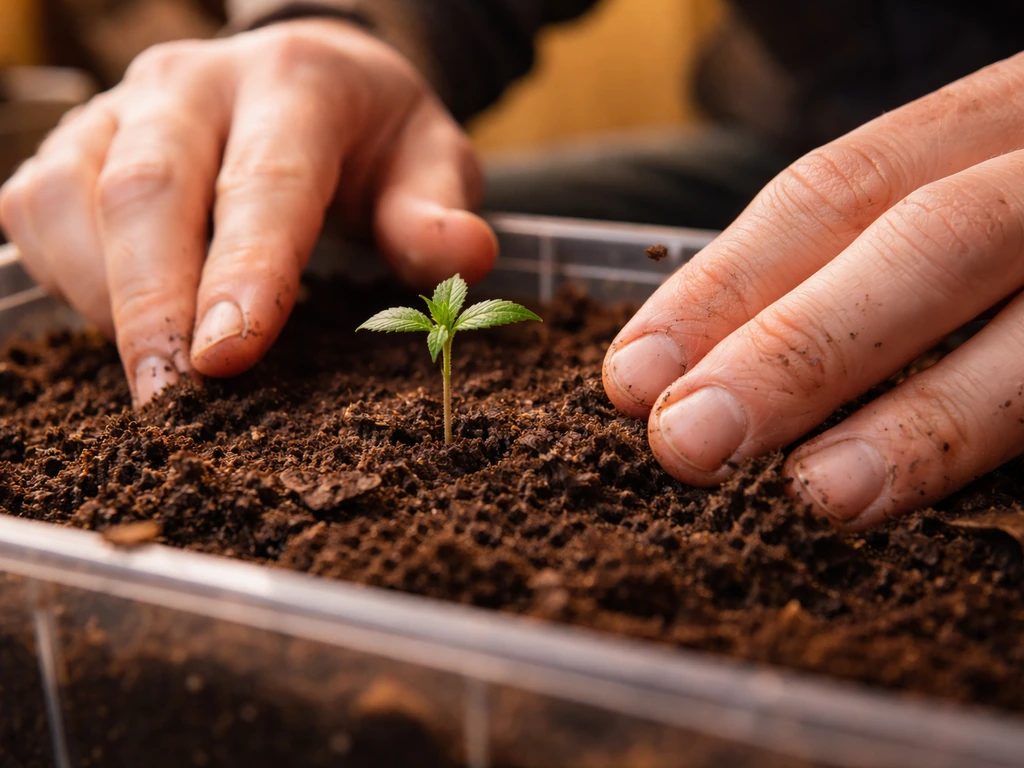
Germination and getting your seedling into DWC
DWC doesn't handle clones of autoflowers well, because autos can't be kept as mother plants and clones inherit the parent's age. Start from seed every time. The cleanest method for DWC is germinating directly in a pre-soaked rockwool cube.
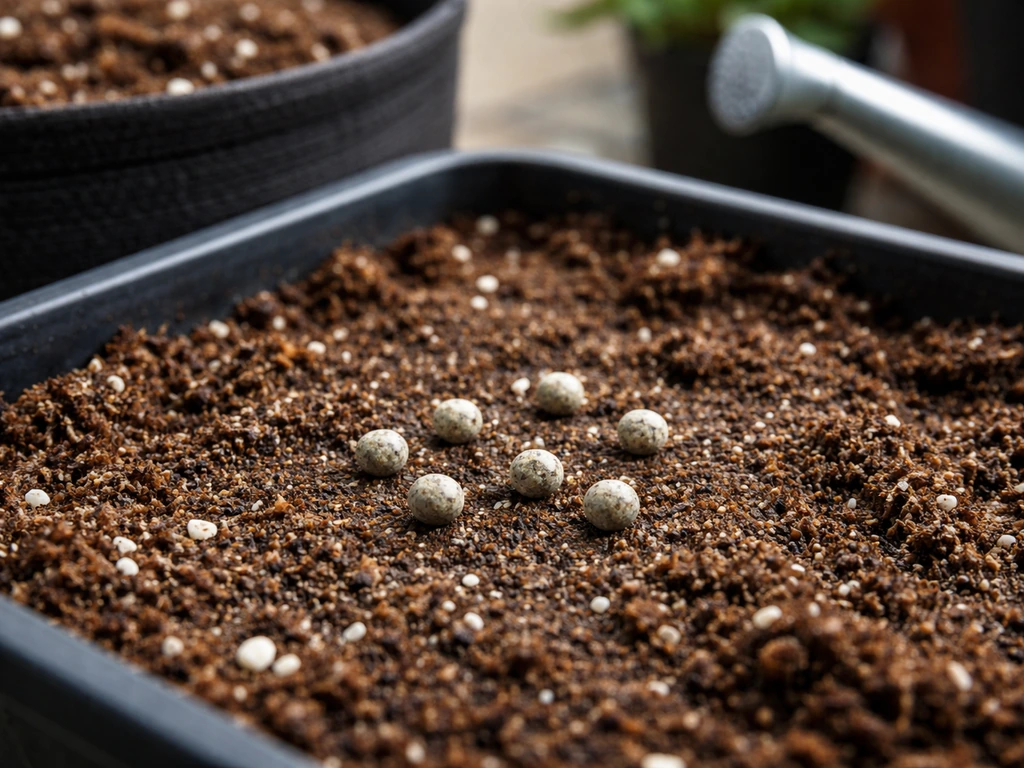
- Soak your rockwool cube in pH 5.5 water for 30 minutes, then squeeze out the excess.
- Drop your seed into the pre-made hole in the cube and pinch the top lightly closed.
- Place the cube in a warm, dark spot (around 77°F) with a dome over it for humidity. You'll see a tap root in 24 to 72 hours.
- Once the seedling emerges and shows its first true leaves, move it under low-intensity light.
- Transfer the rockwool cube into your net pot, packed in with clay pebbles, when you see roots beginning to poke out of the bottom of the cube or when 3 to 4 true leaves are visible.
- At transplant, set your water level so the bottom of the net pot is just barely touching the surface of the nutrient solution, or even 1/2 inch above it. The air stone splash should keep the lower clay pebbles moist. As roots grow down into the solution, lower your water level to leave a 1 to 2 inch air gap between the water surface and the bottom of the net pot.
The most common mistake at this stage is drowning the seedling by keeping water levels too high before the roots reach the solution. Roots need that oxygen gap to develop properly. The other common mistake is running full-strength nutrients too early. Keep EC under 0.5 for the first two weeks. The seedling has enough food stored in the seed itself to get started.
Training your autoflower in DWC: what works and what to skip
Training autoflowers requires a different mindset than training photoperiods. You don't have the luxury of a long recovery window. Any technique that causes significant stress (topping, fimming, heavy defoliation) carries real risk of stunting an auto that's already on the clock.
LST: the right call for autos in DWC
Low stress training (LST) is the go-to technique for autoflowers. You start bending and tying the main stem outward from around week 2 to week 3, before the plant has hardened off completely. The goal is to open up the canopy, expose lower bud sites to direct light, and create an even, flat profile instead of a single dominant cola. Tie down the main stem gently with soft plant ties or velcro tape, angling it toward the edge of the bucket. As new growth emerges upright, continue training outward. Stop new LST work once the plant enters pre-flower, because you don't want to stress it during that transition.
Topping: use with caution
Topping an auto is possible but risky. If you're going to top, do it early (around week 2 to 3, when the plant has 4 to 5 nodes) and only once. Some genetics handle it well; others stall and never fully recover. If you're a first-time DWC auto grower, skip topping entirely on your first run and rely on LST instead. You'll get better results with less risk.
Airflow and canopy management
Good airflow through the canopy matters more in DWC than in soil because the humid environment around a water reservoir can promote mold and powdery mildew faster. Run at least one oscillating fan pointed at canopy level. During flower, light selective defoliation (removing large fan leaves that block lower bud sites) is fine, but do it gradually over a few sessions rather than stripping the plant in one go.
Week-by-week DWC autoflower grow plan
The timeline below fits most autoflower genetics, which typically finish in 70 to 90 days from germination. If you want the same approach mapped to your plant's exact timeline, use a how to grow autoflowers week by week guide alongside this DWC plan Week-by-week DWC autoflower grow plan. Faster strains may hit harvest closer to week 9; heavier-yielding or more complex strains can push to week 11 or 12. Let the plant, not the calendar, tell you when to harvest.
| Week | Stage | Key Actions | pH / EC Target |
|---|---|---|---|
| Week 1 | Germination / Seedling | Germinate in rockwool, place in net pot, minimal light, water touching net pot base | pH 5.8–6.1 / EC 0.2–0.4 |
| Week 2 | Early Seedling | First true leaves appear, increase light intensity slightly, begin very light nutrient solution | pH 5.8–6.1 / EC 0.4–0.6 |
| Week 3 | Veg Growth | Begin LST, lower water to create air gap, increase nutrients to half-strength | pH 5.8–6.2 / EC 0.8–1.0 |
| Week 4 | Active Veg | Continue LST, check root health (should be white), full veg feed, monitor EC daily | pH 5.8–6.2 / EC 1.2–1.4 |
| Week 5 | Pre-Flower / Transition | First pistils appear, stop LST, transition to bloom nutrients, reduce nitrogen | pH 5.8–6.2 / EC 1.4–1.6 |
| Week 6 | Early Flower | Buds forming, increase P and K, watch for cal-mag deficiency in RO water users | pH 5.8–6.2 / EC 1.6–1.8 |
| Week 7 | Mid Flower | Stack buds, maintain peak EC, full reservoir change to refresh mineral balance | pH 5.8–6.2 / EC 1.6–2.0 |
| Week 8 | Peak / Late Flower | Trichomes going milky, monitor amber development, keep pH dialed in | pH 5.8–6.2 / EC 1.6–2.0 |
| Week 9–10 | Flush / Final Ripening | Switch to plain pH'd water or a flush solution, let EC drop toward zero | pH 5.8–6.0 / EC 0.0–0.4 |
| Week 10–12 | Harvest Window | Check trichomes with loupe, harvest when mostly cloudy with 10–20% amber | Plain water only |
Do a full reservoir change every 7 to 10 days in early growth, and every 5 to 7 days once you're in flower. Topping off daily with pH'd water between changes is normal, as plants drink more as they grow. Always measure EC and pH after topping off to make sure you haven't accidentally diluted or concentrated your solution.
Troubleshooting the most common DWC autoflower problems
Root rot (brown, slimy roots)
Root rot is caused by pythium, a water mold that thrives above 72°F with low oxygen. Healthy DWC roots are white and smell faintly sweet. Brown, slimy roots with a foul smell mean pythium is present. Act fast: lower your water temperature immediately, check that your air stone is running properly, do a full reservoir change with fresh nutrients, and add a beneficial bacteria product like Hydroguard (Bacillus amyloliquefaciens). Hydrogen peroxide (3% food grade at 3ml per gallon) can be used as an emergency treatment, but it also kills beneficial biology, so use it once and then rebuild with bennies. Prevent this entirely by keeping water temp under 72°F and never letting your reservoir go more than 10 days without a change.
pH swings and nutrient lockout
If your plants start showing yellowing leaves, strange spots, or tip burn while your EC looks fine, pH lockout is usually the first thing to check. pH in DWC naturally rises as plants consume nutrients (especially nitrogen). If you're checking once a week, you might already be 0.5 to 1.0 pH points off your target. Check daily. If pH keeps climbing despite corrections, do a full reservoir change with freshly mixed solution and re-dial your pH to 5.8 before refilling.
Light leaks causing algae
Green or brown algae coating the inside of your bucket or climbing the net pot means light is getting into your reservoir. Algae competes with your plant for dissolved oxygen and nutrients and can clog the air stone. Fix it by covering any gaps around the net pot with a lid insert or black tape, wrapping the bucket in black/white poly film, and ensuring bucket lids are fully opaque. Once algae is established, do a full clean-out with diluted hydrogen peroxide before restarting.
Nutrient deficiencies and toxicities
Calcium and magnesium deficiencies are the most common nutrient issues in DWC, especially if you're using reverse osmosis water. Add a dedicated cal-mag supplement from week 2 onward. Iron deficiency (interveinal yellowing on new growth) usually points to pH being too high. Nitrogen toxicity (dark, clawing leaves) means your EC is too high for the plant's current stage. Back off your nutrients, do a partial reservoir change, and come down to the EC target for that week.
Slow growth or stalled plant
If your auto seems stuck, check three things in order: water temperature (too warm = low oxygen = slow roots), air stone output (check for blockages or a failing pump), and pH. A stalled DWC auto is almost always an environmental problem, not a genetics problem. If the plant looks healthy but slow, just be patient; the auto lifecycle is compressed but not uniform across all genetics.
Pump and backflow damage
If your air pump loses power while the airline is submerged, water can siphon back into the pump and destroy it. This is a preventable failure: run your airline tubing up and over the bucket rim before dropping it into the water (creating a loop above the water line), or install a simple inline check valve on the airline. Either fix costs almost nothing and saves your pump.
Harvest, drying, and curing your DWC autoflower
Knowing when to cut
Most autoflower genetics are ready somewhere between 70 and 90 days from germination, but that's a guideline, not a rule. The real indicator is trichome development. Get a jeweler's loupe (30x to 60x) or a digital microscope and look at the trichomes on the buds themselves, not the sugar leaves. When the majority of trichomes are cloudy/milky white with 10 to 20% turned amber, and most pistils have darkened and curled in, you're in the harvest window. Cloudy trichomes give a more energetic effect; more amber means a heavier, more relaxing result. Harvest based on what you want.
Flushing before harvest
The flush debate is ongoing, but the practical approach for DWC is straightforward: in the last 7 to 14 days before harvest, switch to plain pH'd water. You can use a flushing agent like Flawless Finish or simply use water. Monitor EC: as you refill with plain water over several days, your EC will naturally drop. When it reaches near zero and the leaves start to yellow (the plant is eating itself for stored nitrogen, which is normal), you're ready to cut. This process helps clear the solution's mineral residue from the buds.
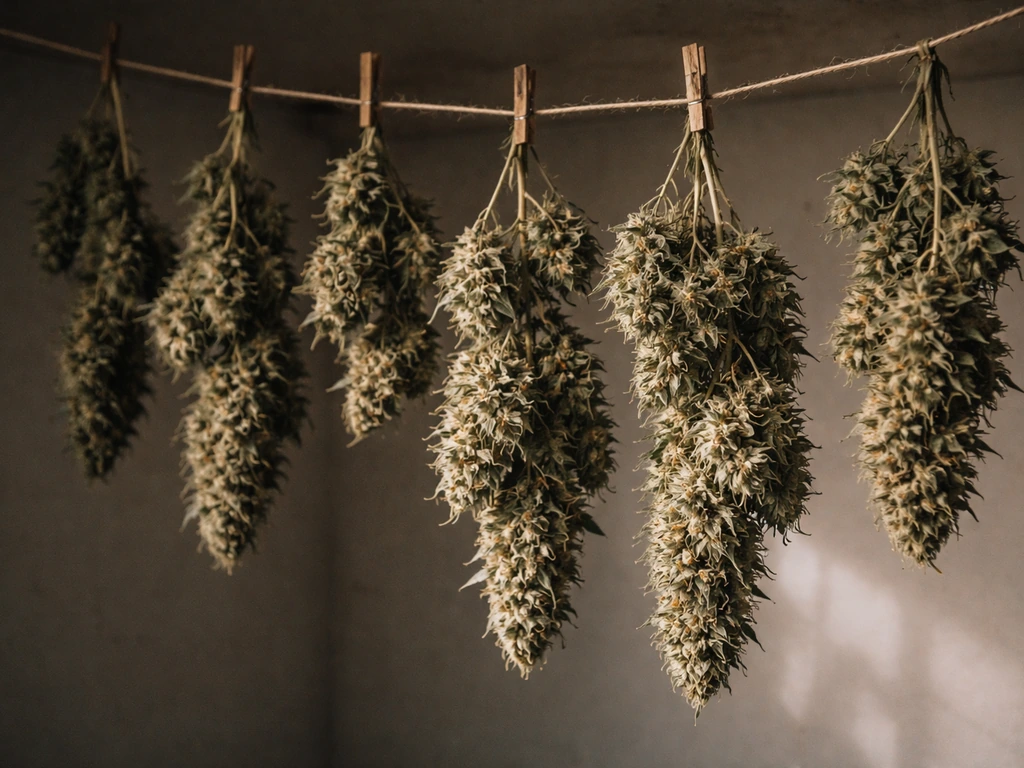
Drying and curing DWC buds
Buds from DWC-grown plants are often denser and heavier than soil-grown counterparts, which means they need a thorough dry before curing. After harvest, hang cut branches upside down in a dark room at 60°F to 70°F with 45% to 55% relative humidity. Air circulation should be gentle (no fans blowing directly on buds). Most DWC buds need 10 to 14 days to dry properly. Rushing this step with higher temps or lower humidity gives you hay-smelling buds and degrades terpenes.
Once the smaller stems snap cleanly rather than bend, trim your buds and move them into airtight glass jars filled to about 70% capacity. Open the jars (burp them) for 10 to 15 minutes once or twice daily for the first two weeks to release moisture and CO2, then reduce burping to every few days for weeks three and four. After 30 days of curing, the flavor and smoothness of your DWC autoflower will be noticeably better than freshly dried bud. After 60 days, it's genuinely excellent.
What to do differently next run
Every DWC autoflower run teaches you something. After your first harvest, review your reservoir change log, your pH drift patterns, and your EC targets at each stage. If you had root issues, prioritize water temperature control or add a chiller. If growth felt slow in weeks 2 and 3, you may have kept EC too low or water levels too high during early seedling. DWC autoflower growing rewards consistent maintenance and punishes skipped days, but once you've got a system down, it's one of the most satisfying and efficient ways to grow. If you are specifically growing Gorilla Glue autoflowers in DWC, the same pH, EC, and oxygen targets apply, with tight attention to timing during the short auto life cycle DWC autoflower growing. If you want truly organic results, you can apply this same DWC routine while choosing organic inputs and maintaining them organically from seed to harvest how to grow autoflowers organically.
FAQ
Why does my DWC reservoir pH keep drifting even after I adjust it?
If you see pH drifting even though nutrients and dosing are consistent, check the reservoir top-offs and how you mix. Refill with the same nutrient water base each time (not plain water), and after every topping off, recheck EC and pH at the correct time window (right after mixing, then again 2 to 3 hours later). Sudden jumps usually come from adding water to nutrient concentrate or from measuring pH before the solution fully mixes.
How often should I test pH and EC for how to grow autoflowers in DWC?
Don’t rely on reservoir pH alone, especially early on. In DWC, roots sit in the full solution, so small temperature or oxygen changes can shift uptake. Measure pH and EC daily during weeks 1 to 3, then every day in flower. If you only sample weekly, you can miss a lockout window, since autos cannot “recover later.”
Can I switch my light schedule during an auto grow in DWC?
Yes, but do it intentionally. Autos in DWC can handle the light schedule change, yet a big jump in intensity or distance (for example, moving lights closer during early veg) can stress the plant and trigger nutrient issues. Make any light schedule changes gradually (within a few days), and keep canopy temperature under about 82°F.
What should I do if I think I have root rot in my DWC auto?
If you get slimy roots or a foul smell, treat it as pythium until proven otherwise. Immediately lower reservoir temperature, confirm the air stone is actively bubbling across the whole reservoir, then do a full change with fresh nutrients. After that, add a beneficial bacteria product and avoid repeated peroxide use, since it can knock back the biological system you need for stable DWC.
When is an aquarium chiller necessary for DWC autoflowers?
A chiller is worth it when your room routinely runs above 72°F or you cannot control temperature swings, since DWC oxygen decreases as solution temperature rises. If your space stays within range most days, ice bottles or a properly managed freeze-and-swap routine can work, but expect more daily monitoring and temperature spikes.
How do I prevent drowning the seedling when learning how to grow autoflowers in DWC?
Keep initial water level low until you see healthy root development in the net pot zone. A practical approach is to ensure the lower part of the net pot media stays just above or barely touching the solution early on, then gradually raise or lower the basket position so the roots reach the oxygenated water without being constantly submerged before they establish. The key is avoiding a prolonged oxygen-starved seedling phase.
Do I really need cal-mag in DWC autoflowers, and when should I add it?
Cal-mag is usually most important from early vegetative growth onward because many nutrient setups rely on sufficient available calcium and magnesium. In practice, if you are using reverse osmosis water, start cal-mag around week 2 as the article suggests, then keep an eye on new growth color and leaf tip condition. Don’t “chase” symptoms with large cal-mag spikes if pH is drifting.
What do I check if nutrients look right by EC but my leaves still burn or claw?
If your EC is “correct” but leaves show tip burn or dark clawing, verify the solution didn’t drift after you topped off. Topping off with plain water instead of nutrient water lowers EC and can worsen swings, while topping off with strong concentrate can spike it. Correct by doing a partial reservoir change to bring EC back to the target for that stage, then resume daily monitoring.
Why do I get algae in my DWC bucket and how do I stop it?
If algae appears quickly, it almost always comes from light leaks, not a feeding problem. Make sure the bucket is fully opaque, seal or tape any gaps around the net pot, and avoid leaving the reservoir exposed when checking plants. Once algae is established, you need a full clean-out before restarting, not just a pH correction.
How much should I defoliate my DWC autoflower without hurting yield?
Don’t remove large amounts of fan leaves right before or during pre-flower. For DWC autos, use gentle, incremental defoliation only to improve light penetration to lower sites, and pause if you see slowed growth after a session. Because autos have no recovery window, stress can show up as delayed flowering or lower bud sites.
How do I know when to harvest if my pistils don’t match the trichome timing?
For harvest timing, use bud trichomes, not just pistils. If you harvest based only on pistil color, you can cut too early, since trichomes can lag behind. Use a 30x to 60x loupe or microscope and confirm that most trichomes are in the cloudy-to-amber range you want.
How long should I flush DWC autoflowers, and what EC level should I aim for?
If you flush with plain water, don’t panic if EC takes a few days to approach near-zero, because the plant is still transpiring and consuming stored nutrients. The better signal is leaf yellowing plus EC trends rather than an exact flush day. End the flush when EC is low and leaves are eating themselves in the final window.
My DWC buds are taking too long to dry, what should I change?
Drying depends on your local humidity and how dense your buds are, DWC buds tend to be heavier, so they dry slower. If branches never snap after the usual time, reduce drying temp slightly and increase airflow indirectly, without blasting buds. If RH drops too low, you can preserve terpenes but risk brittle buds and harshness, so keep your target RH range and adjust slowly.