If you want to grow better in hydroponics, the short answer is this: get your pH dialed between 5.5 and 6.2, keep your EC in the right range for your plant's stage, eliminate light leaks from your reservoir, and match your system to your real space and budget constraints. Everything else builds on top of those four things. Whether you're setting up your first deep water culture bucket or troubleshooting a stalled second cycle, this guide walks you through every layer of a high-performing hydro setup with specific numbers, timelines, and fixes you can apply today. better grow hydro cardiff
Better Grow Hydro: Step-by-Step Hydroponics Guide

Marcus Holloway
24 Mar 2026
What 'Better Grow Hydro' Actually Means
The phrase 'better grow hydro' gets used in a few different ways. Sometimes people mean it as a shorthand for a hydroponic supply store or brand (you may have seen it referenced in forums alongside store recommendations). But most growers searching this phrase are really asking: how do I get bigger, healthier, more productive plants out of my hydro setup? That's exactly what this guide addresses. It's about outcomes, not a specific brand or proprietary system.
A better hydro grow means faster vegetative growth, denser canopy development, stronger root systems, higher yields per watt, and fewer crisis moments mid-cycle. To get there, you need to set realistic goals and understand your actual constraints before you buy or change anything. The three constraints that catch most growers off guard are space (which determines your system type and plant count), budget (especially ongoing electricity and climate control costs, which add up fast once fans, dehumidifiers, and heaters are running 24/7), and water quality (your tap water's baseline pH and EC affect everything downstream).
Before touching your system or nutrients, answer these questions honestly: How much space do you have in cubic feet? What is your local electricity rate per kWh? Do you have access to a reliable RO filter or are you working with tap water? These answers will shape every recommendation in this guide. A 2x4 tent grower and a 10x10 room grower are not running the same setup, and pretending otherwise wastes money and time.
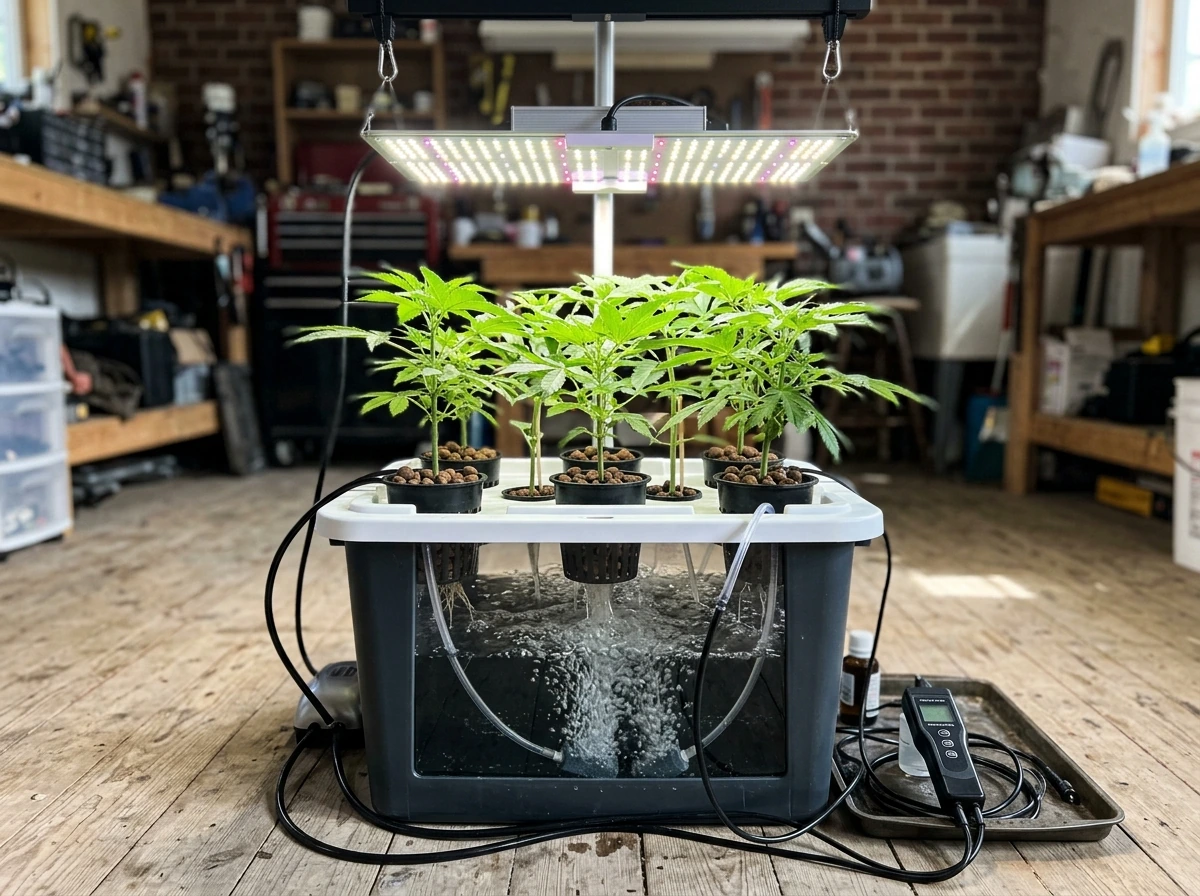
Choosing the Right Hydroponic System
There is no universally best hydroponic system. The right choice depends on your experience level, available time, budget, and how much hands-on management you want to do. Here is a practical breakdown of the most common systems home growers use, with honest trade-offs for each.
| System | Best For | Avg. Setup Cost | Management Level | Yield Potential |
|---|---|---|---|---|
| Deep Water Culture (DWC) | Beginners, small grows | $50–$150 | Low–Medium | High per plant |
| Recirculating DWC (RDWC) | Intermediate, multi-plant | $200–$600 | Medium | Very high |
| Nutrient Film Technique (NFT) | Leafy greens, herbs | $100–$300 | Medium | Moderate |
| Ebb & Flow (Flood & Drain) | Versatile, any plant size | $150–$400 | Medium | High |
| Drip System | Large grows, experienced growers | $200–$800+ | Medium–High | Very high |
| Kratky (passive DWC) | Beginners, no pumps | $20–$80 | Very low | Moderate |
For most first-time hydro growers, a single-bucket DWC or a Kratky setup is the best entry point. DWC gives you the active oxygenation that Kratky skips, which translates to faster root development and better growth rates. Once you're comfortable reading your plants and managing pH and EC daily, RDWC or an ebb and flow system scales up well without being overwhelming.
One thing to think carefully about before jumping to a more complex system: recirculating systems spread problems fast. If you get root rot or a pH crash in a shared reservoir, every plant in the system is affected within hours. Isolated buckets give you containment. That trade-off matters more than raw yield potential when you're still building your hydro intuition.
System Setup Checklist
- Use food-grade or purpose-built hydroponic containers (never clear plastic, light penetration feeds algae)
- Seal all reservoir lids with reflective tape or opaque covers to block 100% of light
- Position air stones under or beside net pots, not just at the bottom center of the reservoir
- Run tubing inside conduit or along walls to reduce trip hazards and heat transfer
- Label every reservoir, line, and pump with waterproof tape before your first fill
- Install a dedicated drain valve at the lowest point of every reservoir for easy water changes
Nutrients, pH, and EC: The Numbers That Actually Matter
This is where most growers either win or lose their cycle. Hydroponic plants have no soil buffer to fall back on, so your nutrient solution is doing all the work. Getting pH and EC right is not optional, it's the foundation of everything.
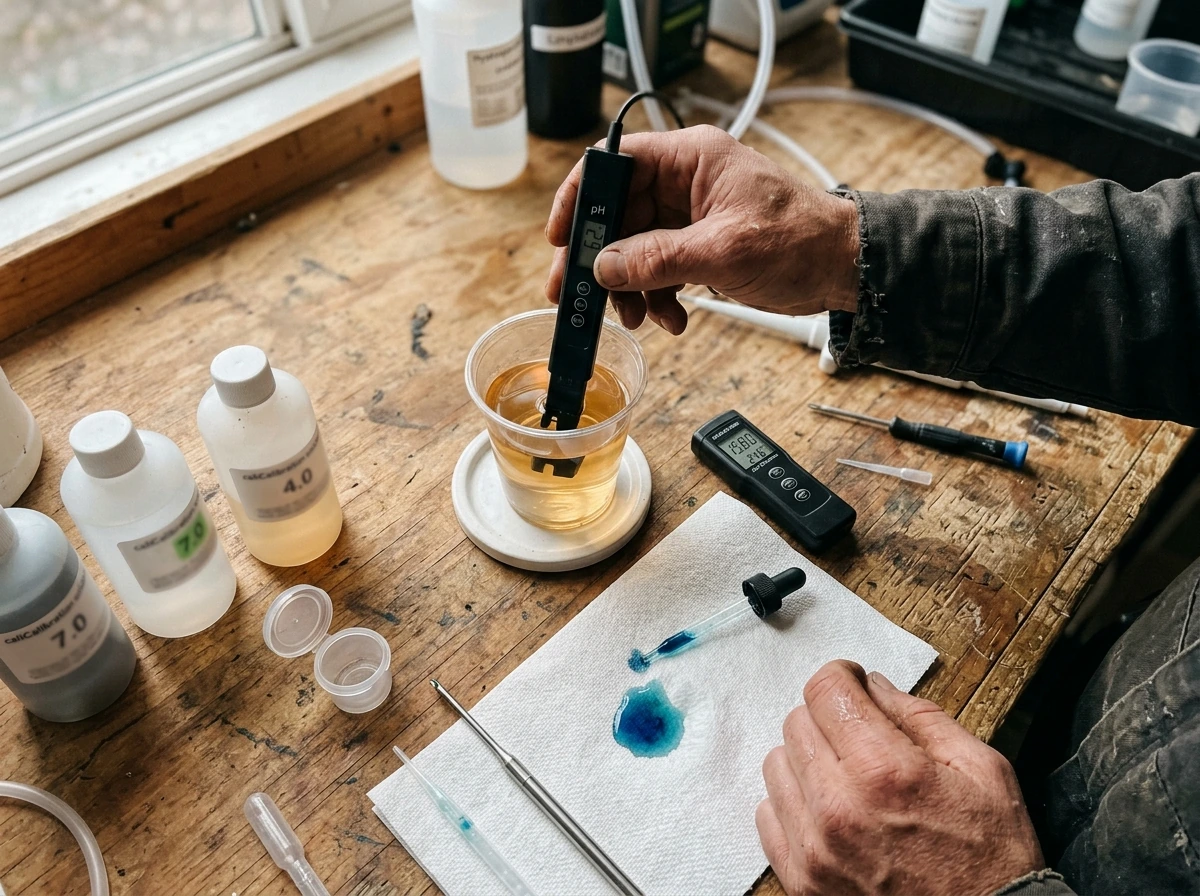
pH Targets
Keep your reservoir pH between 5.5 and 6. Virginia Tech extension materials note that hydroponic crops generally perform well when reservoir pH is about 5.5 to 6.2 blank" rel="noopener noreferrer">5 and 6. 2 for most plants. The sweet spot for general vegetative and flowering growth is 5.8 to 6.0. Different nutrients are available to your plant at different pH levels, so drifting above 6.5 will lock out iron and manganese even if they're physically present in the solution. Drifting below 5.5 causes calcium and magnesium lockout. Check pH at least once daily, twice during fast-growth phases. Use a calibrated digital pH pen (not strips) and calibrate it weekly with fresh buffer solution. A $15 uncalibrated pen will lie to you.
EC Targets by Growth Stage
| Growth Stage | Target EC (mS/cm) | Notes |
|---|---|---|
| Seedling / Clone | 0.4–0.8 | Very dilute; roots are sensitive |
| Early Veg (weeks 1–2) | 0.8–1.2 | Ramp up slowly as plant establishes |
| Mid–Late Veg (weeks 3–5) | 1.2–1.8 | Push higher only if plant shows no stress |
| Early Flower (weeks 1–3) | 1.6–2.0 | Transition nutrients toward P/K |
| Peak Flower (weeks 4–7) | 1.8–2.4 | Monitor for tip burn; back off if needed |
| Flush / Late Flower | 0.4–0.8 or plain water | Reduce 1–2 weeks before harvest |
These EC ranges assume you're starting with near-zero EC water, ideally RO water or water under 0.2 EC. If your tap water comes in at 0.4 EC or higher, subtract that baseline from your target and adjust accordingly. Feeding a plant with a target EC of 1.2 when your tap water already reads 0.6 means you're only adding nutrients to reach 0.6 EC total, not 1.2.
Nutrient Line Selection
For beginners, a simple two or three-part base nutrient (A+B or Grow/Bloom/Micro) from a reputable brand keeps things manageable. General Hydroponics Flora Series, Athena, and Advanced Nutrients are commonly used and have well-documented feed charts. Always follow the manufacturer's chart as a starting point, then adjust based on what your plants actually show you. Additives like cal-mag, silica, and beneficial bacteria are worth incorporating once you've got the basics consistent, not before.
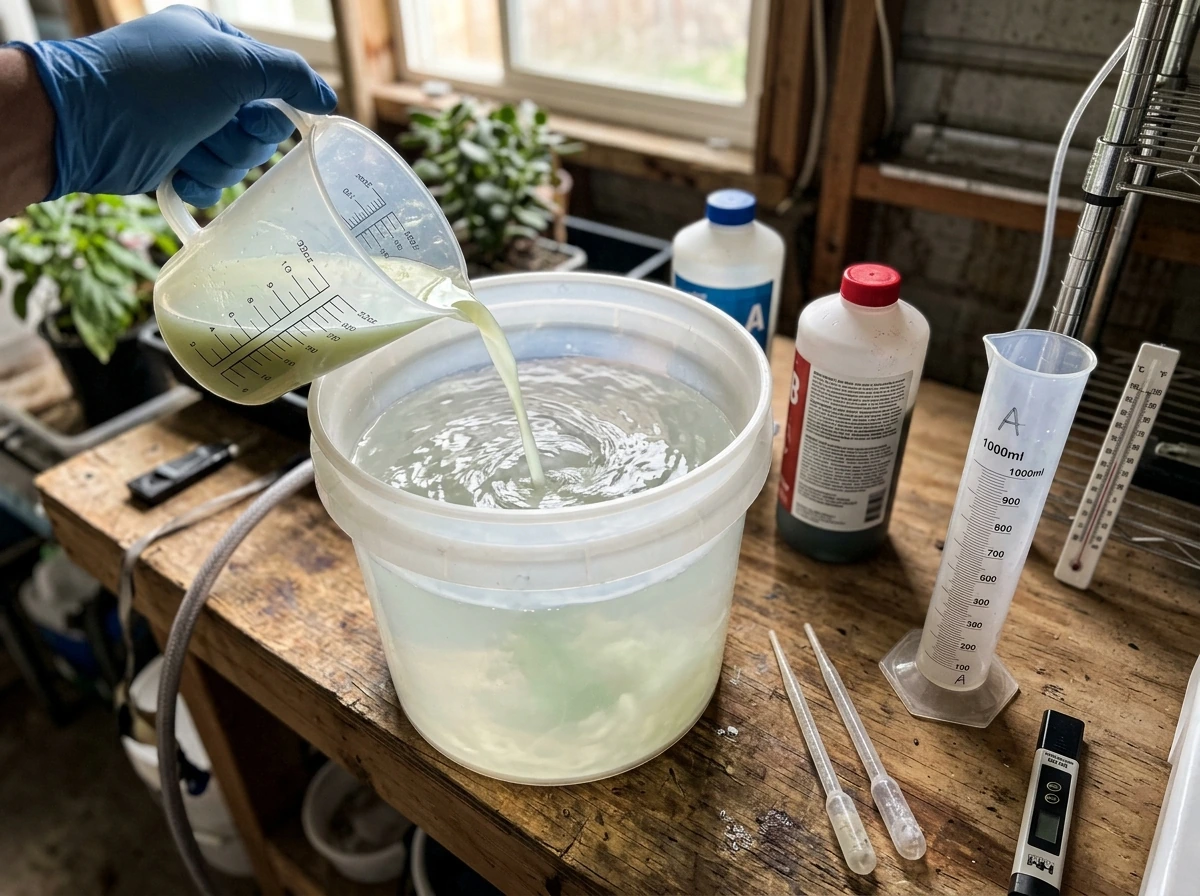
Mix nutrients in this order to avoid precipitation: water first, then cal-mag (if using), then base A, then base B, then any pH up/down at the very end. Never mix concentrated nutrient parts directly together before adding water. This causes precipitation and you'll lose the nutrients before they ever reach the plant.
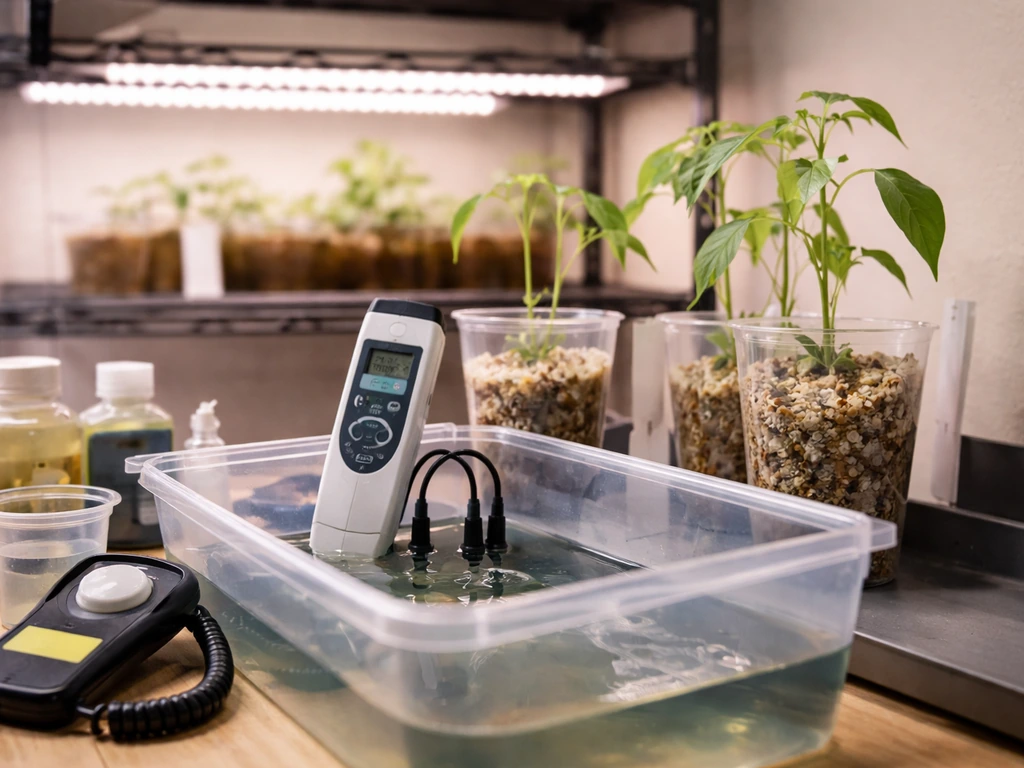
Light, Temperature, Humidity, and Airflow
Environment is the multiplier. Great nutrients in a poorly controlled room will underperform every time. Here's what each variable should look like for a typical indoor hydro grow.
Lighting
For most indoor hydro growers, a <span>quality LED</span> or HID light dialed to the correct PPFD (photosynthetic photon flux density) for each stage makes the biggest single impact on yield. Target 200–400 µmol/m²/s for seedlings and clones, 400–600 for early veg, 600–900 for late veg, and 800–1,100 for flower. CMH (ceramic metal halide), double-ended HPS, and full-spectrum quantum board LEDs all work well. The difference in running costs is significant: a 600W HPS pulls roughly 660W with ballast, while a comparable LED quantum board delivers similar PPFD at 300–400W. Over a 12-week cycle running 18 hours of veg and 12 hours of flower, the electricity savings are real money.
Temperature and Humidity Targets
| Stage | Day Temp (°F) | Night Temp (°F) | Humidity (RH%) |
|---|---|---|---|
| Seedling / Clone | 72–78 | 68–72 | 65–75 |
| Vegetative | 70–80 | 65–72 | 50–70 |
| Early Flower | 68–78 | 62–70 | 45–55 |
| Late Flower | 65–75 | 60–68 | 35–45 |
Reservoir temperature is a separate concern that most growers underestimate. Keep your nutrient solution between 65°F and 72°F (18–22°C). Above 72°F, dissolved oxygen levels drop sharply and pythium (root rot) thrives. HydroBuilder’s dissolved oxygen guidance recommends tuning many hydroponic systems to stay roughly in the 6 to 9 ppm range dissolved oxygen levels between 6 and 9 ppm. Below 60°F, nutrient uptake slows significantly. If your room runs warm, a small aquarium chiller or frozen water bottles rotated into the reservoir will help. This is one of the operating costs that surprises new growers. Climate control, including fans, dehumidifiers, and reservoir chillers, can easily add $40–$100 per month to your electricity bill depending on your local rates and setup size.
Airflow and CO2
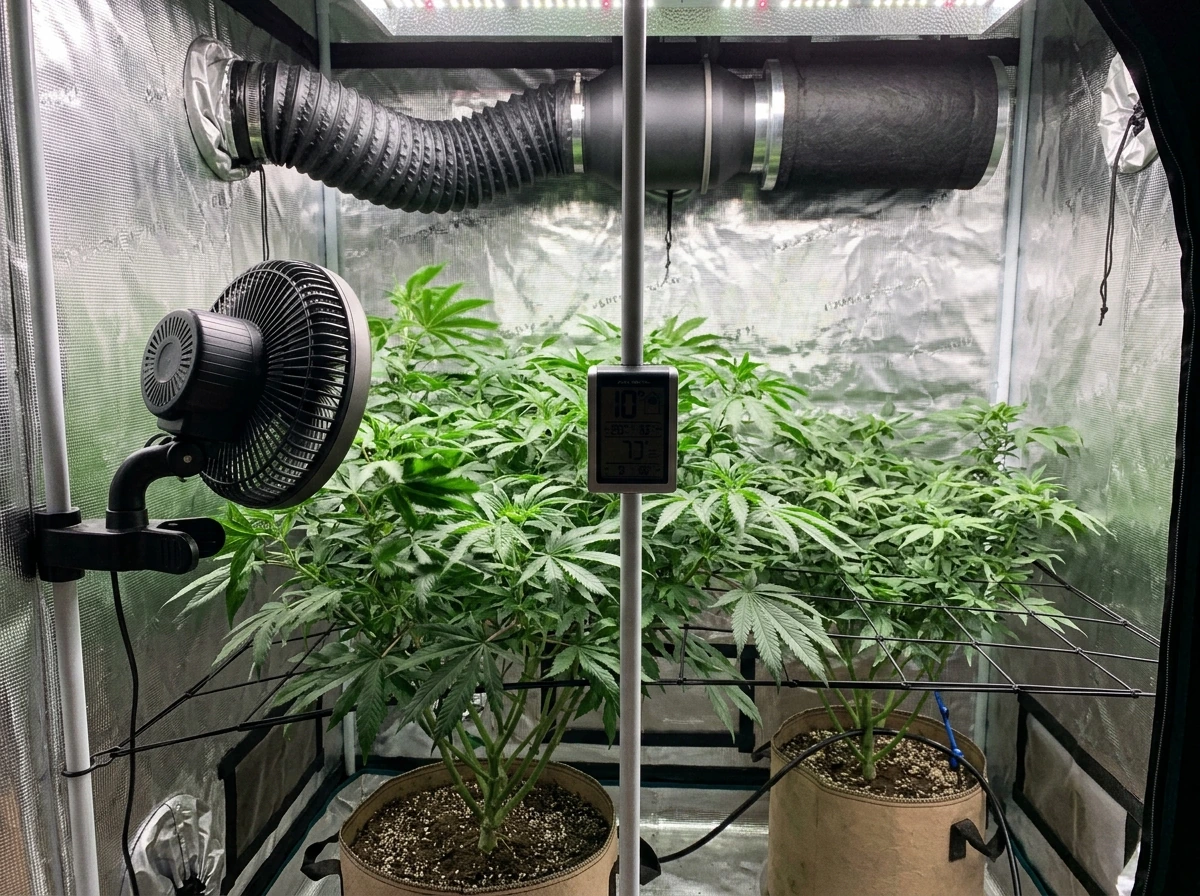
Every grow space needs both an oscillating fan for canopy airflow and an inline exhaust fan sized to turn over the room's air volume every 1–3 minutes. Stagnant air causes humidity hotspots, mold pressure, and weakened stems. For a 4x4 tent, a 4-inch inline fan rated at 190–210 CFM is typically sufficient with a carbon filter attached. For CO2 supplementation: unless you're running lights above 800 µmol/m²/s and have temperature/humidity dialed in, CO2 enrichment (1,000–1,500 ppm) isn't your bottleneck. Fix light, environment, and nutrient delivery first. CO2 is a fine-tuning tool, not a beginner fix.
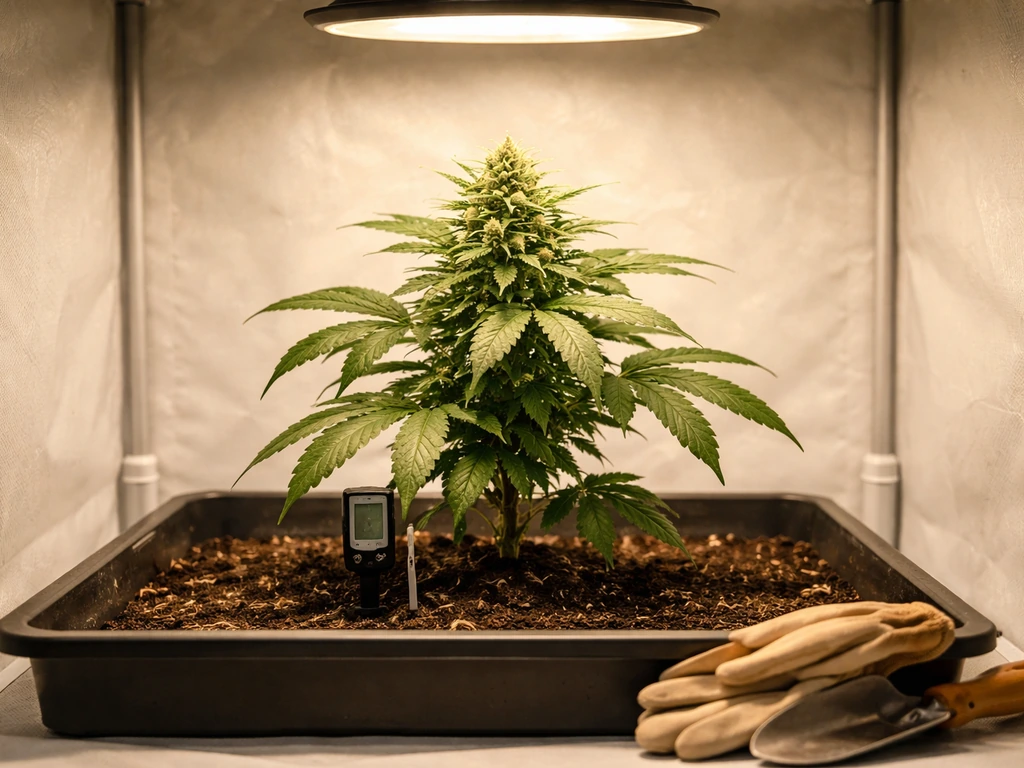
Grow Medium and Root-Zone Management
In hydroponics, your medium isn't feeding the plant, it's just holding the plant and supporting root development. That changes how you choose it. The best media are inert, pH-stable, and allow both air and moisture to reach the root zone.
Comparing Common Hydro Media
| Medium | Best System Pairing | Reusable | Pros | Cons |
|---|---|---|---|---|
| Hydroton (expanded clay) | DWC, RDWC, Ebb & Flow | Yes (clean thoroughly) | Great aeration, pH neutral, durable | Heavy, can clog drain lines |
| Rockwool | Any system, propagation | No | Excellent water retention, good for clones/seedlings | Must be pre-soaked/pH adjusted; disposal concerns |
| Coco coir | Drip, hand-feed hybrid | Partially | Excellent root environment, widely available | Not fully inert; needs cal-mag supplementation |
| Perlite | Ebb & Flow, drip, mix-in | Partially | Lightweight, very airy, cheap | Floats in DWC, needs containment |
| No medium (Kratky/DWC) | Kratky, DWC | N/A | No media cost, direct root oxygenation | Roots more vulnerable without support |
For DWC setups, hydroton in net pots (2-inch or 3-inch for small plants, 4–6-inch for larger) is the most reliable choice. Pre-soak hydroton for 24 hours and rinse until runoff is clear before use. For rockwool, soak cubes in pH 5.5 water for at least an hour before planting. Rockwool's natural pH runs high (7.0+) and will spike your solution if you skip this step.
Root Health and Oxygen
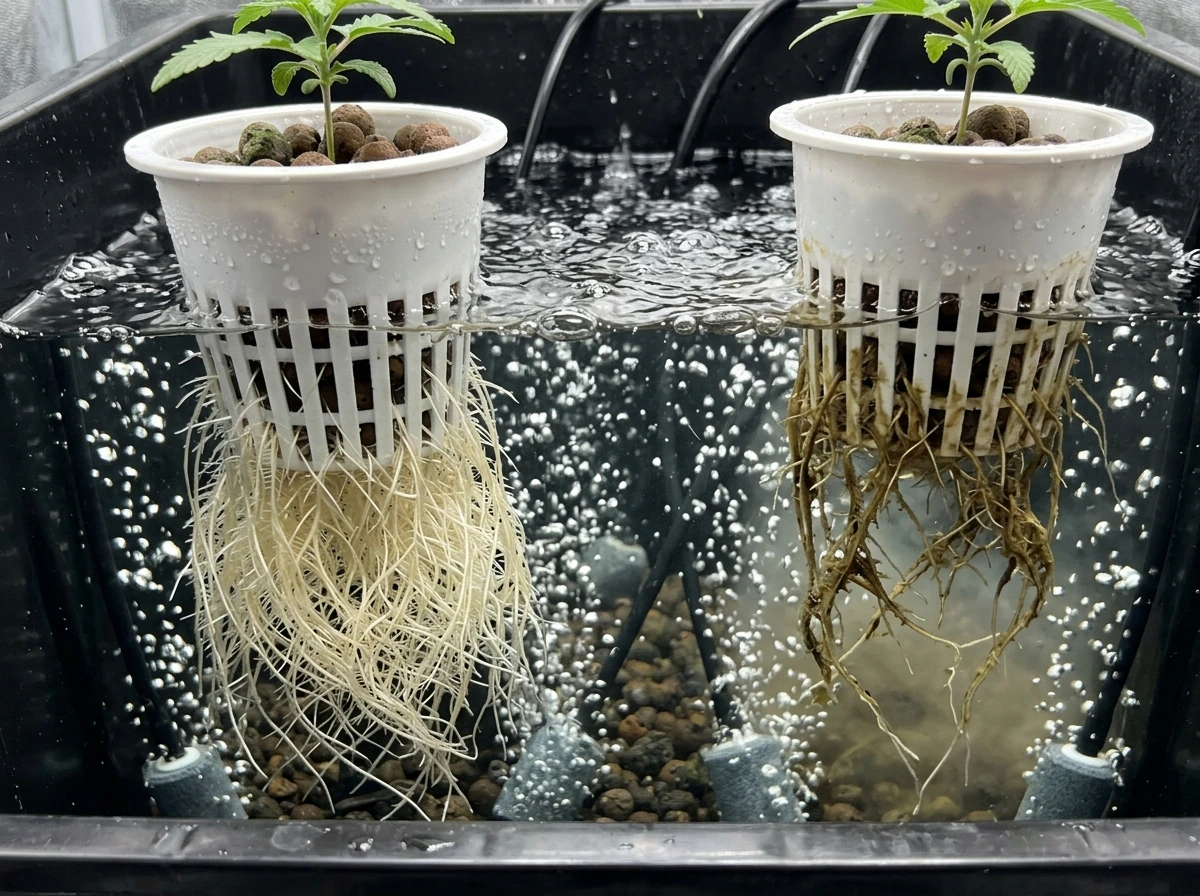
Healthy hydro roots should be white or very light cream, firm, and dense. Brown, slimy, or foul-smelling roots are almost always a sign of pythium (root rot), usually caused by warm reservoir temps, low dissolved oxygen, or light leaks feeding algae. Run air stones sized to your reservoir volume (at least 1 watt of air pump output per gallon), keep the reservoir dark, and maintain temps under 72°F. Adding beneficial bacteria products like Hydroguard or similar at the manufacturer's rate provides biological competition against pathogens and is worth the cost in any recirculating system.
Week-by-Week Feeding Schedule and Training
The schedule below is a practical framework for a typical cannabis or fast-growing flowering plant in a DWC or RDWC setup under LED lighting. Adjust timing for your specific strain or plant type, but the structure holds across most vigorous hydro crops.
Vegetative Phase (Weeks 1–5)
- Week 1: Seedling or clone in reservoir at EC 0.4–0.6, pH 5.8. Lights at 18/6, PPFD 250–350. No training. Focus on root establishment.
- Week 2: Raise EC to 0.8–1.0. Confirm roots are reaching the solution. Begin low-stress training (LST) by gently tying down the main stem to encourage lateral branching.
- Week 3: EC 1.0–1.4, pH 5.8–6.0. Continue LST, tucking fan leaves that block bud sites. Increase PPFD to 500–600.
- Week 4: EC 1.4–1.8. Top or FIM if using those techniques (do this no later than week 4 to allow recovery before flip). Add silica supplement at this stage if using.
- Week 5: EC 1.6–1.8. Final shaping and defoliation. Prepare to flip lighting schedule. Begin transitioning nutrients toward a higher P/K ratio.
Flowering Phase (Weeks 1–8+)
- Flower Week 1–2 (Transition): EC 1.6–2.0, pH 5.8–6.0. Switch to 12/12 lighting. Expect 'stretch' (50–100% height increase). Continue light defoliation.
- Flower Week 3–4: EC 1.8–2.2. Bud sites forming. Raise PPFD to 800–900. Monitor for tip burn, a sign EC is too high or VPD is off.
- Flower Week 5–6: EC 2.0–2.4. Peak nutrient demand. Add a bloom booster (high P/K) per your nutrient line's chart. Check pH twice daily.
- Flower Week 7: EC 1.8–2.2. Begin tapering nutrients slightly. Focus on potassium. Trichome checking begins with a jeweler's loupe.
- Flower Week 8+ (Flush): Drop EC to 0.4–0.8 or plain pH-adjusted water for the final 7–14 days. Watch for fade (yellowing of fan leaves), which is normal and expected at this stage.
Plant Spacing and Training Rules
- Allow 1–2 square feet per plant in veg for most strains; 2–4 square feet in flower for full canopy expression
- SCROG (screen of green) nets work very well in hydro, giving you a flat, even canopy that maximizes light penetration
- LST is lower-risk than topping in hydro because recovery stress is shorter with direct nutrient access
- Avoid heavy defoliation after week 3 of flower, removing too many leaves at this stage stresses the plant and can reduce yield
- Maintain a 12–18 inch distance between your light and canopy (check your specific fixture's manufacturer recommendation)
Troubleshooting the Most Common Hydro Problems
Hydro problems tend to escalate faster than soil problems because there's no buffer. Here are the issues you're most likely to face, with a fast diagnosis and fix for each.
pH Drift
pH rising: the plant is consuming more water than nutrients, leaving the solution more concentrated and alkaline. If you are in Pasadena and want to dial in conditions for healthier hydroponic plants, focus on getting your reservoir pH steady every day pH rising. This is common in late veg and peak flower. Fix: top off with plain pH 5.5–5.8 water instead of full-strength nutrient solution, and do a partial reservoir change every 7 days. pH dropping: the plant is consuming more nutrients than water, or microbial activity is producing acids. Fix: check for root rot (brown roots, slimy smell), increase aeration, and consider beneficial bacteria. Always adjust pH after mixing nutrients, never before.
Nutrient Deficiencies vs. Lockout
The most important distinction in hydro: a deficiency symptom doesn't always mean the nutrient is missing, it often means the pH is wrong and the plant can't absorb it. Before adding more of any nutrient, check pH first. Yellow interveinal leaves (magnesium deficiency appearance) at pH 6.5 will fix with a pH correction, not a cal-mag flush. Yellow tips (nitrogen toxicity appearance) paired with high EC means back off feeding, not add more. Train yourself to read symptoms in the context of your pH and EC logs.
Algae Growth
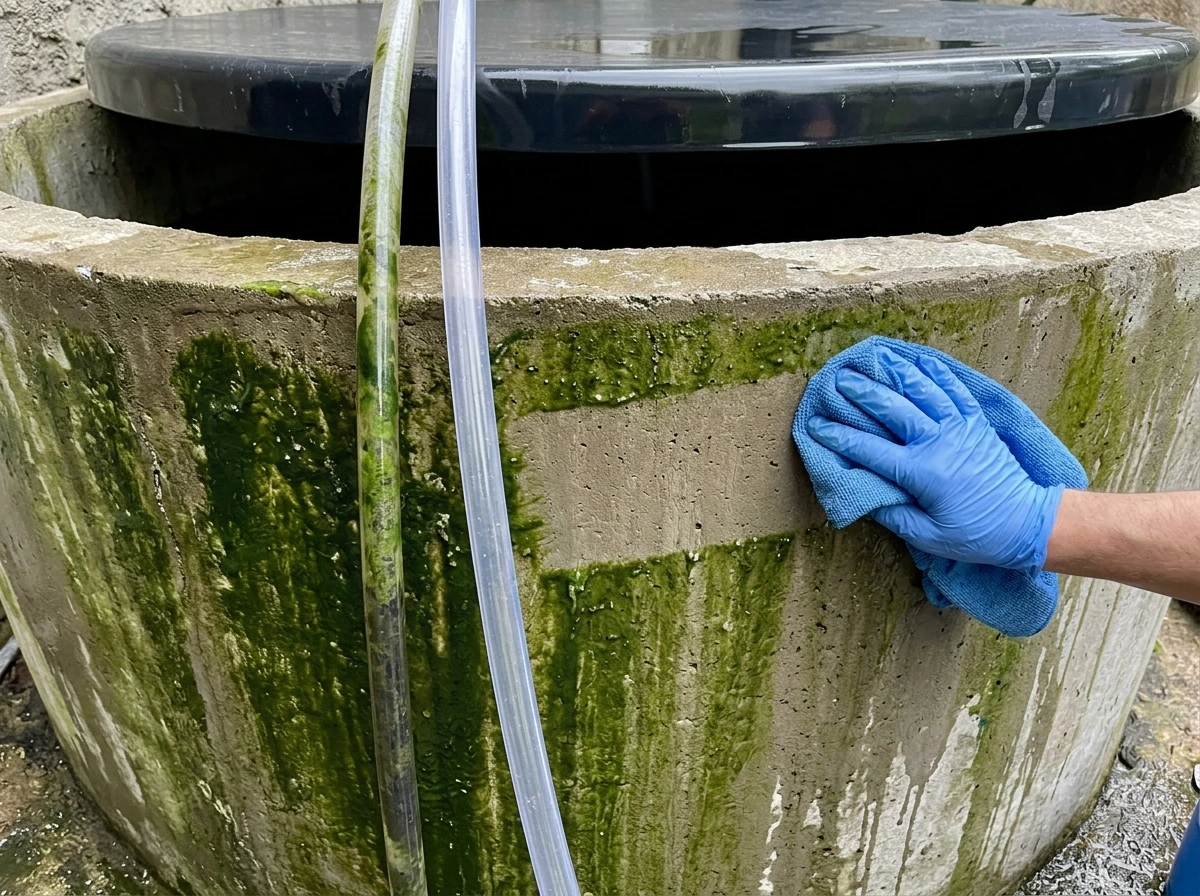
Green slime on reservoir walls, medium, or tubing is algae, and it competes with your plant for oxygen and nutrients while clogging lines. The cause is almost always light leaking into the nutrient solution. Cover every possible light entry point on your reservoir: lid edges, net pot holes between the plant stem and the pot edge, and tubing entry points. Use opaque tape, neoprene inserts around net pots, and paint or wrap any clear containers. Once algae is established, do a full reservoir drain and bleach rinse (1 tsp unscented bleach per gallon of water, rinse thoroughly before refilling), then address the light leak. good to grow water. good to grow hydroponics
Root Rot (Pythium)
Signs: brown or gray roots, slimy texture, foul smell, sudden wilting even with full reservoir. Causes: reservoir temp above 72°F, insufficient aeration, light leaks, or dirty equipment. Fix: lower reservoir temp immediately, double your air stone output, add Hydroguard or similar beneficial bacteria at double the standard rate for two days, remove dead root material with clean scissors, and do a partial water change. Prevention is far easier than recovery, so dial in reservoir temps before you need this fix.
Clogged Lines and Pumps
Drip lines and pump intakes clog from root material, algae, and mineral salt buildup. Flush lines with plain pH-adjusted water once weekly in any recirculating system. Between cycles, run a citric acid or commercial line cleaner solution through the entire system before your final rinse. Use mesh pre-filters on pump intakes. In RDWC systems, roots will eventually reach the tubing, so plan for slightly larger line diameters (3/4 inch minimum for main returns) than you think you need.
Slow Growth or Stalled Plants
If plants look healthy but just aren't moving, run through this checklist in order: check and calibrate your pH pen (a drifting pen is the single most common invisible problem), verify light distance and PPFD, confirm reservoir temp, check that air stones are actually bubbling (pumps fail silently), and review your feed chart to confirm EC is appropriate for the plant's size and stage. Most stalls are one of these five things.
Harvest Timing, Yields, and What to Fix Next Cycle
Knowing when to harvest is as important as everything that came before it. Harvesting too early costs you significant yield and potency. Harvesting too late can degrade quality. The most reliable method is trichome inspection with a 60–100x jeweler's loupe or a digital microscope.
Trichome Harvest Indicators
- Clear trichomes: not ready, plant still developing
- Cloudy/milky white trichomes: peak potency approaching, harvest window opening
- Mixed cloudy and amber (10–20% amber): most growers' preferred harvest window for balanced effects
- Mostly amber (30%+): past peak, heavier/more sedative profile, some degradation occurring
Secondary indicators: pistils (hairs) turning from white to orange or red (70–90% color change), calyxes swelling and stacking, and fan leaves beginning to yellow and drop naturally during the flush period. Use all three signals together, not any one in isolation.
Realistic Yield Expectations in Hydro
A well-run DWC setup under a 600W HPS or equivalent LED can produce 0.5–1.0 grams per watt in a realistic home grow scenario, meaning 300–600 grams per cycle. RDWC with optimized canopy management and dialed-in environment can push 1.0–1.5 g/w in experienced hands. First cycles rarely hit these numbers and that's completely normal. The learning curve in hydro is steep for the first one or two grows and then flattens sharply once you've seen your system through a full cycle.
Your Next-Cycle Improvement Checklist
- Log what happened: write down your pH and EC readings from each week, any problems you saw, and when they appeared. Patterns become obvious over two or three cycles.
- Identify your biggest bottleneck: was it environment (temp/humidity swings), root health, light intensity, or nutrient management? Fix the biggest one first, not all of them at once.
- Clean everything: full bleach rinse of reservoir, lines, and net pots between cycles. Salt and biofilm buildup from one cycle becomes a problem in the next.
- Re-calibrate all meters: pH and EC pens drift. Fresh calibration solution is cheap. Wrong readings are expensive.
- Tighten your light leak points: inspect every seal on your reservoir in a darkened room with a flashlight. If you can see light in, algae will find it too.
- Adjust your EC ladder: if you hit deficiencies, you ran too low; if you hit toxicity or lockout, you ran too high. Shift your whole schedule up or down by 0.2 EC and observe.
- Consider your water source: if you're on tap water and had persistent pH drift or unexplained deficiencies, investing in a basic RO filter ($80–$150) often solves problems that no amount of pH correction fully fixes.
- Plan your training earlier: if your canopy was uneven, top or LST one week sooner next cycle and give yourself more time before the flip.
Hydro rewards consistency and attention more than any other growing method. The growers who get the best results aren't necessarily using the most expensive equipment. They're checking their reservoir daily, keeping clean logs, and making small adjustments based on what their plants actually show them. Start with that habit and everything else in this guide will compound on top of it.
FAQ
My pH reading looks stable, can I trust it without calibrating my meter every week?
Yes, but you should still correct it. If your target pH is 5.8 and your pen reads 6.0, the fix is not “wait it out”, it is to recalibrate the pen first (fresh 5.5 and 7.0 buffer) and only then adjust the reservoir. A consistent offset from an uncalibrated or cold pen can waste a full cycle of nutrients.
When pH rises, can I just top off with pH down water and never change the reservoir?
In hydro, “plain pH water” top-off is only safe for short periods. If EC keeps rising, you likely have evaporation plus nutrient concentration, so do top-offs with pH 5.5 to 5.8, then schedule a partial reservoir change when EC or total dissolved solids drift beyond your target band (for example after 7 days as a default).
Can I add cal-mag, silica, and beneficial bacteria at the same time from day one?
Avoid it. Beneficial bacteria, cal-mag, and pH up/down solutions can interact indirectly by changing pH and nutrient availability, and some additives require specific water chemistry. Get your base A and B feeding, pH, EC, and reservoir temperature stable first, then add one additive at a time and watch for 3 to 5 days before changing anything else.
What should I do if my EC is below the feed chart, do I immediately increase nutrients?
Yes, if the “low EC” is due to dilution from temperature swings or water top-offs done with nutrient-free water. The practical approach is to log EC and pH daily, and when you adjust, increase by small steps (for example 0.1 to 0.2 EC) rather than jumping to the full chart target.
My reservoir smells bad and leaves droop, but roots look only slightly discolored, what’s the priority fix?
It depends on the cause. If the roots are brown or slimy, you need to address temperature and oxygenation first (keep the solution under 72°F, ensure vigorous aeration, and remove dead root tissue). If the roots look healthy but stems droop, check light intensity and airflow, because water can be present but uptake may still be limited by pH or temperature.
Is it okay to mix nutrients with hot water to dissolve faster?
Yes, but only if you can control it. Using “hot” water to dissolve nutrients can lead to precipitation or uneven mixing. Mix at room temperature, dissolve one component at a time into water, and ensure the reservoir is fully mixed before checking EC, then recheck after 30 to 60 minutes to confirm reading stability.
How do I find light leaks when the reservoir is covered and I cannot see any obvious gaps?
Use a simple containment strategy: cover the reservoir, seal unused holes, and keep tubing pass-throughs light-tight. For net pots in DWC, use snug neoprene or foam collars so light cannot reach the solution through the gaps around the stem. If you see green film on the lid or tubing, assume light leak and fix immediately.
My plants are stalling, how do I tell if it’s an aeration problem versus a nutrient problem?
Run two tests. First, verify your air pump output by observing vigorous bubbling at the diffuser, since failing pumps can look “mostly fine.” Second, test dissolved oxygen indirectly by tracking plant response after aeration changes, because pH alone will not reveal low oxygen. In emergencies, increase aeration before adding more nutrients.
Why does my pH keep drifting after I adjust it, even when I follow the routine?
Check your measurement method. pH should be adjusted after nutrients are mixed and the solution has had time to circulate, because fresh mixing can shift pH readings. Also make sure you measure a mixed sample from the reservoir, not a surface layer, and stir the reservoir before sampling.
If algae returns after I bleach the reservoir, what’s the most common reason it keeps coming back?
Green slime usually signals algae, but it can also be biofilm from poor cleaning or sediment. If you only bleach once but keep the same light conditions, it will return. Clean the system thoroughly (drain, bleach rinse, and wipe light-exposed surfaces), then fix the light leak and reduce nutrient spill or condensation on external surfaces.
Do I need to redo my EC baseline if my tap water or RO water source changes?
Yes, and it affects EC math. Start with a baseline EC measurement of your source water, then add nutrients based on the combined EC target. If you switch filters or start using different tap sources, recalculate the baseline or you can accidentally underfeed or double-feed plants.
Can I reuse nutrient solution from the previous cycle to save money?
For reusing water between reservoirs or cycles, do not assume stability. If you suspect root rot or algae, dispose and fully sanitize, because pathogens and biofilm carry over. If you are simply doing normal maintenance, use partial changes based on logs, but still clean the tubing path periodically to prevent mineral buildup.
When pistils are not fully dark yet, can I still harvest if trichomes look ready?
A safer approach is to harvest based on trichomes plus one or two secondary signals. If most trichomes are near the target stage but pistils are still mostly white, you may be early for potency depending on strain. Use trichomes as the primary decision, then confirm with the majority color shift of pistils and calyx swelling consistency.