You can grow clones hydroponically by taking cuttings from a healthy mother plant, rooting them in a sterile medium like rockwool or foam plugs inside a high-humidity dome, and then transferring them into your hydroponic system once roots are 1–2 inches long and white. The whole process from cut to transfer typically takes 7–14 days when you control humidity (90–100% RH early on), air temperature (75–80°F), and light properly. Once transferred, you dial in pH to 5. 5–6.
How to Grow Clones Hydroponically: Step-by-Step Guide

Marcus Holloway
23 May 2026
0, keep EC low at first, and ramp up nutrients as the plant establishes. That's the core of it. If you want ideas for what to grow hydroponically next, focus on fast, high-demand leafy greens and herbs that match your available light and nutrient strength hydroponic system. Everything below is the detail that makes the difference between 90% survival rates and losing half your cuts.
Clones and hydroponics: what you're actually trying to do
A clone, in the horticultural sense, is a cutting taken from a donor plant (called the mother plant) that, once rooted, becomes a genetically identical copy of that parent. No seeds, no genetic variation, no guessing. If your mother plant produces exactly what you want, every clone from it will too. That's the whole appeal.
The challenge with clones in hydroponics is that cuttings have no roots when you take them. They're immediately at risk of wilting because they can't uptake water yet, but they're still losing moisture through their leaves. Your job for the first week or two is to keep the cutting alive and stress-free while it develops roots, then move it into an active hydro system without shocking it. Get that transition right and clones in hydroponics grow faster than almost anything else, because the roots go directly into a highly oxygenated, nutrient-rich environment the moment they're ready.
Compared to growing from seed, cloning saves weeks of vegetative time, eliminates males in flowering crops, and locks in traits you've already verified. If you're already running a hydroponic system and you've found a phenotype you love, cloning is the obvious next step. If you're wondering what to grow in hydroponics in RimWorld, start by choosing plants that match your temperature and light setup so the system can keep up with production already running a hydroponic system.
Picking your clone method and starter setup
Before you take a single cutting, decide how you're rooting your clones. The method you choose affects what equipment you need, how hands-on the process is, and how easily you can scale up.
Rooting medium options
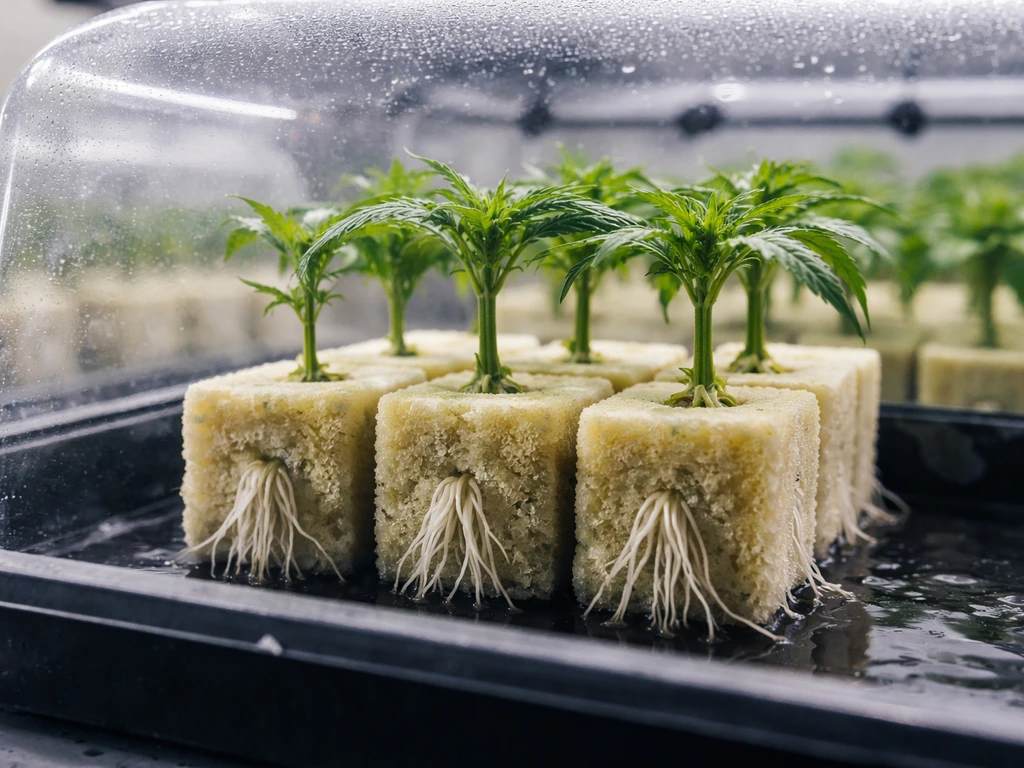
Rockwool cubes are the most common choice and for good reason. They're sterile, inert, hold moisture while staying airy, and work in almost every hydroponic system. Soak them in pH 5.5 water before use, squeeze out the excess, and they're ready. Foam plugs (like Rapid Rooters or Root Riots) are nearly as good and are a bit more forgiving if you overwater. Coco coir plugs work too, especially if you're moving clones into a coco-based system afterward. Avoid plain perlite or hydroton for initial rooting since they don't hold moisture consistently enough at the early stage.
| Medium | Best For | Drainage | Transfer Compatibility | Beginner Friendly |
|---|---|---|---|---|
| Rockwool cubes | Any hydro system | Excellent | DWC, NFT, drip, aeroponics | Yes, with pH prep |
| Foam plugs (Rapid Rooter) | Any hydro system | Good | DWC, drip, aeroponics | Very easy |
| Coco coir plugs | Coco/drip systems | Good | Drip, coco beds | Yes |
| Aeroponics (no medium) | Advanced setups | N/A (misted roots) | Aeroponics, DWC | Steeper learning curve |
Clone-friendly hydroponic systems
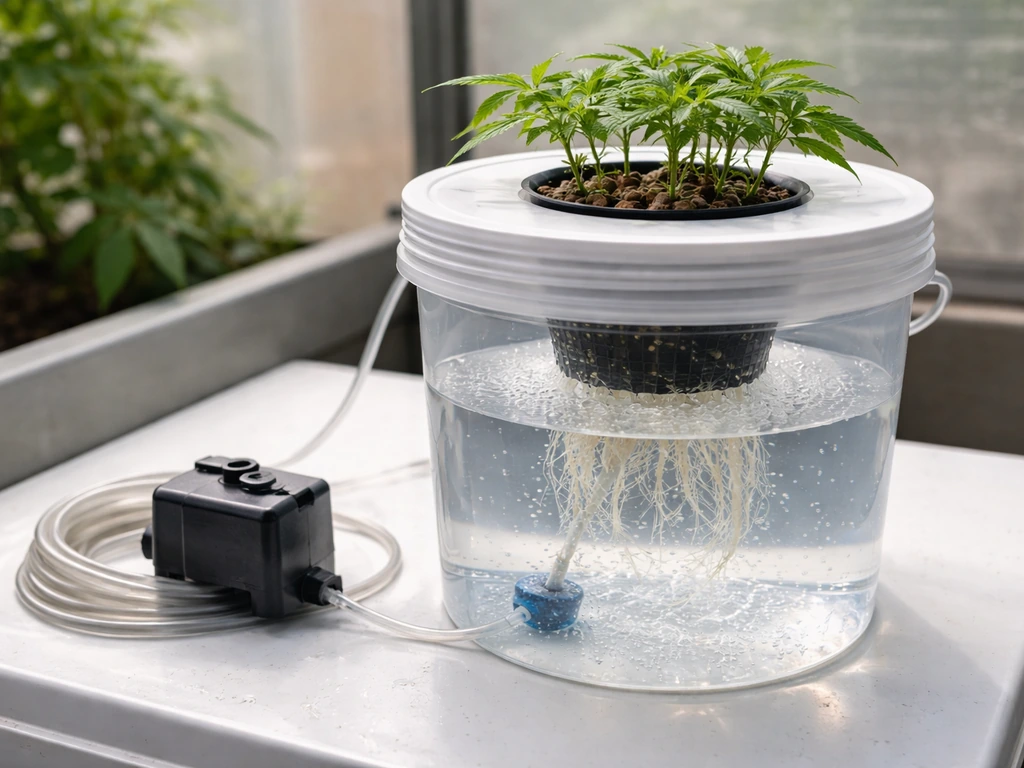
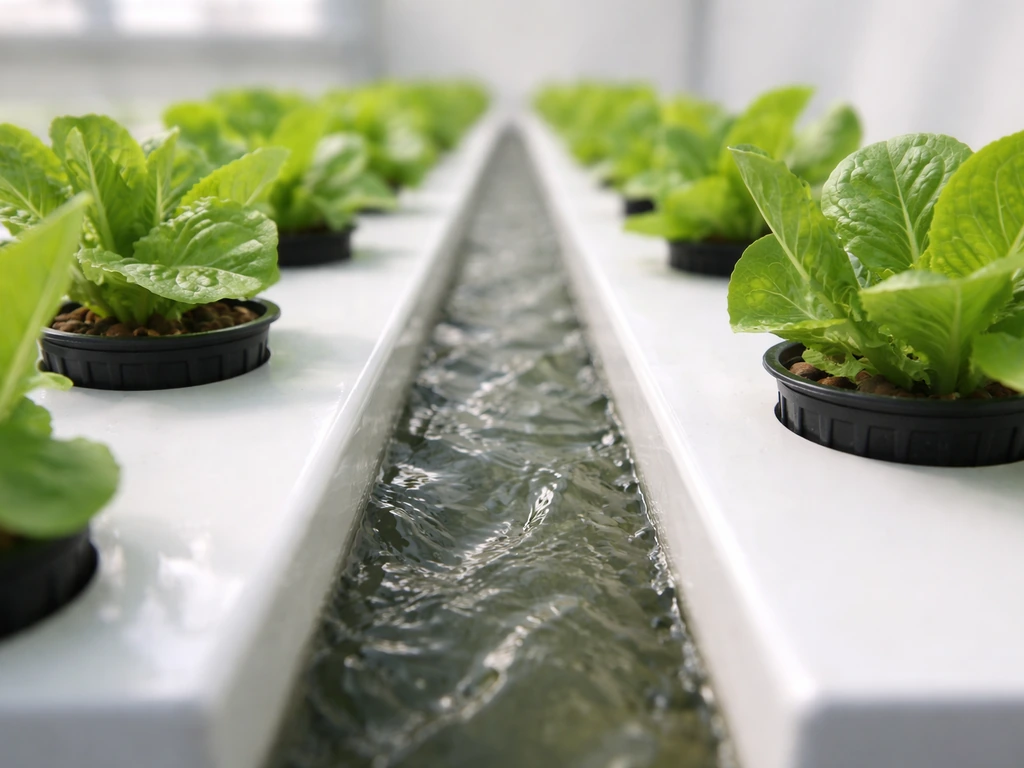
For most home growers, a simple deep water culture (DWC) bucket or a small recirculating drip system is the easiest entry point after rooting. If you want to choose the best container for hydroponic tomatoes, DWC is a common starting point because it keeps roots oxygenated and easy to manage best container to grow tomatoes hydroponically. DWC keeps roots submerged with constant aeration, which young clones respond to quickly.
NFT (nutrient film technique) systems work well once roots are established but can stress clones early on because the thin nutrient film can dry out fragile new roots. If you want ideas on crop selection specifically for an NFT setup, you should focus on fast-growing, shallow-root-friendly plants and manage the flow so new roots never dry out what to grow in an NFT system.
Aeroponics is genuinely the fastest rooting method, spraying misted nutrient solution directly onto suspended roots and delivering dissolved oxygen levels of 7–10+ ppm, but it requires more equipment, more precision, and more troubleshooting if a mister clogs or the timer fails. I'd recommend DWC for beginners and aeroponics for growers who already have a feel for managing a hydro system.
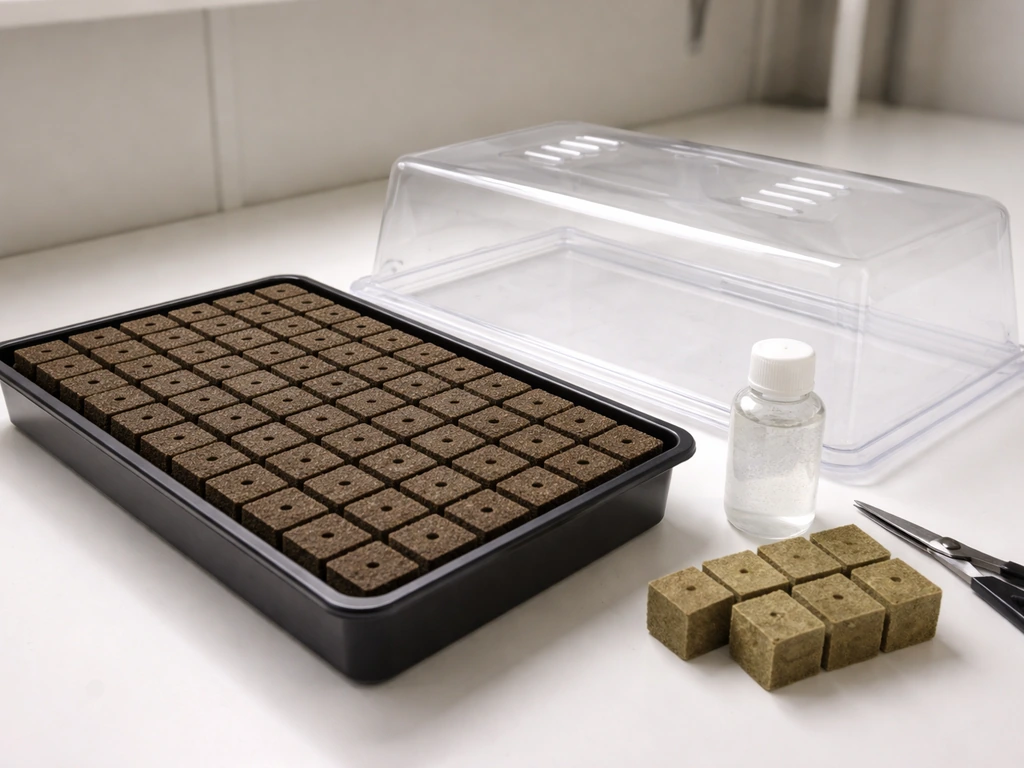
Your starter kit for clone rooting should include: a propagation tray, a humidity dome, a seedling heat mat, a propagation light (T5 or LED panel), your chosen rooting medium, a small spray bottle for misting, pH meter, and rooting hormone. That's the core list. A digital thermometer/hygrometer placed inside the dome at canopy level is worth adding so you're reading actual conditions rather than guessing.
Preparing your mother plants and taking cuttings
The quality of your cuts is determined almost entirely by the health of the mother plant before you take them. A stressed, overfed, or nutrient-deficient mother produces cuttings that root slowly and often fail. Keep mother plants in a vigorous vegetative state, well-watered, and avoid high-nitrogen feeding for about a week before you take cuttings. Nitrogen-heavy growth produces soft, sappy tissue that rots before it roots.
How to take a cutting correctly
- Sterilize your cutting tool with isopropyl alcohol or flame before each cut. This is non-negotiable for preventing disease transmission.
- Select a healthy shoot tip with at least 2–3 nodes and 3–5 inches of stem. Avoid the very top (it's often too soft) and very old woody growth (it's too slow to root).
- Cut at a 45-degree angle, just below a node, to maximize the surface area for root emergence.
- Immediately place the cut stem in a glass of pH-adjusted water (around 5.8) to prevent air embolism in the stem.
- Strip the lower leaves so only 2–4 leaves at the top remain. Fewer leaves means less water loss through transpiration while roots are absent.
- Dip or coat the cut end in rooting hormone. Gel products (IBA-based, typically 500–2000 ppm for herbaceous cuttings) coat the wound evenly and stay in contact with the tissue better than powder.
- Insert the cutting into your pre-moistened rooting medium, deep enough to cover at least one node.
- Mist the leaves lightly, place in the dome, and get the environment dialed in within the next 30 minutes.
Work quickly. Every minute a cutting sits without humidity protection is stress it doesn't need. If you're taking many cuts at once, fill a clean container with pH 5.8 water and drop each cut in immediately after trimming, then process them into the medium in batches.
Getting the rooting environment right
This is where most beginner failures happen. People take good cuttings, put them in decent media, and then neglect the environment. Temperature, humidity, light, and airflow all work together in the propagation dome, and getting one wrong undermines the others.
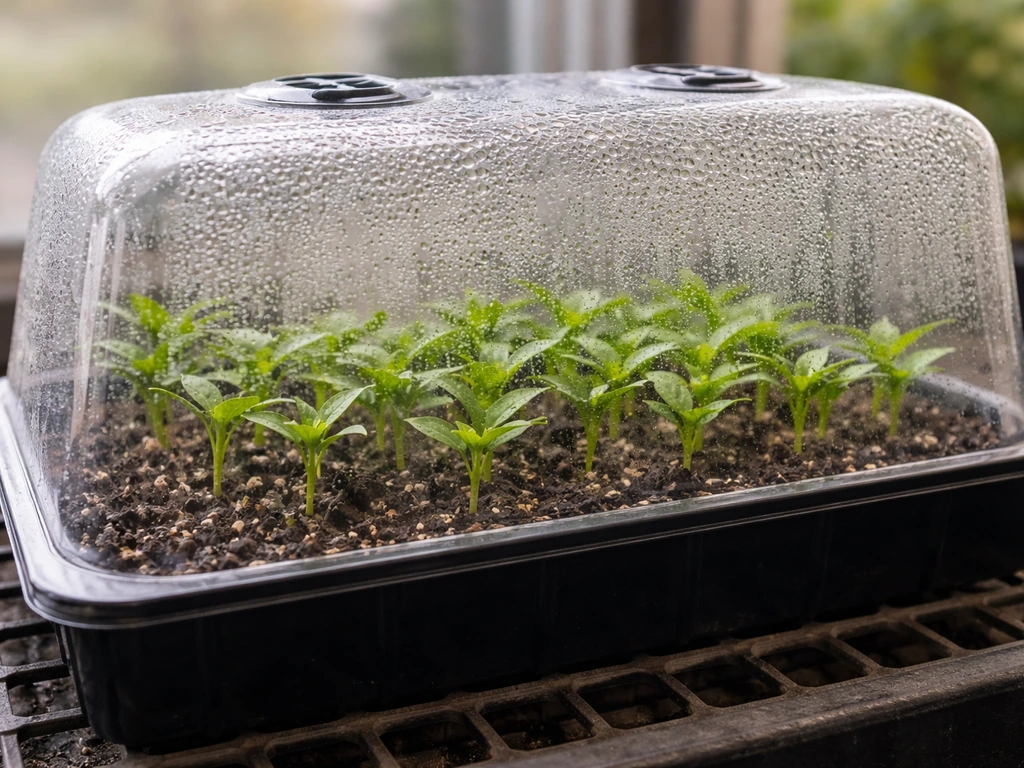
Humidity
Start at 90–100% RH inside the dome for the first 3–5 days. This near-saturated air dramatically reduces transpiration stress while the cutting has no roots to supply water. After day 5, if you see any sign of wilting, leave the dome fully closed. Once you see the cutting perking up on its own and roots beginning to emerge (visible at the bottom of the cube or plug), start cracking the dome vents slightly to reduce humidity toward 70–80% RH over the next 3–5 days. Don't drop humidity abruptly. Rapid drops cause wilting and can stall or kill roots mid-development. Watch for condensation dripping onto leaves inside the dome as a sign you need a brief vent.
Temperature
Air temperature inside the dome should sit at 75–80°F. Root zone temperature matters even more: roots and callus tissue form faster at 72–78°F medium temperature, and a seedling heat mat under your propagation tray is one of the cheapest and highest-impact investments you can make. Don't let the medium temperature exceed 80°F or you'll encourage pathogen growth. Conversely, cool media below 65°F dramatically slows root formation. Don't rely on room temperature alone to hit these numbers. Put your sensor inside the dome at canopy level.
Light
Clones don't need intense light, but they do need enough to support some photosynthesis, which actually fuels rooting. A T5 fluorescent or a small LED propagation panel at 18 hours on, 6 hours off works well. Keep the light 4–6 inches above the dome (not inside it) to avoid heat buildup. Insufficient DLI delays rooting because the leaves can't generate the energy the cutting needs to push root tissue. That said, don't go too bright early on: high-intensity light increases transpiration demand and stresses cuttings that have no roots yet. A gentle, consistent light level is the goal.
Airflow
Inside a dome, you want minimal direct airflow across leaves, but you don't want completely stagnant air either. Stagnant air combined with high humidity creates conditions for mold (especially Botrytis) on leaf surfaces and propagation media. Briefly venting the dome once a day during the first few days provides a small gas exchange without crashing humidity. Once vents are cracked open after day 5, passive airflow through those vents is usually enough. A small fan oscillating gently nearby (not blasting into the dome) helps maintain ambient air movement around the outside.
Nutrients for clones: rooting phase vs. early vegetative phase
One of the most common clone-killing mistakes is feeding too aggressively too soon. Clones don't need heavy nutrients while they're rooting. They have no roots to uptake nutrients safely, and salts in the medium can actually draw moisture out of the cutting through osmosis, causing wilting and tip burn.
During rooting (days 1–10)
Use plain pH-adjusted water (pH 5.5–5.8) or an extremely diluted nutrient solution with an EC no higher than 0.4–0.6 mS/cm (roughly 200–300 ppm) for misting leaves and keeping media moist. Some growers add a small amount of liquid seaweed or a rooting solution with low NPK to the misting water. Avoid any high-nitrogen bloom or grow formulas at this stage. The cutting gets most of what it needs from stored energy in its own tissue.
Transitioning to vegetative (days 10–21)
Once roots are 1–2 inches long and white, you can begin introducing a diluted vegetative nutrient solution. Start at EC 0. 8–1. 0 mS/cm (400–500 ppm) and raise it gradually over 5–7 days toward your system's normal vegetative target (typically EC 1.
2–1. 8 mS/cm for most crops in DWC or recirculating systems). The guide value to keep in mind: during cloning, aim for no more than EC 1. A step-by-step cloning guide for hydroponic growers recommends keeping cloning EC low, no more than about 1.
5 EC (15 CF / 1050 PPM), and using pH-adjusted water around 5. 5, 5. 8 when adding solution to clone blocks [aim for no more than EC 1. 5 as an absolute ceiling](https://www.
rollitup. org/t/cloning-for-hydroponic-growers-a-step-by-step-guide. 759655/). 5 as an absolute ceiling.
Crossing that line before roots are strong causes nutrient lockout and leaf tip burn.
Established vegetative hydroponics (week 3 onward)
Once your clone is in the main hydro system and showing new growth, treat it like any other vegetative plant. Use a balanced N-P-K formula suited to your crop, maintain EC in the target range for your system type and crop, and monitor plant response rather than rigidly following a feed chart. Pale new growth means bump EC up. Tip burn or tacoing leaves means back off and check pH first.
Managing pH, EC, dissolved oxygen, and system cleanliness
These four variables determine whether a hydroponic clone system stays healthy or becomes a disease vector. None of them are optional to monitor.
pH
Keep your reservoir and misting solution at pH 5.5–6.0 for the rooting stage, and pH 5.8–6.2 once plants are in the main hydro system. Check pH daily in a small clone system because small reservoir volumes swing faster than large ones. Use a calibrated digital pH meter, not strips. If pH drifts above 6.5, iron and calcium become unavailable at the root level even if they're present in the nutrient solution. Below 5.0, phosphorus and calcium lock out. Both scenarios look like nutrient deficiency even when the feed is fine.
EC
Check EC every 1–2 days. If EC is rising between reservoir changes, plants are drinking more water than nutrients (common in warm conditions), so top off with plain pH-adjusted water. If EC is dropping, plants are feeding actively and you may need to top off with diluted solution. Don't let a reservoir run below 50% of its starting volume without topping up, especially in small DWC setups where concentration swings happen fast.
Dissolved oxygen and water temperature
Dissolved oxygen (DO) in your reservoir is what keeps roots white, healthy, and disease-resistant. Warm water holds less oxygen: at 77°F (25°C) water holds significantly less DO than at 65°F (18°C). Dropping water temperature by about 9°F (5°C) increases DO availability by roughly 15–20%. Target reservoir water temperature between 65–70°F. Above 75°F, pathogen populations (especially Pythium, the main culprit in root rot) explode in hydro systems. Use a water chiller if your environment is warm, and run air stones or a high-quality pump to maximize aeration. Aeroponics delivers the highest DO of any system (7–10+ ppm when working correctly), but well-aerated DWC with a quality air pump and stones reaches adequate levels for healthy clones.
System hygiene and reservoir changes
Change your reservoir completely every 7–10 days in a clone system. Between changes, top off as needed. Before you start a new batch of clones, sanitize all equipment: trays, domes, tubing, reservoirs, pumps, and net pots. A diluted bleach solution at 150–200 ppm run through the system for up to 3 hours works well for a full cleandown between cycles. Alternatively, use food-grade hydrogen peroxide (about 3 ml of 34% H2O2 per gallon of water) as a less corrosive option that breaks down to water and oxygen. Clean every surface that contacts nutrient solution, not just the reservoir. Pumps and tubing harbor biofilm that re-inoculates fresh solution almost immediately if left dirty.
Troubleshooting common clone failures
Most clone failures in hydroponics come down to four issues: root rot, slow or failed rooting, mold, and nutrient problems. Here's how to identify and fix each one.
| Problem | What You See | Root Cause | Fix |
|---|---|---|---|
| Root rot (Pythium) | Brown/slimy roots, foul smell, wilting despite moist media | Warm water, low DO, contaminated reservoir | Lower reservoir temp to 65–68°F, increase aeration, flush with H2O2, sanitize system |
| Slow/no rooting | No root emergence after 14+ days, yellowing lower leaves | Too cold, low humidity, poor rooting hormone, wrong pH | Add heat mat, check dome humidity, re-dip in fresh gel hormone, verify pH 5.5–5.8 |
| Mold on stems or medium | White or gray fuzzy growth on stem base or medium surface | Stagnant humid air, excess moisture, poor airflow | Vent dome briefly daily, reduce misting frequency, increase airflow outside dome |
| Leaf drop | Leaves yellowing and falling in first 3–5 days | Normal stress response OR too-high light or heat | Expected in small quantity; reduce light intensity if severe, check dome temperature |
| Nutrient burn/tip burn | Crispy brown leaf tips, curled edges | EC too high too soon, pH out of range | Flush with plain pH water, reduce EC, re-check pH before reintroducing nutrients |
| Wilting despite humidity | Drooping, not recovering in dome | Air embolism in stem, or cut exposed too long before planting | Recut stem underwater, re-dip in hormone, replant immediately |
| pH swings | Deficiency symptoms shifting, erratic plant response | Small reservoir volume, high plant demand, algae | Increase reservoir size, check for light leaks causing algae, test and adjust pH daily |
| Clogged lines/dead zones (NFT/drip) | Dry medium in spots, roots not reaching solution | Debris in lines, biofilm buildup | Flush lines with H2O2, check flow rate, clean emitters |
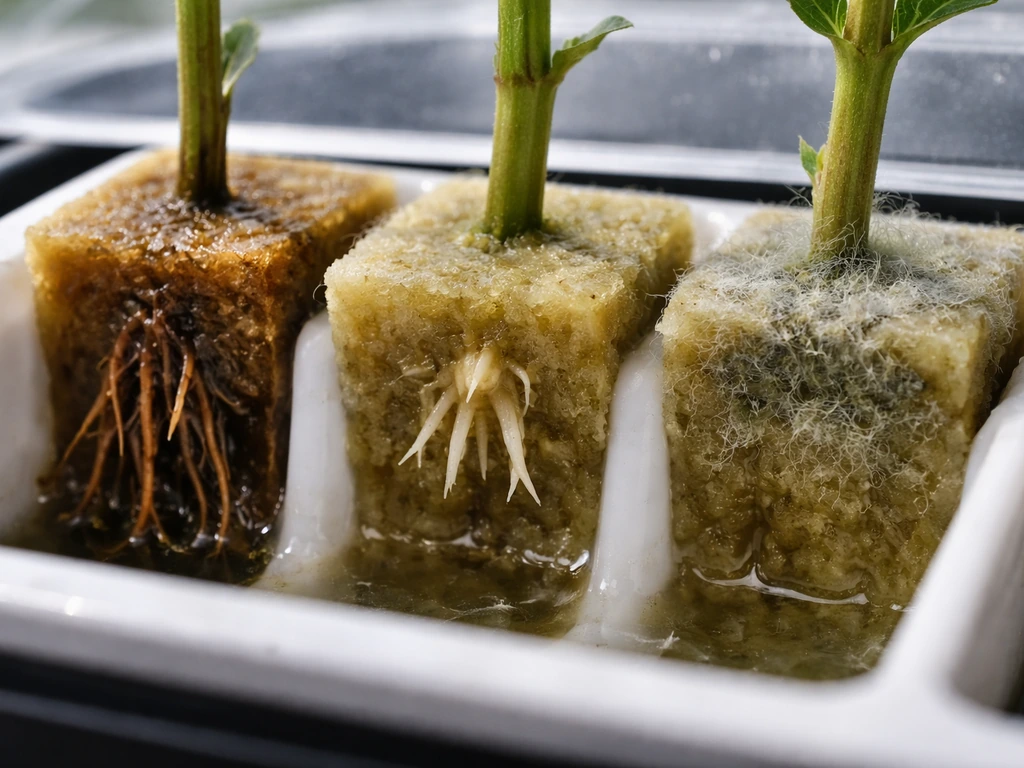
Root rot is by far the most common failure in hydroponic clone systems and it's almost always preventable. Keep water cool, keep oxygen high, keep your system clean, and you'll rarely see it. If you do catch it early (slightly tan roots, mild odor), a hydrogen peroxide flush and a temperature drop can reverse it. Once roots are brown, slimy, and smelling like a swamp, that plant is probably done.
Mold on the propagation medium is a separate issue from root rot and responds to different fixes. It's almost always an airflow problem. You can't eliminate humidity without stalling rooting, so instead focus on gentle air exchange through dome vents and keeping the medium surface from staying soaking wet.
Week-by-week plan: from cutting to established plant
Here's how a typical clone-to-hydro progression looks in practice. Timing varies by species, environment, and clone health, but this gives you clear benchmarks to measure against.
| Timeline | Stage | Key Actions | Target Conditions |
|---|---|---|---|
| Day 0 (cut day) | Taking cuttings | Sterilize tools, select healthy shoots, 45° cut, dip in IBA gel (500–2000 ppm), insert into pre-soaked medium, mist and dome immediately | Dome RH: 95–100%, Temp: 75–80°F, Light: 18h/6h low intensity |
| Days 1–5 | Rooting phase 1 | Keep dome closed, mist leaves once daily if no condensation visible, check heat mat temp, no nutrient solution yet | Dome RH: 90–100%, Temp: 75–80°F, Medium temp: 72–77°F |
| Days 5–10 | Rooting phase 2 | Start venting dome briefly once daily, watch for root emergence at medium base, begin light misting with pH 5.5–5.8 water only | Dome RH: dropping toward 80%, Temp: 75–78°F |
| Days 10–14 | Root check and transfer prep | Roots visible 1–2+ inches, white and branching. Begin very diluted nutrient solution (EC 0.4–0.6). Remove dome for increasing periods each day | RH: 70–75% (ambient), EC: 0.4–0.6, pH: 5.5–5.8 |
| Day 14–16 | Transfer to hydro system | Move rooted clones to net pots in DWC/NFT/drip system. Introduce nutrient solution at EC 0.8–1.0. Maintain pH 5.8–6.0. Check roots are reaching solution | Reservoir temp: 65–70°F, EC: 0.8–1.0, pH: 5.8–6.0, DO: high |
| Week 3 | Early vegetative | Raise EC gradually to 1.2–1.5 as new growth appears. Monitor for tip burn or deficiency. Change reservoir on day 7 of system use | EC: 1.2–1.5, pH: 5.8–6.2, change reservoir weekly |
| Week 4+ | Established vegetative | Full vegetative feeding schedule, EC matched to crop/system requirements. Begin training if applicable. Mother plant maintenance if keeping for future clones | EC: 1.5–2.0+ (crop-dependent), pH: 5.8–6.2, monitor DO and temp continuously |
If your clones aren't showing any root development by day 12–14, don't panic immediately. Some species and some environmental conditions push rooting to day 16–18. The signal to act is wilting inside the dome or deteriorating stem condition, not just slow timing. Check your heat mat temperature, verify your pH, and make sure you used viable rooting hormone (gel has a shelf life and degrades after opening).
What to do after your clones are established
Once your clones hit week 3 in the hydro system and are pushing new growth, you're past the hardest part. From here, treat them like any vegetative hydroponic plant: dial in your feed schedule, manage pH and EC consistently, and start planning your next round of clones from the same mother plant. If you want the rimworld best food to grow in hydroponics, make sure your feed plan matches the crop's stage and keep EC, pH, and oxygen stable. Keeping a healthy, well-maintained mother in a separate container or grow space means you can take cuttings on a rolling basis and run your hydroponic system at near-constant capacity.
If you're building out a bigger setup, the skills you develop cloning for a basic DWC or drip system transfer directly to more advanced configurations. NFT systems, for example, are a natural next step once you understand root health and flow management. The foundational rules are the same: clean system, correct pH, adequate oxygen, and gradual nutrient introduction. Get those right and hydroponically grown clones are about as reliable a production method as you'll find.
FAQ
How do I prevent my clones from drying out before they root, even if the dome is on?
Focus on two checks: medium moisture level and cut handling time. Keep the cubes or plugs evenly moist (not waterlogged) and trim the cutting so it sits in the medium immediately after cutting. If you see domed condensation turning into dry film on leaves, crack vents earlier and mist lightly with pH 5.5–5.8 water (avoid adding nutrient strength to the mist).
What rooting hormone should I use, and does the type matter for hydroponic clones?
Use rooting hormone products labeled for cuttings (gel or powder). Gel tends to be more convenient and stays where you apply it, but only use fresh product after opening, because degradation can slow rooting. If you use liquid rooting mixes, keep dilution very light, since over-strong solutions can irritate the stem base and delay callus formation.
My clones look green but no roots after two weeks. What should I troubleshoot first?
Check root-zone temperature and pH before you change anything else. Confirm the mat is warming the medium under the tray (not just the air), aim for medium about 72–78°F, and verify the pH of the misting water. Also ensure you started with a healthy mother and avoided high-N feeding right before taking cuts, because soft tissue from excess nitrogen often roots slowly or rots.
Should I mist leaves or soak the cubes, and how often?
Mist just enough to keep the surface slightly moist and the medium consistently hydrated. Soaking is safer than drying, but constant saturation can fuel mold on the medium surface. A practical approach is to mist lightly when the dome humidity drops slightly, and rely on the hydrated plug for most of the moisture rather than frequent heavy misting.
Can I use tap water for cloning and then switch to nutrients?
Tap water can work if you can control pH reliably and it is not overly hard or chlorinated. Since small systems swing quickly, measure and adjust pH before every cloning batch (pH 5.5–5.8 for the dome stage, and 5.8–6.2 later). If your tap has high alkalinity, you may see pH drift that stalls rooting even when nutrients are correct.
When should I move clones out of the dome into the main hydro system?
Move them when roots are visibly 1–2 inches long and white, and the cutting is perking up on its own. If you remove them earlier, you usually get wilting because the plant cannot uptake water yet. After transfer, keep nutrient strength low initially, then ramp over about a week rather than jumping straight to full vegetative EC.
Do I need to clean everything every batch, or is sanitizing the reservoir enough?
Sanitizing only the reservoir is not enough. Biofilm forms in tubing, pumps, and any parts that contact nutrient solution, and it can seed disease into fresh solution. Clean trays, domes, and all nutrient-contact surfaces each cycle, then run the full system through a diluted bleach or peroxide clean, followed by thorough rinsing.
How do I tell nutrient problems from light or humidity problems on new clones?
Use pattern recognition. Leaf droop that comes with slow growth and high dome humidity issues often points to environmental stress or moisture imbalance. Pale new growth after transfer usually indicates underfeeding or insufficient light/DLI, while tip burn or leaf tacoing early often points to EC or pH drifting high. Always check pH first when leaves show deficiency-like symptoms, because locked-out nutrients mimic both underfeeding and overfeeding.
What EC should I use during rooting, and is it okay to start feeding right away?
Keep misting water plain pH-adjusted water, or only extremely dilute rooting solution, with EC no higher than about 0.4–0.6 mS/cm. Avoid heavy feeding during rooting, since salts can pull water from the cutting through osmosis and cause wilting before roots are ready. Once roots are established and you transfer to hydro, start around EC 0.8–1.0 and ramp gradually.
My reservoir EC keeps rising. Does that mean I should add nutrients?
Usually no. Rising EC between reservoir changes typically means water is evaporating or plants are drinking more water than nutrients. Top off with plain pH-adjusted water until the EC returns toward target, then reassess. If EC is rising quickly during warm periods, reduce reservoir temperature and increase aeration rather than adding fertilizer.
What reservoir temperature range should I aim for to avoid root rot?
Aim for about 65–70°F in the reservoir. Above roughly 75°F, pathogens that drive root rot increase rapidly. If your grow space is warm, use a chiller or at least keep the reservoir insulated and increase aeration with a quality pump and air stones.
Can I clone in NFT right away, or should I start in DWC?
For most growers, start in DWC (or at least a stable, well-hydrated rooting method) and only use NFT once roots are strong. NFT can stress fresh roots because the thin nutrient film can dry fragile new roots. If you must use NFT earlier, manage flow so new roots never dry out and monitor more frequently for droop and browning.
What are the signs of mold that are different from root rot?
Mold usually appears as fuzzy growth or patches on the medium or leaf surfaces, and it responds to airflow and surface moisture control rather than a temperature-only fix. Root rot presents in the roots themselves, with tan-to-brown slimy roots and a swampy odor. If you see mold in the tray but roots are white and firm, adjust dome venting and reduce prolonged surface wetness.