The best autoflowers to grow right now are Gorilla Glue Auto, Northern Lights Auto, Blueberry Auto, Fast Buds' Original Auto Amnesia, and Royal Dwarf, but the 'best' one for you depends entirely on your setup, skill level, and what you actually want out of the grow. Seedbank’s beginner-focused guidance similarly frames “blank" rel="noopener noreferrer">best” autoflower choices around traits like robust genetics and reasonable finish time, including flowering-time ranges for comparing autoflowers versus photoperiods. Autoflowers are genuinely easier than photoperiods for most home growers because they flower based on age, not light cycle changes, which removes one of the biggest beginner mistakes from the equation. Below is a practical breakdown of how to pick the right strain, set up your grow correctly, feed it without burning it, and actually hit the yields on the seed packet.
Best Autoflowers to Grow: Top Strains by Goal and Setup

How to Pick the Right Autoflower for Your Situation
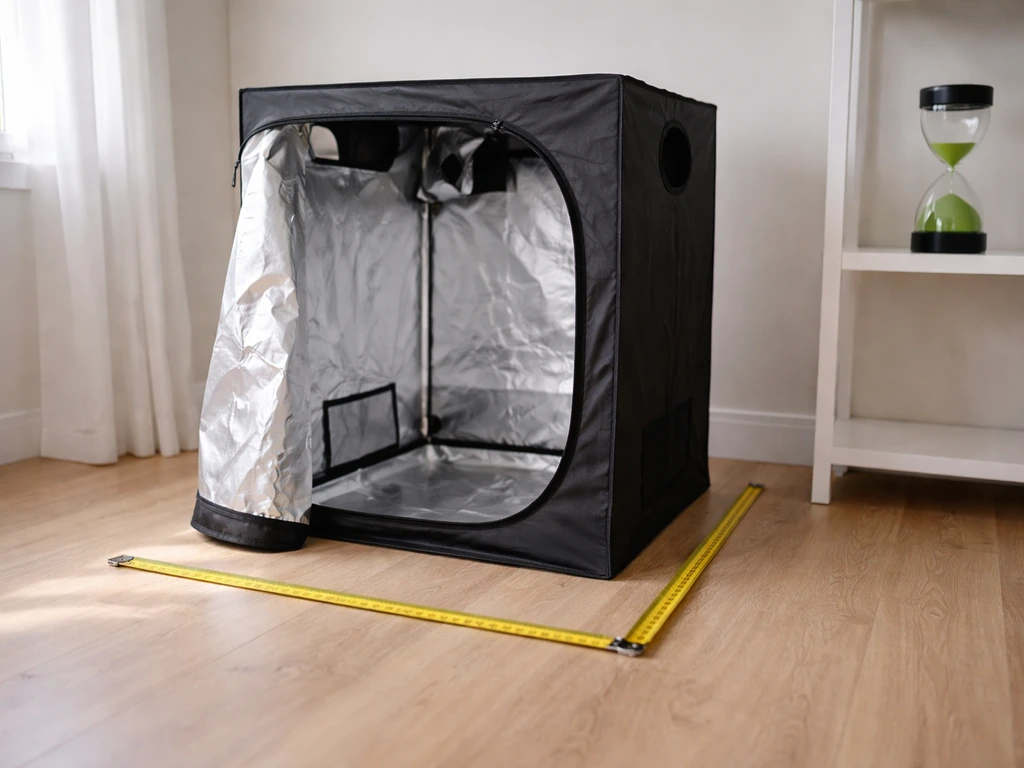
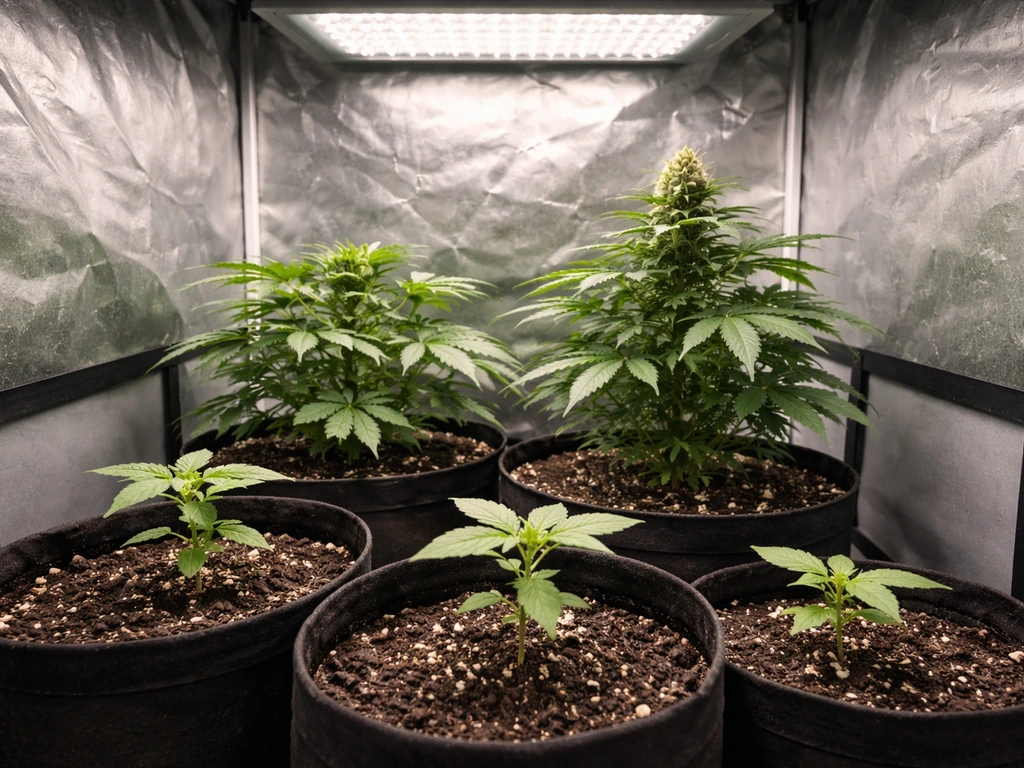
Before you buy seeds, get clear on four things: where you're growing (indoor tent, spare room, outdoor patio), how much vertical space you have, how fast you need it done, and what you value most, yield, potency, or flavor. Autoflowers are compact by nature, but there's still a big difference between a strain that tops out at 50cm and one that hits 110cm. Indoors, most growers are working with a 60x60cm or 80x80cm tent, which suits compact-to-medium autos just fine. Outdoors, you have more flexibility on height but less control over temperature and humidity.
Yield expectations matter here too. A beginner in a 60x60cm tent with a single 200W LED can realistically pull 30–60g from one plant if everything goes well. A more experienced grower with dialed-in conditions and a quality genetics like an auto-feminized Gorilla Glue can hit 100–150g per plant indoors. Outdoor grows with full sun can push even higher. Don't buy a high-yield strain expecting those numbers on your first run, genetics are only part of the equation.
| Priority | What to Look For | Example Trait |
|---|---|---|
| Beginner ease | Stable genetics, tolerant of minor overfeeding/underwatering | Northern Lights Auto, Royal Dwarf |
| Speed | Seed-to-harvest under 70 days | Fast Buds Gorilla Glue, Quick One |
| Limited height | Under 60–70cm finished height | Royal Dwarf, Lowryder 2 |
| Indoor yield | Dense buds, good branching, 400–600g/m² potential | Auto Amnesia, Critical Auto |
| Flavor/terpenes | Heavy terpene expression, fruit or fuel profiles | Blueberry Auto, Zkittlez Auto |
| High potency | THC above 20%, stable Indica or Hybrid lean | Gorilla Glue Auto, Girl Scout Cookies Auto |
One more thing worth flagging: autoflowers don't respond well to heavy training techniques like topping or aggressive LST early on. Because they're on a fixed clock, any stress you apply during the first 3–4 weeks slows growth at a point when the plant can't afford to lose time. Keep this in mind when choosing a strain, if you want to do any training, pick a strain with a slightly longer vegetative window (60+ days total) so it has time to recover.
Best Autoflower Strains by Category
Best for Beginners
Northern Lights Auto is the go-to recommendation for first-time growers. It's one of the most genetically stable autoflowering strains available, it's forgiving of minor feeding mistakes, and it finishes in around 70–75 days from seed. If you're wondering how long that will take indoors, most autoflowers finish from seed in roughly 8 to 11 weeks depending on the strain and conditions finish from seed in around 70–75 days. Plants stay compact (60–80cm), produce dense, resinous buds, and the earthy-pine flavor is universally appreciated. Royal Dwarf (from Royal Queen Seeds) is another smart beginner pick, it stays under 50cm, takes about 8–9 weeks, and is almost impossible to stress out. If you're working with a small, low-profile space, Royal Dwarf is hard to beat.
Fastest Seed-to-Harvest
Quick One from Royal Queen Seeds regularly finishes in 8 weeks (56 days) from germination, making it one of the fastest autoflowers available with actually decent bud quality. Fast Buds' Gorilla Glue Auto also completes in around 56–63 days while delivering significantly higher potency and yield than Quick One. If you need a fast turnaround but don't want to sacrifice too much quality, the Fast Buds Gorilla Glue is the better call. For outdoor growers who need to beat an early frost, either of these are reliable choices.
Highest Yield Indoors
Auto Amnesia (various breeders, with Original Sensible Seeds and Fast Buds both offering solid versions) is consistently one of the highest-yielding autoflowers available, with well-grown plants producing 100–150g each indoors and up to 200g outdoors. Critical Auto is another heavy producer, leaning more Indica and finishing slightly faster, often yielding dense, chunky nugs. For raw grams-per-watt efficiency in a tent, Critical Auto is one of the best available. Both strains need a proper feeding program and good light to hit those numbers, you won't get there with a blurple 150W LED.
Best Flavor and Terpene Expression
Blueberry Auto (based on DJ Short's classic genetics, now available from multiple autoflowering breeders) produces a genuinely distinctive sweet-berry aroma that's hard to replicate in other strains. It takes a bit longer than average, around 75–80 days, but the terpene profile is worth it. Zkittlez Auto from Barney's Farm or Fast Buds delivers tropical-fruit sweetness and is one of the more exciting flavor profiles in the auto market right now. Both strains benefit from a slow, cool dry and a proper cure to fully express their terpenes, rushing that stage kills the flavor regardless of how well you grew them.
Strongest Potency
Gorilla Glue Auto leads the potency category for most growers, with THC testing regularly above 24% in good conditions. Girl Scout Cookies Auto is another high-potency option with a more balanced Indica-Hybrid effect and a sweet, earthy flavor. Bruce Banner Auto (Fast Buds) is worth mentioning here too, it's one of the more potent autos on the market and produces an energetic, euphoric effect that's different from the heavy-handed couch-lock of some high-THC Indicas. For medical growers or those wanting high-CBD options, CBD Crack Auto (25:1 CBD:THC) finishes fast and is easy to grow.
Grow Setup Checklist
Soil vs. Hydroponics for Autoflowers
Soil is the better starting point for most autoflower growers. The best soil to grow autoflowers is usually a quality pre-amended mix that buffers nutrients, supports beneficial microbes, and drains well. A quality pre-amended soil like Fox Farm Ocean Forest or Biobizz Light Mix gives you a built-in buffer against feeding mistakes, and the soil microbiology supports natural nutrient uptake. The downside is slower growth compared to hydro, and slightly less control over nutrient delivery. Hydroponics (particularly DWC or coco coir) can push faster growth and bigger yields, but it demands tighter pH and EC management, and autoflowers are less forgiving of lockout or salt buildup than photoperiods because they can't recover during a prolonged veg phase. If you're newer to growing, start with soil. If you've done a few runs and want to optimize, coco coir is the best middle-ground: it grows like hydro but feeds like soil and is more forgiving than full DWC.
Container Size
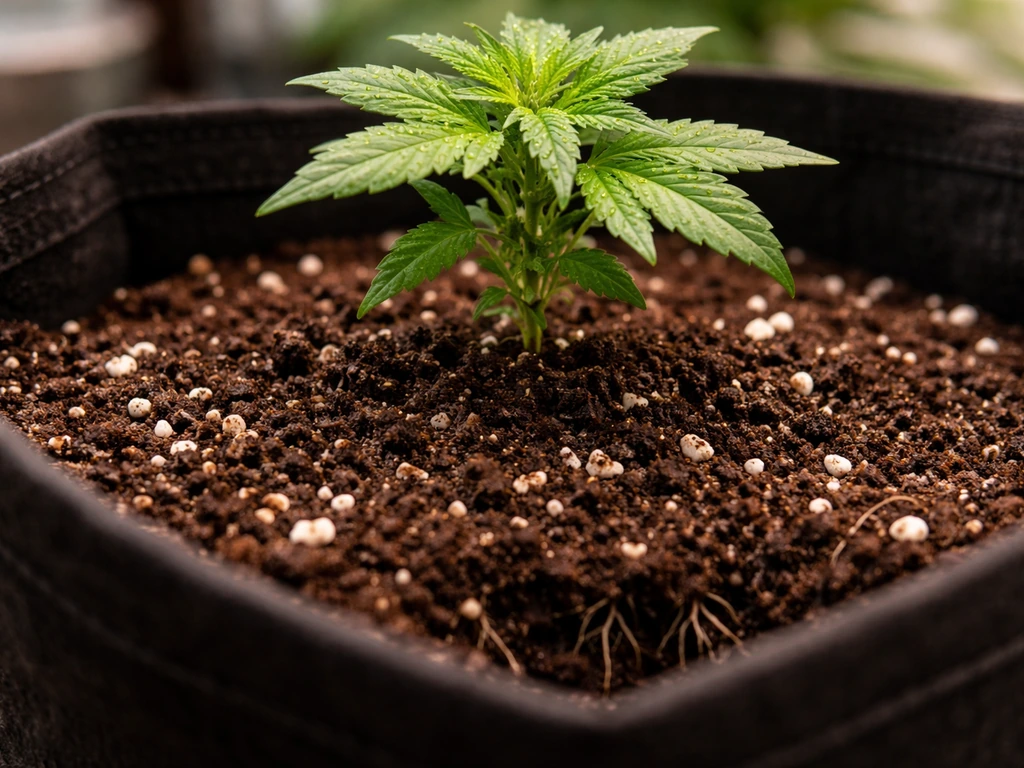
Plant autoflowers directly into their final container, don't start them in small pots and transplant. Transplant shock on an autoflower costs you 5–7 days of growth the plant never gets back. A 3-gallon (11L) fabric pot is the sweet spot for most indoor autos. Larger strains like Auto Amnesia or Gorilla Glue Auto benefit from a 5-gallon (19L) pot. Fabric pots promote air pruning of roots, which improves drainage and prevents overwatering, one of the most common beginner problems.
Lighting
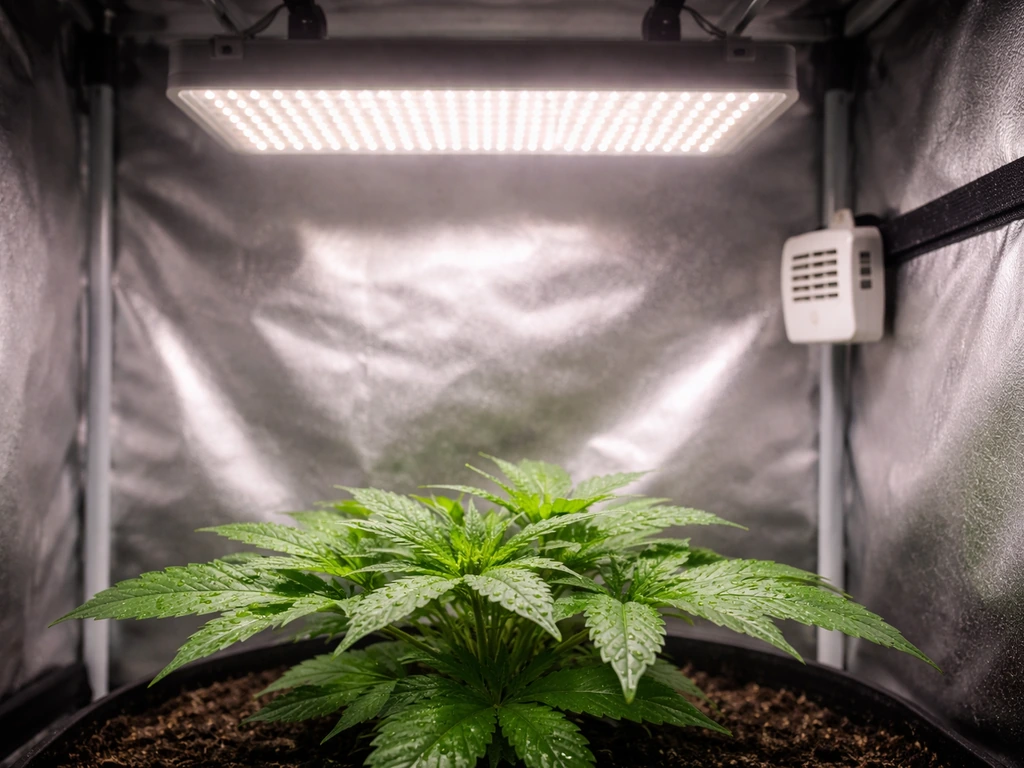
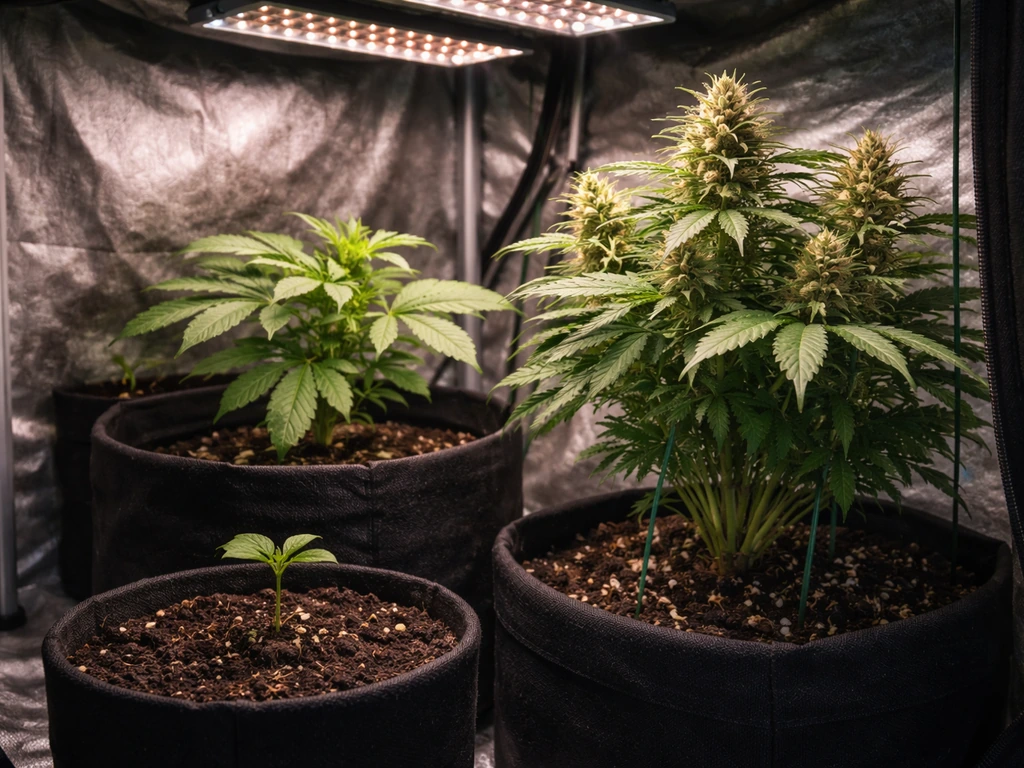
Autoflowers grow well under 18–20 hours of light per day throughout their entire life cycle. A quality full-spectrum LED in the 200–300W range (actual draw) is sufficient for a 60x60cm tent with one or two plants. The Spider Farmer SF-2000 and Mars Hydro TS 2000 are reliable options at that wattage. Avoid cheap blurple LEDs, they underdeliver in both spectrum and intensity, and you'll see it in your final yield. If you're running multiple plants in a larger tent, scale up accordingly: aim for at least 40–50W per square foot of actual LED draw.
Climate and Airflow
Target 20–28°C (68–82°F) during lights-on, dropping no more than 5–8°C during lights-off. Humidity should sit around 60–70% during early veg, dropping to 40–50% during flowering to prevent mold, especially important for dense-budding strains like Critical Auto or Northern Lights. A small oscillating fan inside the tent provides stem strengthening and airflow, while an inline exhaust fan keeps heat and odor controlled. Don't skip the carbon filter if smell is an issue, even small autoflowers can produce noticeable odor during late flower.
Training Limits with Autoflowers
Low-stress training (LST), gently bending and tying branches outward to open the canopy, is the safest technique for autoflowers and can meaningfully improve yields. Start LST at week 3, once the plant has 4–5 nodes. Avoid topping or FIMing unless you're very comfortable with the technique and growing a longer-cycle auto (75+ days). High-stress techniques on fast autos typically reduce final yield rather than improve it. Scrogging (Screen of Green) works well with autos if you're growing multiple plants and want an even canopy.
Seed-to-Harvest Timeline: Week by Week
| Week | Stage | Key Actions |
|---|---|---|
| Week 1 | Germination & seedling | Germinate in moist paper towel or directly in soil. Keep humidity 65–70%, temps 22–25°C. No nutrients yet. |
| Week 2 | Early veg | First true leaves appear. Begin very light watering, no nutrients or 25% of recommended seedling dose. 18–20 hrs light. |
| Week 3 | Veg growth | Rapid leaf and node development. Start LST if desired. Begin quarter-dose veg nutrients. |
| Week 4 | Late veg / pre-flower | Pre-flower pistils may appear. Ramp nutrients to half-dose. Watch for first signs of sex. |
| Week 5 | Early flower | Buds begin forming. Switch to bloom nutrients. Increase phosphorus and potassium, reduce nitrogen. |
| Week 6 | Mid flower | Rapid bud swell. Full bloom nutrient dose. Monitor EC and pH closely. Defoliate lightly if needed. |
| Week 7 | Late flower | Trichomes developing. Begin checking with loupe or jeweler's scope. Reduce nitrogen to zero. |
| Week 8 | Ripening | Flush with plain pH-correct water (soil) or reduce EC to near zero (coco/hydro). Trichomes cloudy with some amber. |
| Week 9–10 | Harvest window | Most autos finish 60–75 days. Harvest when 10–20% of trichomes are amber for balanced effect. 20–30%+ amber for heavier sedation. |
These timelines assume a typical 65–75 day autoflower. Fast strains like Quick One may hit harvest at week 8; longer strains like Blueberry Auto can run to week 10–11. For most autoflowers, the biggest growth spurt happens during early to mid flower as the plant ramps up bud production when do autoflowers grow the most. Don't harvest based on the calendar alone, always check trichomes with a 30x–60x loupe or digital microscope. The seed packet dates are estimates, not guarantees.
Feeding and Nutrients for Autoflowers
Autoflowers are lighter feeders than photoperiod plants, this is one of the most important things to understand before you start. Their root systems are smaller and their growth window is compressed, so they don't have time to metabolize heavy nutrient loads the way a photoperiod can. A nutrient burn at week 2 on an autoflower is a much bigger setback than the same mistake on a photoperiod that has weeks of veg time to recover.
Starting EC and pH
- Soil: target pH 6.0–7.0 for water and nutrient solution; 6.2–6.8 is the sweet spot
- Coco coir: target pH 5.8–6.2; EC should start at 0.4–0.6 mS/cm for seedlings, rising to 1.0–1.4 mS/cm in peak flower
- DWC hydroponics: pH 5.5–6.0; EC 0.5–0.8 mS/cm in veg, up to 1.2–1.8 mS/cm in flower
- Always start at 25–50% of the manufacturer's recommended dose and work up based on plant response
Soil-Specific Feeding Tips
If you're using a pre-amended soil like Fox Farm Ocean Forest, you may not need to add any nutrients for the first 3–4 weeks. The soil contains enough baseline nutrition to carry a seedling through early veg. After that, introduce a mild bloom-focused base nutrient line. Fox Farm Trio, BioBizz Grow/Bloom/Top Max, or General Hydroponics Flora Series all work well. Stick to 50% of label dose for autoflowers. Water when the top inch of soil feels dry, and always water to 10–20% runoff to prevent salt buildup.
Coco Coir and Hydro Feeding Tips
Coco is inert, so you need to add nutrients from day one, but keep EC extremely low for seedlings (0.4–0.6 mS/cm). Coco growers need to water/feed daily or even twice daily in late flower because coco dries out fast. Never let coco dry completely, it creates hydrophobic dry spots that are hard to rewet and cause patchy root distribution. In DWC, change your reservoir water every 7–10 days and monitor EC and pH daily. A 1°C rise in reservoir temperature can trigger pythium (root rot), keep reservoir temps under 20°C (68°F), ideally using a small aquarium chiller.
Troubleshooting Common Autoflower Problems
Early Stretch
If your seedling is stretching tall and thin in the first two weeks, it's not getting enough light. Move the light closer (follow manufacturer specs for minimum distance) or increase intensity. Seedlings in colder environments also stretch more as they reach for warmth. Fix the light distance first, then check temps. You can bury a leggy seedling deeper in the medium to shore up the stem, autoflowers handle this well.
Nutrient Burn and Lockout
Nutrient burn shows up as brown, crispy leaf tips, usually starting on the newest growth. The fix is simple: flush with plain pH-correct water (2–3x the pot volume) and drop your EC by 25–30% for the next few feedings. Nutrient lockout is different, it looks like a deficiency (yellowing, purple stems, clawing leaves) even though you've been feeding. The cause is usually pH drift or salt buildup blocking nutrient uptake. Check and correct your pH first, then flush if the issue persists. Lockout is more common in coco and hydro than in soil.
Common Deficiencies
| Deficiency | Visual Symptoms | Quick Fix |
|---|---|---|
| Nitrogen (N) | Yellowing starting on lower/older leaves, spreading upward | Add mild veg nutrient or increase N ratio; check pH first |
| Calcium (Ca) | Brown spots on mid-canopy leaves, edges curl up | Add Cal-Mag supplement (1–2ml/L); common in RO or soft water |
| Magnesium (Mg) | Interveinal yellowing on older leaves (green veins, yellow between) | Add Cal-Mag or Epsom salt (1g/L as a foliar spray) |
| Phosphorus (P) | Purple/red stems and undersides of leaves, slow bud development | Check pH (P locks out below 5.5 in coco); increase P in bloom feed |
| Iron (Fe) | Yellowing on newest growth, veins stay green | Usually a pH issue — correct to 6.0–6.5 in soil; 5.8–6.0 in coco |
Hermaphrodite Risk
Autoflowers can hermaphrodite (produce male pollen sacs alongside female flowers) when stressed. The most common triggers are light leaks during lights-off, extreme temperature swings, severe overfeeding, and physical damage to the plant. Buy feminized auto seeds from a reputable breeder, this dramatically reduces herm risk. If you spot small banana-shaped growths (nanners) or pollen sacs emerging between buds, remove them with clean tweezers immediately and check for environmental stressors. One or two nanners don't automatically ruin the grow, but ignoring them will seed your entire crop.
Harvest, Drying, Curing, and What to Actually Expect
When to Harvest
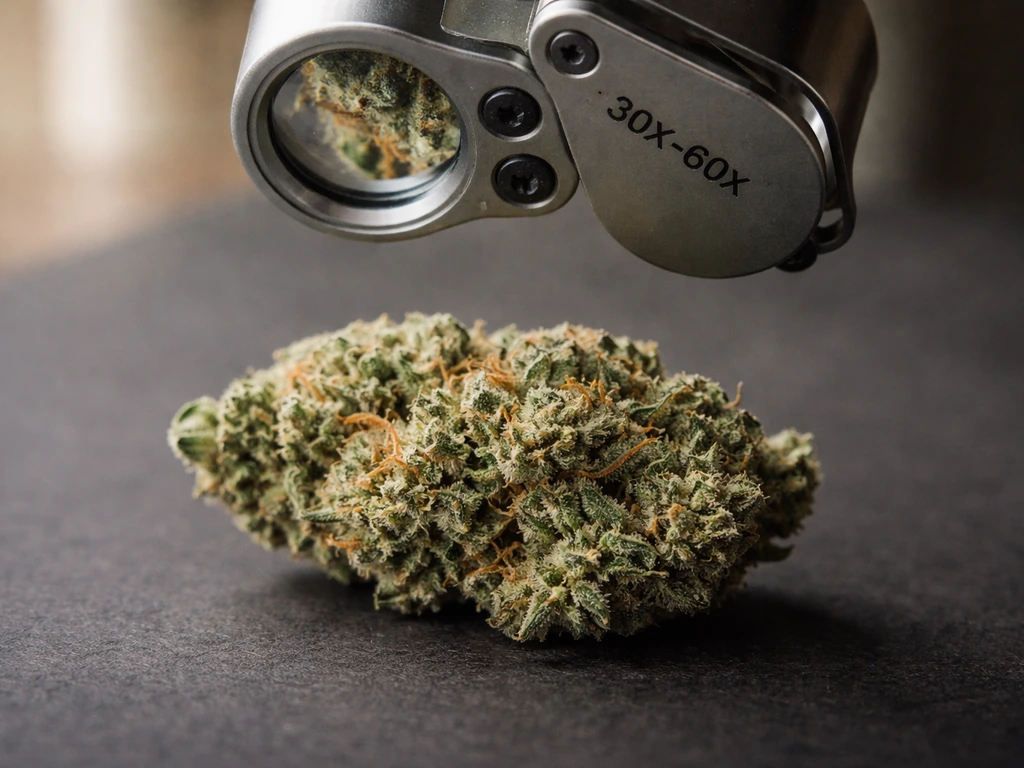
The only reliable way to time your harvest is with trichome inspection. Use a 30x–60x loupe or a cheap digital microscope (around $20 on Amazon) to check the resin glands on the buds themselves, not the sugar leaves. Clear trichomes mean the plant isn't ready. Milky-white (cloudy) trichomes indicate peak THC content and a more cerebral, energetic effect. Amber trichomes indicate THC degrading to CBN, heavier, more sedating. Most growers harvest at 10–20% amber for a balanced effect. Go higher (30%+) if you want heavy sedation.
Drying
A slow dry produces far better results than a fast one. Target 60–65°F (15–18°C) with 55–60% relative humidity, and aim for a 10–14 day dry. Hang whole branches or individual buds upside down in a dark, ventilated space. The buds are ready to jar when the outer surface feels dry to the touch and small stems snap rather than bend. Drying too fast (above 70°F or below 45% RH) locks in chlorophyll and gives you harsh, grassy smoke regardless of genetic quality.
Curing
After drying, place buds loosely in glass mason jars, fill them about 75% full. For the first 1–2 weeks, open the jars for 10–15 minutes twice a day (this is called 'burping') to release moisture and refresh the air. After 2 weeks, burp once a day. Buds are properly cured after 4–6 weeks in the jar. The difference between a 2-week cure and a 6-week cure is significant: flavor deepens, harshness reduces, and the effect profile smooths out. Store cured buds in a dark, cool environment (ideally 60–65°F, 55–62% RH) in sealed glass jars. Properly cured and stored buds stay potent for 12–18 months.
Realistic Yield Expectations
Be honest with yourself about first-grow expectations. A beginner with a single autoflower in a 3-gallon pot under a mid-range LED will typically harvest 20–50g of dried bud. An experienced grower with dialed-in conditions, proper feeding, and quality genetics can realistically pull 80–150g from a single high-yield auto like Critical Auto or Auto Amnesia. Multi-plant setups in larger tents scale up accordingly. Outdoor grows with full sun, large containers (10+ gallons), and a long season can push 200–300g per plant from vigorous strains. The genetics determine the ceiling, your environment and skill determine how close you get to it.
If you want to keep improving run by run, pair your strain selection with a consistent grow journal: log your pH, EC, temps, and humidity daily. If you want to make that journaling easier, a good reference like the best autoflower grow book can give you quick, reliable checklists and timing grow journal. Patterns in that data will tell you more about why a run underperformed than any grow guide can. The growers hitting consistent high yields from autoflowers aren't using secret strains, they're running stable genetics with dialed-in environments and consistent feeding protocols, every single time. Grow Weed Easy also points to blank" rel="noopener noreferrer">MSNL as an example of a breeder with autoflowering versions that are more “truly stable” and beginner-friendly.
FAQ
How many best-autoflower seeds should I plant per tent (and when would I choose more than one plant)?
For a single plant, stick with one autoflower per 3-gallon container in a 60x60cm tent. Add a second plant only if you can keep airflow strong across both canopies and you have enough actual LED coverage, otherwise you get smaller buds and uneven canopy. If you plan to run multiple plants, choose strains with similar heights and similar total run times so harvest timing does not become a juggling problem.
Can I use the same feeding schedule as a photoperiod plant for the best autoflowers to grow?
Usually no. Autoflowers are lighter feeders and have less time to recover from mistakes, so using a photoperiod schedule tends to increase early burn risk. A safer approach is to start at lower strength than you would for veg, then ramp only when growth is stable (not when you see stretch). If your plan is to follow labels, cut to about half dose until you see consistent green growth and no tip burn.
What’s the best way to avoid nutrient burn in week 2 or 3 with autos?
Use a combination of smaller early feed amounts and consistent watering to runoff. Let the top inch dry before watering, then water enough to get 10 to 20% runoff so salts do not accumulate. Also watch for EC creep, coco and hydro setups can drift quickly, even when the recipe is correct.
Should I start germination indoors, or can I plant seeds directly into the final pot?
Directly planting into the final container is best for most autoflowers because it removes transplant shock. If you germinate first, avoid moving the seedling multiple times and keep the root cool and undisturbed. Once it is planted, focus on getting the light distance and temperature right immediately, since the first two weeks determine whether the plant stays compact or stretches.
Do autos really need 18 to 20 hours of light, can I reduce it to save electricity?
You can run shorter schedules for some growers, but the article’s baseline 18 to 20 hours is the safest choice for maximizing predictable growth. If you cut time too aggressively, the plant may slow through its fixed clock and you can lose yield. If power cost is your main concern, consider keeping the light on longer during early to mid flower when the growth spurt hits.
What should I do if my auto is stretching, but I already moved the light closer?
After adjusting light, check temperature and ventilation next. Cold environments commonly cause extra stretching as the plant tries to reach warmth, so bring lights-on temps into the target range. Also confirm you are not overwatering, saturated media can reduce oxygen to roots and lead to weak, lanky growth.
Is topping or aggressive LST ever worth it for the best autoflowers to grow?
It can work only if you are very comfortable and you choose a longer-cycle auto, but it usually carries higher risk than gentle LST. If you want to train, start with bending and tying at week 3 when there are 4 to 5 nodes, and avoid anything that causes major leaf loss or breaks. If you miss the window, it is better to stop training than to force it and sacrifice late-stage bud development.
How do I tell nutrient lockout from nutrient burn on autoflowers?
Nutrient burn often shows as crispy, browned tips that start on newer growth, it is typically an excess issue. Lockout is more often a deficiency-looking pattern (yellowing, clawing, purpling) even though you have been feeding, and it is commonly linked to pH drift or salt buildup. First, correct pH and consider a targeted flush, then reduce strength for the next feed instead of immediately increasing nutrients.
My buds have some nanners, does that automatically ruin the whole crop?
Not always. One or two nanners may not seed the entire plant, but it is a risk. Remove visible sacs right away with clean tweezers, then reduce stressors that trigger them, especially light leaks during dark hours and any sudden heat or feeding spikes. Plan to inspect more frequently for the next 1 to 2 weeks.
When harvesting autos, what if my trichomes are mostly cloudy, but some amber already appear?
If you have mixed clarity, choose your target based on the effect you want. For a balanced outcome, you typically harvest when the majority is cloudy and you have a modest fraction turning amber. If you wait until everything is amber, you may over-shift into heavier sedation, but if you harvest too early you can lose potency and overall density.
How long should I dry and cure for the best flavor from Blueberry Auto or Zkittlez Auto?
Plan for a slower dry first, about 10 to 14 days at roughly 60 to 65°F and 55 to 60% RH. Then cure longer than most first-timers expect, 4 to 6 weeks is where the biggest improvements usually show for terpene expression. Skipping cure or rushing jars after drying fast is one of the most common reasons fruity autos taste muted.
Where should I store cured buds to keep them potent for 12 to 18 months?
Use sealed glass jars, fill them around 75% full to reduce excess air space, and keep them in the dark at cool, stable temperatures. Avoid frequent checking and temperature swings, which can drive moisture changes and degrade flavor. If your humidity drifts upward, use smaller burp schedules, if it drops too far, you may need a humidity pack to stabilize.