Yes, you can absolutely grow autoflowers hydroponically, and they actually respond very well to it. Because autos run on a fixed internal clock (most finish in about 8–10 weeks from seed), getting nutrients directly to the roots without the buffering delay of soil means faster uptake, stronger growth, and in many cases bigger harvests than you'd pull from the same strain in a pot of dirt. The main thing to get right is keeping EC low early, pH locked between 5.8–6.0, and your root zone oxygenated. Nail those three things and hydro autoflowers are genuinely hard to mess up.
Can You Grow Autoflowers Hydroponically? How-To Guide

Marcus Holloway
5 May 2026
Why hydro and autoflowers are a natural match
Autoflowers don't wait. They start flowering based on age, not light schedule, which means every day of slow growth or recovery from stress is a day off your total yield window. If you specifically compare growth speed, the reason many people ask whether do autoflowers grow faster than photoperiod is that autos cannot be slowed down or sped up by light timing the way photoperiods can. Hydroponics removes most of that drag.
Roots sitting directly in an oxygenated nutrient solution can feed on demand 24/7, so plants hit their growth milestones faster and carry more energy into flower. You also get precise control over exactly what the plant eats and when, which matters a lot with autos because their short veg period means a nutrient imbalance in week two can cost you a full week of recovery time you don't really have.
One important heads-up before you commit: avoid transplanting autoflowers in hydro. Germinate directly into your final net pot or starter medium. Transplant stress is brutal on any plant with a countdown timer, and it's completely avoidable. Start in the system you plan to finish in.
Choosing the right hydro setup for autoflowers
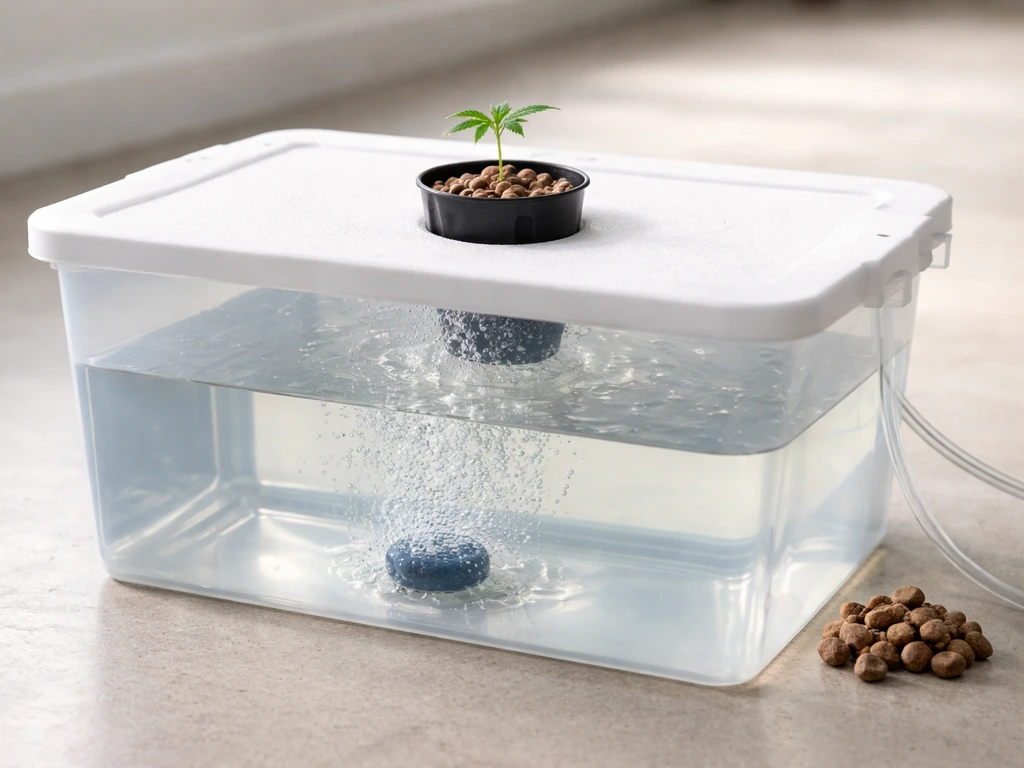
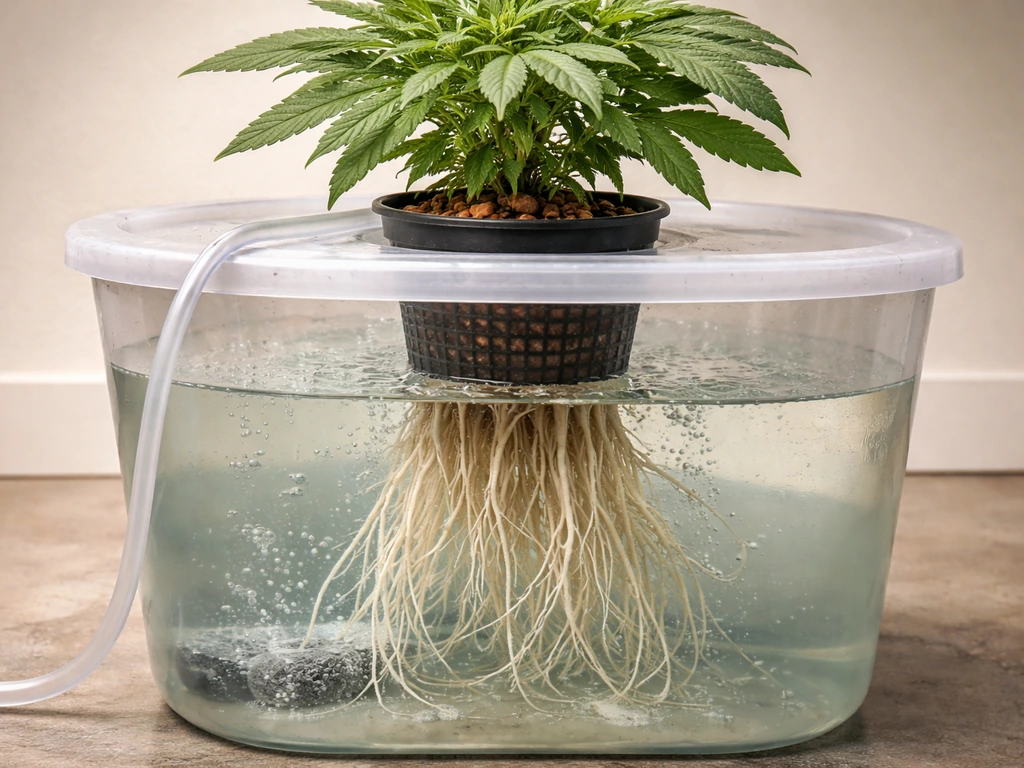
For home growers, Deep Water Culture (DWC) is the go-to starting point. It's simple, cheap to set up, and well-documented. You suspend the plant in a net pot over a reservoir of nutrient solution, and an air pump with a diffuser keeps oxygen levels high enough that roots don't drown. A single-bucket DWC can run one plant from seed to harvest with minimal equipment. If you're running multiple plants, Recirculating DWC (RDWC) links buckets through a central reservoir, which makes topping up and pH/EC management easier across the system.
Ebb-and-flow (flood-and-drain) works well too, especially if you want to use coco or clay pebbles as a support medium in trays. It floods on a timer, drains completely, and the dry-down cycle keeps roots chasing moisture and oxygen. Drip systems and NFT (Nutrient Film Technique) are viable but add plumbing complexity that most beginners don't need. Wikipedia’s overview of hydroponics notes that in nutrient film technique (NFT), roots are supplied by a thin recirculating film that delivers water and nutrients. Aeroponics delivers the best growth rates but is expensive, finicky, and hard to recover from if a pump or timer fails. For most home growers, DWC or a simple drip-to-waste over coco is the right answer.
| System | Best For | Complexity | Auto-Friendly? |
|---|---|---|---|
| DWC (single bucket) | Beginners, 1–4 plants | Low | Excellent |
| RDWC (recirculating) | Multi-plant home grows | Medium | Excellent |
| Ebb-and-Flow | Coco/clay pebble setups | Medium | Very good |
| Drip-to-waste (coco) | Beginners who want medium support | Low-Medium | Very good |
| NFT | Experienced growers only | High | Moderate |
| Aeroponics | Maximum growth, high budget | Very High | Good, but risky |
If you're choosing today, start with DWC. A 5-gallon bucket, a net pot lid, an air pump rated at roughly 1 watt per gallon of reservoir volume, an air stone, and some expanded clay pebbles is genuinely all you need for your first run.
Seedling through flower: the hydro auto timeline
The workflow in hydro is similar to soil conceptually but faster, and the timing windows are tighter because autos transition on their own schedule regardless of what you do.
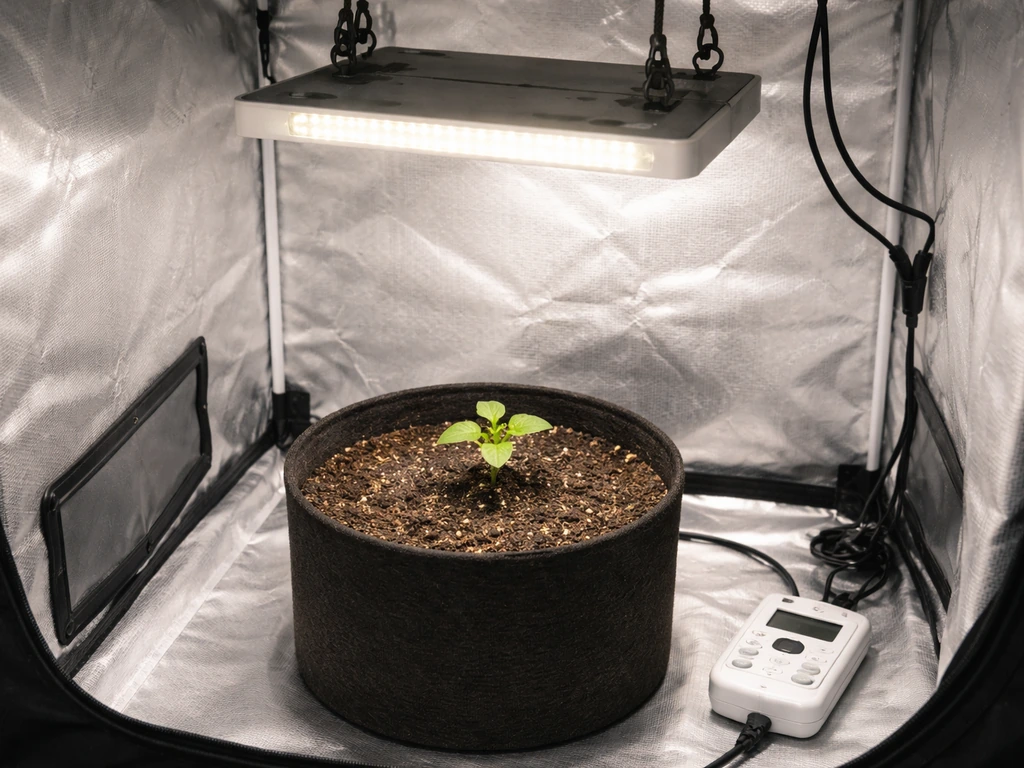
Germination and seedling (Days 1–7)
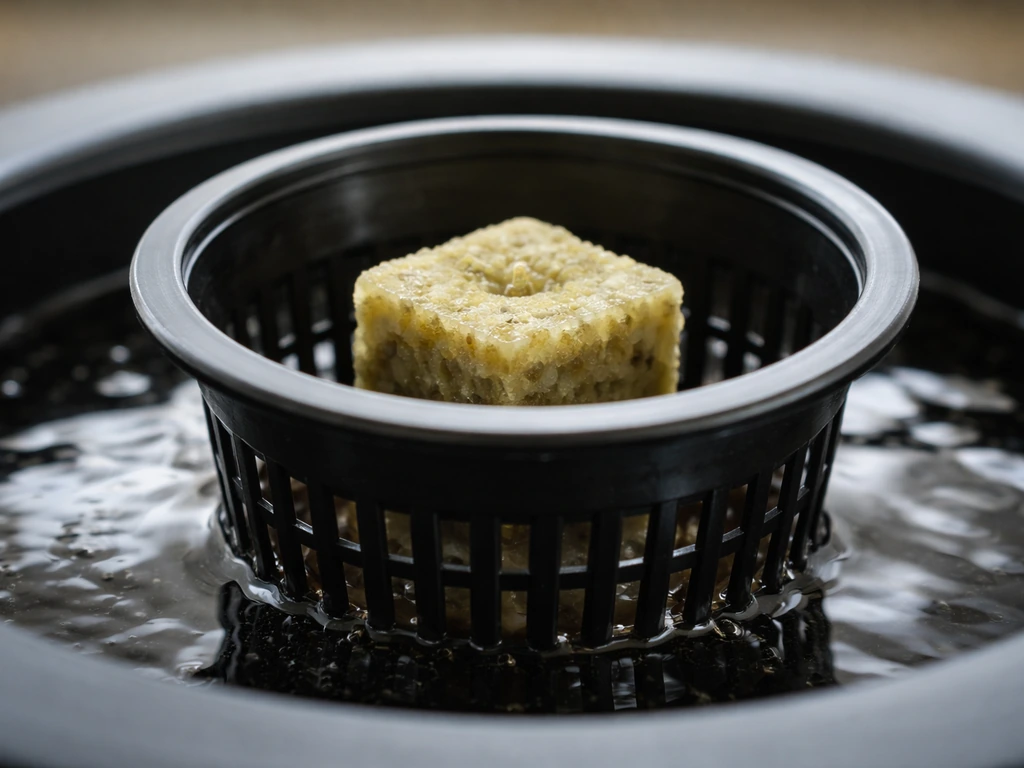
Germinate directly in your final medium. If you're in DWC, germinate in a small rockwool cube or rapid rooter sitting in your net pot over the reservoir. Keep the water level high enough that the bottom of the cube stays damp but the roots aren't submerged yet. Run EC at 0.2–0.4 and pH at 5.8–6.0. Keep the environment warm (about 75–78°F / 24–26°C) and humidity higher, around 65–70% RH. Seedlings don't need much at this stage, so resist the urge to push nutrients.
Early veg (Days 7–21)
Once roots hit the reservoir, the plant takes off fast. Raise EC gradually to 0.4–0.6 in early veg, then to 0.6–0.8 as the plant fills out. This is your only real vegetative period with an auto, and it's short. Most strains show sex and begin pre-flowers by the end of week three. Don't try to extend it by manipulating light schedule the way you would a photoperiod plant. Autos don't respond to that, and trying to force more veg just wastes time.
Flower (Weeks 3–8+)
Once you see the first white pistils, you're in flower. Bump EC to 0.8–1.0 in early bloom and up to 1.2 at peak bloom. Switch your nutrient formula toward a bloom-heavy ratio (lower nitrogen, higher phosphorus and potassium). Maintain pH between 5.8 and 6.0 throughout. In the final 1–2 weeks, start dialing EC back down as the plant approaches harvest. Some growers do a plain-water flush for the last week; others don't bother. Either way, resist the urge to feed hard until the very end.
Nutrients and pH/EC targets for autoflowers
Autos are lighter feeders than photos at every stage. The most common mistake hydro growers make on their first auto run is feeding at the same EC they'd use for a mature photoperiod plant. That's a fast track to nutrient burn. Start lower than you think you need to, watch the plant, and scale up slowly.
| Stage | Week (approx) | EC Target | pH Target |
|---|---|---|---|
| Seedling | Weeks 1–1.5 | 0.2–0.4 | 5.8–6.0 |
| Early veg | Weeks 1.5–2.5 | 0.4–0.6 | 5.8–6.0 |
| Mid/late veg + pre-flower | Weeks 2.5–3.5 | 0.6–0.8 | 5.8–6.0 |
| Early bloom | Weeks 3.5–5 | 0.8–1.0 | 5.8–6.0 |
| Peak bloom | Weeks 5–7 | 1.0–1.2 | 5.8–6.0 |
| Late bloom / flush | Weeks 7–harvest | 0.4–0.8 (tapering) | 5.8–6.0 |
When mixing nutrients, always add each part to water separately. Never premix your nutrient concentrates together before adding them to water. Mixing concentrated parts A and B together directly causes them to bind and precipitate, essentially locking nutrients out before they even reach the reservoir. Add them one at a time to your full water volume, stir between additions, and always pH your solution after all nutrients are in. Nutrients shift pH significantly, and pH-ing before you've added everything gives you a useless reading.
For meters: calibrate your pH pen every 3–7 days if you're using a basic hobby pen, and your EC pen every 1–2 weeks. Before first use, soak your pH probe in fresh storage solution for at least 1–2 hours and calibrate with fresh, sealed buffer solutions at pH 7.00 and 4.01. A $15 pen that's drifted out of calibration will silently ruin an entire grow.
Picking your support medium: rockwool, coco, expanded clay, or net pots
In hydro, the medium isn't feeding the plant; it's just holding the root mass in place and wicking moisture. That changes which medium you choose and why.
| Medium | Best Use | Pros | Cons |
|---|---|---|---|
| Expanded clay (hydroton) | DWC net pots, ebb-and-flow | Reusable, great drainage, neutral pH | No moisture retention; roots can air-prune in small pots |
| Rockwool cubes | Seedling/clone starts, DWC transitions | Sterile, holds moisture well, easy to transplant | Needs pH adjustment before use; single-use |
| Coco coir | Drip systems, ebb-and-flow trays | Excellent air-to-water ratio, reusable, forgiving | Technically a medium, not fully inert; needs coco-specific Cal-Mag |
| Net pots | Container for any of the above in DWC/RDWC | Allows root exposure to solution and air | Not a medium itself; needs to be filled with one of the above |
For a beginner DWC setup, fill your net pots with expanded clay pebbles. They're pH-neutral, drain instantly, and don't compact around roots. If you start seeds in a rockwool cube, just nestle the cube into the center of the clay pebbles in your net pot once the seedling has a couple sets of leaves. The roots will find the reservoir on their own within a few days.
If you go the coco route (which is technically a soilless medium rather than true hydro), treat it like hydro for pH and EC purposes. When using coco as a support medium, coco has buffering behavior over time, so you should plan your flushing and pH/EC targets accordingly treat it like hydro for pH and EC purposes. Coco-grown autos often take a few extra days to dry post-harvest compared to plants grown in pure DWC, which is worth keeping in mind when planning your dry room.
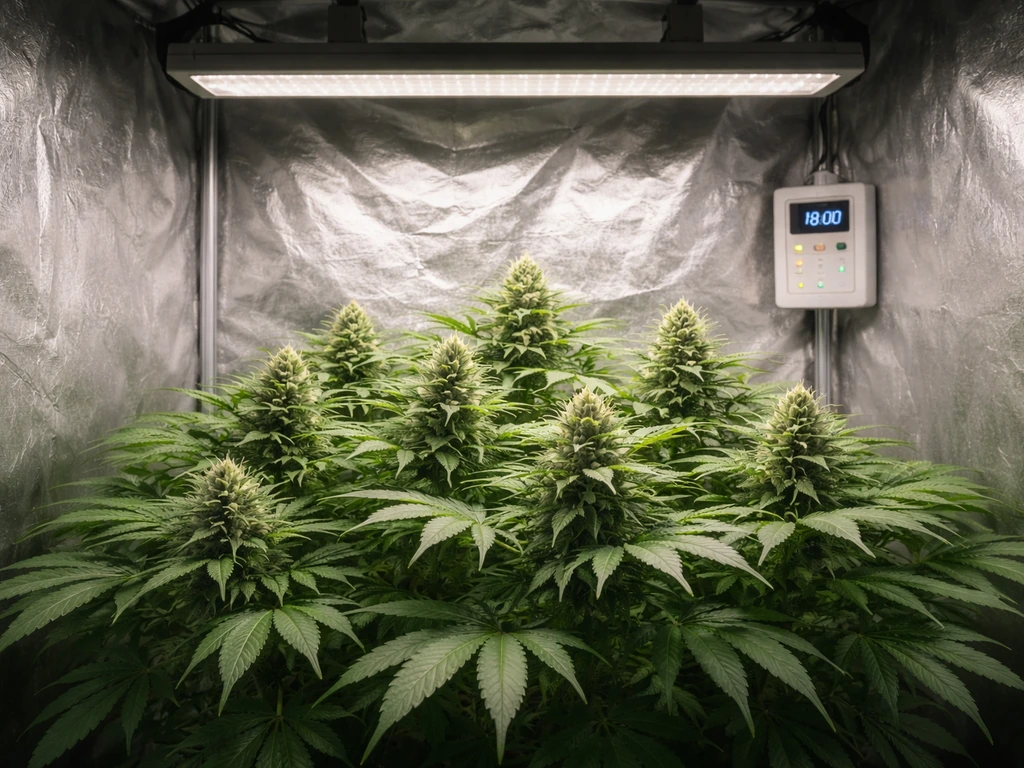
Light, environment, and airflow for indoor hydro autoflowers
Because autoflowers don't need a light schedule change to flip into flower, you can run them on whatever schedule you want. Most hydro growers run 18/6 (18 hours light, 6 hours dark) from seed to harvest as a good balance of growth and electricity cost.
If you want a simple 12/12 reference point, autos will still flower on their own clock, so changing from 18/6 to 12/12 mainly affects growth speed and stretch rather than timing 18/6 (18 hours light, 6 hours dark). Some run 20/4 for maximum photosynthesis. If you’re asking whether an auto can live comfortably in a 12 12 space, the key is matching the plant size and airflow to that footprint rather than relying on the exact square measurements.
Running 24/0 is possible but not recommended long-term because plants benefit from a small dark period for respiration and stress recovery.
For light intensity, LED grow lights at around 400–600 µmol/m²/s PPFD is the target for veg, ramping up to 600–900 µmol/m²/s during flower depending on strain and CO2 enrichment. Check manufacturer hang distance recommendations and dial in from there. Autoflowers can handle high light once established but don't push intensity too hard during the first two weeks while roots are developing.
- Air temperature: 72–80°F (22–27°C) during lights-on, 65–72°F (18–22°C) during lights-off
- Relative humidity: 65–70% RH for seedlings, 50–60% for veg, 40–50% for flower, 40–45% in late flower to prevent mold
- Airflow: at least one oscillating fan moving air across the canopy to strengthen stems and prevent hot/humid pockets
- CO2: ambient (400 ppm) is fine for most home setups; only worth supplementing if your lights and feeding are already dialed in
- Nutrient solution temperature: keep between 65–68°F (18–20°C). Above 72°F (22°C) dissolved oxygen drops sharply and root pathogen pressure spikes
Oxygenation is where most new hydro growers cut corners and regret it. Target 6–9 ppm dissolved oxygen in your reservoir. Use an air pump sized at roughly 1 watt per gallon of reservoir volume, running continuously. The dissolved oxygen level drops as water warms up, so if your grow space runs hot, managing solution temperature is more critical than anything else in the system.
Troubleshooting the most common hydro auto problems
Nutrient burn
Burned tips (yellowing or browning at the very tip of fan leaves) mean EC is too high for where the plant is in its cycle. Drop your EC by 0.2–0.3, do a partial reservoir change with clean pH'd water, and give the plant a few days to recover. Don't chase it with more nutrients to compensate.
Deficiency signs
Yellowing that starts at the bottom of the plant (older leaves first) usually means nitrogen deficiency, often caused by pH drift rather than truly low nitrogen. Check your pH before adding more N. If pH has crept above 6.5 or below 5.5, the plant can't absorb nutrients even if they're present in the solution. This is called nutrient lockout. Fix the pH, flush with clean water if it's severe, and the plant will usually recover within 3–4 days.
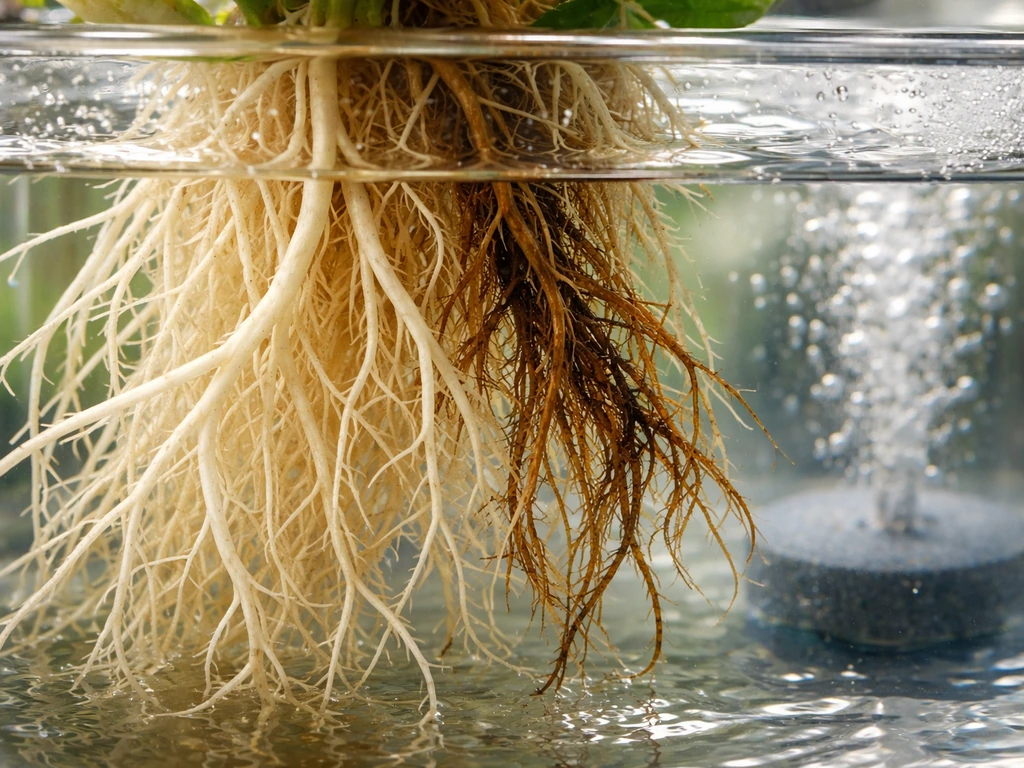
Root rot and oxygen issues
Brown, slimy roots with a bad smell mean root rot, caused by low dissolved oxygen and warm water. Act fast: do a full reservoir change with fresh cool nutrient solution, add a beneficial bacteria product (like Hydroguard or similar), reduce water temperature to below 68°F, and make sure your air pump is running and your air stone isn't clogged. Healthy roots should be white and fuzzy. Tan or brownish roots are a warning sign; slime is an emergency.
Algae
Green or brown film inside your reservoir means light is getting in. Algae competes with roots for oxygen and can crash your dissolved oxygen levels quickly. Block all light from your reservoir using opaque buckets, black tubing, and light-proof reservoir lids. Never use clear containers for DWC. Once algae is present, drain the reservoir, clean everything with diluted hydrogen peroxide, and refill. Prevention is much easier than treatment.
pH drift
pH naturally drifts in an active reservoir as roots uptake nutrients and gas exchange happens. Check pH daily during the first couple of weeks until you know your system's drift pattern. Most DWC setups drift slightly upward as the plant drinks. Adjust up or down in small increments (0.1–0.2 at a time) using pH Up or pH Down. If your pH is swinging more than 0.5 points per day, something is wrong: check for algae, a failing air stone, or extremely aggressive feeding.
Harvest, drying, and what yields to expect
When to harvest
Don't rely on the breeder's week count alone. Use a jeweler's loupe or pocket microscope to check trichomes. At around 70% cloudy (milky white) trichomes with pistils mostly red/orange and curled, you're in the harvest window. If you want a more sedative, body-heavy effect, wait for some amber to appear (10–20% amber is a common target). Harvesting too early because you're on a clock is one of the most common mistakes in auto growing, and it costs you potency.
Drying and curing
After harvest, hang whole branches or place buds on drying racks in a dark room at 59–68°F (15–20°C) and 50–60% RH. Expect drying to take about 7–14 days. Plants grown in pure DWC tend to dry a bit faster than coco-grown plants because the root moisture content differs. Once the small stems snap cleanly (rather than bending), the buds are ready to jar. Cure in glass mason jars for at least two weeks, burping the jars several times per day for the first week to release moisture and gas. Two weeks minimum for cure; four or more weeks is better for smell and smoothness.
Hydro vs soil: what yields to actually expect
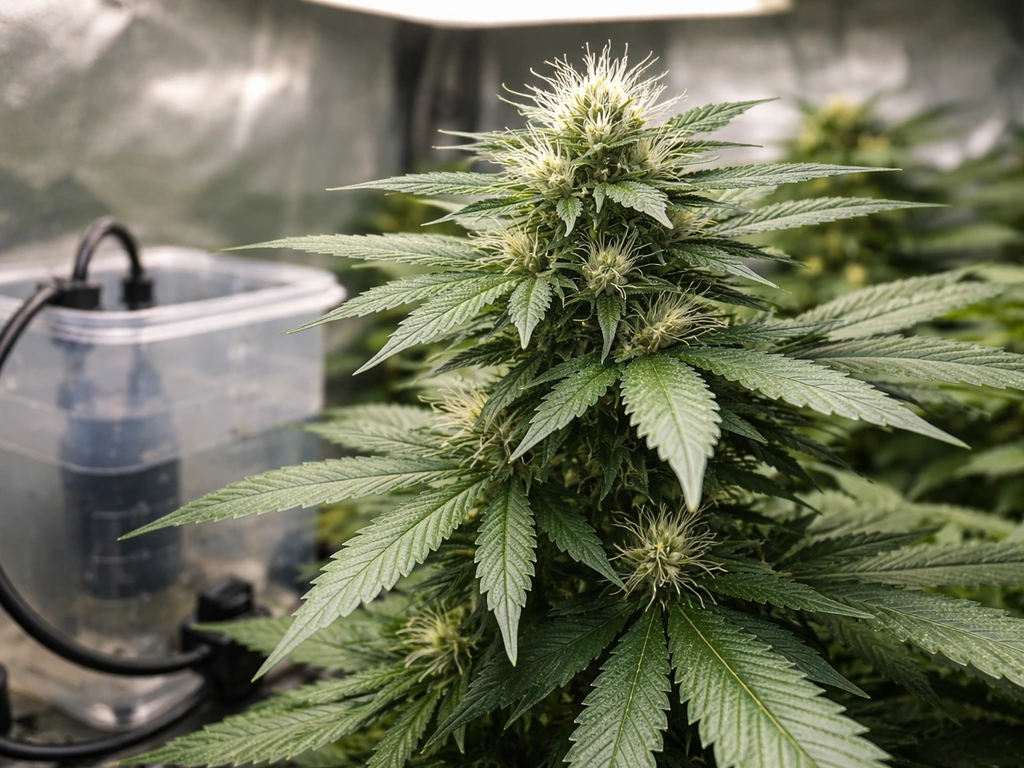
In practical terms, well-run hydro autoflowers typically yield 10–30% more than the same strain in soil under the same light, primarily because of faster veg growth and more efficient nutrient uptake. The quality ceiling is also higher in hydro when managed correctly because you're not depending on soil microbes to break down nutrients. The downside is that mistakes in hydro hit harder and faster. A pH crash in soil takes days to cause visible damage; in DWC, you can see stress within 24–48 hours. Soil is more forgiving for beginners, but if you're comfortable monitoring pH and EC daily and keeping a clean reservoir, hydro will out-perform soil in almost every measurable way for autoflower grows.
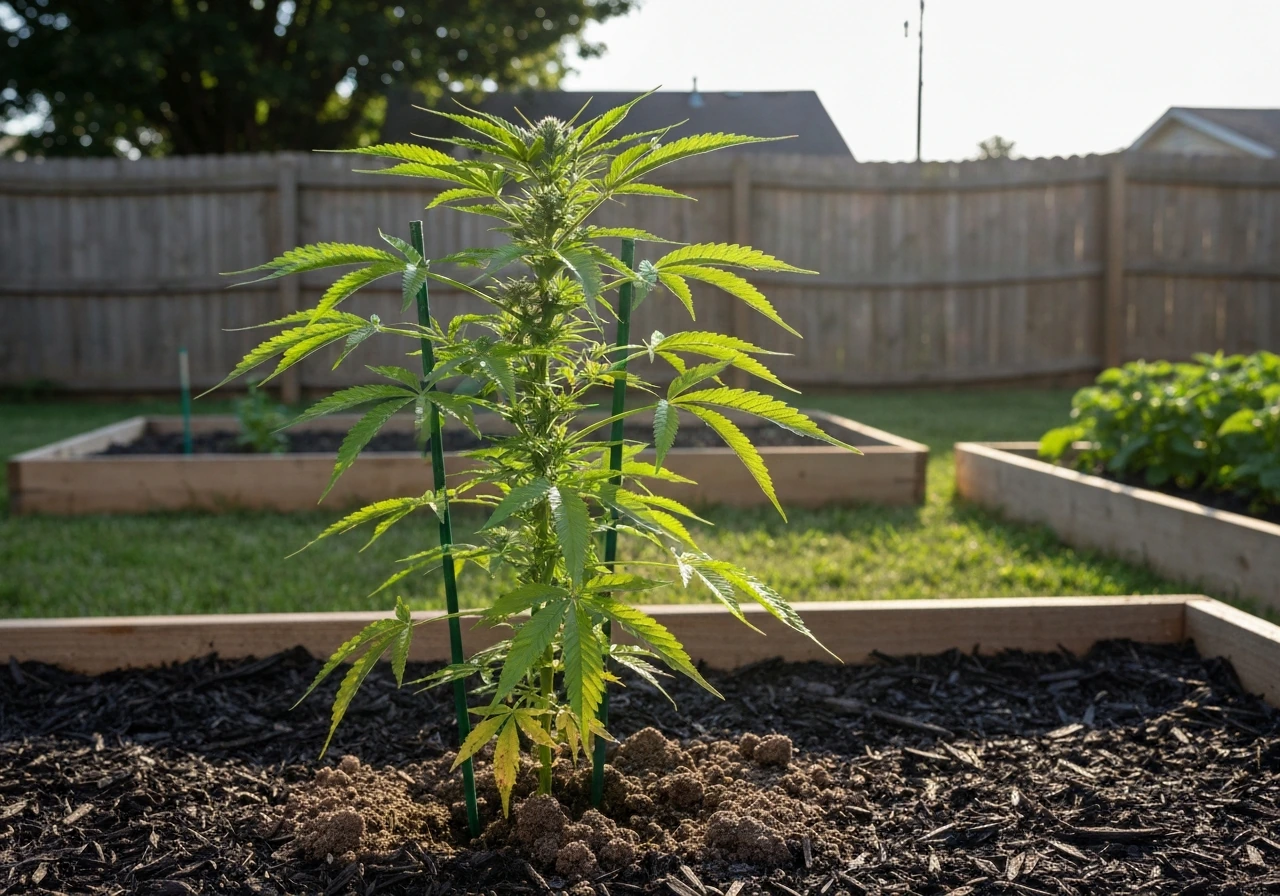
For a realistic expectation: a single auto in a 5-gallon DWC bucket under a decent LED in an 18/6 environment can produce anywhere from 1–3+ oz (28–85g) depending on strain, light intensity, and grower skill. If you’re growing outdoors, autoflowers can get bigger than most first-time indoor grows, as long as you choose the right strain and provide steady sunlight, water, and nutrients do autoflowers grow bigger outside. Larger systems, better dialing of nutrients, and experience with a specific strain all push that number up. Your first run probably won't hit the strain's genetic ceiling, and that's fine. Write down what you did, what the plant showed you, and adjust EC and pH targets run by run.
One last thing worth keeping in mind: since autoflowers don't require a light schedule flip to flower, they're uniquely compatible with mixed grow tents and shared environments. That compatibility is also why you can grow autoflower and photoperiod together, as long as you keep lighting and nutrient timing consistent for both plant types mixed grow tents and shared environments. If you're considering running autos alongside photoperiod plants, the scheduling and light management questions get more involved, but the hydro principles covered here apply the same way to any autoflowering strain you choose.
FAQ
Can you grow autoflowers hydroponically if you do not want to test pH and EC every day?
You can start with a more forgiving setup (DWC with a small reservoir and consistent aeration), but completely skipping monitoring is risky with autos. A practical compromise is checking pH once daily for the first 2 weeks, then every other day once your drift pattern is predictable, while checking EC every 1 to 2 days. If you cannot measure reliably, consider a shorter-cycled coco run (drip-to-waste) where conditions are less sensitive to sudden reservoir shifts.
What reservoir size should I use for my first hydro auto run?
For learning, a 5-gallon bucket is a solid baseline, because it buffers mistakes and reduces how fast pH and EC swing. If you go much smaller (like under 2 gallons), expect faster drift, more frequent top-offs, and higher nutrient mistake impact, especially during week 2 when autos are very unforgiving about imbalance.
How often should I top off water in DWC for autoflowers?
Top off when the water level drops enough to keep the bottom of the starter cube just damp (not submerged). In most DWC setups, that is often every 1 to 3 days, but temperature and airflow change the rate. Always top off with clean pH-adjusted water, not fresh concentrate, then re-check pH and EC after you’ve adjusted volume.
Can I use tap water for hydro autoflowers?
It depends on your tap’s hardness and baseline EC. If your tap has high dissolved minerals, it can push your starting EC too high and make pH behavior erratic. A useful decision aid is measuring tap EC first, then aiming to build your working solution from that baseline. If tap EC is already high, pre-treat with reverse osmosis or dilute until your final starting EC lands in your early target range.
Do autoflowers in hydro need any supplements beyond the main nutrients?
Usually not for a first run, but you may benefit from a preventative approach depending on your system. The biggest “extra” that matters is staying biologically stable in DWC using a beneficial bacteria product if you are prone to slime or root rot, especially in warmer rooms. However, do not add multiple bloom boosters and supplements on day one, because they can complicate pH and make it harder to identify nutrient burn versus deficiency.
Is it safe to transplant autoflowers after they germinate in hydro?
The safest approach is to avoid transplanting entirely, starting directly in the final net pot or cube. If you absolutely must move them, keep handling minimal, do it only when roots are short and healthy, and expect a slower start. In general, transplant stress can cut into yield because autos have a fixed flowering countdown.
Why do my seedlings stall in hydro even when pH and EC seem correct?
Common causes are insufficient oxygen at the root zone, water too warm, and starting nutrients too strong. Even if your EC is in range, seedlings can be harmed if solution temperature runs high or air flow is intermittent. For the first couple of weeks, keep aeration constant, use low EC, and make sure the cube stays moist but roots are not fully submerged immediately after germination.
What EC and pH should I aim for during the transition from veg to flower?
As soon as you see pre-flowers or the first pistils, you should expect the plant’s uptake to change. The practical move is to increase EC gradually rather than jumping, and shift to a bloom-forward nutrient ratio while keeping pH in the same tight band (around 5.8 to 6.0). If you see tip burn right at the start of flower, back EC down by about 0.2 and do not “feed through it.”
Should I flush the last week in hydro for autoflowers?
It’s optional, and it can be counterproductive if you flush too aggressively late when the plant is still actively finishing. If you do flush, do a mild, controlled approach (for example, running lower EC for several days rather than dumping fully) and monitor leaf fade. Many hydro growers skip a full flush and instead taper EC, because hydro systems already keep nutrients readily available and leaching can disrupt balance.
How do I prevent algae in reservoirs for DWC?
Use opaque containers and block light completely, clear tubing is a common mistake, and even brief light exposure can seed algae. Also avoid overexposing nutrient solution when you check levels. If algae appears, drain and clean promptly, then run with a light-proof lid and opaque bucket to avoid a recurring cycle.
What should healthy roots look like, and what is the fastest warning sign of trouble?
Healthy roots are typically white to light tan and feel firm, sometimes with a fuzzy appearance. The fastest warning signs are a sudden smell, roots turning brown or slimy, or a visible drop in dissolved oxygen. If that happens, act quickly with a full reservoir change, cooler solution, and confirm air pump and air stone function.
How can I estimate when to harvest if my breeder says a certain number of weeks?
Use the breeder timeline only as a rough reference, then verify with trichomes. A practical method is to start checking trichomes around when most autos near peak, then base harvest on cloudy versus amber percentage rather than calendar days. If pistils are mostly receded but trichomes are still very clear, waiting a bit usually preserves potency.
Can I grow autoflowers hydroponically with a shared tent that also has photoperiod plants?
Yes, but only if you standardize the operating schedule and nutrient management for both types. Since autos will keep progressing based on age, the photoperiod plan must not require you to change light timing mid-cycle. Choose one stable light schedule (commonly 18/6 for both), and keep EC and pH consistent while avoiding aggressive feeding that could stress the more sensitive plant.