For most home growers, the best coco grow medium is a pre-buffered, fine-grade coco coir fiber mixed with 20–30% perlite. If you want the best indoor grow medium overall, start with a pre-buffered coco coir base and adjust perlite to match how often you water. If you’re choosing the best grow medium for coco, prioritize buffered, washed products with consistent pH and a manageable EC so your feed schedule stays predictable.
Best Coco Grow Medium Guide: Choose, Prep, and Tune pH EC

Marcus Holloway
20 May 2026
That combination gives you the aeration roots need, the water retention that forgives missed waterings, and a neutral enough starting point that you can dial in EC and pH without fighting the medium itself. Many growers prefer fine-grade coco fiber or coco chips as their best hydroponics grow medium because they balance moisture retention with oxygen delivery dial in EC and pH without fighting the medium itself.
The real differences between products come down to whether they're properly buffered, how clean they are (salt load and contamination), and what particle size fits your irrigation style. Get those three things right, and the brand matters less than you'd think.
Coco coir basics and what 'best' really means
Coco coir is the fibrous material processed from coconut husks. It's naturally inert and nutrient-poor, with a pH that typically sits somewhere between 5. 5 and 6. 8 depending on source and processing.
That range sounds acceptable, but the problem is what's hiding in the cation exchange complex. Coco has a high cation exchange capacity (CEC), which means it acts like a chemical sponge. Fresh, unbuffered coco is often loaded with sodium and potassium from the ocean or processing salts.
The moment you run calcium- and magnesium-rich nutrient water through it, the coco trades those stored sodium and potassium ions for your calcium and magnesium, pulling them right out of solution and away from your plants. You feed calcium, the plant gets sodium instead. That's the core problem buffering solves.
'Best' in coco is not just about brand name. It means a medium that's been properly processed (low salt load), has a consistent particle structure, holds moisture without staying waterlogged, and is ready to use without major prep surprises. For most setups, that means pre-buffered coco in loose bag form, not compressed bricks you have to rehydrate from scratch (though bricks work fine if you know how to handle them). Premium buffered coco from brands like Botanicare's CocoGro or similar products saves you a step because they've already done the calcium-displacement process before packaging.
Chips vs. fiber: picking the right coco type and grade
Coco comes in a few distinct forms, and matching the right one to your setup makes a genuine difference in how your roots develop and how often you need to water.
| Type | Particle Size | Air Capacity | Water Retention | Best For |
|---|---|---|---|---|
| Coco fiber (fine) | < 2 mm | Moderate | High | General containers, hand watering, drip systems |
| Coco fiber (coarse) | 2–5 mm | Moderate-High | Moderate | Larger containers, experienced growers wanting faster dryback |
| Coco chips | 5–20 mm | High | Low-Moderate | Top layer, air-layering, mixed with fiber for drainage |
| Compressed coco bricks | Fine (after rehydration) | Moderate | High | Budget grows, small batches, emergency supply |
Fine coco fiber is the workhorse. It's what most growers use as their base medium because it holds moisture well enough that roots stay hydrated between waterings, but it still dries back enough to pull oxygen into the root zone. Coco chips are excellent as a top layer or mixed in at 10–20% to open up drainage in a dense fiber mix, but growing purely in chips means you're irrigating much more frequently, almost like deep water culture.
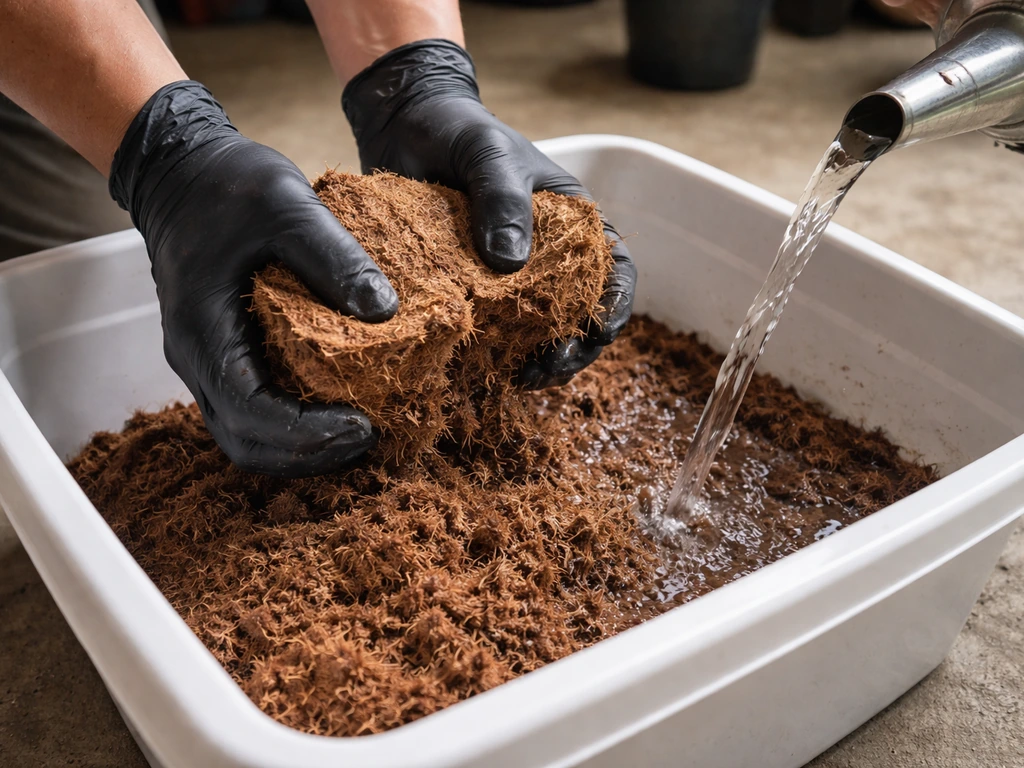
Compressed bricks are budget-friendly and often fine quality, but they come with extra prep work. If you're rehydrating a compressed block, plan on using 1–2 gallons of filtered or RO water per block, and plant into it within 24–36 hours of rehydration. Letting it sit longer risks compaction and anaerobic pockets forming before roots ever get in there.
The key quality specs to check on any coco product: EC of the raw medium (below 0.5 mS/cm is ideal and often means buffering is less critical), pH consistency, cleanliness (look for processed and washed, not raw agricultural coir), and whether it's labeled pre-buffered. Avoid coco that smells musty or shows dark discoloration from mold. A good coco should smell earthy and slightly woody, almost like clean soil.
Pre-buffering, rehydrating, and dialing in your starting EC and pH
If your coco is labeled pre-buffered (like Botanicare's CocoGro), you don't need to run a full buffering process. Doing it anyway can actually cause problems. When you re-buffer already-buffered coco by soaking it in a calcium-heavy solution, you risk over-saturating the CEC with calcium and pushing magnesium out, which creates its own deficiency. If the product says it's buffered, trust it. If you want extra peace of mind, a quick rinse with RO water at a 2:1 water-to-coco ratio before planting is plenty.
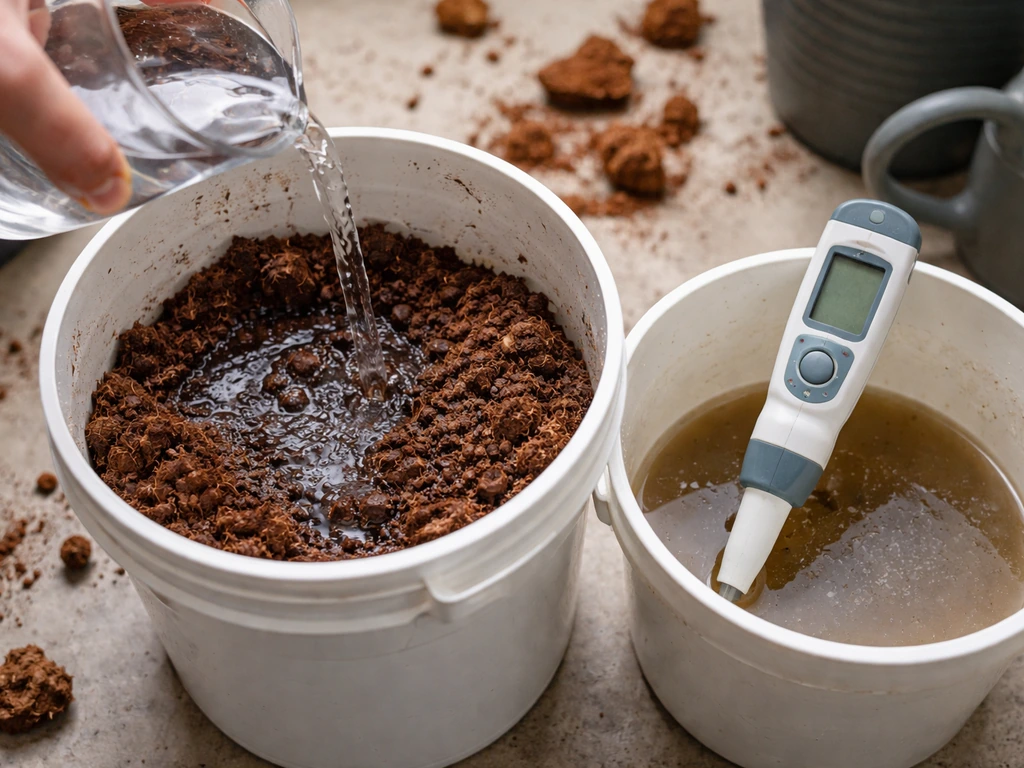
For unbuffered or raw coco, buffering is non-negotiable. The process works by flooding the coco with calcium-rich water, which displaces the stored sodium and potassium. A practical ratio is roughly 200 liters of calcium nitrate-treated water per cubic meter of coco, administered over about 24 hours. For smaller home-grow quantities, mix calcium nitrate into your water at a rate that gets you around 150–200 ppm calcium, soak the coco thoroughly, and let it drain before use. The goal is to saturate the exchange sites with calcium so they stop stealing it from your nutrient solution.
Once buffered and ready to use, your target input solution should sit at pH 5. 8–6. 2. That range keeps all the major nutrients available at the coco's slightly acidic operating pH.
EC for the feed solution depends on crop and growth stage, but a general working range of 1. The GHC coco coir substrate guide provides example feed EC targets by crop, such as about 1 to 3 mS for tomato and about 1 to 2 mS for cucumbers, along with leaching targets [EC for the feed solution depends on crop and growth stage](https://www. ghlinc. com/documents/Tsubstrat/SubstratePGcococoilEN.
pdf). 1–1. 3 mS/cm during early growth scaling up to 2. 0–2.
5 mS/cm in peak growth is a solid starting framework. Tomatoes and peppers typically run 1. 0–3. 0 mS/cm depending on stage; cannabis tends to run 1.
2–2. 4 mS/cm. When you flush or run a diagnostic rinse, look for runoff EC to drop to 0. 4–0.
6 mS/cm before you consider the flush done and the medium clean.
What to mix into coco and when amendments actually help
The single most useful amendment for coco is perlite. A 70% coco / 30% perlite mix is the most widely recommended starting point for container growing, and it's what I'd put beginners on. The perlite opens up the particle structure, improves drainage, and creates air pockets that stay open even when the coco is saturated. You get better oxygen delivery to roots without sacrificing too much moisture retention. If you're watering by hand every couple of days and want the medium to stay wet longer, drop the perlite to 20%. If you're running an automated drip system with frequent short irrigation events, 30–35% perlite handles the extra moisture well.
Beyond perlite, there are a few situations where other amendments make sense. Mycorrhizal inoculants added at transplant can help establish root networks faster in an otherwise sterile coco environment. Worm castings or a small amount of well-finished compost (5–10% by volume) add microbial life and a slow-release nutrient background, but this pushes you more toward a semi-organic approach and requires more attention to avoiding salt buildup. Hydrogel crystals or water-retention amendments are mostly unnecessary in fine coco fiber and can actually cause overwatering issues. Stick to perlite as your primary add-on and add anything else only with a clear reason.
One amendment that's genuinely useful throughout a coco grow (not just at setup) is a dedicated calcium-magnesium supplement in your nutrient water. Because coco's CEC has a preference for calcium and magnesium, you need more of both than you would in soil. Even after buffering, the medium will continue to interact with the ions in your feed water, so supplementing Cal-Mag at 1–5 mL/gallon (depending on your base nutrient line) from week one protects against deficiency without any guesswork.
Container choice, drainage, and irrigation setup for coco
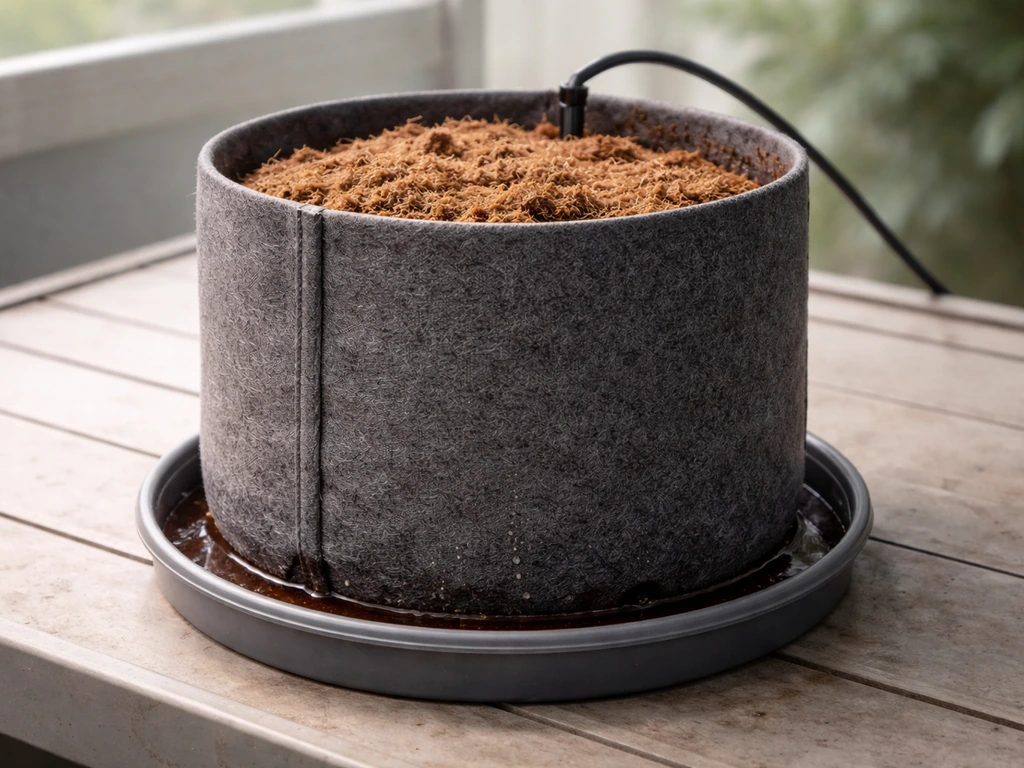
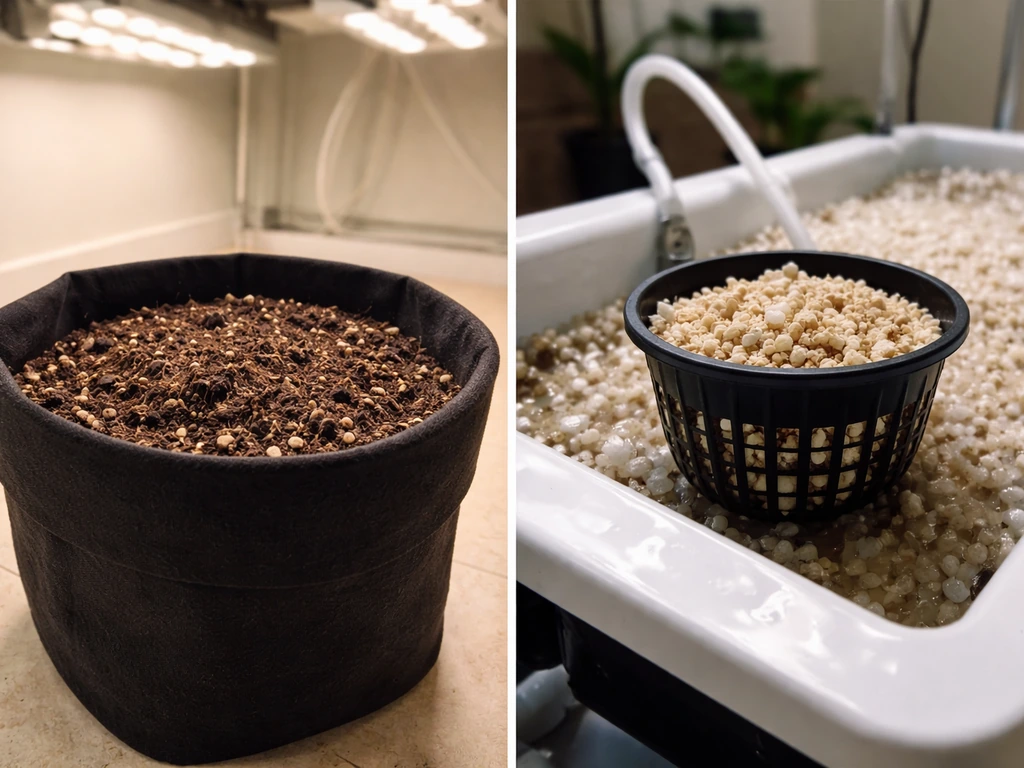
Coco performs best in containers with excellent drainage. Fabric pots are the top choice because air pruning at the root tips encourages lateral root branching and the fabric sides wick moisture away, promoting dryback. Hard plastic containers work fine too, but make sure there are multiple drainage holes at the base, not just one central hole. Standing water at the bottom of a coco container quickly becomes an anaerobic dead zone where roots rot.
Watering frequency in coco is higher than in soil, and that's intentional. Coco thrives on frequent, smaller waterings that keep the medium in a moist-but-not-saturated state. In automated systems, short irrigation events several times a day work well. By hand, daily or every-other-day watering is typical in vegetative growth, shifting to daily or twice daily during heavy flowering.
The target is to see 10–20% of the volume you put in come out as runoff at each watering. That fraction isn't waste; it's the mechanism that prevents salt from accumulating in the root zone. For larger containers (10+ gallons), lean toward 15–20% runoff. For small containers (1–3 gallons), target closer to 20% to compensate for the higher salt concentration per unit of medium.
If you're running a recirculating system with a reservoir, monitor your reservoir EC and pH daily. Runoff from coco can carry significant salt loads back into a shared reservoir, drifting both numbers. If your system allows it, drain-to-waste is simpler for coco beginners because you avoid the feedback loop of recirculating salt-laden runoff.
For growers comparing coco to other hydroponic setups like deep water culture or ebb and flow, coco's managed-runoff approach sits somewhere between the two in complexity, sharing more with flood-and-drain systems in terms of irrigation management principles. Deep water culture uses a different style of aeration and water chemistry, so choosing the right grow medium for DWC depends on how you maintain oxygen and prevent salt buildup best grow medium for dwc.
Nutrient strategy: how coco feeding differs from soil
In soil, the medium itself provides a buffer of nutrients that the plant can draw from over time. In coco, you're responsible for every nutrient the plant needs, at every watering. Coco is essentially hydroponic in practice: the medium is a support structure, not a nutrition source. That means you feed at every watering (or nearly every watering), you keep your EC dialed in to the growth stage, and you watch runoff numbers like they're telling you what's happening underground, because they are.
Use a nutrient line formulated for coco or hydroponics. Soil-specific nutrients often have different NPK ratios and may include slow-release organic components that don't dissolve cleanly and can create uneven nutrition in a coco medium. A coco-specific or hydroponic base nutrient paired with a Cal-Mag supplement is the cleanest combination. Start at a lower EC than the manufacturer suggests (about 70–80% of recommended strength) for the first two weeks, then scale up as the plant shows it can handle the load. Watch new growth, not old growth, for deficiency signs.
Runoff EC management is where most coco nutrient strategy lives. If your runoff EC is 0.2–0.3 mS/cm higher than your inflow EC, the medium is holding salts. The fix is not to cut feed strength; it's to increase your watering volume temporarily to push more solution through and flush accumulated salts out. Aim for a runoff fraction closer to 20% for the next few waterings until runoff EC comes back in line with inflow. If runoff EC is lower than inflow, the plant is drinking heavily and you may need to increase feed EC slightly or water more frequently to maintain root-zone saturation.
Common coco problems and how to fix them
Salt buildup and nutrient lockout
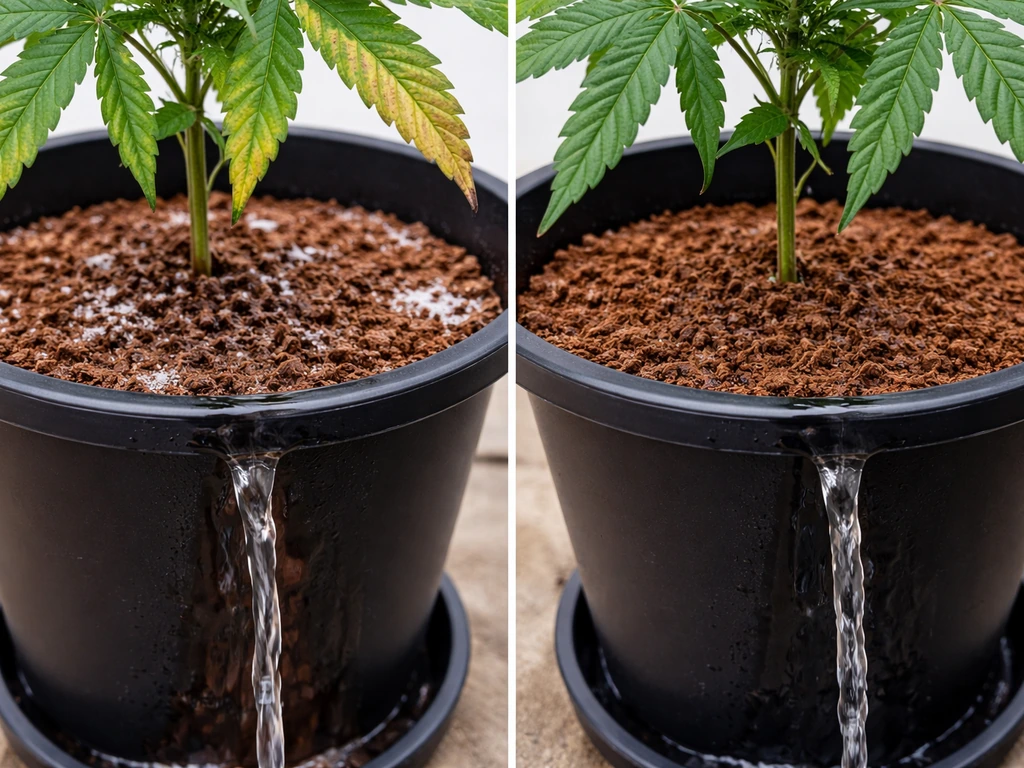
This is the most common coco problem by far. Signs include climbing runoff EC over multiple waterings, yellowing or brown leaf tips (salt burn), and plants that look hungry even though you're feeding at full strength. The fix is a flush: water with plain pH-adjusted water (pH 5.8–6.0) at a volume that creates significant runoff, and keep going until runoff EC drops to 0.4–0.6 mS/cm. After flushing, resume feeding at a slightly reduced EC and rebuild gradually. Going forward, protect against recurrence by consistently targeting 10–20% runoff at every watering.
Calcium and magnesium deficiency
Interveinal yellowing on newer leaves (magnesium) or brown spots and curling leaf edges (calcium) in coco almost always trace back to either insufficient Cal-Mag supplementation or pH drift above 6.5 that locks out uptake. Check your input pH first. If it's drifted above 6.2, correct it and see if new growth recovers over the next 5–7 days. If pH is on point, increase Cal-Mag supplementation by 1–2 mL/gallon and monitor. In coco, calcium and magnesium deficiency is predictable enough that proactive supplementation from day one is smarter than treating it after symptoms appear.
Root health and oxygen problems
Brown, slimy, or foul-smelling roots in a coco system usually point to one of three causes: overwatering that keeps the medium waterlogged and oxygen-depleted, reservoir or solution temperatures above 72°F (22°C) that promote pathogen growth, or physical compaction in the medium from insufficient perlite. Healthy roots in coco should be white or off-white, dense, and smell earthy, not rotten. If you're seeing brown roots, check your medium moisture level first. Lift the container: if it feels heavy and the medium surface is still visibly wet from the last watering, wait longer between irrigations. Then check solution temperature and increase perlite percentage in your mix if compaction is the issue.
pH instability and drift
If your pH keeps swinging even when you're adjusting the input correctly, the root zone is telling you something is wrong. pH instability in coco is often a symptom of salt accumulation or inconsistent wetting patterns, not a standalone problem. Dry spots in the medium create micro-zones where salts concentrate and pH spikes.
Make sure your irrigation is reaching the entire root mass (not channeling down the sides of the pot), and use the runoff EC diagnostic to catch salt buildup before it causes pH chaos. Acidifying your rinse water to pH 5. CANNA also recommends rinsing coco with acidified water at pH 5. 8 to limit the burning risk caused by salt behavior in the CEC [Acidifying your rinse water to pH 5.
8 with a pH-down product before flushing can help stabilize the medium faster. ](https://other. canna. com/usingcannacoco).
8 with a pH-down product before flushing can help stabilize the medium faster.
Quick-start checklist for getting coco right from day one
- Choose pre-buffered, fine-grade coco fiber with a raw EC below 0.5 mS/cm (compressed bricks are fine if you rehydrate with 1–2 gallons of RO water per block and plant within 24–36 hours).
- Mix coco with 20–30% perlite by volume before filling containers.
- If coco is not pre-buffered, soak in calcium nitrate solution for 24 hours at roughly 200 liters per cubic meter, then drain before use. Do not re-buffer already-buffered coco.
- Set input pH to 5.8–6.2 and starting EC to around 1.0–1.3 mS/cm, scaling up as plants grow.
- Add a Cal-Mag supplement from the first feed at 1–5 mL/gallon depending on product and base nutrient line.
- Water to 10–20% runoff at every watering event to prevent salt accumulation.
- Check runoff EC at least once a week. If runoff EC exceeds inflow EC by 0.2–0.3 mS/cm, flush with clean pH-adjusted water until runoff EC drops to 0.4–0.6 mS/cm.
- Keep solution temperature below 72°F (22°C) and use fabric pots or well-draining hard containers to protect root oxygen levels.
Coco is genuinely one of the most forgiving semi-hydroponic mediums once you understand how it behaves, and it outperforms soil for plant growth rates in most controlled indoor environments. The growers who struggle with it almost always skip the buffering step, ignore runoff EC, or underwater in the early weeks while the root system is establishing.
Nail those three things and coco will reward you with fast root development, consistent growth, and a lot of control over exactly what your plants are eating. If you're comparing your options more broadly, coco sits in a useful middle ground between pure hydroponic setups like deep water culture and traditional soil, sharing characteristics with other inert-medium systems like flood and drain or ebb and flow but with the added benefit of being easy to manage in simple hand-watered containers.
If you're using ebb and flow, the best grow medium is one that drains quickly, resists salt buildup, and stays consistently aerated during the flood and dry cycles flood and drain or ebb and flow. In flood-and-drain systems, the best grow medium is one that drains fast, holds enough moisture for roots, and prevents anaerobic pockets flood and drain.
FAQ
How can I tell if my coco is truly pre-buffered or if I still need to buffer it?
Check the label for a pre-buffered statement and look for a spec sheet that mentions low EC (raw medium EC ideally below about 0.5 mS/cm). If the product has no buffering info, has an earthy smell but still tests high EC, assume it is not properly buffered and do the calcium displacement treatment before planting.
Should I wash buffered coco anyway to remove dust or fine salts?
A quick rinse is fine, but keep it light. Use a RO or filtered rinse at about a 2:1 water-to-coco ratio and then drain fully. Avoid soaking buffered coco for long periods, since repeated calcium-heavy soaking can shift the balance of calcium and magnesium on the CEC.
What EC test should I use for “raw medium EC,” and how do I sample coco consistently?
Use an EC meter on a water extract from a representative handful, not runoff from a one-time watering. Mix coco with RO or filtered water in a repeatable ratio (commonly done by brands in lab methods), stir, let it equilibrate briefly, then test the solution. Consistency matters more than the exact ratio, so use the same method each time to compare products.
Can I reuse coco after harvest, or does it need to be replaced?
Coco can be reused in some setups, but it is rarely worth it for beginners. Salt accumulation, microbial buildup, and structural breakdown make performance unpredictable. If you reuse, plan on thorough flushing, testing input and runoff EC/pH, and consider refreshing calcium and magnesium levels, then discard if roots or odor indicate issues.
How do I prevent salt buildup without wasting too much water?
Instead of only increasing watering volume when runoff EC rises, keep runoff fraction stable at the start (about 10 to 20% for typical containers). Also avoid letting the top dry out completely between feedings, since dry zones concentrate salts and can drive pH swings even if your EC readings looked fine earlier.
What if my runoff EC is always lower than my inflow EC?
That usually means the plant is drawing down salts quickly, or the medium is not staying evenly wet. Try slightly more frequent irrigations or a small EC increase, but confirm you are measuring runoff after it has contacted the root zone (not just early drainage). Also verify your pH is within range, since uptake can lag if pH drift is locking nutrients out.
Is it better to target 10% runoff or 20% runoff?
Lower runoff can work when your irrigation is very even and your feed consistency is excellent, but it increases risk of salt accumulation if watering misses the medium. Higher runoff is safer for hand-watered grows, small pots, and periods of irregular watering. A practical decision rule, if you cannot reliably water on schedule, aim closer to 20% runoff.
How can I stop pH from drifting up in coco even when my input pH is correct?
First, confirm your irrigation is reaching the full root mass and not channeling down the pot walls. Second, use runoff EC trends to diagnose salt buildup, since localized salt concentration often drives pH spikes. If needed, do a targeted rinse with pH-adjusted water around 5.8 and continue until runoff EC stabilizes in the expected range.
What temperature matters most, medium temperature or reservoir temperature?
Medium temperature is strongly influenced by reservoir temperature and ambient conditions, but reservoir temperature is the easier one to control and monitor. If roots smell bad or turn brown, check solution temperatures, keep them closer to or below about 72°F (22°C), and improve aeration and drainage with the right perlite percentage.
Can I use coco without perlite if I want to water less often?
You can, but fine fiber alone tends to stay wet longer and increases the chance of oxygen depletion. If you try it, you must compensate with more frequent and smaller irrigation events only if you are sure drainage remains fast, or you risk slimy roots and stalled growth. For most growers, perlite is the safest way to balance moisture and oxygen.
Why do I get calcium or magnesium issues even when I buffered properly?
Buffered coco still interacts with ions during feeding, and nutrient ratios can shift as the plant grows. If symptoms appear, recheck your input pH for drift above about 6.2 to 6.5, then adjust Cal-Mag supplementation upward rather than changing everything at once. Use changes only on new growth first, then reassess over about a week.
Do I need mycorrhizae or worms/castings in coco?
Mycorrhizal inoculants can help with early root establishment, but they are optional and best applied at transplant. Worm castings or compost can add microbes and slow nutrients, but they also raise the risk of uneven salt and nutrient behavior in an otherwise inert medium. If you use them, start with small volumes (roughly 5 to 10%) and monitor runoff EC closely for creep.
What is the fastest way to recover when runoff EC keeps climbing?
Do a proper flush with pH-adjusted water (around 5.8 to 6.0) using enough volume to generate strong runoff, and continue until runoff EC drops into the typical clean range (about 0.4 to 0.6 mS/cm). After flushing, restart feeding at a reduced EC and rebuild gradually instead of jumping back immediately to your previous target.
When should I do a rinse versus increasing feed volume?
Increase watering volume temporarily when runoff EC is only slightly above inflow and the trend is improving. Choose a full rinse when runoff EC climbs over multiple waterings, runoff starts showing high persistent values, or plant symptoms suggest salt stress. Rinse is also the right step if you suspect poor wetting, dry pockets, or irrigation channeling.
What container type is safest for coco if I can’t control irrigation perfectly?
Fabric pots generally offer the most forgiveness because air pruning and side wicking improve dry-down and reduce stagnant water. If using hard plastic, use multiple bottom drainage holes and avoid containers that can trap water. After watering, check the container weight and surface wetness, if it stays heavy and visibly wet, improve drainage or adjust perlite and watering frequency.