If you're searching for a "Carbo CO₂ alternative" in the context of flora grow or plant nutrients, you're likely trying to do one of two things: replace a carbon-based liquid supplement (like a liquid CO₂ product) or find a cheaper, safer way to enrich your grow room with CO₂ gas without buying a dedicated CO₂ system. Both are totally solvable.
Flora Grow CO2 Alternative: Safe Ways to Boost Indoor CO2

Marcus Holloway
23 May 2026
If you also need to calculate how much FloraNova to use, dosing per gallon depends on your grow stage and target strength Flora Grow product dosing. The short version: compressed CO₂ with a regulator and timer is the most reliable home setup, fermentation rigs work fine for small tents, and liquid carbon products are mostly relevant for aquatic plant setups. Keep reading and I'll walk you through each option with actual setup steps.
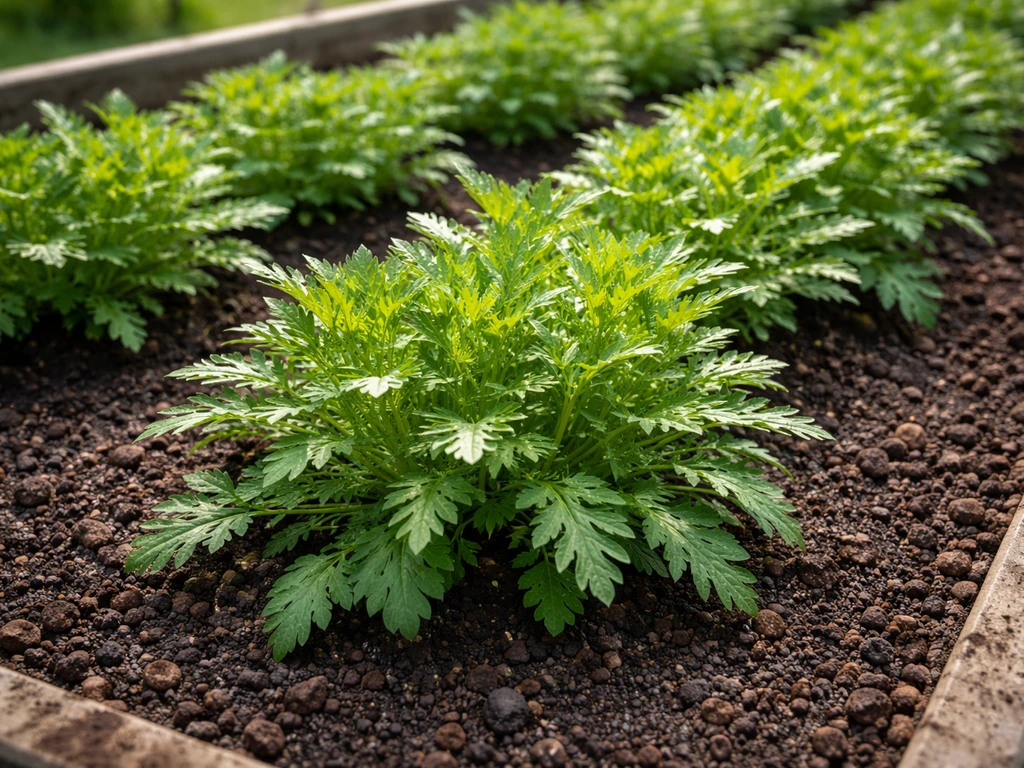
Valerian is one of those herbs that can be grown from seed or transplants, but it still follows the same best-practice indoor growing basics like lighting, airflow, and nutrient management.
What "Carbo" and "CO₂ alternative" usually means for growers
The word "Carbo" shows up in a few different product categories, and they're not the same thing. In the aquarium and planted-tank hobby, "Carbo" products like Dennerle Carbo Care Pro or Easy-Life EasyCarbo are liquid carbon fertilizers marketed as alternatives to pressurized CO₂ injection systems. They supply carbon to aquatic plants through a chemical pathway rather than dissolved gas. In hydroponics grow stores, you'll see "Carbo" branding on carbohydrate additives like Carbo Blast, which are sugar-based supplements aimed at feeding beneficial microbes or boosting energy delivery to roots. Neither of these is a pressurized CO₂ gas system.
So when a grower asks about a "flora grow carbo CO₂ alternative," they're usually asking one of three things: how to replace a liquid carbon supplement they've been using, how to enrich their grow room with CO₂ without buying a specific branded product, or whether there's a way to get growth benefits from carbon management without running CO₂ gas at all. This guide covers all three angles.
For nutrient-side questions about specific Flora Grow product dosing, that's a separate topic involving nutrient schedules and EC management. If you're specifically trying to dial in a floranova grow dosage, focus on nutrient schedules and EC management so you don't overfeed while CO₂ enrichment is only a secondary boost Flora Grow product dosing.
If you're trying to figure out a terra grow dosage, start by matching the product dosing to your nutrient schedule and keeping EC and pH in range specific Flora Grow product dosing. If you’re dosing FloraNova Grow, the best frequency depends on your medium, growth stage, and how stable your EC and pH stay between feedings how often to use floranova grow.
When CO₂ enrichment actually helps (and when it won't)
CO₂ enrichment is one of those tools that gets overhyped for beginners and undersold for experienced growers running dialed-in setups. Here's the honest breakdown: CO₂ only drives faster growth when everything else is already optimized. If your lights are underpowered, your temps are off, or your VPD is wrong, adding CO₂ does almost nothing useful. Plants can't use extra carbon if the photosynthesis machinery is already bottlenecked by something else.
CO₂ works by feeding the Calvin cycle directly. At normal atmospheric levels around 400 ppm, most C3 plants are carbon-limited when light is abundant. Push CO₂ up to 800 to 1,500 ppm in a well-lit room and you can see a measurable bump in photosynthetic rate, faster canopy development, and better yield per watt. Research consistently shows CO₂ below about 200 ppm causes growth to essentially stop, which can actually happen in sealed rooms with dense canopies during lights-on if ventilation is poor.
CO₂ enrichment genuinely helps when you're running high-intensity lighting (600W HID or equivalent LED), maintaining 75 to 85°F canopy temps, keeping VPD in range, and your plant's nutrient program is dialed in. It won't help if you're running a 200W LED in a 4x4 tent, have temperature swings, or your pH is drifting. In those cases, fix the fundamentals first and skip the CO₂ cost.
Best CO₂ alternatives for home grows: compressed, generators, fermentation
There are three practical ways to enrich CO₂ in a home grow, each with real trade-offs in cost, control, and effort. Here's how they compare side by side.
| Method | Upfront Cost | Ongoing Cost | Control Level | Best For |
|---|---|---|---|---|
| Compressed CO₂ cylinder + regulator | Medium ($80–$150 setup) | Low (refills) | Excellent (PPM controller) | Tents, sealed rooms, any size |
| CO₂ generator (propane/natural gas) | Medium-High ($150–$300) | Low (fuel) | Good (timer + controller) | Larger rooms, good ventilation |
| DIY fermentation rig | Very Low ($10–$30) | Very low (sugar/yeast) | Poor (no setpoint control) | Small tents, budget grows |
| Liquid carbon products ("Carbo") | Low–Medium (per bottle) | Moderate | None (passive) | Aquatic plants mainly; limited for soil/hydro |
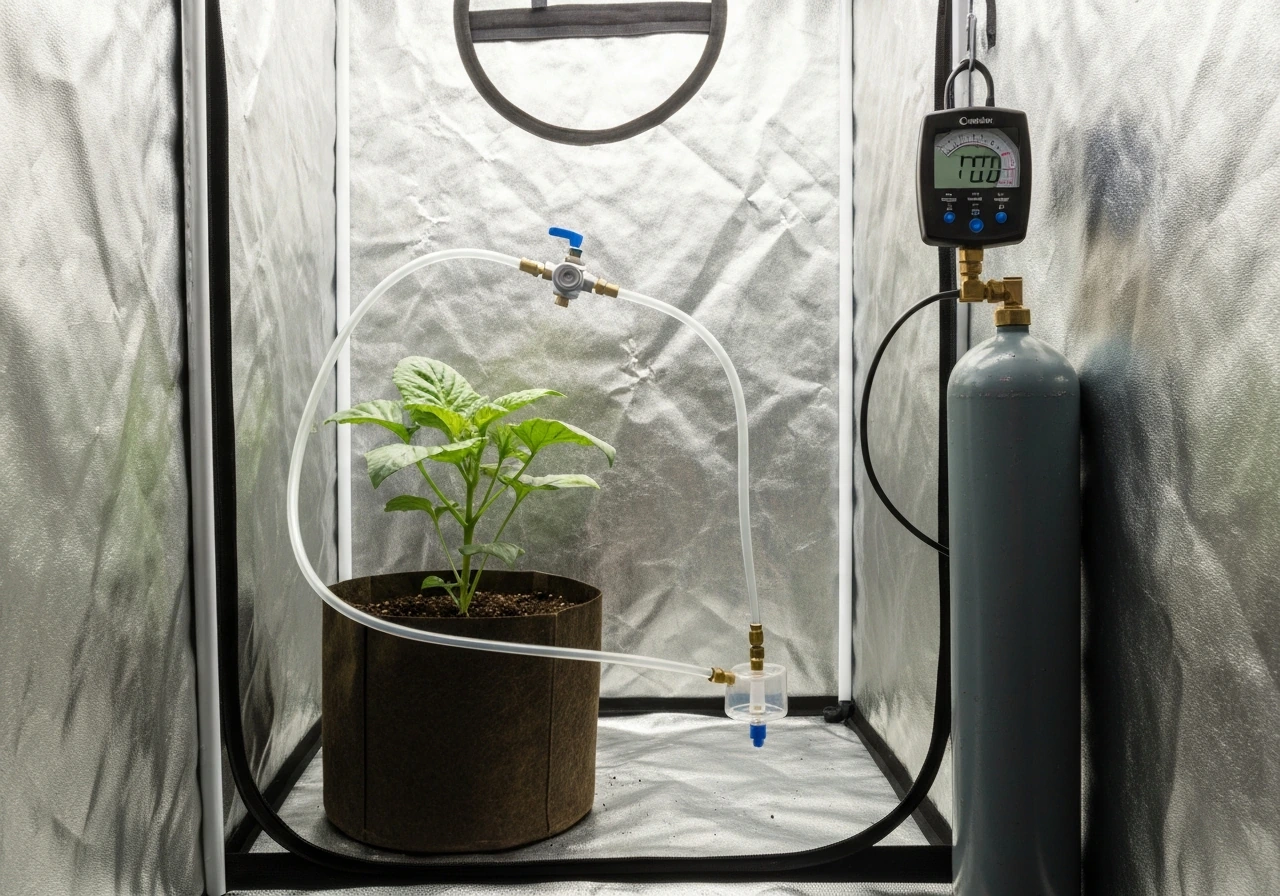
Compressed CO₂ cylinders
This is the cleanest solution for most home growers. You get a 5 or 10 lb aluminum CO₂ cylinder (same ones used for homebrew setups), a dual-stage regulator, a solenoid valve, and a PPM controller or timer. The regulator screws onto the cylinder, tubing runs to the top of the canopy (CO₂ is heavier than air, so releasing it above the canopy lets it sink into the leaves), and the controller cuts the flow when you hit your target PPM. Refills run about $20 to $30 for a 10 lb cylinder at welding supply shops or homebrew stores, and a 10 lb tank lasts several weeks in a small sealed tent.
CO₂ generators
Propane or natural gas CO₂ generators produce CO₂ by combustion and work well in larger grow rooms (think 10x10 and up). They also produce heat and water vapor as byproducts, which matters for your climate control. You need good horizontal airflow to distribute CO₂ evenly. One practical benchmark: in a room with good horizontal airflow, a target of 1,000 to 1,200 ppm is achievable and sufficient. If your room isn't tightly sealed, plan to produce up to 50% more CO₂ than your calculated need to account for leakage. Generators are overkill for small home tents and require more ventilation planning.
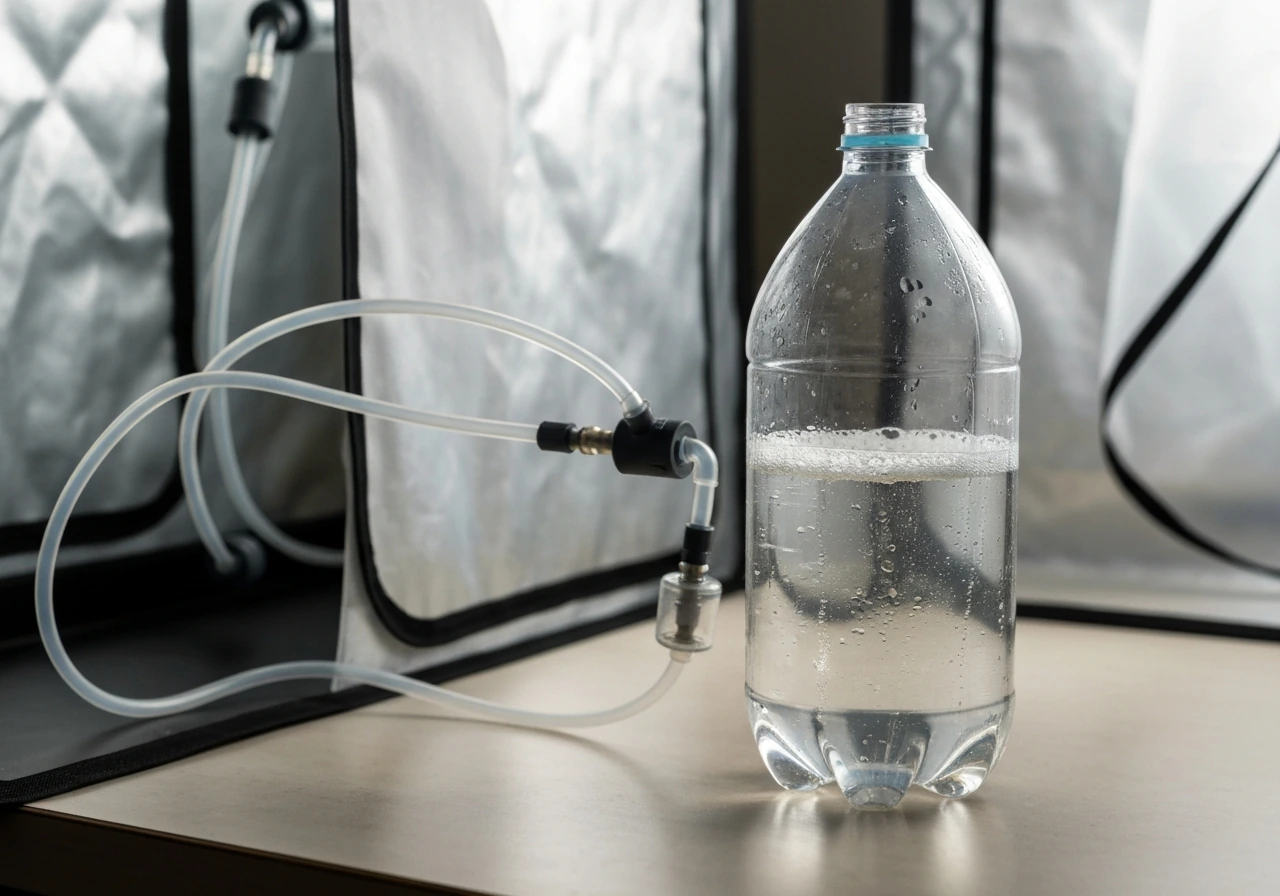
DIY fermentation CO₂
A fermentation rig is dead simple: a 2-liter bottle with a sugar and water solution, a packet of bread yeast, and an airlock-style tube running into your tent. Yeast fermentation produces CO₂ as a byproduct. It costs almost nothing to build and can nudge CO₂ levels in a small tent upward, but you have zero setpoint control. It's not going to hit 1,200 ppm in anything larger than a 2x2 or 2x4 tent, and output drops as the yeast colony ages. Good for beginners experimenting on a budget, not for serious production runs.
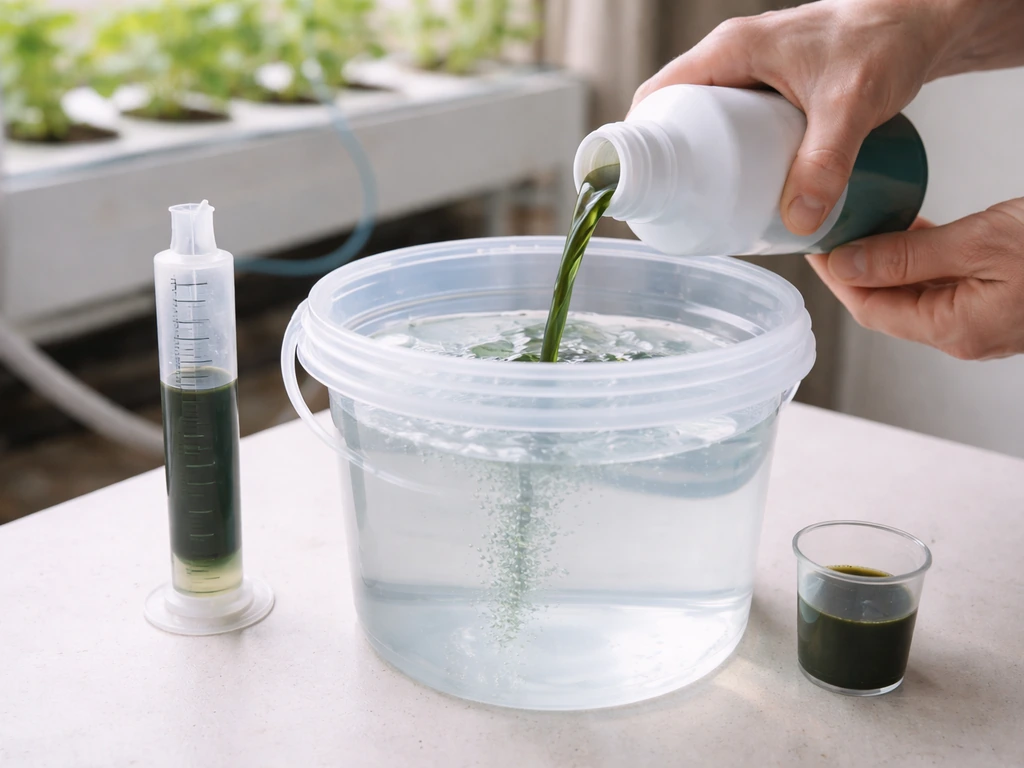
Liquid carbon products
Liquid "Carbo" products like those from Dennerle or Easy-Life are designed for aquatic planted tanks, where CO₂ injection hardware is expensive and CO₂ dissolves in water. For soil and hydroponic indoor grows, their utility is much more limited. Carbohydrate-style additives marketed in hydro stores are a different product category altogether and are really about feeding microbial populations rather than enriching atmospheric CO₂. If you're growing in soil or a hydro system and hoping a liquid carbo product will replace CO₂ gas enrichment, it won't. For guidance on the right terra grow dosage for indoor crops, see the specific product instructions and dosing ranges for your stage.
How to set up CO₂ in soil vs hydroponics (placement, timers, monitoring)
The physical setup principles are the same regardless of medium, but there are a few differences worth knowing. In both cases, CO₂ should be delivered during lights-on periods only. Plants fix carbon through photosynthesis, which requires light. Running CO₂ in the dark wastes gas, accomplishes nothing, and lets CO₂ build up dangerously if your room isn't actively ventilating.
Equipment checklist
- CO₂ source: 5–10 lb compressed cylinder, CO₂ generator, or fermentation rig
- Regulator with solenoid valve (for cylinder setups)
- CO₂ PPM controller or programmable timer
- Distribution tubing with small holes or a manifold for even distribution
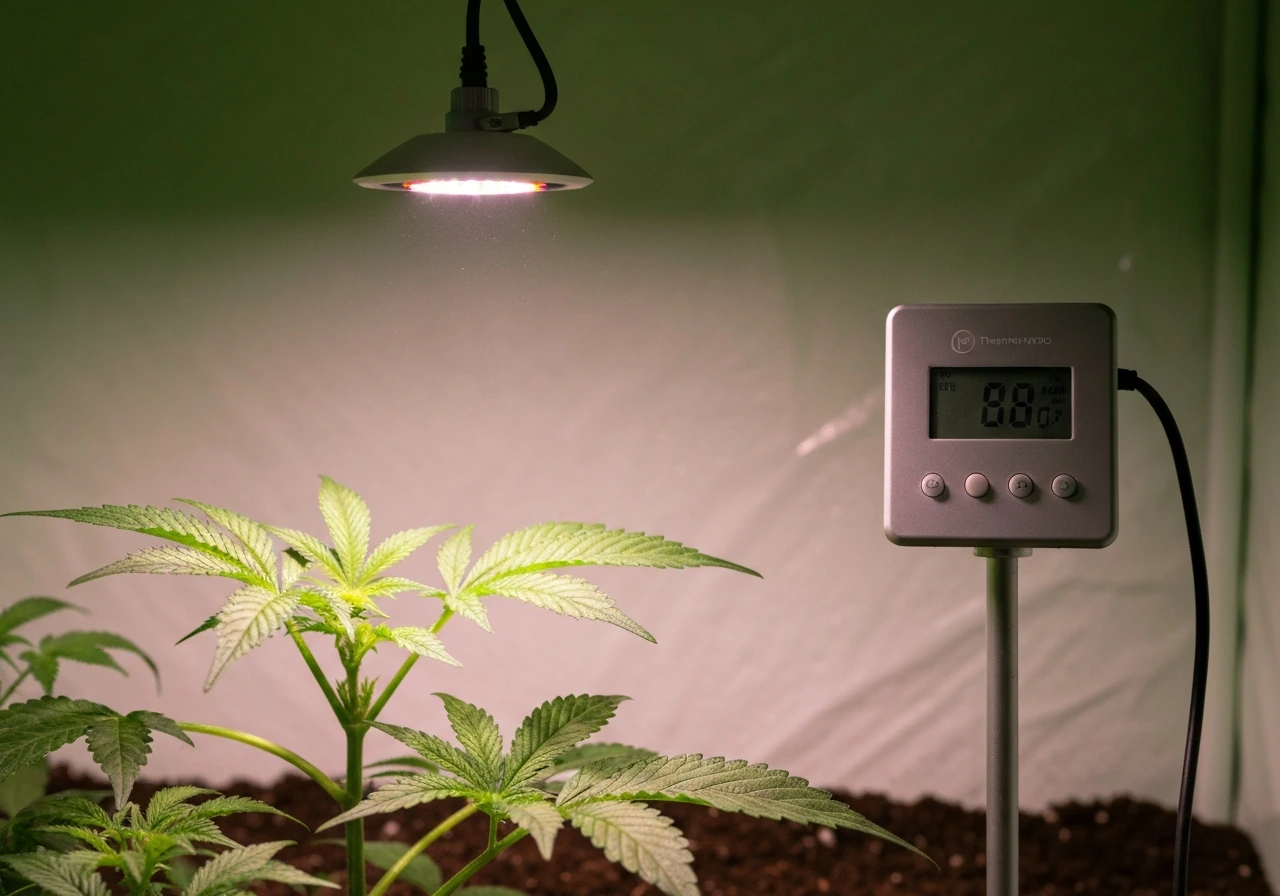
- Inline CO₂ meter/monitor placed at canopy height
- Oscillating or horizontal airflow fans to distribute CO₂ across the canopy
- High-temp safety interlock if using a controller (cuts CO₂ at high temps)
Placement and airflow
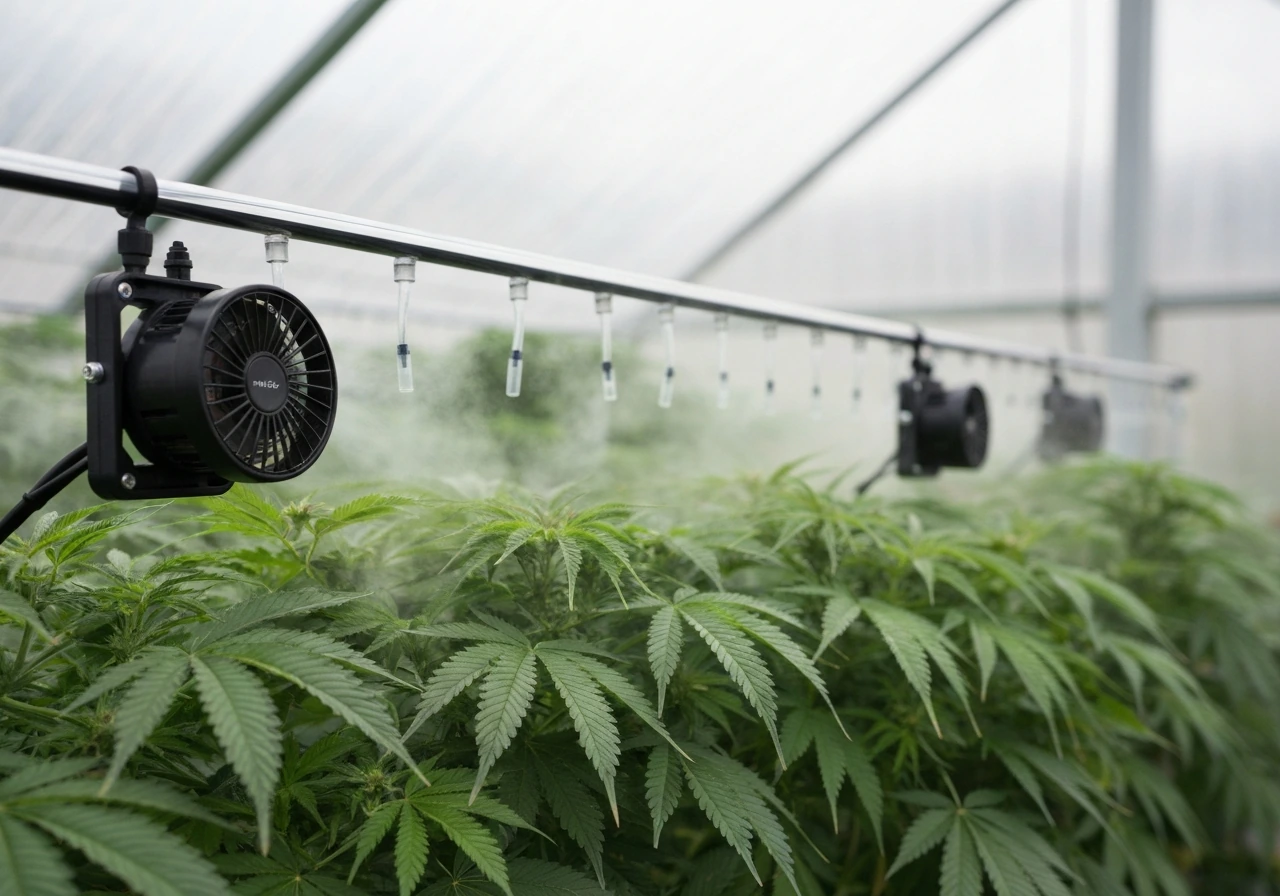
CO₂ is heavier than air. Run your distribution tubing along the top of the canopy and let it fall down through the leaves. Horizontal airflow fans circulate it evenly so you don't get pockets of high concentration right at the emitter and depleted zones at the canopy edges. One important controller logic note: when your CO₂ output is ON, your exhaust fan should be OFF. Running exhaust while injecting CO₂ is just venting expensive gas outside. Good controllers manage this automatically with interlocked outputs.
Soil vs. hydroponics differences
Soil grows tend to have more thermal mass and slower response times, so CO₂ levels stabilize more gradually. Hydroponic setups in sealed rooms respond faster and tend to be better candidates for CO₂ enrichment because growers have usually already invested in climate control hardware. In hydroponics, keep your nutrient solution well-oxygenated (separate issue from atmospheric CO₂) and dial in your EC and pH before adding CO₂ enrichment. CO₂ enrichment at elevated levels can subtly affect stomatal conductance and leaf temperature, so watch your VPD more carefully once you start supplementing.
Target CO₂ ranges by growth stage and safe ventilation practices
Here are the practical CO₂ targets most indoor growers use, broken down by stage. These are lights-on targets only.
| Growth Stage | Target CO₂ Range (ppm) | Notes |
|---|---|---|
| Seedling / Clone | 400–600 ppm (ambient) | No enrichment needed; focus on humidity and roots |
| Early Veg | 600–800 ppm | Light enrichment if lights are high-output |
| Active Veg / Canopy Build | 800–1,200 ppm | Good enrichment window; match light intensity |
| Flowering / Fruiting | 1,000–1,500 ppm | Peak enrichment; max yield benefit with sufficient PPFD |
| Late Flower / Flush | 800–1,000 ppm | Taper back; lower input needs as canopy matures |
| Lights off (all stages) | Do not enrich | Stop CO₂ injection; exhaust as needed |
On safety: OSHA's permissible exposure limit for CO₂ is 5,000 ppm over an 8-hour workday. For home growers entering their grow space regularly, a hard upper limit of 2,500 ppm is a sensible ceiling, which is well below the OSHA PEL and leaves a comfortable buffer. Never exceed 5,000 ppm in an occupied or frequently entered space. Levels above 5,000 ppm are dangerous, and a controller failure without a high-alarm cutoff can get there faster than you'd expect in a sealed room. Always install a CO₂ monitor at the door level (not just canopy level) and consider a controller with a door/entry sensor that stops CO₂ injection when the room is entered.
During lights-off periods, run your exhaust fan to clear built-up CO₂ and manage humidity. This is also when you can safely enter the room for maintenance without worrying about elevated gas levels.
Non-CO₂ growth boosts: light, nutrients, airflow, and VPD
If you're not running high-intensity lighting, every dollar spent on CO₂ enrichment is mostly wasted. CO₂ enrichment only accelerates growth when the photosynthetic machinery is already running at high capacity. More light means more CO₂ can be used, period. If you're on a budget or in an early grow stage, these non-CO₂ levers will move the needle more than any gas cylinder.
- Light intensity and spectrum: Upgrading to a quality LED or HID fixture at appropriate PPFD for your canopy area is the single highest-ROI move for most home growers. CO₂ enrichment at 1,500 ppm with weak lights does less than ambient CO₂ with strong lights.
- VPD management: Vapor Pressure Deficit affects how efficiently plants transpire and take up CO₂ through stomata. Target 0.8–1.2 kPa during veg and 1.0–1.5 kPa during flower. Elevated CO₂ reduces stomatal conductance slightly, so monitor VPD more actively once you start supplementing.
- Airflow and leaf boundary layer: Oscillating fans break up the stagnant air layer on leaf surfaces (the boundary layer), which directly improves CO₂ and O₂ exchange at the stomata. This is free and often underutilized.
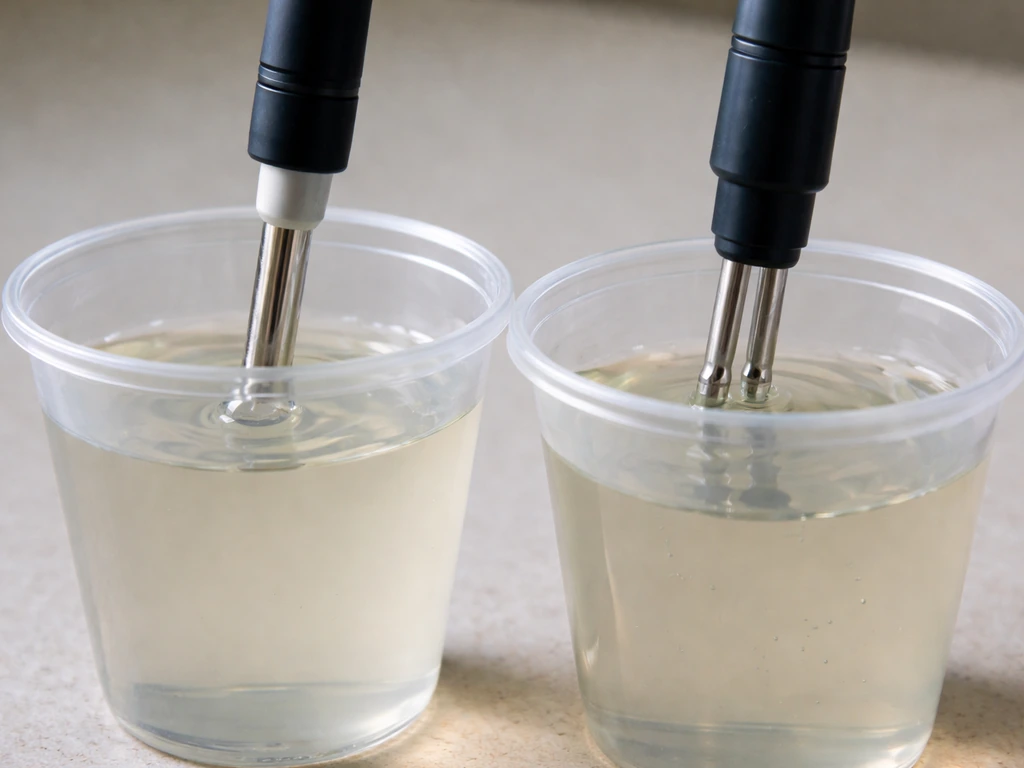
- Nutrient balance and EC: Plants running CO₂ enrichment at elevated levels have higher metabolic demands. You may need to bump EC slightly during peak flower to feed the faster growth rate. Keep pH in range (5.8–6.2 for hydro, 6.0–6.8 for soil) so nutrient uptake isn't the bottleneck.
- Temperature: Elevated CO₂ shifts the optimal temperature for photosynthesis upward slightly. Running canopy temps at 77–82°F (25–28°C) during CO₂ enrichment can extract more benefit than the same CO₂ at 68°F.
- Carbon-use efficiency without gas: If you're growing in living soil or with microbially active media, carbohydrate supplements can feed the soil biology and indirectly improve plant nutrition. This is the legitimate use case for carbo-type additives in a soil context, not CO₂ replacement.
Troubleshooting: why growth stalls after changing CO₂ or carbon inputs
You added CO₂ (or a new carbon supplement) and expected faster growth, but nothing improved or it actually got worse. Here's how to work through it systematically.
Check your CO₂ readings first
Buy or borrow a calibrated CO₂ meter and actually verify what's happening in your room. Many growers assume their system is working when the controller isn't hitting setpoint, the tubing has a kink, or the cylinder ran empty. Place the sensor at canopy height and check it during lights-on. If you're not hitting at least 800 ppm during active enrichment, the delivery system isn't working as expected.
Light is likely the real limiting factor
CO₂ enrichment above 600 ppm in a room with low PPFD is largely inert. If your plants aren't responding to CO₂, measure your actual light intensity at canopy level. For CO₂ to show a meaningful yield benefit, you generally want PPFD above 600 µmol/m²/s during veg and above 800 to 1,000 during flower. Below those thresholds, light is the bottleneck, not carbon.
Temperature and VPD are out of range
CO₂ enrichment combined with poor temperature management can actually slow plants down. Elevated CO₂ reduces stomatal conductance, which reduces evaporative cooling at the leaf surface. If your room is already running warm, adding CO₂ without adjusting your climate can push leaf temperatures above the optimal range and trigger stress rather than growth acceleration. A PubMed-indexed review on C3 and C4 photosynthesis temperature responses discusses how photosynthesis can be limited across thermal ranges by processes such as Rubisco activity, RuBP regeneration, or P(i) regeneration adding CO₂ without adjusting your climate can push leaf temperatures above the optimal range. Check that your intake, exhaust, and AC are keeping canopy temps steady at or below 82°F when enriching.
Nutrient or pH issues masking CO₂ benefits
If your pH is drifting or your nutrient program is off, faster photosynthesis just means faster expression of a nutrient deficiency. Check your runoff pH and EC after introducing CO₂ enrichment. Plants with higher carbon fixation rates demand more of every macro and micronutrient. A small EC bump (0.2 to 0.3 mS/cm) is often needed once you move into serious enrichment territory, particularly in hydroponics where nutrient uptake is direct and rapid.
Medium-specific issues: soil vs. hydroponics
In soil, the microbial and organic processes that govern nutrient availability are slower to respond than a hydro system. If you switched from a liquid carbon product (like a carbo supplement for soil biology) to CO₂ gas enrichment, you may actually be missing the microbial feeding benefit the supplement was providing. These are two different tools for two different problems. In hydroponics, root zone issues like poor oxygenation, reservoir temp out of range (keep it at 65–68°F), or biofilm buildup can completely block any benefit from atmospheric CO₂ changes. Resolve root zone health before diagnosing CO₂ effectiveness.
Controller or safety interlock blocking CO₂ delivery
If you're using a CO₂ controller and have a temperature safety interlock (which you should), verify it isn't tripping during your lights-on window. A controller configured to cut CO₂ output when temps exceed a threshold will stop delivery during the hottest part of the day, exactly when you want it most. Review your controller's output log or use a data-logging meter to see if CO₂ levels are tracking your setpoint across the full lights-on period, not just at a single snapshot in time.
FAQ
Is a “flora grow carbo CO2 alternative” the same as replacing pressurized CO₂?
No. “Carbo” liquids for planted aquariums are carbon sources for underwater plants (often via carbon pathways and chemical availability), not a replacement for CO₂ gas that feeds the Calvin cycle in air. For soil or hydroponics, you should treat “Carbo” and CO₂ enrichment as different inputs with different goals.
What happens if my grow tent is not very sealed when I try to use CO₂?
If you try to run CO₂ gas without a sealed space and reliable airflow control, you usually end up paying for gas that leaks out and you cannot hold a stable ppm. In leaky tents, you will see big swings and may never reach meaningful levels like 800 to 1,200 ppm during lights-on, so the most practical “alternative” is improving sealing and airflow or using CO₂ only in small, well-managed tents.
How can I tell whether my CO₂ system is actually delivering the ppm I set?
Controller setpoint is not the same as actual ppm. Put a calibrated CO₂ meter (or at least one known-good sensor) at canopy height and confirm you reach your target during the full lights-on window. If you never get near the setpoint, common culprits are an empty cylinder, regulator or solenoid leak, kinked tubing, low output settings, or the sensor placed in a dead-air pocket.
Can I run CO₂ at night to “preload” the room?
Do not run CO₂ during lights-off, because plants are not photosynthesizing and CO₂ accumulation can rise to unsafe levels in an actively ventilating or sealed room. A safer workflow is CO₂ on only during lights-on, with ventilation behavior interlocked as described in your controller logic.
Will adding more CO₂ always help if my plants seem to be responding?
Yes, but only up to a point, and the best practice is to avoid “chasing ppm” at the expense of climate. CO₂ reduces stomatal conductance, which can make leaf cooling less efficient. If you cannot keep canopy temps in the target range (for many indoor setups roughly around the low 80s F), CO₂ can become a stressor rather than a growth accelerator.
Where should my CO₂ monitor be placed for both accuracy and safety?
You generally want the sensor at canopy height and the monitor at door or entry level for safety. Canopy ppm can look fine while the room entry area is higher due to circulation patterns, especially if distribution tubing and fans create localized pockets. For safety, rely on an entry-level monitor and a high-limit shutdown feature if possible.
When would a fermentation CO₂ setup be a bad idea?
Fermentation rigs can raise CO₂ a bit, but they are not designed for tight ppm targets. If you need consistent levels across veg and flower, combustion or compressed gas with a controller is the reliable route. A yeast setup can also lose output as the culture stabilizes and as temperature drops, so expect weaker results later in its cycle.
CO₂ is on but my plants are not improving, what should I check first?
If you are using CO₂ and your growth stalls or worsens, verify light intensity first, then check temperature stability and nutrient availability. CO₂ can speed up photosynthesis, which increases nutrient demand, so a previously “good” EC and pH program can become insufficient. Recheck runoff or reservoir pH and EC after CO₂ starts, especially in hydro.
Is CO₂ worth it if my lights are smaller or lower power than recommended?
Not usually. If your PPFD is low, CO₂ is mostly inert because photosynthesis is light-limited. A practical decision aid is to measure light at canopy level, then only invest in gas enrichment if you are already running strong lighting for your stage (veg and flower often require substantially higher PPFD than many entry-level setups).
Why does my CO₂ ppm struggle to reach setpoint even though the controller is calling for CO₂?
If your exhaust fan runs while CO₂ injection is active, you are venting the enriched gas and wasting it, often preventing you from reaching setpoint. With most proper controllers, outputs are interlocked so CO₂ injection and exhaust do not fight each other. If yours does not have interlocks, consider adding that control logic before spending more on gas.
If I stop using a liquid carbo supplement, will I lose the same benefits when I switch to CO₂ gas?
Switching from a liquid carbon product (common in aquatic or soil biology contexts) to gas CO₂ can change what benefit you are getting. In soil, some carbon additives support microbes and organic matter processes that do not replicate via atmospheric CO₂ alone. If your goal was soil biology, CO₂ gas will not restore the same microbial pathway, so compare your “why” for adding carbon before switching methods.
What safety limits should I set so a controller failure does not become dangerous?
Do not assume “more CO₂ is better.” Use a ceiling and a safety buffer, and avoid exceeding safe thresholds even if you can technically reach them. A practical next step is to set a conservative high-limit alarm and ensure the controller has a fail-safe cutoff so a sensor or solenoid failure does not keep injecting CO₂.