Gorilla Glue autoflower goes from seed to harvest in roughly 9 weeks, grows 60–130 cm tall, and produces some of the densest, most resin-caked buds you'll find in an auto. It works in soil or hydro, tolerates light training well, and is genuinely forgiving enough for a first grow while still rewarding experienced growers who dial in their environment. The core challenge is keeping stress to a minimum in weeks 1–3, because any setback early on eats into a short life cycle that has no reset button.
How to Grow Autoflower Gorilla Glue: Full Grow Guide

Marcus Holloway
20 May 2026
Gorilla Glue Auto: What You're Actually Working With
Gorilla Glue Auto (popularized by Fast Buds and available through several breeders) is classified as a large-sized autoflower, which sounds contradictory until you compare it to compact autos that barely hit 50 cm. In practice, expect most plants to land in the 80–110 cm range indoors with good conditions. The buds are chunky, tightly packed, and absolutely loaded with trichomes. The aroma runs piney and citrusy with a diesel and fuel undertone that gets stronger as you approach harvest.
Because it's an autoflower, it flowers based on age rather than light schedule changes. That means no flipping to 12/12, no separate veg and flower rooms, and a predictable 9-week timeline. The flip side is that you can't just add a week of veg time if something goes wrong. Every day counts, especially the first three weeks. Stress during early development can extend completion time or reduce final yield even if the plant looks fine by week 5.
This strain is suitable for growers at different experience levels, and it actually responds well to low-stress training (LST) and careful defoliation as long as you don't go aggressive with it. That's a meaningful distinction from more temperamental autos that punish any interference. Plan your grow space for a plant that could reach 130 cm if conditions are ideal, but realistically budget for 80–100 cm in a typical indoor tent setup.
Choosing and Preparing Your Grow Medium
You have two realistic options here: a quality amended soil or a hydroponic system like deep water culture (DWC). If you want a simpler baseline, read up on the best grow medium for autoflowers to compare soil and hydro options before you commit. Both work well for Gorilla Glue Auto, but they require different management approaches and have different learning curves.
Soil Setup
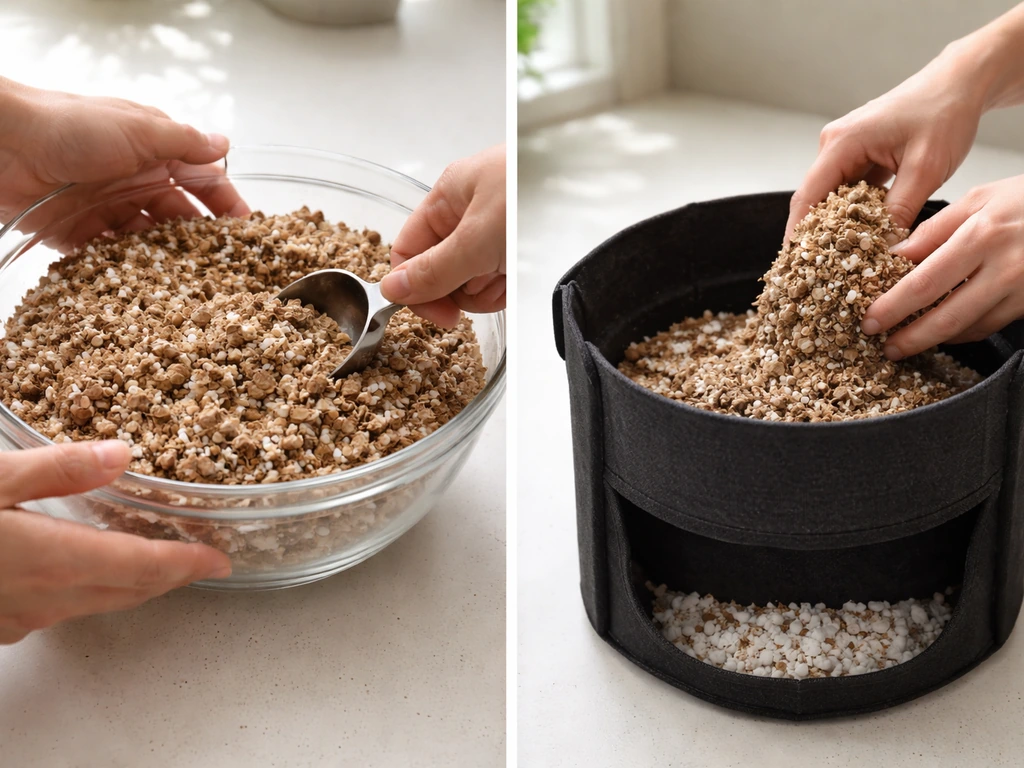
Soil is the more forgiving choice and the better starting point for beginners. Use a light, airy mix with good drainage, something like a coco-perlite blend or a quality cannabis-specific potting mix that isn't heavily pre-loaded with nutrients. Heavy nutrient charges in the medium can burn seedlings in weeks 1–2 before they're ready for feeding. Mix in about 20–30% perlite by volume if your soil doesn't already include it. This keeps the root zone oxygenated and prevents the waterlogged conditions that are responsible for more failed autoflower grows than almost anything else.
For container size, go straight into your final pot to avoid transplant stress. A 3-gallon (roughly 11-liter) fabric pot is a solid minimum for an auto that can hit 100 cm. Five-gallon pots give you more root space and are worth it if you have the tent floor space. Fabric pots promote air pruning at the root tips, which encourages branching and healthy root development throughout the grow.
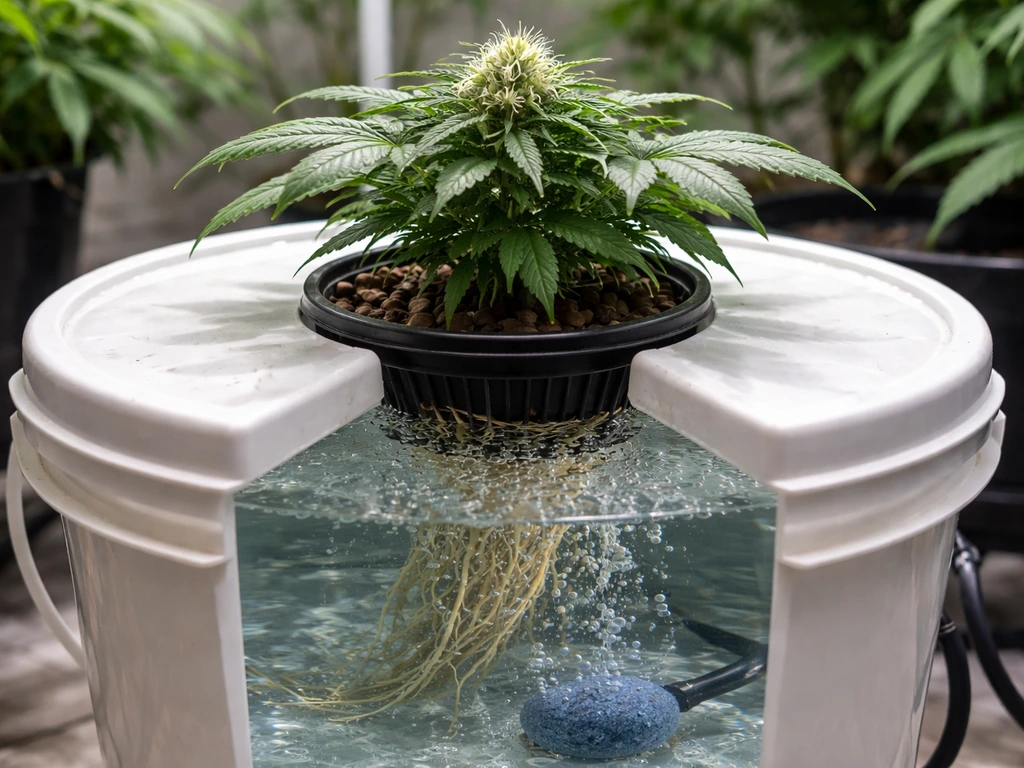
Hydroponic Setup (DWC)
DWC (deep water culture) dramatically speeds up vegetative growth and can push yields noticeably higher, but it demands more attention. Growing autoflowers in deep water culture is a genuinely rewarding upgrade, but you need to understand the fundamentals before adding that complexity autoflowers in DWC. You'll need a reservoir, net pots, an air pump with airstones, and a quality pH and EC meter. The roots hang directly in oxygenated nutrient solution, which means faster uptake but also faster consequences if your pH drifts or your reservoir gets contaminated. Check pH and EC daily during peak veg and flower, and refresh your reservoir every 10–14 days. Target pH in the 5.5–6.5 range, with a sweet spot around 5.8–6.0 for optimal nutrient availability. If you're newer to growing, build your soil skills first, then move to DWC once you understand how GG Auto behaves. Growing autoflowers in DWC is a genuinely rewarding upgrade, but you need to understand the fundamentals before adding that complexity.
| Factor | Soil | DWC Hydroponics |
|---|---|---|
| Beginner friendliness | High — buffers mistakes | Lower — requires daily checks |
| Growth speed | Moderate | Faster vegetative growth |
| Yield potential | Good | Higher ceiling |
| pH target | 6.0–7.0 | 5.5–6.5 (sweet spot ~5.8–6.0) |
| Watering frequency | Every 1–3 days | Continuous (top-up as needed) |
| Equipment cost | Low | Moderate to high |
| Risk of root issues | Lower with good drainage | Higher if pH drifts or res gets contaminated |
Week-by-Week Grow Plan: Seed to Harvest
This timeline is built around a 9-week grow, which is realistic for GG Auto under solid conditions. Some plants run a day or two longer, especially if early conditions weren't perfect. Use this as your working roadmap and adjust based on what you see. If you want an exact schedule, follow this week-by-week approach for timing your watering, feeding, and training through harvest how to grow autoflowers week by week.
Pre-Week 1: Germination
Use the paper towel method: dampen two paper towels, place seeds between them, fold and put in a plastic bag or covered plate in a warm dark spot (around 70–80°F). Check daily and keep the towels moist but not dripping wet. Most seeds crack and show a taproot in about 4 days, though some take up to 10 days depending on seed age and storage conditions. Once the taproot is about 5 mm long, plant it taproot-down about 1 cm deep in your medium. Avoid strong light at this stage. A low-intensity setup or simply positioning your light higher keeps things gentle until the seedling breaks soil.
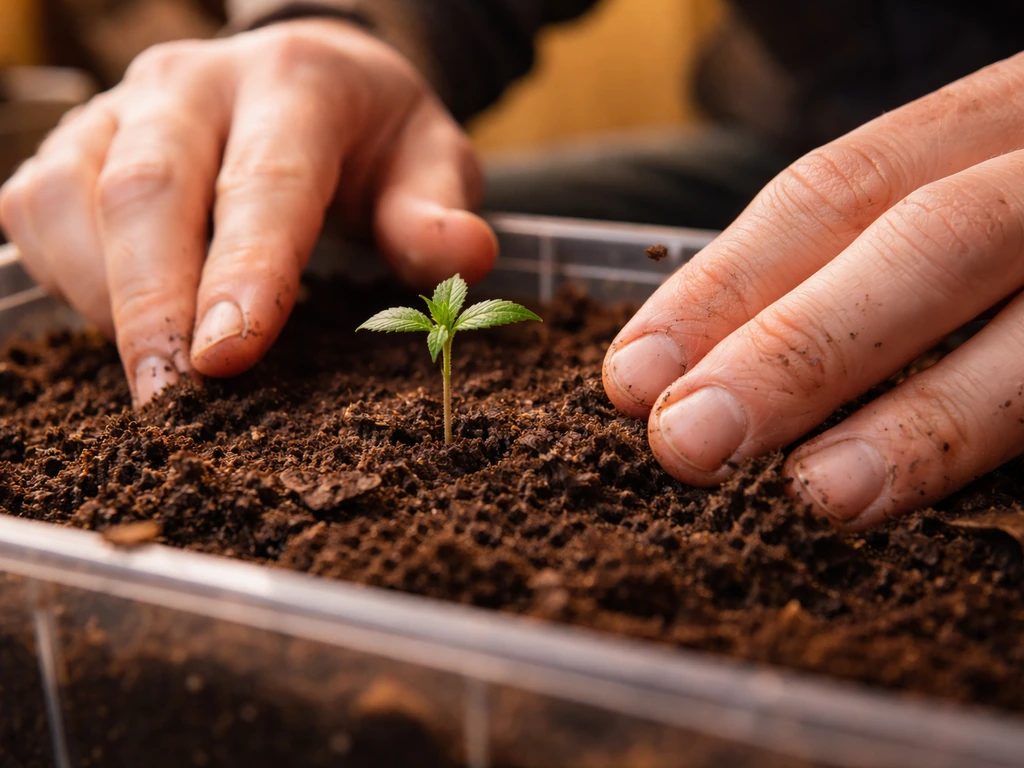
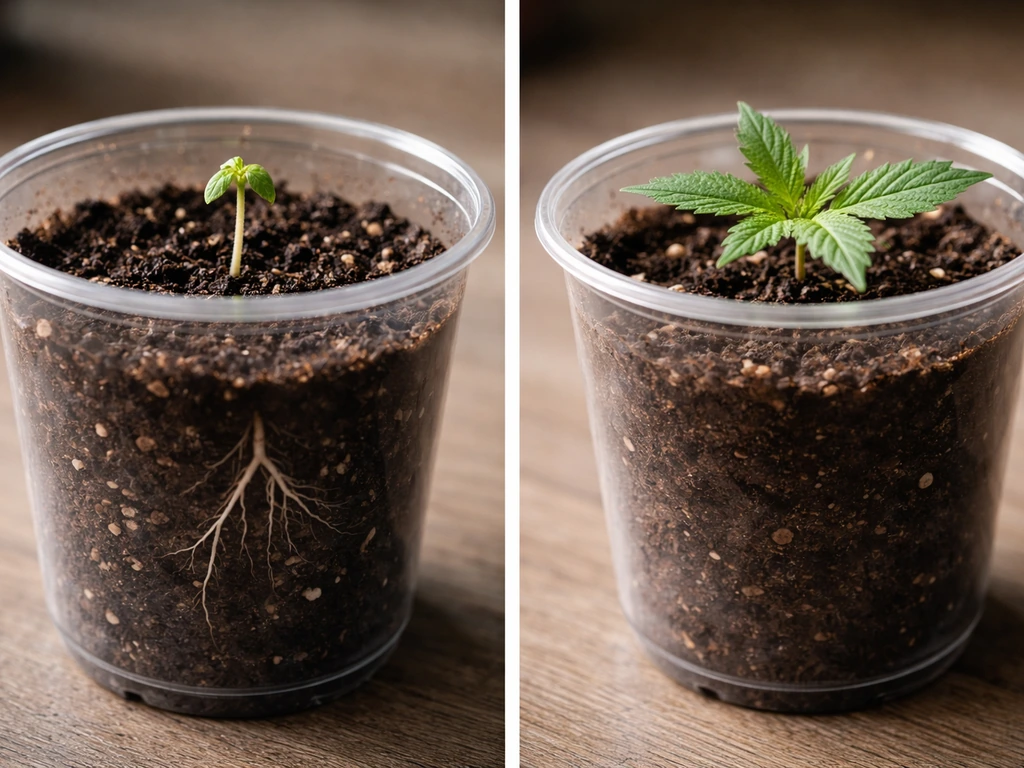
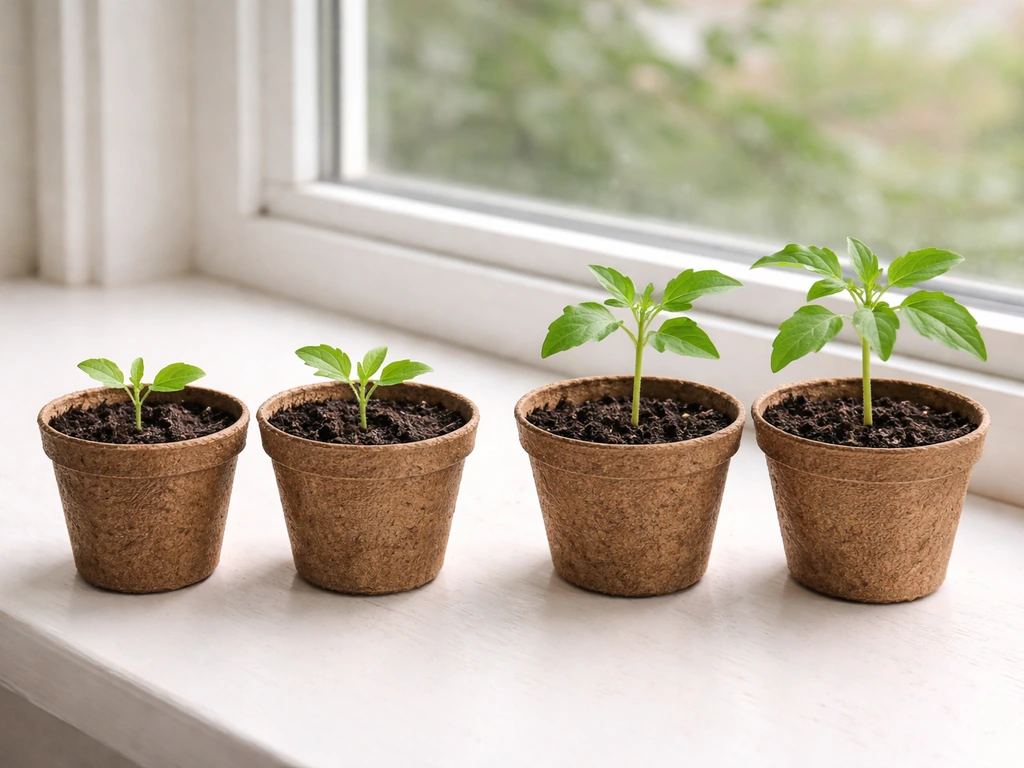
Weeks 1–2: Seedling Stage
The seedling emerges and focuses entirely on root development. Water lightly and only in a small circle around the stem, not the whole pot. The goal is to encourage roots to chase moisture outward. No nutrients yet, or a very light seedling formula at quarter strength if you're using a nutrient-light medium. Lights at 18/6 or 24/0 are both used successfully for autos; 24/0 gives slightly faster growth because there's more total light, but 18/6 works well and gives the plant a dark rest period that some growers swear by.
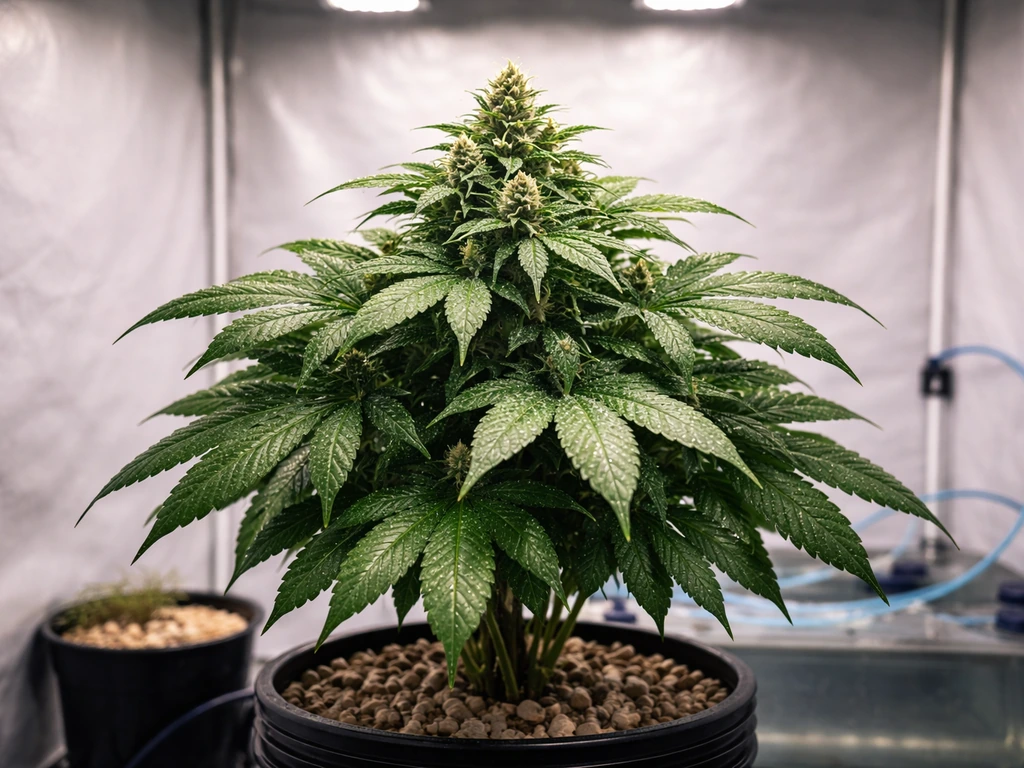
Weeks 3–4: Early Vegetative Growth
Growth accelerates noticeably. You'll see new node sets developing quickly and the plant starting to build its structure. Introduce nutrients at a low to moderate level now, focusing on a balanced NPK with adequate nitrogen. Start watering when the top inch of soil feels dry, or lift the pot to judge weight. This is the window to begin any LST you plan on doing. Gently bend the main stem outward and tie it down to open up the canopy. Keep it subtle.
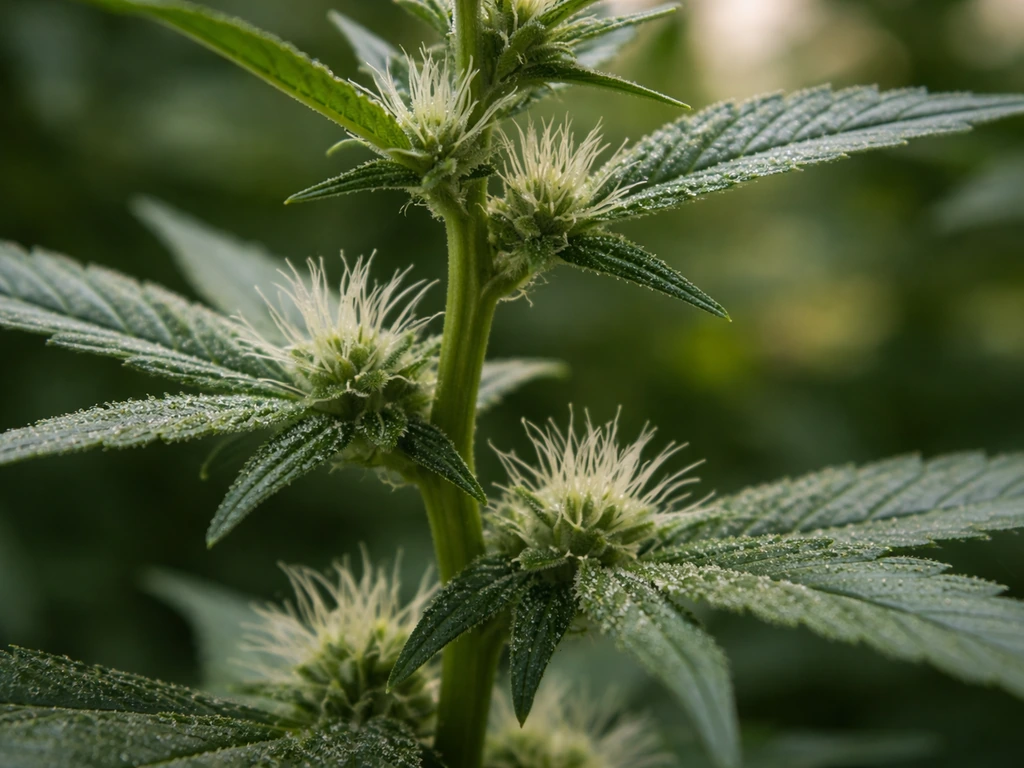
Weeks 5–6: Pre-Flower and Early Flower
White pistils appear at the nodes, and the plant transitions into flower. This is when you start shifting the feed profile toward less nitrogen and more phosphorus and potassium. Don't cut nitrogen completely, just reduce it. The plant still needs some for early bud development, but pushing high nitrogen now causes leafy, airy buds and can stress the plant. Continue LST if you started it, adjusting ties as the plant grows. GG Auto stretches noticeably during this window, which is normal.
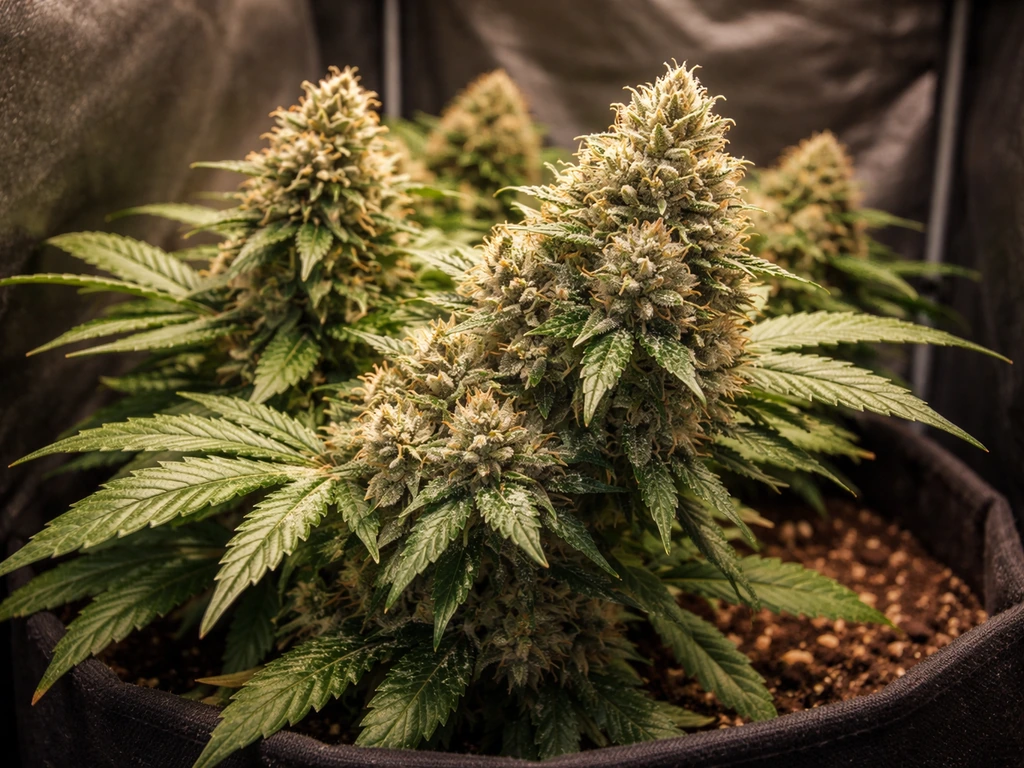
Weeks 7–8: Peak Flower
Buds swell considerably and trichome production ramps up. The characteristic piney-diesel smell becomes very pronounced. Feeding is at peak nutrient concentration, with a heavy lean toward bloom-focused nutrients. Humidity management becomes critical here because the dense buds GG Auto produces are susceptible to mold if RH climbs above 50% in this stage. Keep airflow moving and RH under 45–50%. Watch for any signs of nutrient burn, lockout, or pests (more on those below).
Week 9: Flush and Harvest
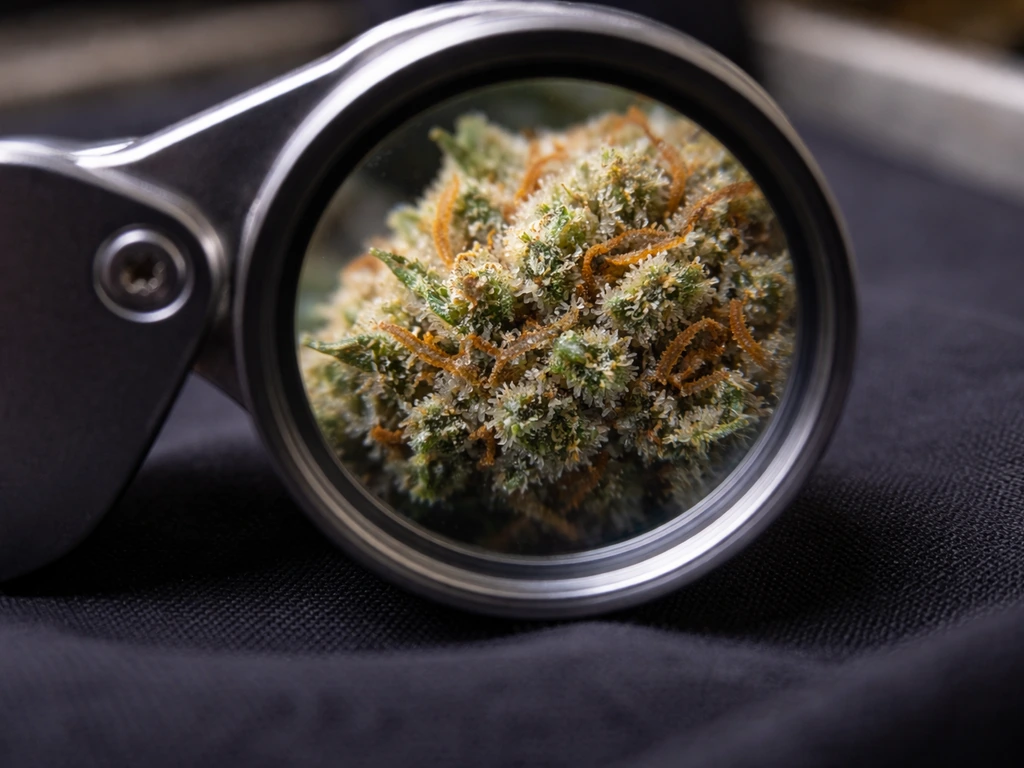
In the final 7–10 days, flush with pH-balanced plain water to clear residual nutrients from the medium. Harvest timing is best read by trichome color using a jeweler's loupe or digital microscope. Milky white trichomes with a few amber give a more uplifting effect. Mostly amber trichomes produce a heavier, more sedative result. Most growers targeting peak effect harvest when around 70–80% of trichomes are milky with 10–20% amber. Once cut, dry in a dark space with temps around 60–70°F and RH around 50%, with gentle airflow, for 7–14 days before curing.
Light, Temperature, Humidity, and Airflow Targets
Light intensity matters as much as light schedule for autoflowers. During seedling, keep PPFD around 200–400 µmol/m²/s. In vegetative growth, move to 400–600 µmol/m²/s. For flower, push to 600–900 µmol/m²/s if your plants can handle it without light stress. An 18/6 schedule works reliably from seed to harvest for most growers; 24/0 is also used but watch for heat buildup if your grow space isn't well ventilated.
Temperature during lights-on should stay in the 70–80°F (21–27°C) range. Night temps can drop 5–10°F below that, which is actually beneficial in late flower and can enhance terpene expression. Avoid going below 60°F or above 85°F consistently, as both extremes slow metabolic processes and invite problems.
Relative humidity targets shift by stage. In early veg, you can run 60–70% RH without issue. As you move into flower, bring it down progressively. Target 40–50% RH during peak flower and ideally below 45% in the final two weeks to protect those dense GG Auto buds from botrytis. Vapor Pressure Deficit (VPD) is the more precise way to manage this: it combines temperature and humidity into a single target that tells you how hard the plant is transpiring. For veg, aim for 0.8–1.2 kPa VPD. For flower, 1.2–1.6 kPa supports strong transpiration and nutrient uptake while keeping conditions unfavorable for mold.
Airflow is non-negotiable. Run at least one oscillating fan to create gentle stem movement, which strengthens stalks and keeps the canopy temperature even. An inline exhaust fan pulling air through a carbon filter handles both odor control and fresh air exchange. Aim to replace the air in your tent every 1–3 minutes during flower.
Watering and Feeding Schedule
Watering in Soil
Overwatering is the single most common killer of autoflowers, especially in weeks 1–3. Don't water on a schedule. Water when the top inch of soil is dry and the pot feels noticeably lighter. Water until you get 10–20% runoff, then wait. The wet-dry cycle is what drives root growth outward and keeps the root zone oxygenated. Roots sitting in constantly moist soil get low oxygen, which slows growth and opens the door to root rot.
Nutrients and Feeding by Stage
Autoflowers are sensitive to nutrient overload compared to photoperiod strains. Start light and increase gradually. Use EC or PPM as your guide if you have a meter. For seedlings, aim for 200–400 ppm (0.4–0.8 EC). In early to mid veg, 400–700 ppm (0.8–1.4 EC). In flower, most autos peak at 700–1000 ppm (1.4–2.0 EC) depending on the brand's baseline. If you're growing organically or with slow-release soil amendments, the approach is different since nutrients release gradually rather than being dialed via mixing. If you're following a slow-release approach with products like Dr. If you are using Dr. Earth, follow its top-dress schedule and don’t overdo liquid feeding since nutrients release gradually. Earth or Grow Dots, the top-dress or at-planting method changes how often you intervene with liquid feeding. For a lot of growers, Grow Dots can be used as a no-mix feeding system by simply top-dressing or placing them at planting, then letting the nutrients release gradually.
For the nutrient profile itself: run a balanced nitrogen-forward feed in seedling through early veg, then shift to a grow formula in mid-veg, and transition to a bloom formula once pistils appear (weeks 5–6). Reduce nitrogen inputs significantly in flower but don't eliminate them. Cut everything except flush water in the final week.
| Stage | Weeks | NPK Focus | Approx. PPM Target | Notes |
|---|---|---|---|---|
| Seedling | 1–2 | Balanced, very light | 0–300 ppm | No feeding or quarter-strength only |
| Early veg | 3–4 | Nitrogen-forward | 300–600 ppm | Introduce grow feed gradually |
| Late veg / pre-flower | 4–5 | Balanced N-P-K | 500–700 ppm | Start LST if using |
| Early flower | 5–6 | Shift to more P and K | 600–800 ppm | Reduce nitrogen input |
| Peak flower | 7–8 | High P and K, low N | 700–1000 ppm | Watch for burn symptoms |
| Flush / final | 9 | Plain pH water only | 0 ppm | Clear residual nutrients |
pH Management
In soil, keep feed water pH between 6.0 and 7.0, with 6.2–6.8 being the practical sweet spot. In hydro, target 5.5–6.5 with a sweet spot around 5.8–6.0. pH outside these ranges causes nutrient lockout even if your reservoir or soil is loaded with the right elements. A basic digital pH pen is a necessary tool, not an optional one. Calibrate it monthly.
Training, Pruning, and Working With the Auto Timeline
Gorilla Glue Auto is one of the better autoflowers for training because it responds well to LST and selective defoliation when done carefully. The key word is carefully. Autoflowers have a fixed life cycle, so there's no recovery period built in the way there is with a photoperiod strain you can hold in veg for three extra weeks.
LST (low-stress training) is the go-to technique. Start bending the main stem outward and tying it down at weeks 3–4, once the plant has 4–5 nodes. Use soft plant ties or pipe cleaners, never wire. The goal is to flatten the canopy so lower bud sites get more light. This alone can meaningfully increase yield without risking the plant. If you want to maximize bud size beyond setup basics, use the same low-stress approach in the guide for how to grow bigger autoflowers increase yield. Continue adjusting ties as the plant grows through early flower.
Topping (removing the main growing tip) is higher risk with autos because recovery time eats into the timeline. It can work if done very early (week 3, on the 3rd or 4th node), but it's not recommended for beginners. LST gives you most of the same canopy benefits without the recovery risk.
Defoliation is possible with GG Auto but requires restraint. Remove only 3–5 leaves per session and never defoliate after the second week of flower. Focus on removing large fan leaves that are blocking light to bud sites, not stripping the plant. Overdoing it stresses the plant and can genuinely stunt final bud development on a 9-week timeline where there's no time to bounce back.
Common Problems and Fast Fixes
Nutrient Burn
Symptoms: brown or yellowing tips on leaves, starting at the leaf edges. Cause: too much nutrient concentration, usually from feeding too aggressively too early. Fix: if caught at the tip stage, flush with plain pH-balanced water for the next 1–2 waterings, then resume feeding at a lower concentration. Don't panic and strip the plant. Just dial back and monitor.
Nutrient Lockout
Symptoms: yellowing leaves or signs of deficiency even though you're feeding regularly. Cause: nutrients are present but the plant can't absorb them, almost always due to pH being out of range, overwatering causing poor root health, or salt buildup in the root zone. Fix: check and correct pH first, then assess whether overwatering is an issue. Flushing with pH-correct water often resolves lockout within a few days.
Overwatering
Symptoms: drooping leaves that look full and fat (as opposed to the thin, wilted look of underwatering), slow growth, yellowing. Cause: watering too frequently, poor drainage, or too-large containers for the plant's root system. Fix: let the medium fully dry out before the next watering, ensure your pots have drainage holes, and consider adding perlite to improve aeration. Fabric pots help a lot here because they allow passive air pruning and drainage from all sides.
Stretch and Underdevelopment
If your GG Auto is stretching excessively and looking thin and spindly, the light is too far away or too weak. Move the light closer (check manufacturer guidelines for minimum distance) or increase intensity. If growth looks extremely slow in weeks 3–4, evaluate temperature, humidity, and root zone conditions. Unstable temps, cold roots, or consistently wet soil all stall development. Autos that get stunted early will flower regardless of their size, so catching this in week 2–3 is much better than noticing it in week 5.
Pests: Fungus Gnats, Spider Mites, and Aphids
Fungus gnats are the most common soil pest and are almost always tied to overwatering. The larvae live in moist topsoil. Fix the watering cadence, let the top inch of soil dry out between waterings, and use yellow sticky traps to monitor adult populations. Spider mites show up as tiny dots on leaves and fine webbing. Increase humidity slightly (if in veg), improve airflow, and use insecticidal soap or neem oil spray. Aphids cluster on new growth and under leaves. Knock them off with a gentle water spray first, then follow up with insecticidal soap. Avoid heavy chemical pesticides in flower, especially in the last three weeks.
Botrytis (Bud Rot)
This is the nightmare scenario for dense-budded strains like GG Auto. It shows up as grey-brown mold inside tight buds in weeks 7–9, especially if RH climbs above 50%. Prevention is far easier than treatment. Run RH below 45% in late flower, keep airflow strong, and check inside large cola buds regularly. If you find rot, remove the affected section immediately and sterilize your tools. Do not compost affected material. High nitrogen during flower can also increase tissue softness and mold susceptibility, another reason to back off nitrogen in weeks 5–9.
Your Pre-Grow Checklist
Before you drop your first seed, make sure you have the following sorted. Catching a missing piece before the grow starts is a lot easier than scrambling to fix it in week 4.
- Grow space with at least 150 cm vertical clearance for indoor tents
- Quality LED or HPS light sized appropriately for your footprint (check manufacturer PPFD coverage charts)
- Oscillating fan plus inline exhaust fan with carbon filter
- Hygrometer and thermometer combo (or a smart environmental controller)
- pH meter, pH up/down solution, and EC/PPM meter
- Final containers selected: fabric pots in 3–5 gallon size, or DWC reservoir setup
- Grow medium prepared: airy, well-draining soil with perlite added, or hydro media (hydroton/clay pebbles for DWC)
- Nutrients selected and staged by growth phase
- Germination supplies: paper towels, small ziplock bag, warm dark spot
- Timer for your lights set to 18/6 (or 20/4 if you prefer)
Gorilla Glue Auto rewards growers who prepare well and stay consistent. The strain itself is tough, produces stunning resinous buds, and fits a wide range of setups. Nail your environment in weeks 1–3, feed with a light hand, keep your pH dialed in, and this strain will do most of the heavy lifting for you by week 7.
FAQ
Can I grow Gorilla Glue autoflower outdoors, and what changes vs indoors?
Yes, but only if you control heat, humidity, and root saturation. Autos still have a fixed age-based flowering timeline, so outdoor swings in weather can’t be “canceled” like veg in photoperiod plants. Start seeds only when daytime temps are reliably warm (roughly the 70 to 80°F range) and you can manage RH so late flower stays under about 45 to 50% to reduce bud-rot risk.
My GG Auto is yellowing, how do I tell nutrient deficiency from pH lockout quickly?
If you see yellowing and it could be deficiency or lockout, pH checks beat guessing. Confirm your water runoff pH or nutrient solution pH first, then compare plant symptoms to timing, since early yellowing right after first feed often points to overload rather than true deficiency. Avoid doing a heavy flush plus high-strength feeding in the same day, it usually worsens the salt and oxygen stress cycle.
What should I do if I overfeed Gorilla Glue Auto (EC/ppm is too high)?
For autos, the safest “compromise reset” is to pause adding nutrients, not to pause watering. If you suspect overfeeding or tip burn, run plain pH-balanced water for the next one to two waterings, then resume at a lower EC, typically stepping down one tier from what caused the issue. Also verify your runoff exists in soil, if there is no runoff, salts keep building even if you flush once.
How do I prevent Gorilla Glue Auto from getting too tall or outgrowing my tent while using LST?
Since GG Auto can reach tall, plan training and airflow before you start LST. Keep leaves and buds from contacting the tent walls, and leave headroom for stretch during weeks 5 to 6. A practical approach is to start LST around weeks 3 to 4 when you can still keep the canopy low, and to reassess tie points every few days so the plant does not “spring back” as stems stiffen.
Should I use EC/PPM targets in soil the same way as the article suggests for hydro?
If your soil is coco-based or you’re in living soil, don’t assume the same EC targets apply. In soil, meters can still help but the numbers are less direct because nutrients are released gradually and uptake depends on microbial activity. If you use a nutrient meter anyway, focus on runoff EC trends and avoid increasing feed just because the plant looks hungry, check pH and water frequency first.
How do I decide the best harvest day for GG Auto if trichomes are close to “ready”?
Harvest timing can be tightened by temperature and drying conditions, not just trichome color. If you want a more uplifting effect, harvest when most trichomes are still milky with only a small amber fraction, and make sure drying doesn’t run warm, warm drying can degrade terpenes. Aim for steady 60 to 70°F in the drying room and avoid high airflow directly blasting the buds.
What is the most common watering mistake with Gorilla Glue Auto seedlings?
In soil, the highest-risk mistake is watering too often or in too large an area early on. For seedlings, water lightly in a small circle and wait until the top inch dries, then water thoroughly enough to encourage outward root growth. In fabric pots, the plant may feel dry sooner, so re-check the pot weight rather than relying on day count.
What should I do if I spot early bud rot inside dense Gorilla Glue Auto flowers?
If mold risk rises, remove affected material immediately, then reduce wet conditions rather than spraying random solutions. Prevention is humidity and airflow, so lower RH, increase air exchange, and check inside dense colas where rot starts. Do not compost the infected buds, and sterilize scissors or blades after removal.
Can I troubleshoot nutrient problems in the last week before harvest, or should I just flush?
Yes, late-stage nutrient “fixes” often hurt more than they help. In the last 7 to 10 days, the strategy is to feed less or shift to pH-balanced water depending on your medium, because overfeeding can increase softness and mold susceptibility. If you’re unsure, prioritize stable pH water and avoid high nitrogen pushes.
How can I tell if light stress is causing issues instead of nutrient or pH problems?
Not always, especially if you run lights at high intensity. Autos can show early stress that looks like deficiency but is actually photostress, often from excessive PPFD or heat near the canopy. If tips are paling, tacoing, or showing burned edges soon after raising light, reduce intensity, confirm temperature under the light is within range, and wait several days before changing nutrients again.
My leaves look droopy, not wilted, what are the first checks to do before changing nutrients?
If you’re using a fabric pot and see droop that doesn’t match underwatering, treat it like overwatering or oxygen stress first. Let the medium dry fully, confirm drainage holes are not blocked, and consider adding perlite if the mix stays compacted. A quick clue is that overwater symptoms often include heavy, droopy leaves plus slow growth, not the light, crispy look typical of underwatering.