There is no widely documented nutrient brand or grow system officially called 'Eminent Grow Main' in the horticulture or hydroponics space. The most likely explanation is that this phrase refers to starting the main vegetative (veg) phase of an indoor grow operation, sometimes called the 'main grow' or 'main phase,' using whatever system you have. That is exactly what this guide covers: how to set up, start, and dial in your main veg phase from day zero, whether you are growing in soil or hydro, starting from seed or clone.
How to Start Eminent Grow Main Setup Step by Step

Marcus Holloway
27 May 2026
What 'Eminent Grow Main' actually means for your setup
In indoor growing, the 'main grow' or 'main phase' typically means the vegetative stage: the period after germination or clone rooting where your plant establishes its root system, builds canopy, and develops the structure it will carry into flower. It is the most important phase to get right because mistakes made here compound in flowering. If you searched for 'Eminent Grow Main' expecting a specific product line, it is worth knowing that no major nutrient manufacturer currently markets a line under that exact name. Eminent Food notes its cultivation context rather than offering a hydroponics or cannabis nutrient line named “Eminent Grow Main,” which supports the idea that the phrase does not refer to a specific nutrient product no major nutrient manufacturer currently markets a line under that exact name. A few possibilities: you may have seen a local or regional brand, a misremembered name from a forum, or a reference to a custom nutrient schedule someone called their 'eminent grow main' feed. In any case, the guidance below works for your main grow start regardless of brand.
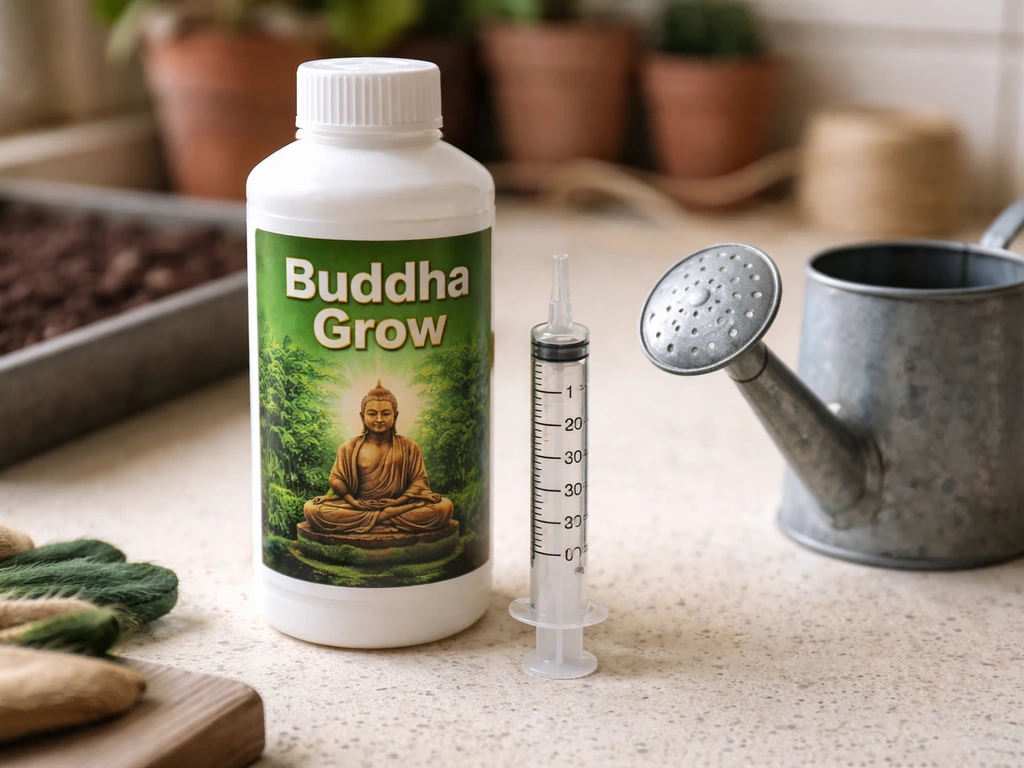
If you are using a specific nutrient line (like Advanced Nutrients pH Perfect Grow, Roots Organics Buddha Grow, or similar) as your 'main' feed during veg, the foundational setup steps are the same. You slot that product into the nutrition plan covered in section five below and follow its manufacturer dilution rates from there.
Choose your grow method and starting materials before anything else
The single biggest decision you make before starting your main grow is soil versus hydro. Everything else, from container size to pH targets to feeding frequency, flows from that choice. Here is a practical comparison to help you decide today.
| Factor | Soil | Hydroponics (DWC/Coco) |
|---|---|---|
| Learning curve | Lower, more forgiving | Steeper, less margin for error |
| Cost to start | $50–$150 for basic setup | $150–$400+ for reservoir/pump system |
| Veg speed | Moderate | Faster (up to 20–30% quicker) |
| pH target range | 6.0–7.0 (ideal 6.2–6.8) | 5.5–6.5 (ideal 5.8–6.2) |
| Watering frequency | Every 2–4 days | Daily or continuous |
| Mistake recovery time | Days to a week | Hours to a day |
| Best for beginners | Yes | Better with some experience |
For seeds: start them in a small seedling cube, rapid rooter, or solo cup with lightly amended soil before transplanting into your main container. For clones: root them in rockwool or a cloning solution, then transfer to your chosen medium once roots are visible (usually 10–14 days). Avoid putting unrooted clones or freshly sprouted seeds directly into a large pot. It slows root zone development and increases overwatering risk dramatically.
Container and medium choices
- Soil in 3–5 gallon fabric pots: best starting point for most beginners, good airflow to roots, hard to overwater
- Coco coir in 3–5 gallon fabric or plastic pots: faster than soil, behaves like hydro, requires daily feeding
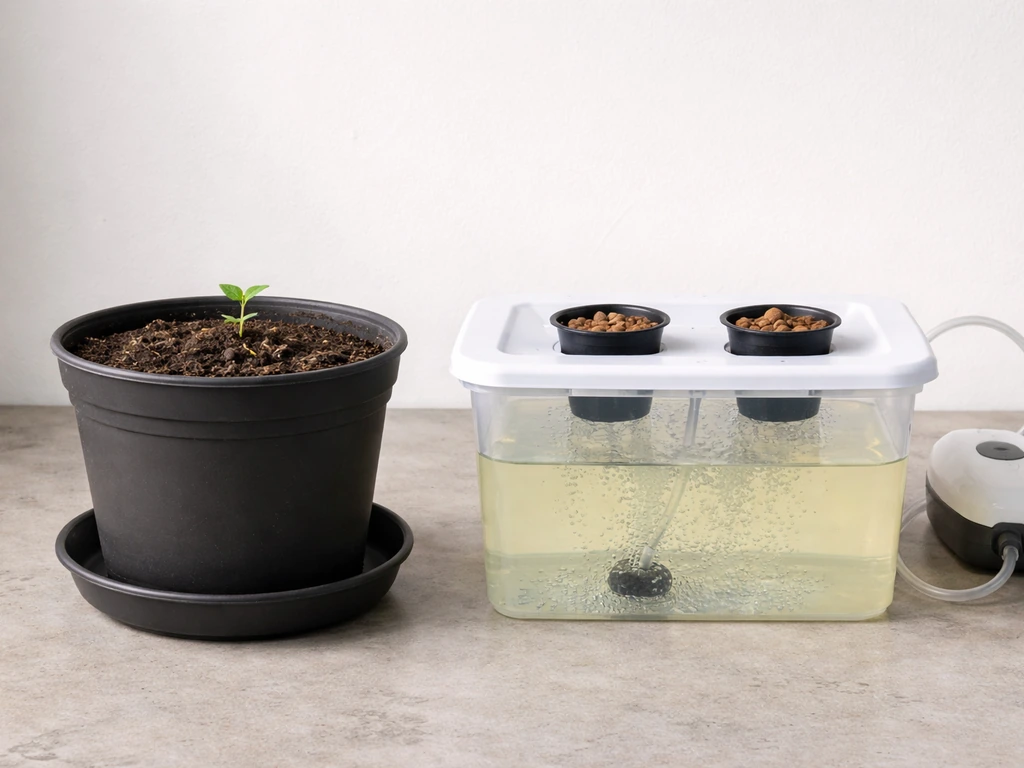
- DWC (Deep Water Culture) bucket: 5-gallon bucket with airstone and reservoir, fast growth but needs daily pH checks
- Rockwool slabs in a drain-to-waste system: popular for intermediate growers, clean and scalable
- Avoid peat-heavy mixes if you are in hydro or coco: pH management becomes inconsistent
Day-by-day setup: lights, environment, and first installation checklist
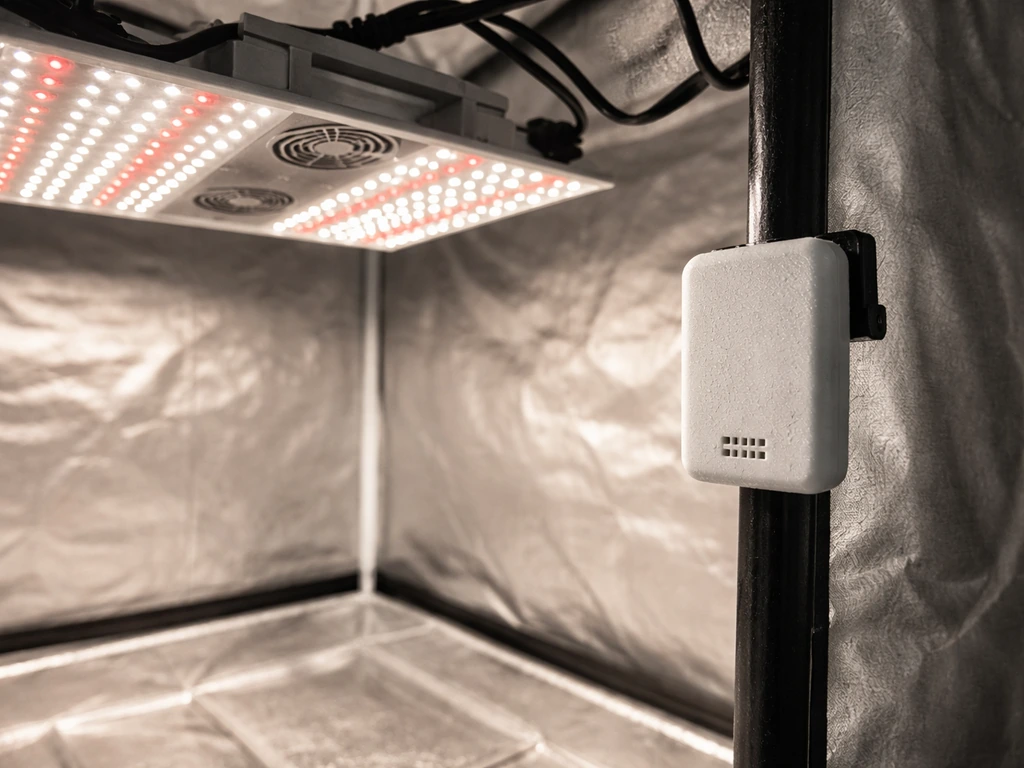
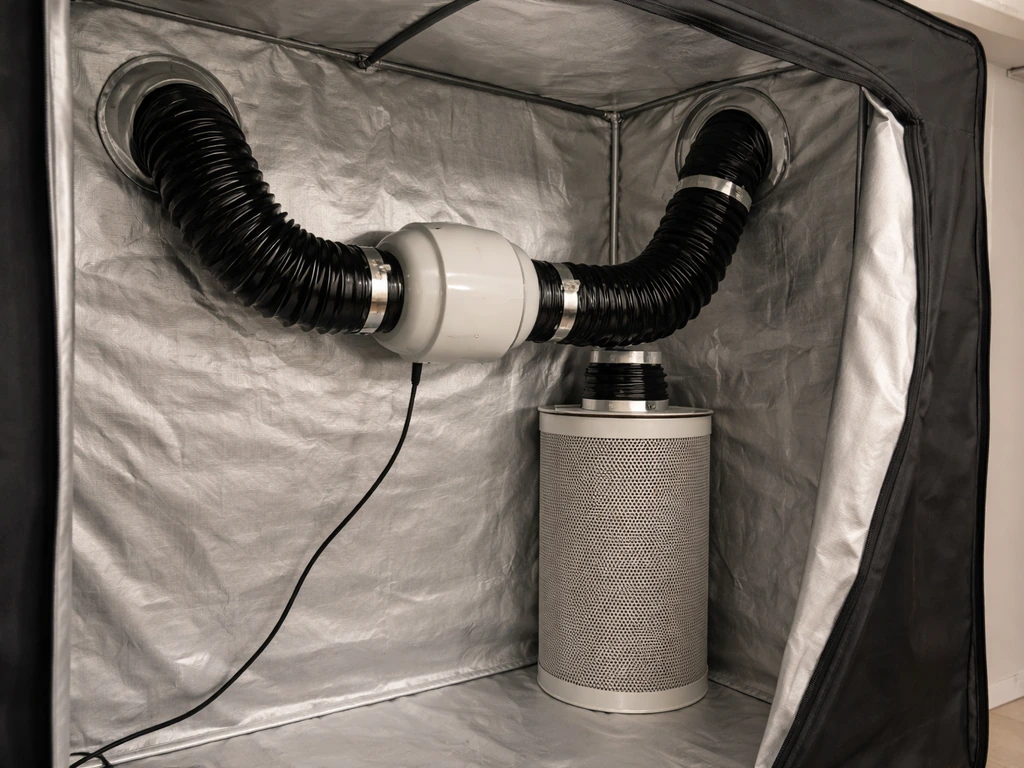
Get your environment dialed in before your plant ever enters the space. A seedling or freshly transplanted clone placed into an uncontrolled environment is already fighting a disadvantage. Target these numbers for the main veg phase: temperature 70–80°F (21–27°C) during lights on, 65–75°F during lights off; relative humidity 55–70% in early veg, dropping toward 50% as canopy fills out; air circulation with at least one oscillating fan keeping foliage moving gently; and a carbon filter and inline fan if odor control matters.
Light setup for veg
For the main veg phase, run an 18/6 light schedule (18 hours on, 6 hours off). This is the standard photoperiod for keeping plants in vegetative growth. LED panels are now the go-to choice for most indoor growers: a 200–300W LED covers a 2x4 ft canopy adequately in veg. Hang your light 24–36 inches above seedlings, lowering to 18–24 inches as plants mature. HID (MH/HPS) setups still work well but run hotter and cost more to operate. CMH (ceramic metal halide) is a solid middle ground if you want broader spectrum coverage.
Day-zero setup checklist
- Set up and seal your grow tent or grow room (check for light leaks before installing plants)
- Install inline fan and carbon filter, set to exchange air volume every 1–3 minutes
- Hang light fixture at correct height, connect to a mechanical or digital timer set to 18/6
- Place oscillating fan at canopy level, pointed slightly away from direct plant contact
- Set up thermometer/hygrometer with min/max memory at canopy height
- Prepare medium: pre-moisten soil or coco 24 hours in advance, or fill reservoir and aerate DWC bucket
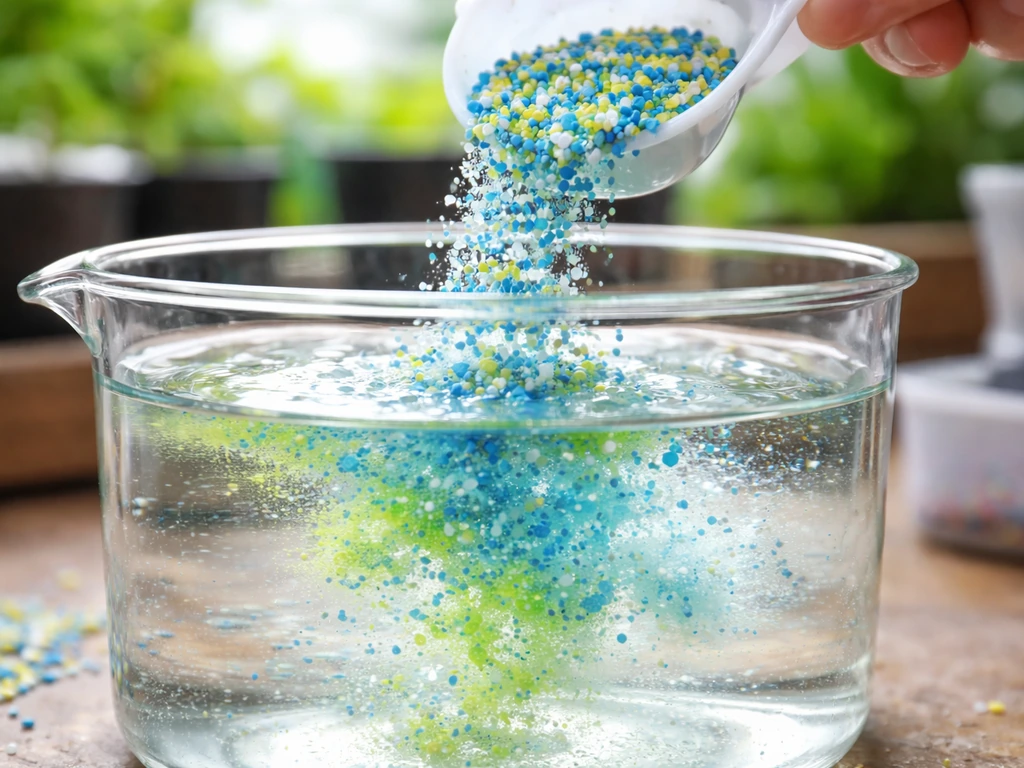
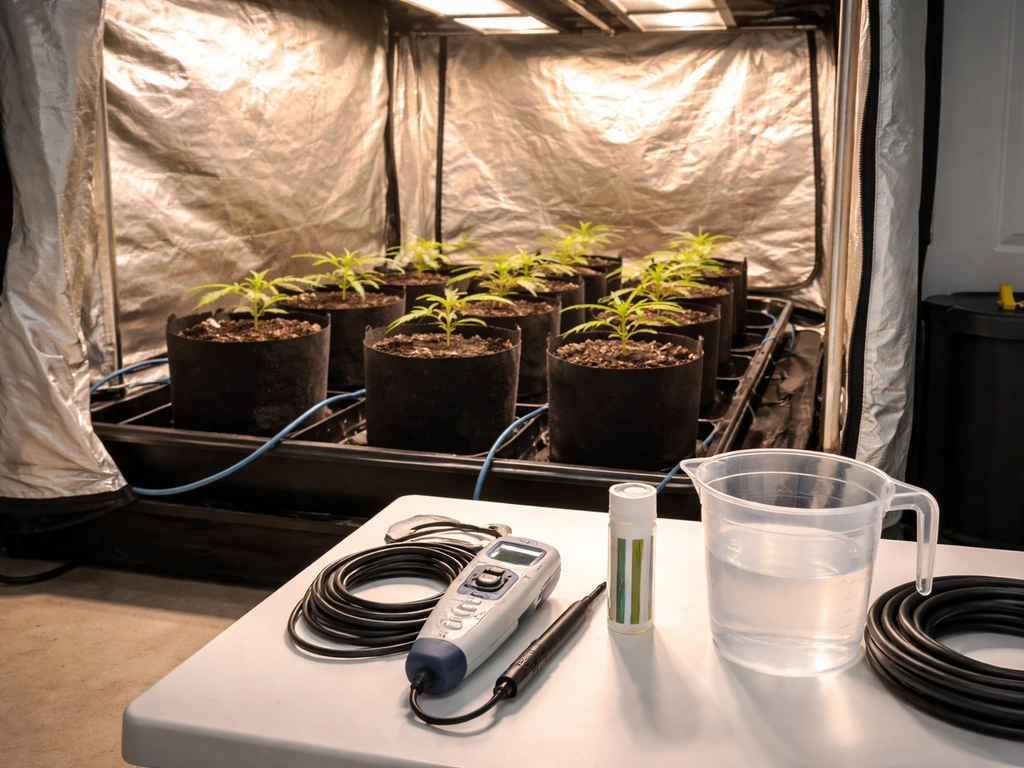
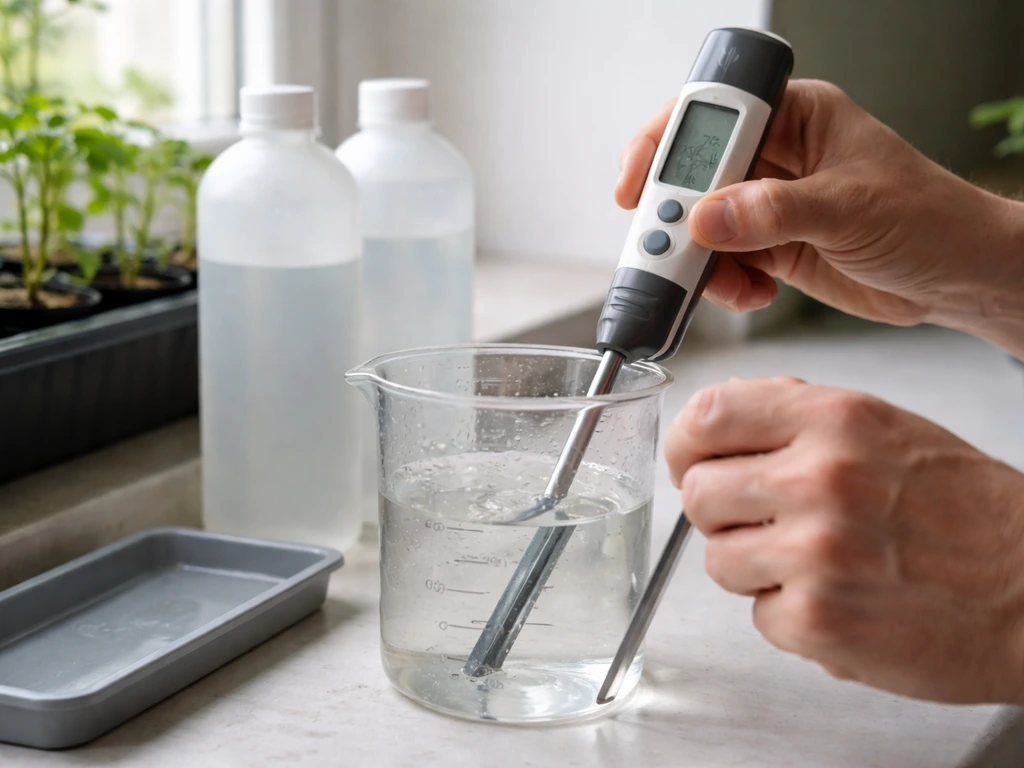
- Calibrate your pH meter and EC/PPM meter with calibration solution before first use
- Mix and pH-correct your first feeding or plain water to target range before watering
- Label pots or buckets with strain, start date, and medium type
Germination, transplanting, and settling into the main veg phase
Germination takes 2–5 days for most seeds using the paper towel method or direct planting in a rapid rooter. Keep seeds at 75–80°F and above 70% humidity during this window. A seedling dome over a heat mat makes this simple. Once the taproot is 0.5–1 inch long, place it root-down into your seedling medium and keep the dome on for the first 3–5 days to maintain humidity while the cotyledons establish.
Transplant from seedling cup to your main veg container when the roots start circling the bottom of the cup or poking through drainage holes. In a solo cup, this usually happens around day 10–18. Transplant stress is real but short: expect 1–3 days of slower growth while the plant adjusts. Water with plain pH-correct water immediately after transplant (no nutrients yet), and keep the environment slightly more humid (65–70%) for those first few days.
For clones entering their first days in the main veg space: make sure roots are at least 1 inch long and white before transplanting. Clones skip the germination step but need the same humidity support and a gentle first week. By day 7–10 post-transplant, you should see new lateral growth, which signals the plant is rooted and ready for its first full feeding.
Initial nutrition plan for the first 1–3 weeks
Feed light in the first week. If you want to micro grow, focus on smaller containers, tighter spacing, and careful environment control during your main veg phase micro growing. Most problems beginners face in early veg are from overfeeding, not underfeeding. A plant with 2–4 nodes does not need the same EC as a plant with 8–10 nodes. Start with plain pH-correct water for days 1–5 post-transplant, then introduce nutrients at 25–50% of the manufacturer's recommended veg dose. When you use easy grow fertilizer, start with a light dose and increase only after your plant shows steady new growth introduce nutrients at 25–50%.
Soil nutrition in weeks 1–3
If you are using a pre-amended soil (like Fox Farm Ocean Forest or a similar hot mix), you likely do not need to add nutrients at all for the first 2–3 weeks. The soil already contains enough nitrogen, phosphorus, and potassium for early veg. Just pH your water to 6.2–6.8 and water when the top 1–2 inches of soil are dry. If you are on a plain or low-nutrient base (like coco or peat-lite), start a nitrogen-forward veg nutrient at about 50% dose by week two. Products like Grow More 30-10-10, Dr. If you use Grow More 30-10-10 during your early veg, start at a reduced dose and follow your pH and EC targets closely. Earth Pump and Grow, or a basic two-part veg formula all work at this stage. If you are using Dr. Earth Pump and Grow during early veg, still start light, pH your water, and ramp nutrients gradually as the plant builds nodes.
Hydro and coco nutrition in weeks 1–3
In coco or DWC, start feeding from day one after transplant because there are no buffered nutrients in the medium. Aim for 400–600 PPM (EC 0.8–1.2 mS/cm) in week one, building to 700–900 PPM (EC 1.4–1.8 mS/cm) by week three as the plant handles more. Keep pH between 5.8–6.2 for coco and DWC. Check pH and EC daily in DWC: a 0.3+ pH swing overnight means roots are drinking fast and you should top off with pH-corrected water.
| Week | Medium | Target PPM | Target EC (mS/cm) | pH Range |
|---|---|---|---|---|
| Week 1 (post-transplant) | Soil (amended) | Plain water only | N/A | 6.2–6.8 |
| Week 1 (post-transplant) | Coco / DWC | 400–600 | 0.8–1.2 | 5.8–6.2 |
| Week 2 | Soil (amended) | 300–500 (light feed) | 0.6–1.0 | 6.2–6.8 |
| Week 2 | Coco / DWC | 600–800 | 1.2–1.6 | 5.8–6.2 |
| Week 3 | Soil | 500–700 | 1.0–1.4 | 6.2–6.8 |
| Week 3 | Coco / DWC | 750–950 | 1.5–1.9 | 5.8–6.2 |
Early maintenance schedule: watering, feeding, and first training moves
Consistency is what separates a smooth early veg from a stressful one. The plant does not need heroic interventions in weeks one through three. It needs the right environment, correct pH water, and a predictable schedule.
Watering and feeding cadence
- Soil in fabric pots: water every 2–4 days, always letting the top 1–2 inches dry between waterings; lift the pot to feel weight as a dry/wet indicator
- Coco: water to 10–20% runoff daily or every other day once the plant is established; coco must not dry out completely
- DWC: top off reservoir daily with pH-corrected water; do a full reservoir change every 7–10 days
- Always water at the base, not over leaves, especially in early seedling stage
- Feed every other watering in soil (plain water, then nutrient solution, alternating)
First training moves in early veg
Wait until your plant has at least 4–5 nodes before starting any training. Low-stress training (LST) is the right choice for early veg: gently bend the main stem outward and tie it down to encourage lateral branching. This keeps height in check and improves light penetration. Avoid topping or FIMing until the plant has 5–6 nodes and looks healthy and vigorous. Never train a plant that is already showing stress signs like clawing, yellowing, or wilting.
Common early problems and how to stop them before they start
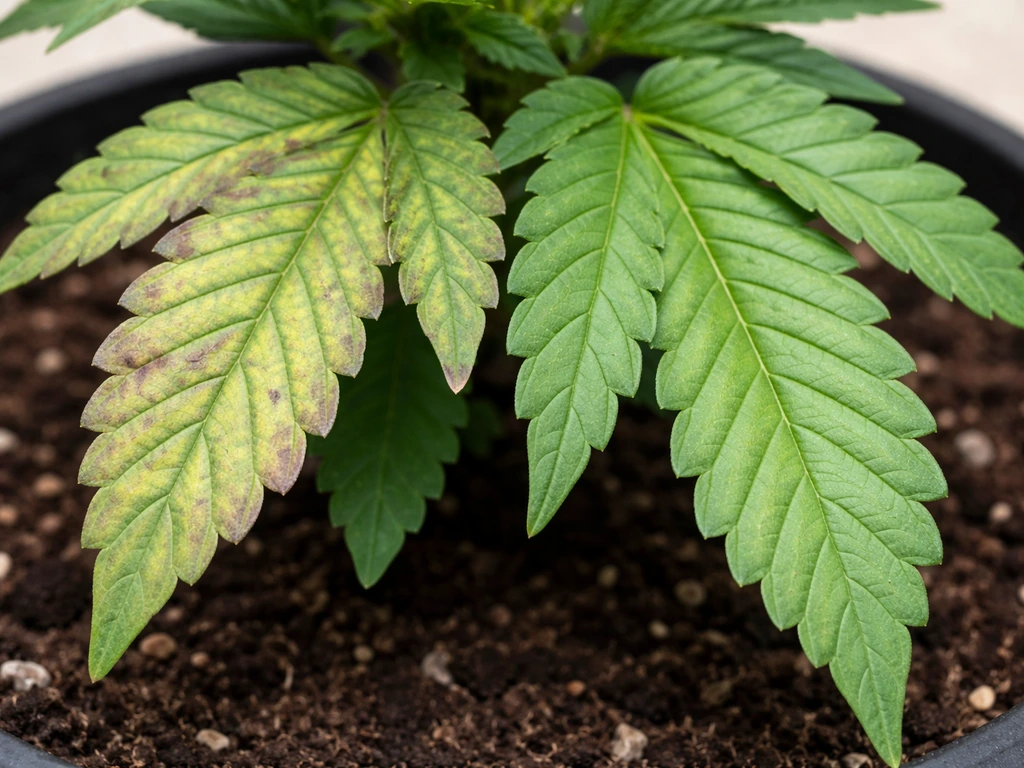
pH lockout
pH lockout is the most common early veg problem. It shows as yellowing between leaf veins (interveinal chlorosis), purple or spotted leaves, or a plant that just looks off despite a correct feed schedule. The fix is always the same: check and correct your water pH before every single feeding. Do not guess. Cheap pH pens drift fast, so calibrate weekly with a fresh calibration solution. If you are already seeing lockout symptoms, flush with pH-correct plain water (2–3 times the pot volume in soil) and resume feeding at 50% dose.
Overwatering
Overwatered plants droop with leaves pointing down and cupping inward. The soil stays wet and smells swampy. Roots need oxygen as much as water, and waterlogged soil starves them. Let soil dry out properly between waterings and always confirm dryness by pot weight before you water again. If you have already overwatered, hold off completely for 3–4 days, improve airflow, and the plant usually bounces back within a week.
Damping-off in seedlings
Damping-off is a fungal collapse that kills seedlings at the soil line, making the stem look pinched and brown before the whole seedling falls over. It happens fast (overnight in bad conditions) and is caused by overly wet, poorly aerated media combined with low airflow. Prevent it by using a clean, well-draining seedling medium (not dense potting soil), keeping the dome ventilated after day 3, and not overwatering seedling containers. There is no cure once damping-off takes hold: prevention is everything.
Early pest prevention
Fungus gnats are the number one early pest in soil grows. Their larvae eat roots and can wipe out seedlings. Prevention: let the top inch of soil dry completely between waterings, use yellow sticky traps from day one to monitor, and add a layer of perlite or diatomaceous earth on top of the soil surface. Inspect the undersides of leaves weekly for spider mites and aphids. Both show up as tiny dots or stippling on leaves. Neem oil or insecticidal soap at first sign works well in veg; avoid spraying during lights-on hours to prevent leaf burn.
Nutrient burn
Brown, crispy leaf tips in early veg almost always mean you overfed. Pull back to 50% dose, flush once with pH-correct water, and resume light. Burned tips do not recover on the existing leaves, but new growth will come in clean if you correct course quickly. This is especially common when growers add extra nitrogen to an already-amended hot soil mix.
Your week-by-week start timeline (Day 0 through early veg)
| Timeframe | Key Actions | What to Watch For |
|---|---|---|
| Day 0–2 | Set up tent, lights, fans, timer; calibrate meters; pre-moisten medium | Light leaks, temperature swings, humidity below 50% |
| Day 2–5 (germination) | Start seeds in paper towel or rapid rooter at 78°F; maintain dome humidity >70% | Taproot emergence; discard seeds with no activity by day 5–6 |
| Day 5–10 (seedling) | Place sprouted seed into seedling cup; keep dome on, water lightly, no nutrients | Cotyledons opening, first true leaves forming; avoid overwatering |
| Day 10–18 (transplant window) | Transplant to main container when roots circle the cup; water with pH-correct plain water only | Transplant shock (normal 1–3 days of slow growth); check for wilting |
| Week 2–3 (early veg) | Introduce nutrients at 25–50% dose; check pH/EC every feed; begin LST at 4–5 nodes | Leaf color (deep green = healthy), root zone moisture, pH drift |
| Week 3–4 (veg establishment) | Ramp nutrients to 75–100% of schedule; increase airflow as canopy fills; consider topping if plant is vigorous | Lateral branching, internode spacing, any pest or deficiency signs |
If you are using a specific nutrient line as your 'main' feed
If you picked up a product you are calling 'blank" rel="noopener noreferrer">eminent grow main' and it is a nutrient concentrate (a nitrogen-heavy veg formula is the most likely type), the rules above still apply. Use the manufacturer's feed chart as your PPM and dosing guide, but start at half dose for the first two weeks regardless of what the label says. Most nutrient companies write their feed charts for ideal conditions with experienced growers, not for week-one seedlings. pH Perfect-style formulas from Advanced Nutrients (like pH Perfect Grow, Micro, Bloom) simplify pH management significantly if you are new to dialing in water chemistry manually. If you are also using Power Grow foliar fertilizer, apply it as a foliar spray only at the right concentration and timing so you do not stress the leaves during veg how to use power grow foliar fertilizer. Comparable options like Roots Organics Buddha Grow or Easy Grow fertilizers follow similar veg-phase principles with different ingredient profiles. The core protocol of 'light feed, correct pH, check EC, watch the plant' works across all of them.
FAQ
What should I do if I can’t find a real product or label called “Eminent Grow Main”?
If you are unsure what “Eminent Grow Main” refers to, treat it as your main vegetative phase and use your actual nutrient line’s veg schedule, then start at half strength for the first 10–14 days. This avoids the most common mistake, overfeeding right after transplant when roots are still ramping up.
When should I begin nutrients, right after transplant, or only after a week?
In coco and DWC, you typically start feeding immediately after transplant, but the first week should use the lower end of the targets and you still need daily pH (and EC in DWC). In soil, the opposite is usually true, wait until the medium’s nutrients are largely consumed before adding fertilizer.
How do I adjust humidity during early veg so I don’t stunt growth?
Aim for “slightly humid” early veg, then reduce gradually as canopy fills and transpiration rises. If you drop humidity too fast, you can cause edge curling and slowed root expansion even when watering seems correct.
How close should my LED be during the first week of main veg?
For light height, use the plant response as your guide, if leaves taco upward and spacing tightens, raise the light. If seedlings look bleached or show crispy patches, raise the light further and/or reduce intensity. Keep stable distance during the first week, constant changes can stress plants.
How do I know when to increase fertilizer beyond 25–50% of the label?
A common approach is to move from 50% dose to full label dose only after you see steady new growth, usually around week two to three. If you see tip burn or interveinal yellowing, pause the ramp and hold the lower dose until new growth looks healthy.
Can I top or FIM during early main veg if the plant is still small?
No, topping or FIMing is often too much stress for unrooted or barely rooted plants. If you still need height control, use gentle LST after you have at least 4–5 nodes and the plant is actively pushing new growth for several days.
Should I follow the same watering and feeding schedule in soil, coco, and DWC?
Yes, “feeding only when dry” can work in soil, but in coco and DWC you should not wait for dryness because nutrient availability depends on medium saturation and your schedule. In coco/DWC, keep consistent intake by maintaining your EC and pH targets rather than delaying feedings.
What does a pH swing overnight mean specifically in DWC?
In DWC, a fast pH swing overnight usually means roots are consuming nutrients aggressively or that your water temperature and aeration are off. First, confirm aerator performance, then top up with correctly pH’d water and keep an eye on EC trends, not just pH.
What if my pH reads correct but I still get lockout symptoms?
If your pH is correct at mixing but the plant still shows symptoms, the next suspect is measurement error or calibration drift. Calibrate your meter weekly, and re-check using a fresh calibration solution before changing your feeding plan again.
How do I avoid nutrient problems if I’m using multiple products at once?
Yes, you can “accidentally” cause nutrient imbalance by overcompensating for a minor deficiency with extra nitrogen or by adding supplements too early. The safer sequence is base veg nutrients first, then only one additional product at a time, ramping after you confirm new growth stays steady.
How can I tell pest damage from nutrient issues during main veg?
Brown spots, pinholes, or rapid leaf damage can be misread as deficiency early on. For any suspicious pest sign, check undersides with a flashlight, use sticky traps to confirm, and start treatment promptly before the problem spreads to the whole canopy.
Should I flush after a nutrient mistake in every medium?
Flush only helps if the medium has excess salts or if you suspect you have been feeding at the wrong pH or EC. In coco/DWC, instead of full “soil-style” flushing, do controlled reservoir changes and correct pH/EC, then monitor new growth response over the next few days.