The best bloom nutrients for an outdoor grow are ones that shift the NPK ratio toward higher phosphorus and potassium with reduced nitrogen, include a full micronutrient package (especially calcium, magnesium, iron, and boron), and match your specific medium. For soil, something like General Hydroponics FloraNova Bloom (4-8-7) or a quality organic bloom fertilizer works extremely well.
Best Bloom Nutrients for Outdoor Grow: Pick, Mix, Feed

Marcus Holloway
27 May 2026
If you want the closest indoor equivalent to these bloom fertilizer choices, see the best fertilizer for indoor grow for a tighter fit to your environment and feeding routine. For coco or hydro, a dedicated hydro bloom formula like HESI Hydro Bloom (3-4-5) paired with a cal-mag supplement is the more dialed-in route. But picking the right product is only half the job.
How you feed it, at what strength, at what pH, and when you stop feeding matters just as much as what's in the bottle.
What bloom nutrients actually do (and what to look for on the label)
Once your plant flips into flower, its nutritional priorities change fast. It starts pulling energy away from building leaves and stems and redirecting everything toward producing flowers, resins, and seeds. That biological shift means it needs less nitrogen than it did in veg, and significantly more phosphorus and potassium. Phosphorus drives cell division and energy transfer in developing flowers. Potassium helps regulate water movement, enzyme activation, and the overall quality of what the plant produces. Together, a higher P and K ratio is what separates a true bloom formula from an all-purpose fertilizer.
When you read a label, the three numbers (NPK) tell you the ratio of nitrogen (N), phosphorus (P), and potassium (K) by percentage weight. A bloom formula like FloraNova Bloom at 4-8-7 has roughly double the phosphorus of nitrogen, which is exactly what you want. A general-purpose 10-10-10 all-purpose fertilizer is not a bloom nutrient. That distinction matters a lot outdoors where growers sometimes reach for the nearest bag without checking the ratio.
Beyond NPK, the micronutrient section of the label is where you separate a complete formula from a bare-bones one. A quality bloom product should include at minimum: blank" rel="noopener noreferrer">calcium, magnesium, sulfur, iron, manganese, zinc, copper, boron, and molybdenum. blank" rel="noopener noreferrer">Products like HESI Hydro Bloom explicitly list all of these. Technaflora's Pura Vida Organics Bloom lists boron at 0.02% and molybdenum at 0.003% as part of its trace element package. Those percentages look tiny on paper but they prevent tip burn, enzyme failures, and growth stalls that show up mid-flower when you least want them. If the label only shows NPK and nothing else, look for a different product or plan to supplement.
Choosing your bloom nutrient type: soil vs. hydro, organic vs. synthetic
Your growing medium should drive your nutrient choice more than anything else. Soil and soilless setups behave very differently, and using a hydro formula at full strength in native soil, or an organic soil amendment in a recirculating hydro system, will cause problems quickly.
Soil (in-ground and potted)
Soil has a natural buffering capacity. Organic matter, microbes, and clay particles hold onto nutrients and release them gradually, which means soil forgives over-application better than hydro does, though not indefinitely. For in-ground outdoor grows, a good organic bloom fertilizer or a slow-release granular with a bloom NPK ratio works well because the soil biology does a lot of the conversion work for you.
If you are trying to dial in your whole outdoor setup, choosing the best seeds for outdoor grow is just as important as picking the right bloom fertilizer slow-release granular with a bloom NPK ratio. If you want the best fertilizer for outdoor grow results, match the bloom formula to your soil biology and NPK needs, then start at a reduced strength and adjust based on plant response.
For potted soil grows outdoors, liquid bloom nutrients give you more control and faster response time since the root zone is more isolated. If you want good nutrients for outdoor grow results, match the bloom NPK to your medium and feed schedule rather than just buying the strongest label you see Outside grows, liquid bloom nutrients give you more control and faster response time. Either way, you want pH in the 6. 0 to 7.
0 range for soil, with 6. 2 to 6. 8 being the sweet spot for most micronutrient availability.
Coco coir and soilless mixes
Coco is the trickiest medium outdoors. It behaves more like hydro than soil because it has almost no natural nutrient buffering and a strong tendency to lock out calcium and magnesium (coco fiber naturally binds to these ions). You need a hydro-appropriate bloom formula and you almost always need a dedicated cal-mag supplement regardless of what your base bloom product contains. General Hydroponics CALiMAGic at 1 ml per liter (1 tsp per gallon) is the standard starting point, and it's worth having on hand as soon as bloom starts.
True hydroponics (recirculating and run-to-waste)
Hydro systems give you the most precision and the least forgiveness. Nutrients go directly to roots with no buffering at all, so EC management, pH stability, and reservoir freshness are non-negotiable. Use nutrients specifically formulated for hydro, check EC daily or every other day, and keep pH tighter (5.8 to 6.2 for most hydro systems during bloom). Outdoors, temperature swings and direct sunlight on reservoirs can crash pH or spike bacterial growth, so insulate or shade your reservoir if it's sitting outside.
Organic vs. synthetic: the honest trade-off
| Factor | Organic Bloom Nutrients | Synthetic Bloom Nutrients |
|---|---|---|
| How they work | Rely on soil microbes to break down and release nutrients; slower uptake | Immediately plant-available; fast response |
| Best for | In-ground soil, living soil, potted soil outdoors | Coco, hydro, run-to-waste systems, potted soil where speed matters |
| Risk of overfeeding | Lower (buffered by biology) | Higher (direct salt buildup) |
| Micronutrient completeness | Variable; quality organics include full trace elements | Usually well-specified on the label |
| pH impact | Generally pH-stable in soil | Can drift pH in reservoir or pot if not monitored |
| Flush requirement | Less critical; microbes handle residual nutrients | More important, especially in hydro and coco |
| Cost | Often lower per application at small scale | Higher upfront cost for quality multi-part systems |
For most outdoor home growers in soil, a quality organic or hybrid organic-synthetic bloom fertilizer is the most forgiving choice. For coco and hydro outdoors, go fully synthetic and purpose-built for those mediums, then supplement cal-mag separately.
How to actually feed your plants in bloom: schedules, ratios, and frequency
Bloom is not one phase. It moves through distinct stages and what your plant needs in week two of flower is different from what it needs in week six. Here is how to structure your feeding through the whole arc.
Early bloom (weeks 1 to 3)
This is the transition period. The plant is still building some structure while the first flower sites are forming. Nitrogen demand drops but does not disappear. Use your bloom base nutrient at a reduced dose, around 50 to 75% of the label's full rate.
If you are using a product like Cronk Nutrients Bloom (0-5-3), start at the lower end of the mL per gallon range specified on the label. EC target for early bloom in soil runs roughly 1. 4 to 1. 8 mS/cm in the root zone.
In hydro and coco, keep EC around 1. 4 to 1. 6 mS/cm. Feed every second or third watering in soil (not every water), and every feeding in coco or hydro since those mediums hold no nutritional reserve.
Peak bloom (weeks 4 to 6)
This is when the flowers are stacking fast and phosphorus and potassium demand peaks. Run your bloom base at or near the full label rate. Some growers also add a bloom booster (a separate high-P/K additive) during this window, which can help, but watch your total EC carefully because stacking products raises salt load quickly. In hydro, reservoir EC during peak bloom typically sits around 1.8 to 2.2 mS/cm for most flower-producing plants. In soil, you have more room but still want to monitor runoff EC to catch salt buildup. This is also the phase where cal-mag supplementation matters most as calcium and magnesium support rapid flower expansion.
Late bloom (weeks 7 to harvest)
Nitrogen consumption drops significantly as the plant finishes. Some growers cut nitrogen almost entirely in the last two weeks and rely on the P/K base alone. Begin stepping down your total EC to around 1.2 to 1.4 mS/cm, then transition into flush (described in detail in the flush section below). Do not spike nutrients at this stage trying to squeeze out extra growth. The plant's ability to take up additional nitrogen is minimal, and pushing it just causes accumulation and taste issues.
Quick reference feeding schedule
| Phase | Duration | Target EC (Soil) | Target EC (Hydro/Coco) | Feed Frequency (Soil) | Key Additive |
|---|---|---|---|---|---|
| Early bloom | Weeks 1–3 | 1.4–1.8 mS/cm | 1.4–1.6 mS/cm | Every 2–3 waterings | Cal-Mag at half dose |
| Peak bloom | Weeks 4–6 | 1.6–2.0 mS/cm | 1.8–2.2 mS/cm | Every 2 waterings | Cal-Mag at full dose |
| Late bloom | Weeks 7+ | 1.2–1.4 mS/cm | 1.2–1.4 mS/cm | Every 2–3 waterings | Drop bloom booster |
| Flush | 7–14 days pre-harvest | Water only | 0.2–0.5 mS/cm max | Every watering | None |
pH, EC, and PPM targets for outdoor flowering
Outdoor pH management gets ignored more than any other variable, and it is the most common reason plants show nutrient deficiencies even when you are feeding them correctly. You can have the perfect bloom formula in your hand but if the pH at the root zone is off, the plant cannot absorb the nutrients regardless of how much is present. This is called nutrient lockout and it happens every single day to outdoor growers who skip the pH meter.
- Soil and potted soil pH: keep feed water and runoff between 6.0 and 7.0, ideally 6.2 to 6.8
- Coco coir pH: target 5.8 to 6.2 for all feed water
- Hydroponic systems pH: target 5.8 to 6.2, tighten to 5.8 to 6.0 during peak bloom
- Flush water pH: use the same targets as your medium (6.0 to 6.8 for soil; 5.5 to 6.5 for hydro/coco)
- EC/PPM conversion: 1.0 mS/cm = approximately 500 to 700 PPM depending on conversion factor used
For outdoor grows, tap water quality matters more than people expect. High alkalinity (high bicarbonate content) in tap water will push pH up over time, especially in containers. Test your tap water's pH before mixing nutrients and adjust down with pH-down solution as needed. If your tap water EC is already 0.4 to 0.6 mS/cm from minerals and treatment chemicals, account for that when calculating your total feed EC. The plant is receiving that baseline load whether you intend it or not.
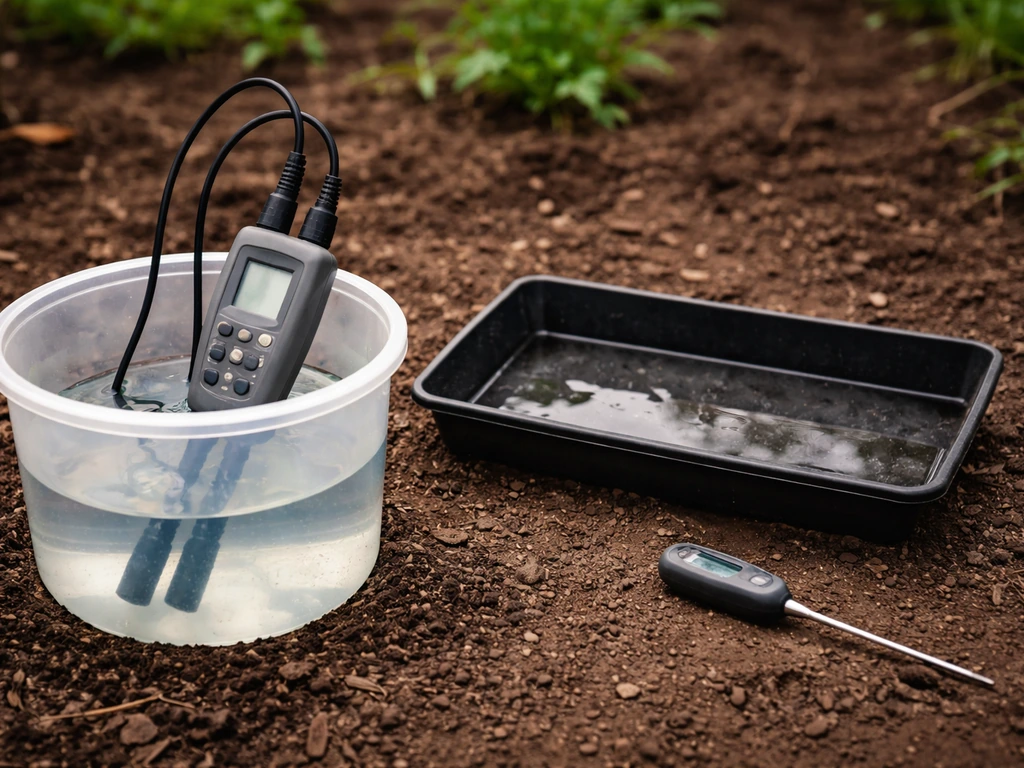
Runoff EC is your best diagnostic tool outdoors. After feeding, collect a small sample of water draining from the bottom of your container. If the runoff EC is significantly higher than your feed EC, salts are building up in the root zone and you need to water with plain pH-adjusted water until the runoff EC comes back down to within about 0.3 to 0.5 mS/cm of your feed solution. In-ground grows are harder to test this way but you can use a slurry test: mix a small amount of dry soil with distilled water and test the EC of the resulting liquid to get a rough read on salt levels.
Troubleshooting common outdoor bloom problems
Outdoor plants face stressors that indoor grows do not. Temperature swings, rain dilution, wind, heat spikes, and pest pressure all interact with your feeding program and produce symptoms that look like nutrient problems even when they are not. Here is how to diagnose and fix the most common ones.
Phosphorus deficiency
Early phosphorus deficiency shows up as darker-than-normal green or slightly blue-green coloration on older leaves. Give it two to three weeks without correction and you will start seeing dark purple or black necrotic spots, and the undersides of leaves may turn distinctly purple. Phosphorus is a mobile nutrient, meaning the plant pulls it from older tissue to feed new growth, so the oldest leaves show symptoms first. The fix is usually a combination of: checking and correcting pH (P becomes unavailable outside the 6.0 to 7.0 range in soil), then increasing your bloom base dose slightly if pH was already correct.
Potassium deficiency
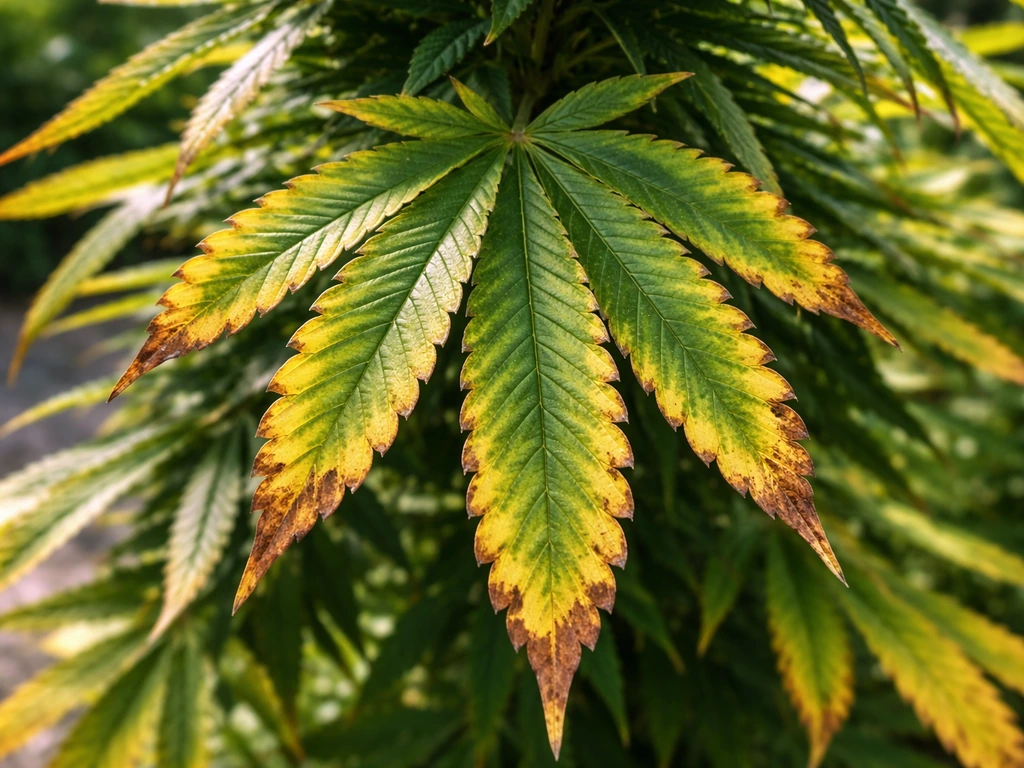
Potassium deficiency looks like scorching or bright yellowing along leaf margins, again starting on older leaves because potassium is also mobile. In hot outdoor conditions, K deficiency can accelerate quickly because heat stress increases potassium demand. If you see crispy yellow-to-brown edges on the older fan leaves during mid-to-late bloom, check your pH first (K locks out above 7.0 and below 5.5), then bump your bloom base or add a K supplement. If tissue analysis is available to you through a local agricultural extension service, use it. It is the definitive answer versus guessing from visual symptoms.
Nitrogen issues during bloom
Nitrogen naturally gets redistributed during flowering. Some yellowing of older fan leaves from the bottom up is normal and expected as the plant cannibalize N from leaf tissue to support flower production. This is not a deficiency to correct. What you do not want is rapid widespread yellowing spreading up the plant, which suggests actual N depletion you need to address with a small bump in your early-to-mid bloom feeding. Conversely, deep green leaves that refuse to yellow at all in late bloom often mean nitrogen overload, which can push the plant to continue vegetative growth instead of finishing flowers.
Tip burn
Brown, crispy leaf tips are called tip burn, and the cause is almost never a calcium deficiency in your nutrient solution. It is usually a transient calcium delivery failure caused by low transpiration. On hot, still outdoor days when plants cannot move water effectively through their leaves (or when leaves grow so fast they outpace calcium transport), the newest growth tips get inadequate calcium delivered to them even if the root zone has plenty.
The fix is improving airflow, reducing heat stress, and ensuring consistent watering. Adding more calcium to your solution often does not help and can throw off other ratios. That said, if you are in coco and not supplementing cal-mag at all, that is a different situation: coco genuinely depletes calcium and magnesium from solution, so add cal-mag at 1 tsp per gallon as a standard part of every feed in coco.
Nutrient lockout from pH swing

Rain is the biggest outdoor pH disruptor most growers overlook. A heavy rain can dilute your carefully pH-adjusted medium and shift pH significantly, especially in containers. After any major rain event, test your runoff pH and EC. High soil pH (alkaline conditions) makes iron and manganese unavailable, causing interveinal chlorosis on newer leaves (green veins with yellow leaf tissue between them). Low pH locks out calcium and phosphorus preferentially. In both cases, the fix starts with flushing the container with properly pH-adjusted water to reset the medium, not by adding more nutrients.
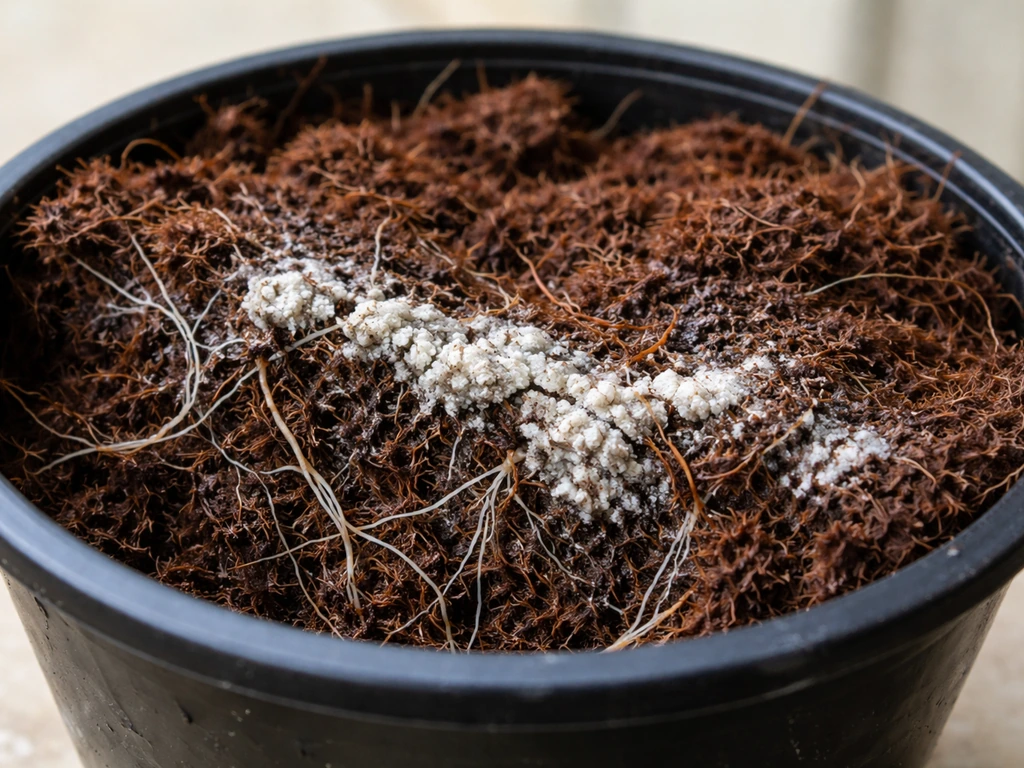
Overfeeding and salt burn
Overfeeding shows as dark green leaves with clawed or downward-curling tips, followed by generalized leaf edge burn that looks like K deficiency but is present across all leaf ages. The key distinction: if young and old leaves both show brown tips at the same time and your feeding rate has been aggressive, suspect salt accumulation rather than a specific deficiency. Run a flush with pH-adjusted water until your runoff EC drops to within range, then restart feeding at a reduced strength (50 to 75% of your previous rate).
The flush: when to stop feeding and how to handle it outdoors
Flushing means running plain, pH-adjusted water through your medium in the final weeks before harvest to clear built-up salt and residual nutrients from the root zone. There is ongoing debate about how much it improves final product quality, but the practical case for flushing is straightforward: accumulated salts in the medium stress the plant during its final ripening window, and clearing them lets the plant use up its remaining internal nutrient stores cleanly.
Flush timing by medium
- Soil (potted): begin flushing 7 to 10 days before planned harvest
- Soil (in-ground): flushing is less practical and less necessary; simply stop all feeding 10 to 14 days out and rely on rain or plain water
- Coco coir: flush 7 days before harvest
- Hydroponics: drop reservoir to plain pH-adjusted water with EC of 0.2 to 0.5 mS/cm for the final 7 to 14 days
Use pH-adjusted water for all flush irrigation. Target 6.0 to 6.8 for soil and 5.5 to 6.5 for hydro and coco. Do not use distilled water alone at very high volumes because pure water can create osmotic stress that damages roots.
For potted grows, collect runoff during the flush and test EC. Your goal is to get runoff EC below 1.0 mS/cm (approximately 700 PPM) and ideally lower before harvest. If your runoff EC is still sitting at 1.5 or higher after multiple plain-water feeds, keep flushing. A runoff EC significantly higher than your flush water input tells you there is still a substantial salt reserve in the medium to clear out.
Outdoor plants in the ground do not have measurable runoff to test in the same way, so the approach there is simply stopping all nutrient inputs 10 to 14 days before harvest and making sure the plant gets clean water (rain or irrigation) through that window. Organic grows in living soil need less aggressive flushing than synthetic salt-based programs because the microbiome handles residual nutrient breakdown naturally.
Building your outdoor bloom feeding plan: a practical checklist
Whether you are running soil pots on a patio or a full coco outdoor setup, here is how to build your bloom feeding plan from day one of flower to harvest.
For potted soil and in-ground soil
- Choose a bloom-specific fertilizer with NPK in the 4-8-7 or similar range (higher P and K than N) plus a full micronutrient panel
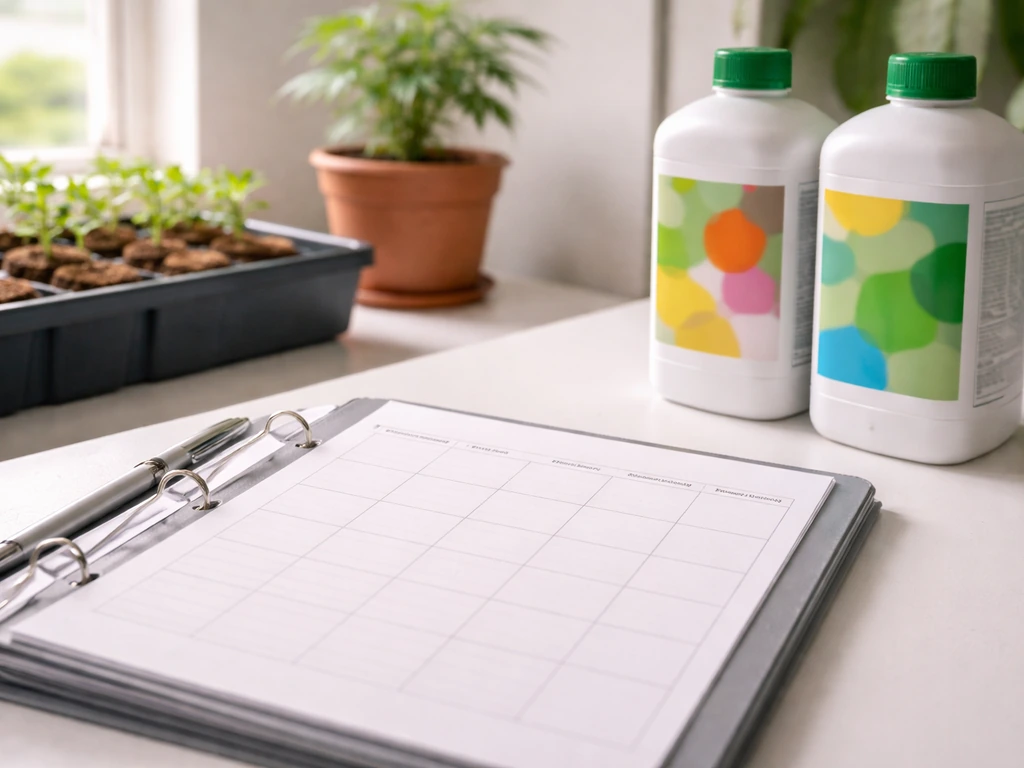
- Set up a pH meter and calibrate it before you start; test every feed batch before applying
- Start at 50 to 75% of the label dose in early bloom; move to full dose at week 3 to 4
- Feed every second or third watering in early bloom; every other watering at peak bloom
- Test runoff EC every one to two weeks; if runoff EC exceeds feed EC by more than 0.5 mS/cm, water with plain pH water until it corrects
- Begin stepping down feed strength in the final two weeks and drop any bloom booster additives
- Flush 7 to 10 days before harvest (potted) or stop all nutrients 10 to 14 days out (in-ground)
For coco coir and hydro systems
- Use a nutrient product specifically formulated for hydroponic and soilless systems
- Add cal-mag supplement (1 tsp per gallon / 1 ml per liter) to every feeding in coco; every feeding or as-needed in hydro
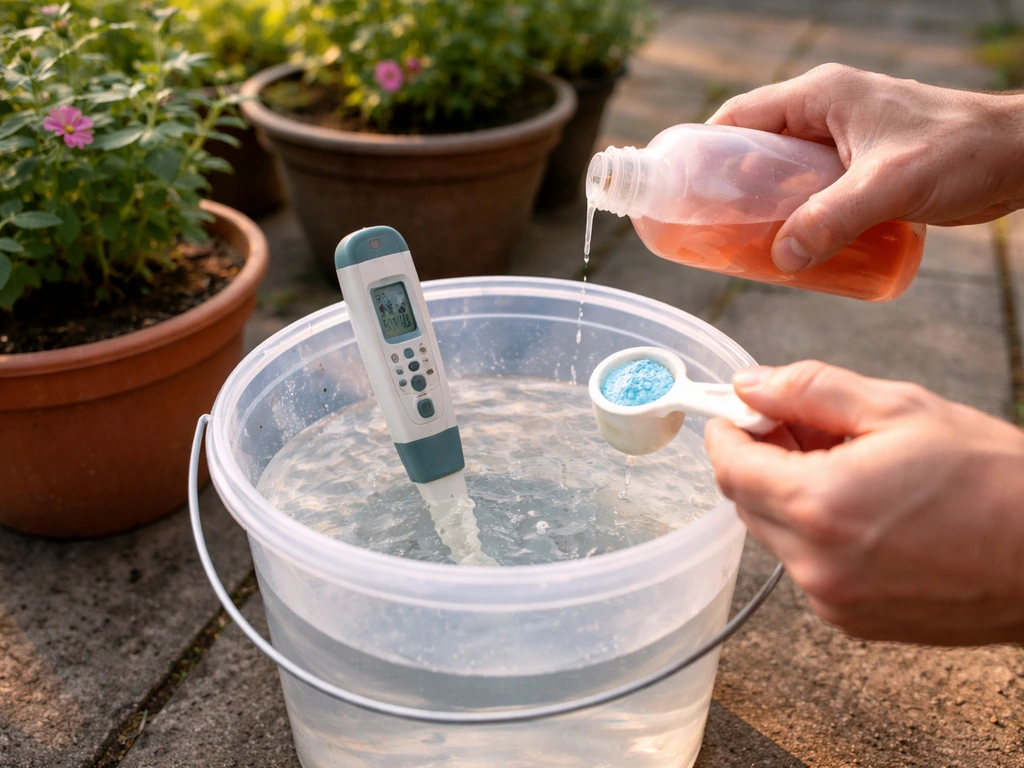
- Mix nutrients into pH-adjusted water in this order: cal-mag first, then base bloom nutrient, then any additives; check pH after each addition
- Target pH 5.8 to 6.2 for coco; 5.8 to 6.0 for recirculating hydro
- Monitor reservoir or runoff EC every 1 to 2 days; adjust up or down to stay within your phase EC targets
- Change reservoir completely every 7 days minimum in recirculating systems to prevent salt and pathogen buildup
- Drop to flush-level EC (0.2 to 0.5 mS/cm) or plain water 7 to 14 days before harvest; confirm by testing runoff or reservoir EC below 1.0 mS/cm before harvest
The feeding schedule topic and what goes into a week-by-week nutrient plan across the whole grow cycle is worth digging into separately if you want more granular detail beyond the bloom phase. For a full feeding schedule and the best nutrients to use outdoors, follow a week-by-week plan so your NPK and supplements stay matched to what the plant needs feeding schedule best nutrients for outdoor grow. Similarly, if you are still deciding on your base fertilizer program or comparing full-season nutrient lines rather than just the bloom stage, looking at how the bloom phase fits into the broader nutrient strategy from seedling through harvest will help you make a more connected decision. The bloom phase does not exist in isolation and the choices you make in veg directly affect how well your plants respond to bloom feeding.
FAQ
Can I use a regular all-purpose fertilizer for outdoor bloom if it’s easier to find?
Yes, but only if the formula actually reduces nitrogen and increases phosphorus and potassium for flowering. If the product is marketed as “general” (often near 10-10-10) you can still grow well in soil, but you should expect slower bud development and later deficiencies. The practical check is the label: look for a bloom-style NPK (like 2-6-4 or 4-8-7) and a real micronutrient package, then start at 50 to 75% strength rather than jumping straight to the full rate.
What happens if I keep feeding at full strength (or add boosters) through the last two weeks before harvest?
It usually backfires. Even in soil, boosting EC late in flower can leave more unused salts in the root zone, which often shows up as tip burn or leaf-edge burn and can degrade taste. A safer approach is to keep your base bloom nutrient consistent through peak bloom, then step your EC down in the final two weeks and move into a planned flush, using plain pH-adjusted water rather than adding extra boosters.
If my outdoor soil is rich in compost, do I still need bloom nutrients and how do I avoid overfeeding?
Not always. Compost and many “organic” bloom fertilizers can be pH-variable and nutrient release can lag after rains or temperature drops. If you have frequent rain exposure, use smaller, more frequent applications (or a slow-release product with known bloom NPK) and watch leaf response rather than assuming the label rate will match your conditions. When in doubt, prioritize potted soil where you can manage runoff EC and pH resets.
How can I tell whether my outdoor bloom issue is nutrient excess or true deficiency?
For soil, the quickest decision tool is runoff EC after watering during bloom (potted plants only). If runoff EC climbs far above your feed EC, you have salt buildup and should water with plain pH-adjusted water until runoff EC comes down within about 0.3 to 0.5 mS/cm of your input. Visual symptoms alone can mislead because rain, heat, and pH swings can look like deficiency or burn.
Can I mix organic bloom products with synthetic hydro-style nutrients outdoors?
Switching between organic and synthetic approaches matters. If you start with synthetic bloom nutrients in coco or hydro and later try to use organic amendments or topdressings, you can create unpredictable ion availability and inconsistent EC/pH behavior. If you want organic, keep the whole system organic-compatible (including supplements) from the start, otherwise stick to purpose-built synthetic nutrient lines for coco and hydro and manage cal-mag separately.
Do I always need cal-mag, or is it only for coco and hydro?
Often yes, and the best way is to check what “cal-mag” actually provides. In coco, calcium and magnesium can become limiting even if your bloom bottle contains traces, so a dedicated cal-mag supplement is commonly needed at the start of bloom. In soil, a pure bloom nutrient with full micros sometimes covers what you need, but if you see classic calcium delivery symptoms during heat stress, address watering and transpiration first before adding more calcium.
How often should I feed bloom nutrients outdoors if I’m using soil versus coco or hydro?
Use the media test and your feeding frequency. In soil, your medium has buffering, so you typically feed every second or third watering and you can use a runoff EC check to confirm you are not stacking salts. In coco and hydro you should manage EC and pH more tightly because there is little reserve, so you feed every time (or nearly every time) and check EC on a daily or every-other-day rhythm.
Is tissue testing worth it for diagnosing outdoor bloom nutrient problems?
If you can, yes, because it prevents guesswork. Tissue analysis can confirm whether you truly have P or K deficiency versus pH-induced lockout. If you cannot test, the fallback is to correct pH first and adjust the nutrient base slightly, then reassess after 1 to 3 weeks, because mobile nutrients like P and K will show the earliest changes on older leaves only.
Should I restart fertilizing after a heavy rain, or just keep going?
Big rain events can wipe out your careful balancing in containers by diluting and shifting pH. After major rain, recheck runoff EC and pH (if potted), and expect to reset with properly pH-adjusted water rather than immediately adding more fertilizer. In-ground plants are less controllable, so plan for 10 to 14 days of reduced inputs near harvest and focus on keeping watering consistent.
Can I flush with distilled water to improve results, or is tap water fine if I adjust pH?
For most home growers, you can reduce salt by flushing with pH-adjusted water, but you generally should not flush with distilled water only at very large volumes because it can create osmotic stress. A better method is to use the same water source you normally use, but with correct pH, and then verify progress with runoff EC in pots. If runoff EC stays high after multiple flush cycles, there is still salt reserve you need to clear.
How aggressive should flushing be for outdoor soil versus coco and hydro?
It depends on your production goal and medium. For synthetic salt-based coco and hydro, a more structured flush and last-step EC reduction is usually more important because salts accumulate directly around roots. For living-organic soil, the microbiome often continues breaking down nutrients, so aggressive flushing is less necessary and can stress plants. The safest middle ground is to reduce and then stop feeding 10 to 14 days pre-harvest for in-ground and use a gentler, monitored approach in pots.
If I manage EC correctly, do I still need to worry about NPK ratios and pH?
Not directly. EC is a practical indicator of total dissolved salts, but it does not tell you the NPK ratio or whether the proportions are balanced. For decision-making, use EC to avoid salt buildup and use label ratios plus pH to ensure nutrient availability. If you see lockout symptoms (interveinal chlorosis on new growth is common), pH reset usually fixes the root cause even when EC looks “okay.”