To grow max using topsoil, you need to start with a pH between 6.0 and 7.0, amend it with 20–30% compost by volume, add 15–20% perlite for drainage and aeration, and feed on a consistent schedule matched to your plant's growth stage. Raw topsoil straight from the bag or ground almost never performs on its own. The real work is in the prep: testing what you have, fixing what's off, and building a living soil mix that feeds your plants from week one through harvest.
Grow Max Top Soil: Build, Amend, and Manage for Yields

Marcus Holloway
15 May 2026
What "topsoil" actually means for growing (and what to skip)
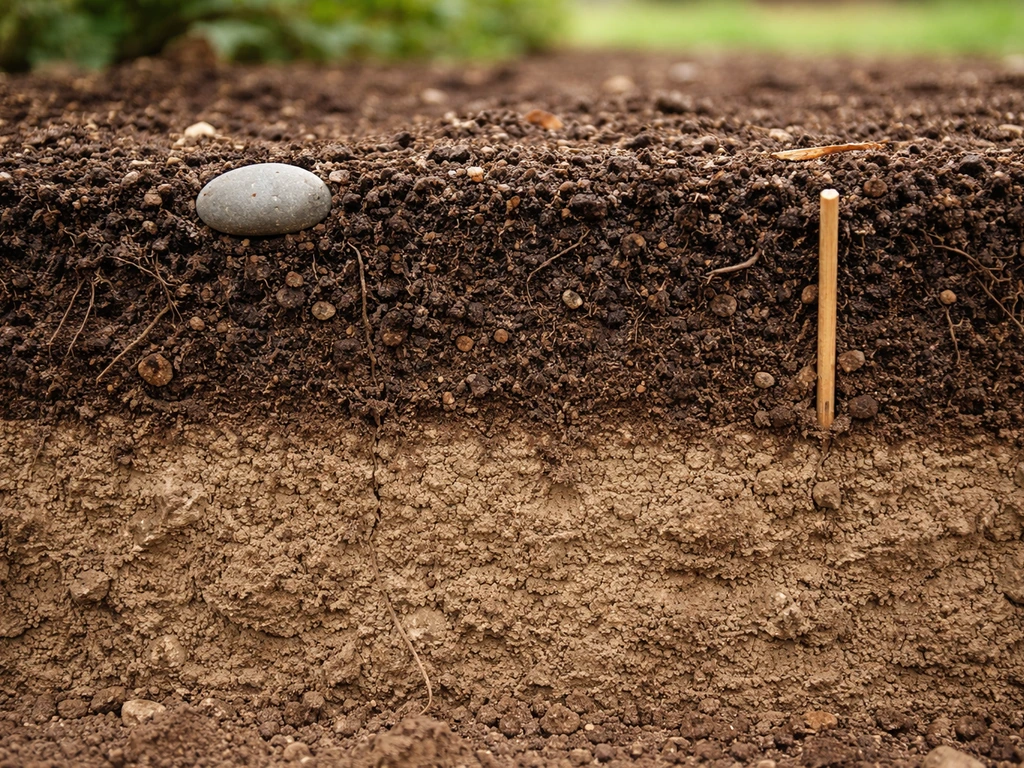
Topsoil is the uppermost layer of soil, typically the top 2 to 8 inches of ground. It's naturally richer in organic matter and biological activity than the subsoil below it. But in a grow context, the word gets used loosely, and that ambiguity causes a lot of problems. Here's how the main soil types actually differ from each other:
| Type | What It Is | Best Use | Key Limitation |
|---|---|---|---|
| Raw topsoil | Mineral soil from the top layer of ground; variable organic matter and texture | Outdoor beds, raised beds as a base layer | Inconsistent quality, may contain weed seeds, compaction risk |
| Bagged topsoil | Screened topsoil, sometimes blended with sand or compost | Raised beds, filling large containers | Often lacks nutrients; pH and drainage vary by brand |
| Potting mix | Soilless or near-soilless blend of peat, perlite, bark, vermiculite | Containers, seed starting | Needs consistent feeding; doesn't retain moisture as long as soil |
| Garden soil (bagged) | Topsoil blended with compost; heavier than potting mix | In-ground beds, raised beds | Too dense for most containers; can waterlog |
| Compost | Decomposed organic matter; high in nutrients and microbes | Amendment only, not standalone grow medium | Too rich solo; can burn roots and retain excess moisture |
| Regular dirt/ground soil | Whatever is in your yard; highly variable | Rarely suitable without heavy amendment | Often wrong pH, compaction, contaminants, low organic matter |
The short version: for container growing, you almost never want straight topsoil. If you're wondering whether you can grow plants in orbeez, think of them like a moisture-holding medium and plan for proper drainage and nutrient support container growing. It compacts, drains poorly, and doesn't have the structure roots need in a pot. For raised beds and outdoor beds, topsoil is a great base but it needs compost and aeration amendments before it performs.
What you absolutely want to avoid is scooping dirt straight from your yard and expecting results. That “regular dirt” path is covered in more depth separately, but the bottom line is that unamended garden dirt is one of the fastest ways to stunt a crop. That "regular dirt" path is covered in more depth separately, but the bottom line is that unamended garden dirt is one of the fastest ways to stunt a crop.
Also worth flagging: if you're growing in an area with older buildings or industrial history, in-ground soil can carry lead, heavy metals, or pesticide residue. Extension guidance is consistent here: use containers or raised beds filled with clean, sourced topsoil plus compost rather than risk contaminated ground. This is the safer default for any urban or suburban grow.
How to pick and test topsoil before you plant anything
Quality topsoil shows up in six measurable characteristics: pH, texture, organic matter content, nutrient levels, soluble salt levels, and the amount of coarse rock fragments or debris. Utah State University Extension also notes that topsoil quality is affected by soluble salts, pH, texture, organic matter, coarse fragments, and nutrient content six measurable characteristics: pH, texture, organic matter content, nutrient levels, soluble salt levels, and the amount of coarse rock fragments or debris.. You can assess most of these yourself before spending money on a lab test, though a full soil test is worth the $15–$25 if you're setting up a serious grow.
Quick hands-on assessment
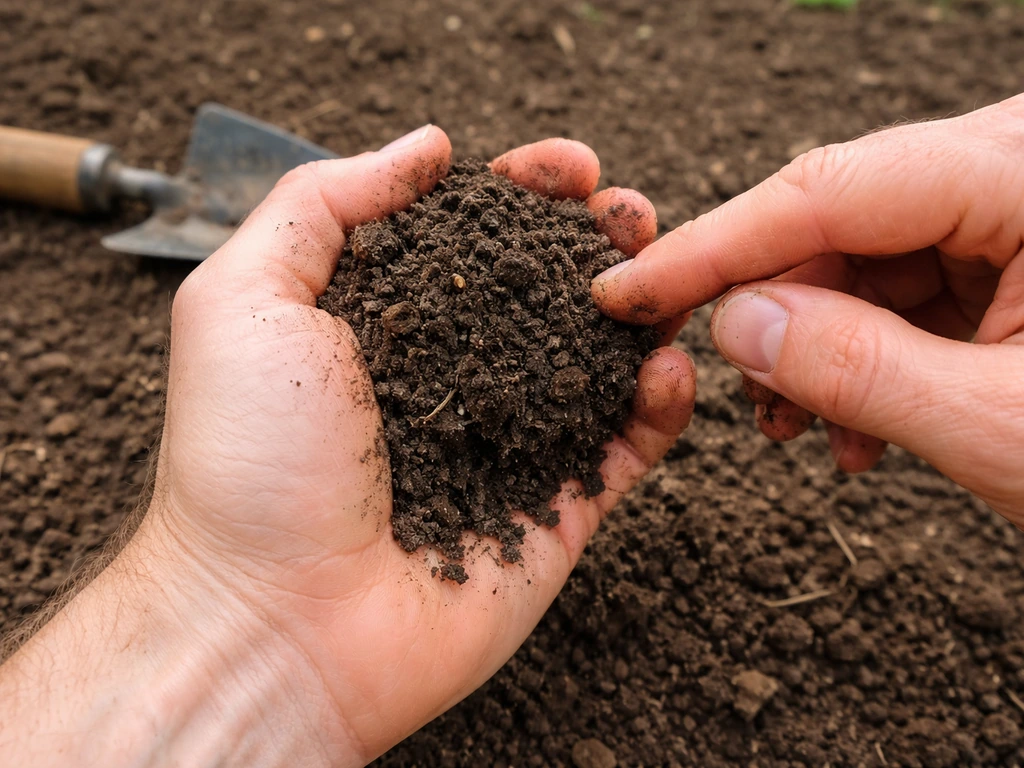
- Texture test: Take a handful and squeeze it. Good topsoil holds a loose ball when moist but crumbles easily when you poke it. Soil that stays in a tight, sticky clump has too much clay. Soil that falls apart immediately and feels gritty is too sandy.
- Drainage test: Fill a container with your topsoil, saturate it, and see how long water sits on top. If standing water is still there after 30 minutes, drainage is a problem.
- Smell test: Good topsoil smells earthy and alive. Sour, ammonia-like, or rotten-egg odors signal anaerobic conditions, excess nitrogen, or sulfur issues. Don't plant in soil that smells wrong.
- Debris check: Sift through a handful. Rocks over half an inch, plastic fragments, clumps of debris, or obvious roots from weeds are red flags. Coarse fragments above 35% by volume reduce usable soil space significantly.
- pH test: A basic digital pH meter or cheap test strips (both available for under $15) will tell you where you stand. Target 6.0–7.0 for most plants. Below 5.5 and nutrient lockout becomes a real risk. Above 7.5 and iron and manganese become unavailable.
What to look for in bagged topsoil
When buying bagged topsoil, look at the label for any mention of added compost or organic matter percentages. A bag that lists only "topsoil" with no amendments is essentially screened dirt and will need the most work. Bags that mention a blend with compost give you a head start. Avoid bags that feel unusually heavy or wet when you pick them up, which often signals compaction or excessive clay content that will cause drainage headaches in beds and containers.
Soluble salt levels are worth checking if you're growing salt-sensitive plants or working with recycled topsoil from construction fill. High soluble salts cause leaf tip burn and stunted growth that mimics both overwatering and nutrient burn. A soil EC (electrical conductivity) meter can tell you in minutes. For most crops, you want EC below 3.0 dS/m in the root zone.
Building a high-performance topsoil blend
This is where the real gains come from. A bare topsoil, even good quality screened topsoil, won't outperform a well-built amended mix. The goal is a blend that drains well, holds just enough moisture, has active microbial life, and feeds your plants across a full grow cycle without constant intervention.
The base amendment formula
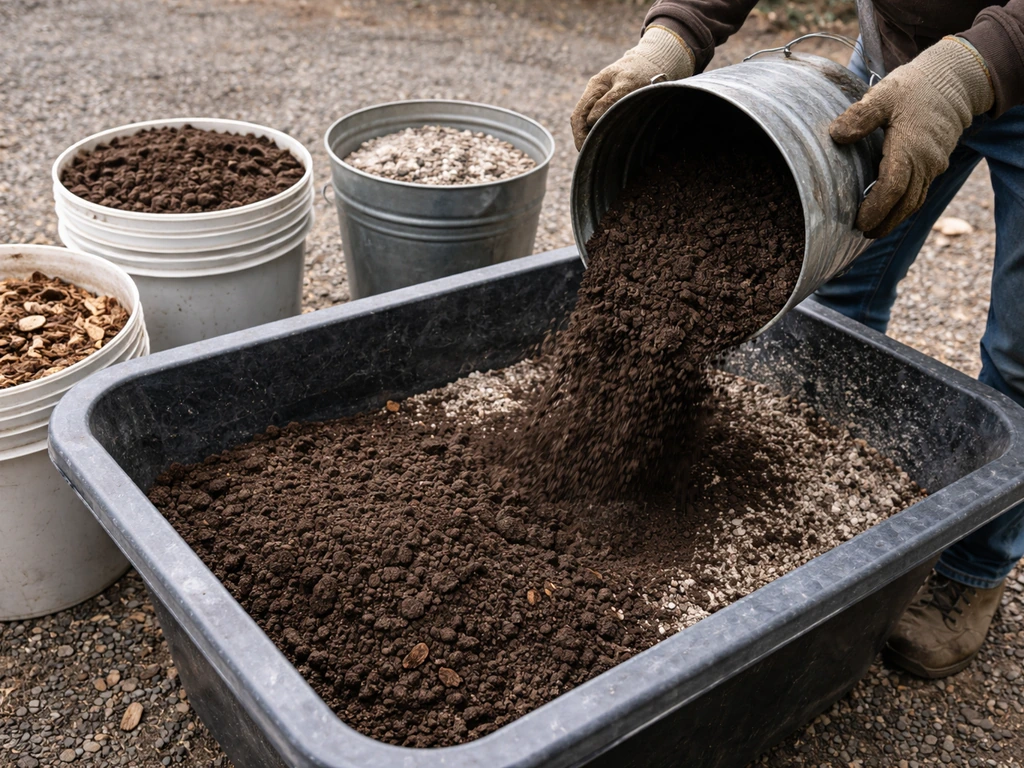
For most applications, whether you're filling a raised bed or building a container blend, start with this ratio and adjust based on your soil's texture:
- 60% quality topsoil (screened, tested, pH-appropriate or corrected)
- 25% finished compost (not fresh compost; it needs to be fully decomposed and dark)
- 15% perlite or coarse horticultural sand (for drainage and aeration)
If your topsoil tests as clay-heavy, bump perlite to 20–25% and reduce compost slightly. If you're working with sandy topsoil, increase compost to 30–35% to add water retention and organic matter. Leaf mold (shredded, composted leaves) is an underused amendment for sandy soils because it improves moisture retention without the density penalty of heavy compost. A 10% leaf mold addition works well as a partial compost replacement for light, fast-draining soils.
Correcting pH before you plant
pH correction is non-negotiable. If you plant into soil outside the 6.0–7.0 window, you will fight nutrient problems for the entire grow even if your feeding schedule is perfect. To raise pH in acidic soil, work in garden lime (dolomitic lime is a good choice because it adds calcium and magnesium) at roughly 5–10 pounds per 100 square feet or a few tablespoons per gallon of container mix, then retest in 7–10 days. To lower pH in alkaline soil, use elemental sulfur or a sulfur-based soil acidifier at label rates. Note that pH correction with sulfur takes 4–6 weeks for full effect, so do this well before you plant.
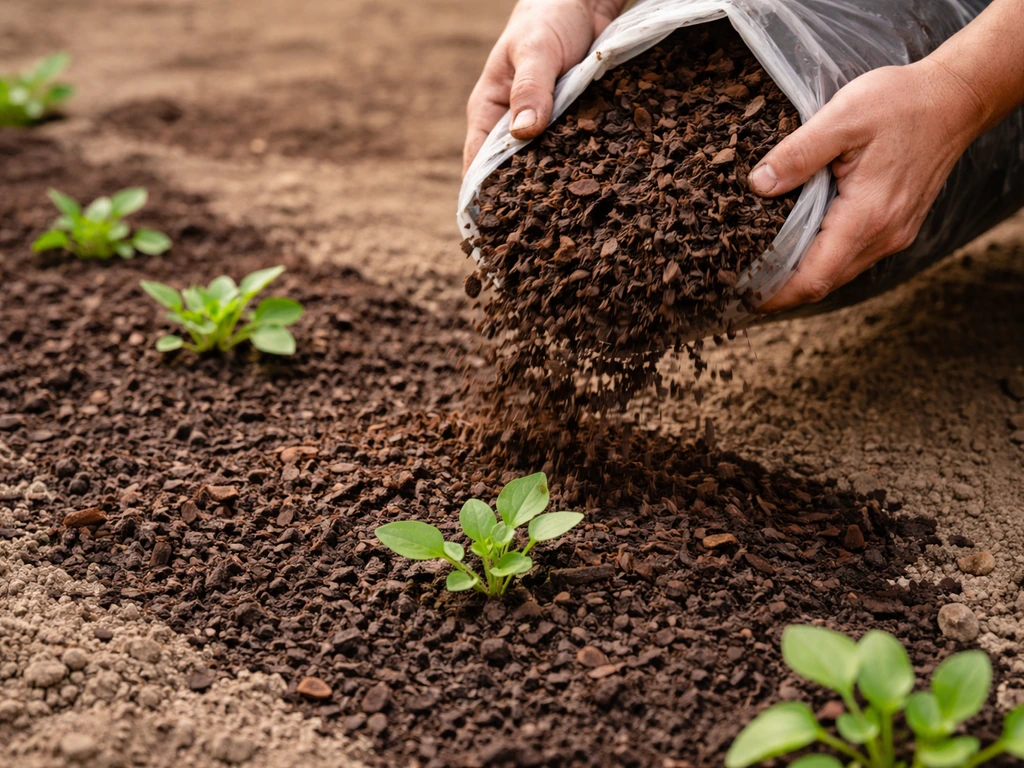
Adding nutrients to the starting mix
Good compost brings a slow-release nutrient profile with it, but for aggressive growth you'll want to supplement the starting mix. Worm castings at 10–15% of total volume give you immediately available nutrients and a strong microbial boost without burning risk. Alternatively, a granular all-purpose organic fertilizer worked into the mix (at label rate) gives you a 6–8 week slow-release base before you need to start liquid feeding. Avoid adding heavy doses of synthetic fertilizer directly to topsoil mixes before planting; the salt load can stress seedlings and young transplants during their most vulnerable period.
What compost actually does and why it matters
Compost doesn't just add nutrients. It physically improves soil structure, supports biological activity (the microbes that convert nutrients into forms plants can actually absorb), and helps buffer pH swings. A soil with 5–10% organic matter content by weight holds moisture better, drains better, and feeds more consistently than nutrient-rich soil with low organic matter. This is why adding compost is step one for max growth, not an optional finishing touch.
Planting setup: containers, beds, and getting the first weeks right
How you set up your grow space physically matters almost as much as what's in your mix. Poor drainage at the bed or container level will undo even the best soil blend.
Container setup
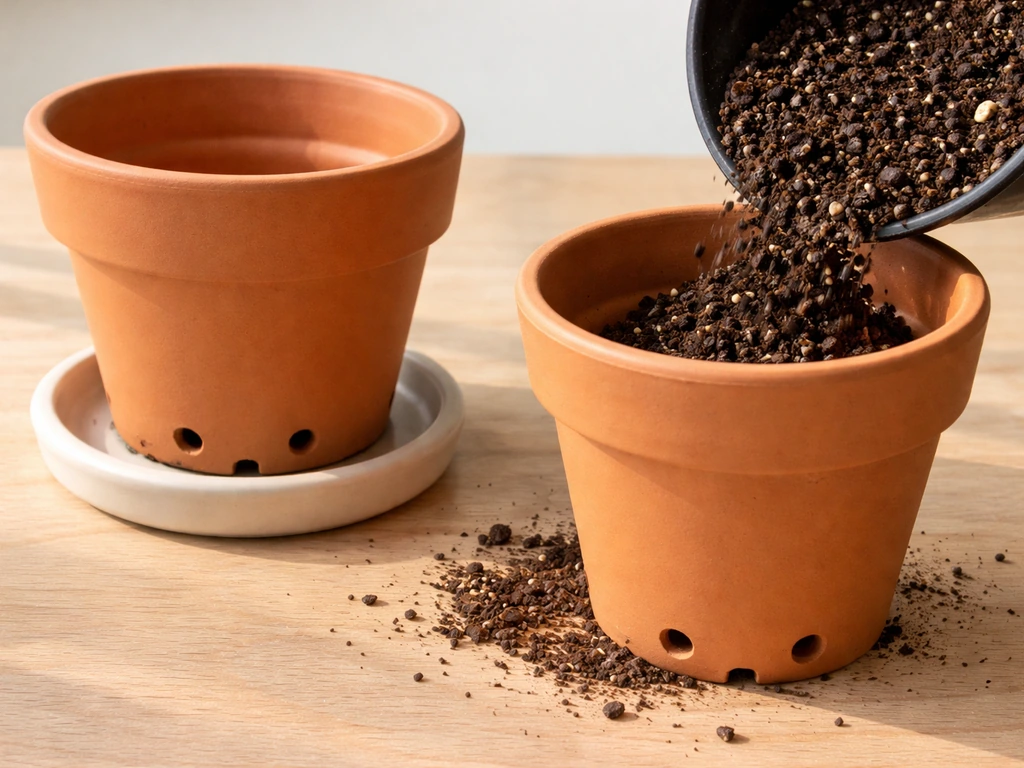
For containers, always use pots with drainage holes. This is obvious advice, but the follow-through matters: make sure the holes aren't blocked by a saucer sitting flush against the bottom. A half-inch gap under the pot or a layer of gravel in the saucer keeps air under the container and prevents root-zone saturation. Container size matters for growth rate: most medium-to-large plants want at least a 5-gallon container to avoid becoming root-bound before peak growth. Going up to 10 or 15 gallons for plants you intend to run through a full season is worth the space trade-off.
For container fills, use the amended topsoil blend above rather than straight potting mix if you want the soil biology advantages of topsoil's mineral base. If you are wondering whether you can grow plants in eco earth, the approach is similar: start with a well-prepared, clean growing mix and keep moisture and nutrients dialed in amended topsoil blend. blank" rel="noopener noreferrer">Straight potting mix (peat, perlite, bark) is lighter and drains better but is essentially a soilless medium that needs regular feeding from week one because it starts with nearly zero nutrient reserves. The topsoil-compost-perlite blend gives you a nutrient buffer that's especially forgiving for beginners.
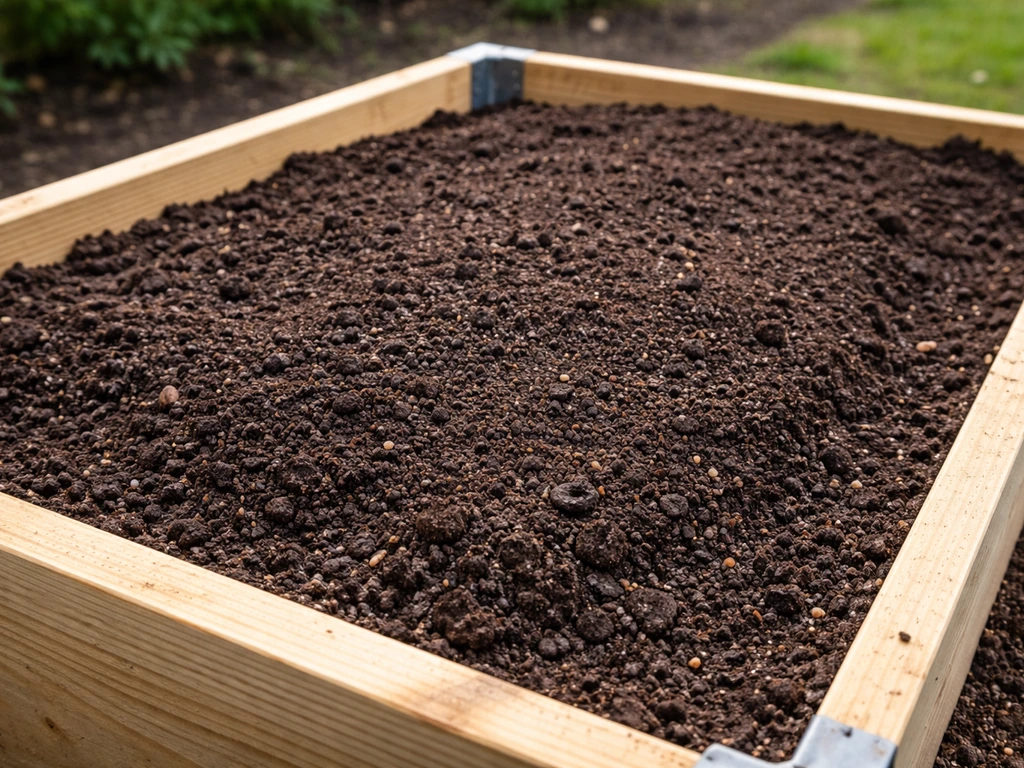
Raised bed and in-ground bed setup
For raised beds, fill to within 2 inches of the top with your amended blend. That 2-inch gap is your mulch space. After planting, apply 1–2 inches of straw, wood chip mulch, or shredded leaves to the surface. Mulch regulates soil temperature, reduces moisture loss by up to 50%, suppresses weeds, and slowly adds organic matter as it breaks down. Mulching is also the key step for protecting the soil and helping mulch break down into organic matter over time what is earth grow mulch. It's one of the most impactful low-effort things you can do for max topsoil performance.
For in-ground beds, till your amended topsoil blend into the top 8–12 inches. Don't bury compost deeper than 12 inches; the aerobic decomposition that makes compost biologically active needs oxygen, and deep burial reduces its effectiveness. If your native soil is extremely poor, consider a 4–6 inch raised layer of your amended mix on top of the native soil rather than trying to fix ground that's severely compacted or contaminated.
Seed starting and transplanting
For seed starting, the topsoil blend above is usually too dense. Seeds need a finer-textured, lower-nutrient medium to germinate without burning. Use a commercial seed-starting mix or a lighter version of your blend (add an extra 10% perlite and sift out large particles) for the first 2–3 weeks. Transplant into your full-strength amended topsoil blend once seedlings have their first set of true leaves. When transplanting, water in with plain pH-adjusted water (no nutrients for the first 3–5 days) to let roots establish before they encounter fertilizer salts.
Watering, aeration, and feeding through the grow
Getting watering right in topsoil mixes is the single biggest variable between good and great results. The goal is consistent moisture in the root zone without waterlogging. For topsoil blends, the finger-test works well: push your finger 2 inches into the soil. If it's damp at that depth, don't water yet. If it's dry, water thoroughly until you get runoff from the bottom of the container. For raised beds, use a moisture meter or just dig a small test hole 3 inches deep. Surface soil can feel dry while the deeper root zone is still moist, which is where most overwatering problems start.
Watering frequency by growth stage
| Growth Stage | Watering Frequency (Container) | Watering Frequency (Raised Bed) | Notes |
|---|---|---|---|
| Seedling / first 2 weeks | Every 2–3 days, small amounts | Every 3–4 days | Keep moist but not wet; no runoff needed yet |
| Vegetative / rapid growth | Every 1–2 days in warm weather | Every 2–3 days | Increase volume as canopy grows; full wet/dry cycle |
| Flowering / fruiting | Daily in heat or large containers | Every 1–2 days | Consistent moisture critical; swings cause tip burn and blossom drop |
| Late season / finishing | Reduce slightly | Reduce slightly | Slight dry-down improves finish on many crops |
Aeration and compaction prevention
Topsoil compacts over time, especially in containers and high-traffic beds. Compacted soil loses the air pockets roots need for gas exchange, and you'll see slowed growth even with perfect watering and feeding. In containers, topdress with a light layer of fresh compost and worm castings every 4–6 weeks rather than digging into the root zone. For beds, a broadfork or hand aerator run down rows every 3–4 weeks keeps structure open without disrupting root systems. Avoid walking on active bed areas and use defined paths in larger gardens.
Feeding schedule for max growth in topsoil
Your amended starting mix gives you roughly 4–8 weeks of baseline nutrition depending on how much compost and slow-release fertilizer you incorporated. After that, you need to start supplementing. A liquid feeding schedule is more responsive than relying on dry top-dressing alone because you can adjust concentration quickly if you see problems.
- Weeks 1–4 after transplant: No liquid feeding if you built the blend with compost and a granular base. Water with pH-adjusted water only.
- Weeks 4–8 (vegetative): Begin liquid feeding every 7–10 days. Use a balanced NPK (something like 3-1-2 or 4-2-3 ratio) at half the label rate to start.
- Weeks 8–12 (transition to flower/fruit): Shift to a lower-nitrogen, higher-phosphorus and potassium formula. Reduce nitrogen by half and boost PK. Feed every 7 days.
- Weeks 12+ (peak fruiting/flowering): Continue PK-forward feeding. Add a cal-mag supplement every 2–3 weeks if you're in a soft-water area or using filtered/RO water.
- Final 2 weeks before harvest: Flush containers with plain pH-adjusted water to clear accumulated salt. Run 2–3 times the container volume through the pot over the final week.
Troubleshooting: when your topsoil grow goes sideways
Most topsoil grow problems trace back to one of four causes: wrong pH, poor drainage, salt buildup from overfeeding, or a pest or pathogen introduced in low-quality or unsterilized soil. Here's how to diagnose and fix each one fast.
pH problems and nutrient lockout
If your plants look yellow even though you're feeding on schedule, pH is usually the culprit before anything else. Nutrient lockout happens when pH is outside the absorption window for specific elements, making nutrients physically unavailable even if they're present in the soil. Nitrogen, phosphorus, and potassium are most available between 6. 0 and 7.
0. Micronutrients like iron and manganese become unavailable above 7. 0 (classic symptom: yellowing between green veins on new leaves). Below 5.
5, aluminum and manganese become toxic, and you'll see stunted roots and leaf distortion. Test your runoff water pH (water going out the bottom of containers) rather than just testing the surface soil for a more accurate reading of what's happening in the root zone. Fix pH with a soil drench of pH-adjusted water, then follow with lime or sulfur as needed at low rates.
Drainage and waterlogging
Yellowing lower leaves, droopy stems that don't recover after watering, and a sour smell from the soil surface are all waterlogging symptoms. In containers, this is almost always a drainage hole or compaction problem. Gently unpot the plant, check the root ball for brown, mushy roots (healthy roots are white to tan), trim any rotted sections, and repot into a better-draining mix with more perlite. In beds, if water is pooling, you need to either break up the clay layer beneath the bed or raise the growing surface. A simple fix for in-ground beds is to add a 2-inch layer of coarse grit or gravel beneath your topsoil layer to create a perched water table break.
Nutrient burn and salt buildup

Brown, crispy leaf tips with no other yellowing are the classic sign of nutrient burn or salt buildup, often from overfeeding or using too much fertilizer in the starting mix. Test your soil EC. If it reads above 3.5 dS/m in containers, flush immediately with plain pH-adjusted water (2–3 container volumes). Cut your feeding dose to 25% of label rate for the next two feedings, then ramp back up slowly. In beds, salt buildup is slower but more persistent. A heavy rain or deep irrigation flush helps, followed by a fresh compost top-dress to encourage microbial activity that processes excess salts.
Stunted growth and slow recovery
Stunted growth that doesn't respond to feeding or watering adjustments often has a biological cause. Check the root zone for signs of fungus gnats (tiny flies around the soil surface whose larvae eat roots), root rot, or soil nematode damage. Fungus gnats are especially common in topsoil-based mixes that stay moist. Let the top inch dry out completely between waterings to break their lifecycle.
Yellow sticky traps catch adults. For root rot, a hydrogen peroxide drench (1 tablespoon of 3% hydrogen peroxide per gallon of water) can help knock back anaerobic pathogens while adding oxygen to the root zone. Slow recovery can also indicate that your topsoil is too dense and roots are physically restricted; in containers, pot up to the next size.
When to ditch topsoil and go soilless or hydro
Topsoil and amended soil mixes do a lot of things really well, but they have real limitations at the performance ceiling. If you're chasing maximum speed of growth, the most precise nutrient control, or you need to scale up without dealing with soil logistics, soilless and hydroponic methods start making more sense. The comparison between hydro and soil grows is worth exploring in detail on its own, but here's the practical crossover point.
| Situation | Topsoil/Soil Works Well | Consider Soilless/Hydro |
|---|---|---|
| Growth speed priority | Moderate; healthy soil grows quickly | Hydro typically delivers 20–50% faster vegetative growth with dialed-in nutrients |
| Beginner grower | Yes; soil buffers mistakes in watering and feeding | More demanding; requires more active monitoring |
| Outdoor/large scale | Best option; topsoil is practical and cost-effective | Impractical outdoors at scale |
| Recurring pest/disease problems | Hard to eliminate once in soil | Soilless medium eliminates most soil-borne pathogens |
| Budget constraints | Lower upfront cost; compost and amendments are cheap | Higher equipment cost but lower per-grow cost over time |
| Contaminated in-ground soil | Use raised beds with clean topsoil blend | Containers with soilless or hydro medium avoids contamination entirely |
| Precise nutrient control | Limited; soil buffering makes micro-adjustments slow | Hydro lets you change nutrient profile within hours |
If you're running into repeated pH and drainage problems despite doing everything right, it's worth asking whether the medium itself is your ceiling. Soilless coco coir as a transition step is a middle ground worth considering: it behaves like soil in terms of physical feel and watering intuition, but it's inert so you control 100% of the nutrient profile, and pH is easier to manage precisely. Coco gives you many of the soil advantages beginners rely on without the variability that comes with topsoil soilless coco coir as a transition step. Coco gives you many of the soil advantages beginners rely on without the variability that comes with topsoil.
Do this today: your action plan and maintenance schedule
If you're reading this because your grow is underperforming right now, here's the fastest path to a diagnosis and fix. If you're setting up fresh, use this as your pre-plant checklist.
Today's quick assessment checklist
- Test soil pH with a meter or strips. If below 6.0 or above 7.0, this is your first priority to fix.
- Do the drainage test (water the soil, watch for pooling). Standing water after 30 minutes means you need to add perlite or repot.
- Check EC if you have a meter. Above 3.5 dS/m, flush today.
- Look at your leaves: yellowing from the bottom up usually means nitrogen deficiency. Yellowing between green veins on new leaves usually means iron or manganese lockout (pH too high). Crispy brown tips usually mean salt burn. Take photos and compare against these baselines.
- Smell your soil. If it smells sour or like ammonia, let it dry out significantly before watering again and check drainage.
- Check for pests at the surface. Tiny flies, white larvae in the top inch of soil, or fine webbing on the undersides of leaves need to be addressed immediately.
If your growth is poor right now
- Fix pH first. A soil drench with pH-adjusted water (bring it to 6.3–6.5) is the fastest intervention. Follow with lime or sulfur amendment as needed.
- Flush if you suspect salt buildup. Run clean, pH-adjusted water through until your runoff EC drops below 2.0.
- Add a light top-dress of worm castings (half an inch across the surface) to reintroduce microbial activity and give an immediate, gentle nutrient boost without burn risk.
- If drainage is the problem, don't try to fix it in the current container. Repot with a perlite-boosted mix.
- Hold off on adding more fertilizer until you've stabilized pH and EC. Feeding a stressed plant in wrong-pH soil doesn't help and usually makes things worse.
Ongoing max-growth maintenance schedule
| Frequency | Task |
|---|---|
| Every watering | Check soil moisture at 2-inch depth before watering. Use pH-adjusted water (6.2–6.8). |
| Weekly | Visual inspection of leaves, stems, and soil surface for pest or deficiency signs. |
| Every 7–10 days | Liquid feed at appropriate growth-stage dose. Alternate between plain waterings. |
| Every 3–4 weeks | Aerate beds with broadfork or hand tool. Check and adjust pH if needed. |
| Every 4–6 weeks | Top-dress containers with half an inch of compost or worm castings. Refresh mulch in beds. |
| Every 8 weeks | Soil EC check. If above 2.5 dS/m in containers, do a light flush before continuing to feed. |
| End of season/grow cycle | Remove spent plants, incorporate compost into beds, let soil rest or cover-crop before next planting. |
Max growth in topsoil isn't about one big intervention. It's about maintaining the right conditions consistently across the entire grow: pH in range, good structure, active biology, and regular nutrients delivered at the right time. Get those four things right and topsoil is a genuinely powerful growing medium that outperforms many beginner hydro setups in hands-off reliability. When you're ready to push beyond what topsoil can deliver, the jump to soilless or hydro systems builds directly on everything you've learned managing soil.
FAQ
Can I use regular yard topsoil in a grow bag or pot if I add fertilizer?
Yes, but only if the “topsoil” you buy is clean and already amended. Straight garden topsoil in a pot often compacts and drains poorly, which raises the risk of root oxygen stress. If you do use it, blend it with compost (about 20 to 30% by volume) and perlite (about 15 to 20%), then confirm pH is in the 6.0 to 7.0 range and that excess water can drain freely from the container bottom.
When should I start nutrients after transplanting into an amended topsoil mix?
Skip fertilizer for 3 to 5 days after transplanting, then start with light feeding. The reason is that newly planted roots are easiest to damage when salts are present while the root system is still establishing. Use pH-adjusted water first, then introduce nutrients gradually, especially if your mix already contains compost or slow-release fertilizer.
What if my plants keep yellowing even though I follow the feeding schedule?
If you are getting persistent yellowing despite feeding on schedule, test pH in the root-zone, not just the surface soil. For containers, check the runoff water pH and aim to bring the root-zone back into the 6.0 to 7.0 absorption window. If you correct pH with sulfur, plan on 4 to 6 weeks for full effect, so don’t expect immediate recovery.
How do I use EC readings correctly, and what should I do if they’re high?
A soil EC meter is helpful, but you must act based on your plant symptoms and container versus bed context. In containers, flush quickly if EC is high (above about 3.5 dS/m) using 2 to 3 container volumes of plain pH-adjusted water, then reduce the next doses to avoid repeat salt spikes. In beds, flush is harder, so prioritize deep watering after heavy feed periods and refresh with compost top-dressing.
Can I reuse previously used amended topsoil without causing problems next season?
Prefer reusing topsoil only when it was not contaminated and you can rebuild its structure. Even “clean” previously used soil can develop salt buildup and lose aeration as it compacts. If you reuse it, remove large debris, mix in fresh compost and perlite, and confirm pH and soluble salts before planting. If you see recurring fungus gnat issues, let the soil dry more between waterings and consider sterilizing only if you are prepared for the trade-offs of reintroducing biology.
How can I tell if I’m actually watering too much when the top looks dry?
If your soil feels dry at the surface but roots are still moist, you’ll overwater. Use a deeper check instead, such as pushing a finger about 2 inches into the mix for containers, or digging a small hole about 3 inches deep in raised beds. Water thoroughly only when that deeper zone is dry, then verify drainage by watching for runoff from the bottom.
What’s the best way to restore aeration if my topsoil is compacting?
Yes, topsoil compacts over time, especially in containers and high-traffic beds. The practical approach is topdressing, not digging. For containers, add a light layer of fresh compost and worm castings every 4 to 6 weeks. For beds, aerate with a broadfork or hand aerator down rows every 3 to 4 weeks, and avoid stepping on active plant zones.
Can I correct pH after I’ve already planted?
Yes, but timing matters. If your pH is off, correct before planting because sulfur takes weeks to fully acidify the soil. After you correct pH, retest in about 7 to 10 days (and again after several weeks if using sulfur) to ensure you are truly back in range before you rely on a nutrient schedule.
How should I adjust the compost-to-perlite ratio if my soil is very clay-heavy or very sandy?
More compost is not always better. In clay-heavy mixes, raising compost too much can worsen drainage and increase the risk of waterlogging. If your soil is clay-like, adjust by increasing perlite toward 20 to 25% and slightly reducing compost. For sandy soils, compost at 30 to 35% by volume can help, and leaf mold (around 10%) is a useful partial replacement to improve water retention without making the mix overly dense.
Why does my topsoil blend perform poorly for germination, and what should I use instead?
It depends on the germination stage. Seed starting needs a lighter, finer medium because dense mixes can restrict root emergence and increase damping-off risk. Use a commercial seed-starting mix, or make a lighter version of your blend by adding extra perlite (about 10% more) and sifting out larger particles for the first 2 to 3 weeks, then transplant into the full-strength mix after true leaves appear.
My plants are stunted and I tried watering and feeding, what are the fastest things to check first?
Often it’s either salt buildup from overfeeding, wrong pH causing nutrient lockout, or a drainage and root-oxygen issue. As a quick triage: verify pH in runoff for containers, measure EC if tips are browning, inspect roots for rot (brown and mushy), and check drainage holes for blockage. Then adjust feeding dose immediately and fix the physical root-zone constraints.